Schema data allows you, as a publisher, to make your content so that search engines have a great understanding of what it is.
Sometimes, this will modify what is displayed in the search engines and can help achieve a higher click-through rate. For example, if you write a review piece of content and add the associated schema data, then your listing can appear like this in Google:

Another example is if you have a food blog/site. Whenever you add new recipes, you will be able to mark the post as a recipe, and then add various information about it (type/ cuisine/ calories/ preparation time/ cooking time, and so on), so that the search engines will push your content above other recipes.
How to Add Schema Data with a Thrive Theme
We have deliberately made the decision to not build schema options into our themes because there is a well-maintained and up-to-date plugin that does a very good job of this.
However, there are two plugins that we can recommend, that are very easy to use and that will help search engines prioritize your site.
We recommend you try one of these plugins:
How to Add the Plugin to Your Site
First of all, let’s see how you can add a plugin to a WordPress site. Simply navigate to “Plugins”, in the left sidebar of your admin dashboard, and click on “Add New”:
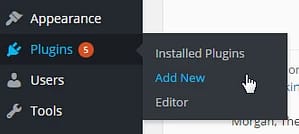
You can then search for the name of the plugin that you want to install. Here is an example:

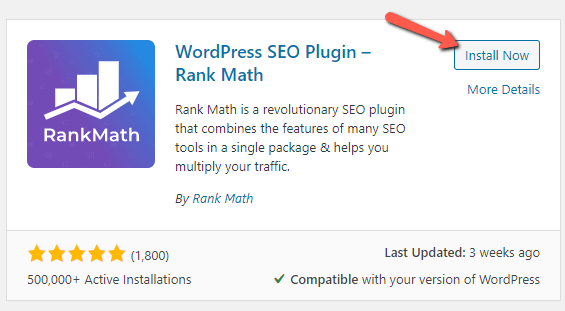
When you find the plugin in your list, click on “Install Now”:
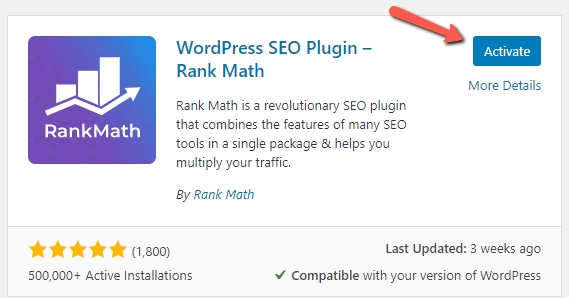
Once the installation has been complete, click on “Activate”, and you’ll be all set to start using the plugin:
How to Use The Plugins
As mentioned above, I have provided two recommendations of plugins that can help you add schema data to your site and content. However, please keep in mind these are just examples and suggestions, as you do not have to use these specific plugins. You can install the plugin of your choice.
Let’s take Rank Math as an example. If you decide to go for this one, here is how to add schema markups to your content.
After you have just installed the plugin, you will have the option to complete their wizard. Go to the post or page you want to add schema data to, and click on “Edit”:

With the plugin active, you will have the “Rank Math” section in the top right corner of the page, right next to the settings section:

When you click on this, a whole new SEO section will open:
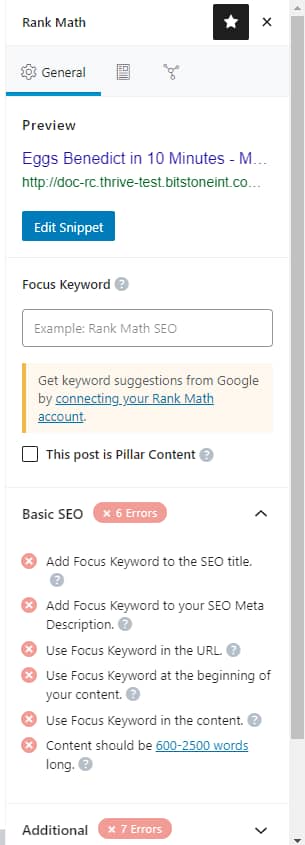
To add schema data, click on this section:
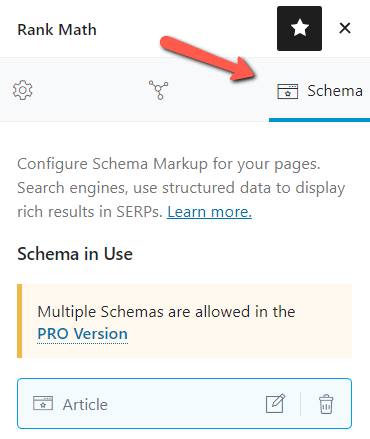
Then, you will be able to set up the schema type, descriptions, headlines, etc.
For example, let’s say I want to add a recipe to my food blog.
This can quickly be done using the “Schema Generator” feature:
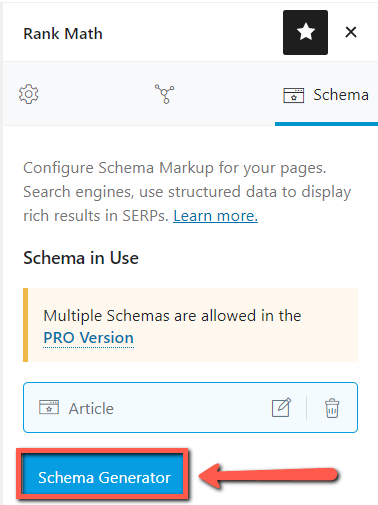
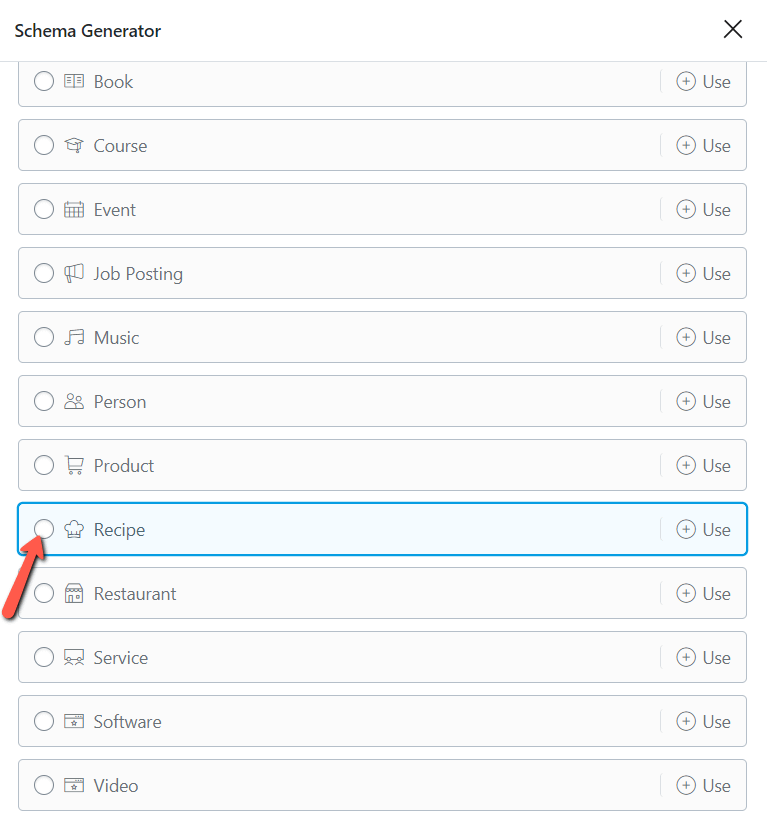
A pop-up opens, from where you can start setting up the schema type. Rank Math allows you to choose from a list with various types of schema, and “Recipe” is one of them, so I will choose that from the list:
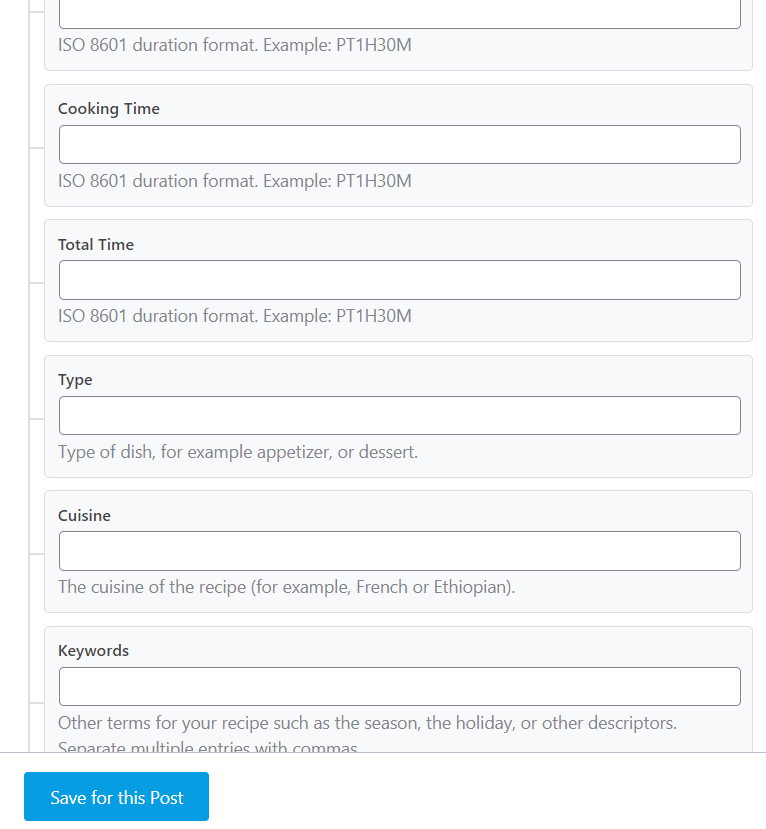
Once you choose the type, some more fields will appear, and you will be able to add all of the data that the search engine needs in order to prioritize your pages and posts:
For more information on how this works, as well as what each of the schema types represents, please check out their article, here, as it is a very comprehensive one.
This plugin was just an example to showcase how to add schema data to your content, and how easily you can do that.
If you need more information about this topic, here you can find a well-structured beginner’s guide.
For more information about our products, make sure you also check out our knowledge base.