The heart of any quiz is its questions. In this article, you’ll learn how to use the visual editor to add questions, incorporate audio and video, and manage complex branching logic.
Accessing the Questions Editor
To start building your quiz content:
- Navigate to the Thrive Quiz Builder dashboard.
- Click the Manage button on the Questions card.
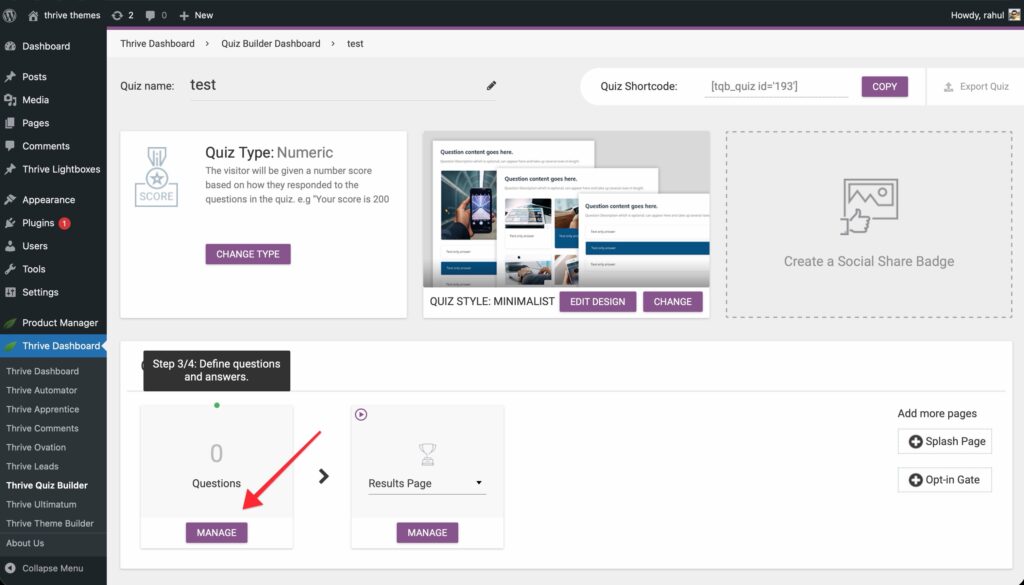
- This opens the visual flowchart editor where you can see the user journey from start to finish.
Managing Answers and Logic

Multiple Choice Questions
For multiple-choice questions, you can control how users interact with the options:
- Allow Multiple Answers: Enable the Maximum selectable answers field to let users pick more than one option.
- Weighting: Assign different numeric “weights” to answers to influence the final score or category.
Open-Ended Questions
Capture qualitative feedback using text input fields.
- Form Size: Choose from Small to Extra Large input fields.
- Constraints: Set a Minimum and Maximum character limit to guide user responses.
- Validation: Customize the error messages users see if their input is too short or too long.
Adding Different Question Types
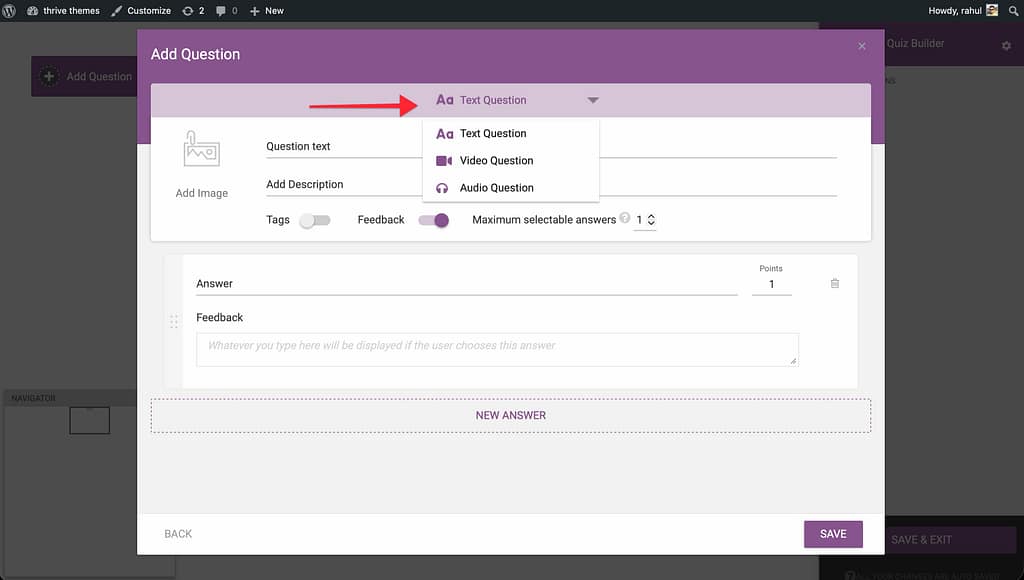
When you click the Add Question button, you can choose between several media-rich formats.
1. Basic Text Questions
Standard multiple-choice or open-ended questions. Ideal for quick check-ins or simple data collection.
2. Audio Questions
Engage users with sound-based questions.
- Sources: Upload a Custom file, or embed tracks from Spotify or SoundCloud.
- Settings: You can enable Autoplay and Loop, or hide the SoundCloud artwork to focus purely on the audio.
3. Video Questions
Incorporate video from platforms like YouTube, Vimeo, Wistia, or Bunny.net.
- Customization: Choose a Video Style (frame), add a custom Thumbnail, and toggle player controls.
- Autoplay: You can set videos to play automatically to create a more dynamic experience.
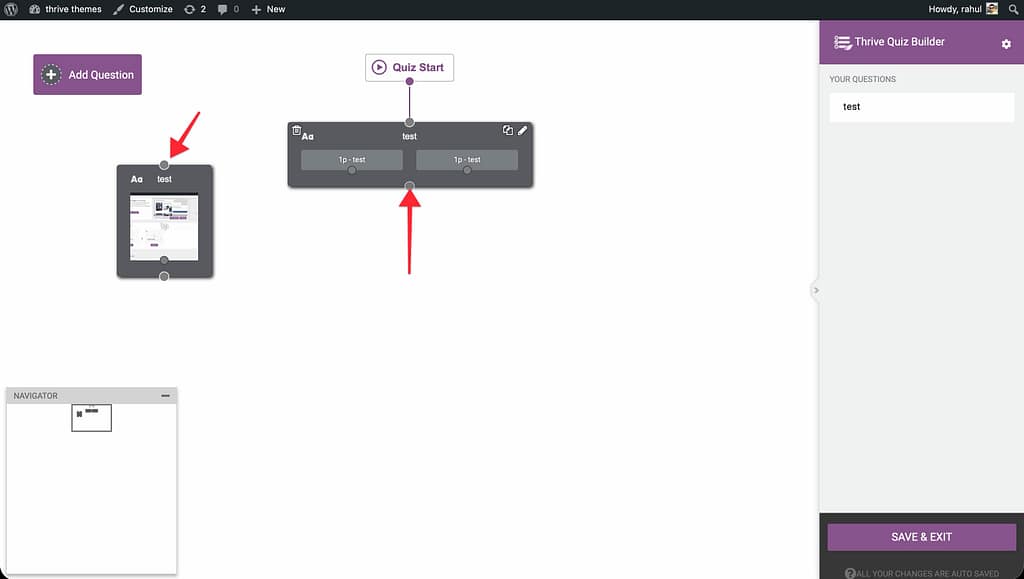
Building Branching Logic (Flowchart)
Thrive Quiz Builder uses a drag-and-drop interface to define the quiz flow.
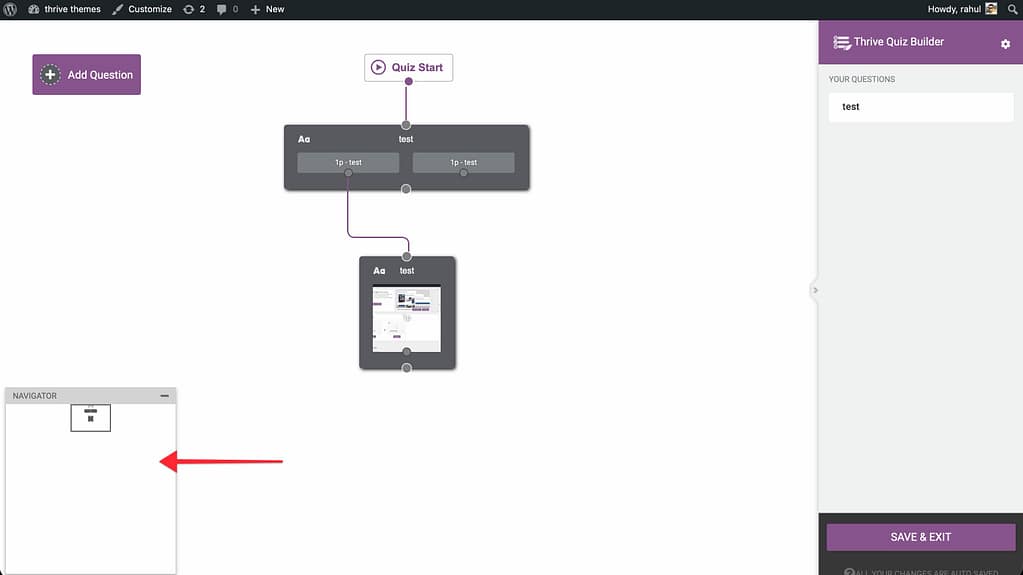
- Linking: To connect two questions, click the circle at the bottom of a question card and drag the line to the circle at the top of the next card.
- Conditional Branching: You can drag links directly from individual answers to different questions. This allows you to “branch” users to different paths based on how they respond to a specific question.

- Managing the Canvas: Use the Navigator window to move around large quizzes, or use the Questions Panel in the sidebar to jump to a specific card.
Related Resources
- Navigation & Flow: Quiz Navigation, Progress Bars & Flow Control
- Quiz Types: Understanding Quiz Types in Thrive Quiz Builder
- Results Page: How to Customize Your Quiz Results Page
- Thrive Quiz Builder Documentation: Explore the full Thrive Quiz Builder knowledge base