Streamline your website administration and user workflows with these practical automation recipes.
1. Content & Post Management
Automate repetitive editorial tasks and manage post visibility without manual intervention.
Recipe: Auto-Tag Newly Published Posts
- Goal: Automatically add specific tags to every post you publish.
- Trigger: WordPress -> “Post is published”
- Action: WordPress -> “Add post tags”
- Setup: Select your desired tags (e.g.,
New,Latest) to be added whenever a post goes live.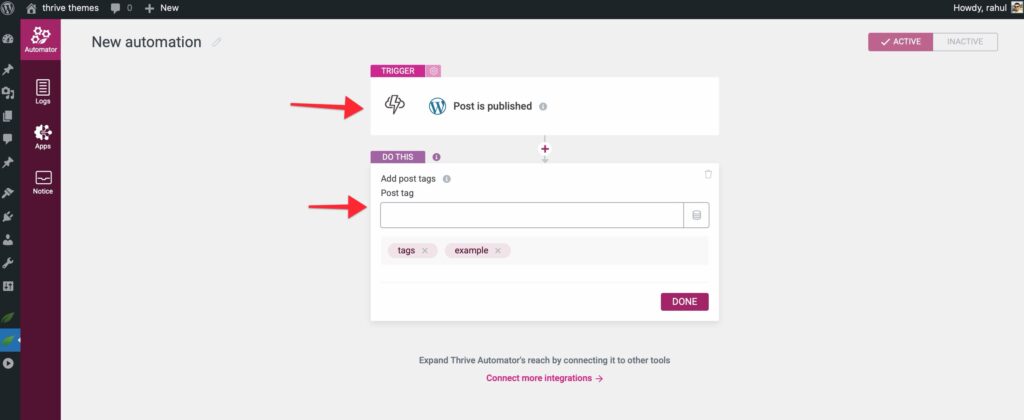
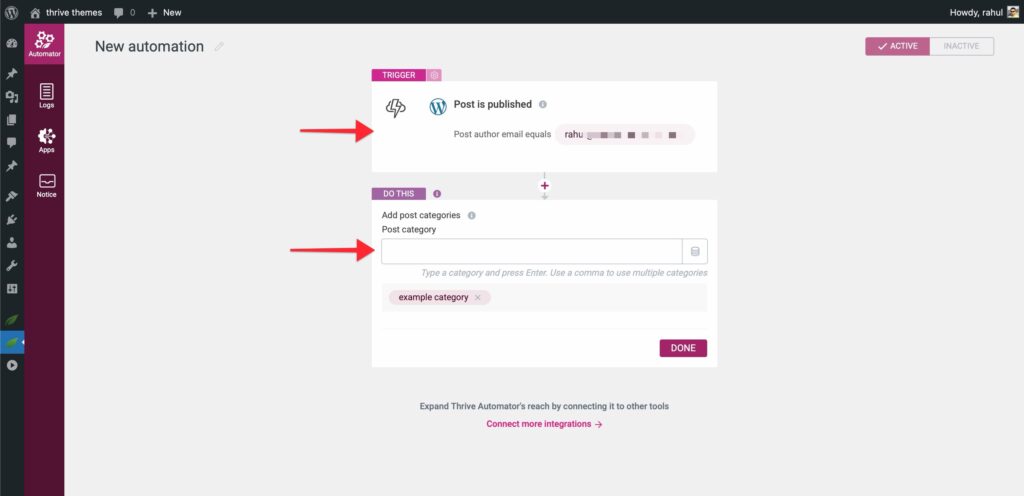
Recipe: Update Category Based on Author
- Goal: Automatically categorize posts when a specific author is assigned.
- Trigger: WordPress -> “Post is updated”
- Condition: Post author email is [[email protected]]
- Action: WordPress -> “Add post categories”
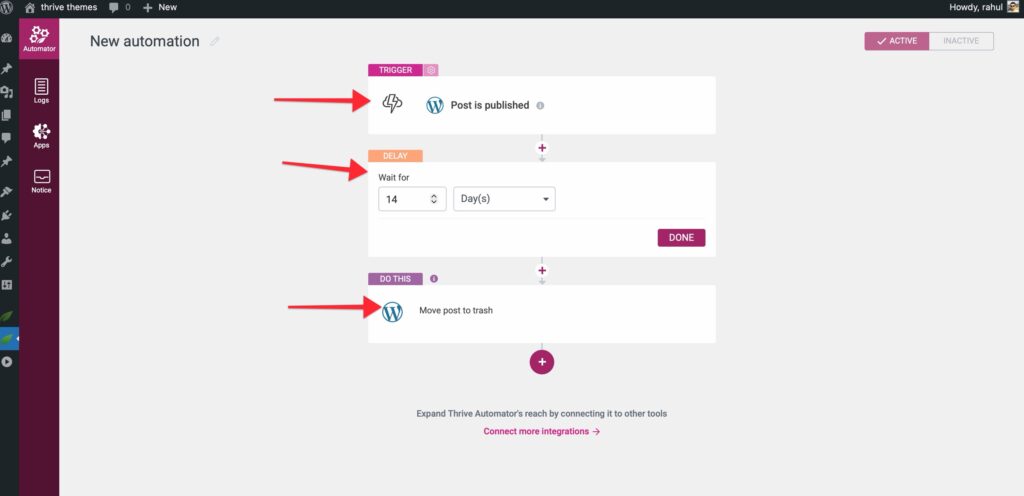
Recipe: Self-Destructing “Flash” Posts
- Goal: Automatically move a post to the trash after a set period.
- Trigger: WordPress -> “Post is published”
- Action 1: “Delay” (e.g., 14 Days)
- Action 2: WordPress -> “Move post to trash”
Recipe: Temporary “Featured” Status
- Goal: Show a post in a “Featured” list for only 7 days.
- Trigger: WordPress -> “Post is published”
- Action 1: WordPress -> “Add post tags” (Tag:
Featured) - Action 2: “Delay” (7 Days)
- Action 3: WordPress -> “Remove post tags” (Tag:
Featured)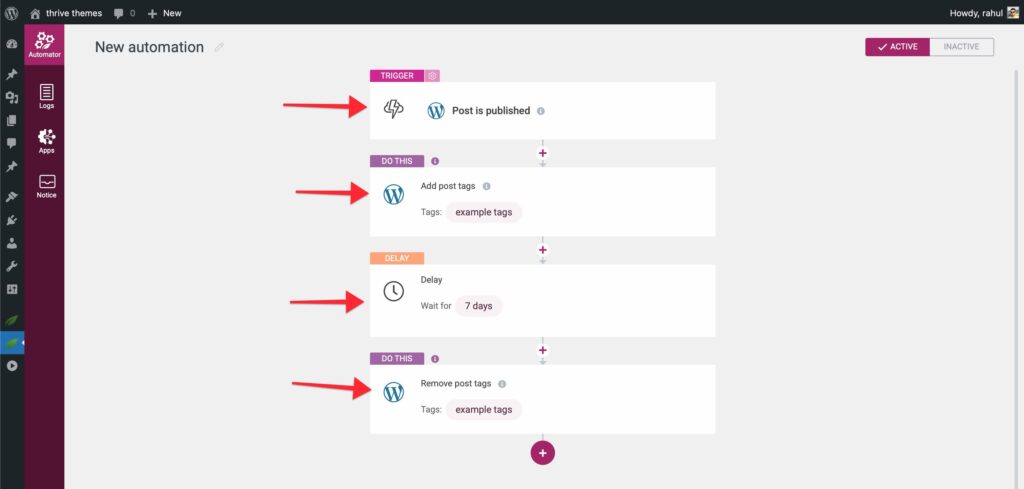
2. User Profile & Data Updates
Keep your WordPress user database updated based on visitor interactions.
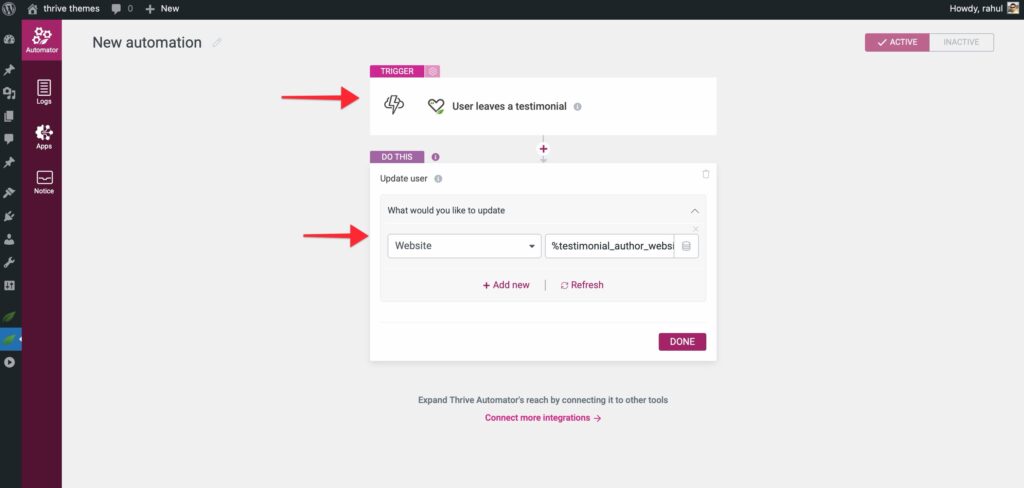
Recipe: Update User Info from Testimonials
- Goal: Update a user’s WordPress profile (e.g., Website URL) when they submit a testimonial via Thrive Ovation.
- Trigger: Ovation -> “User leaves testimonial”
- Action: WordPress -> “Update user”
- Setup: Map the “Website URL” field from the Ovation form to the WordPress user’s “Website” field.
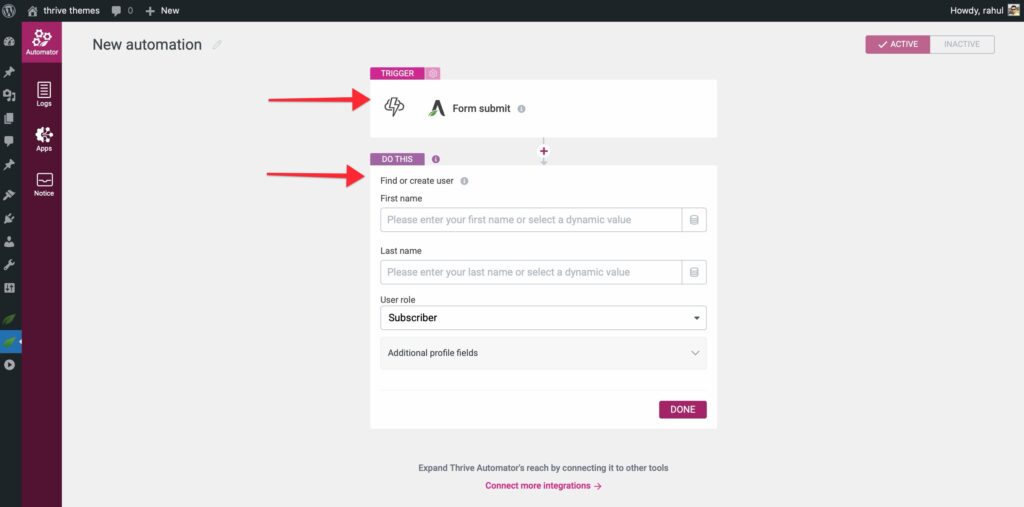
Recipe: Switch User Role via Form Submission
- Goal: Promote a user to a new role (e.g., “Editor” or “Premium Member”) after they fill out a specific form.
- Trigger: Thrive Architect -> “Form submit”
- Action 1: “Find or create user” (Select the new Role)
- Action 2: (Optional) “Add to autoresponder” with a specific tag.
3. Advanced Registration & Site Logic
Enhance your registration flow and perform advanced site actions.
Recipe: Account Creation via Double Opt-in
- Goal: Only create a WordPress account after a user has confirmed their email in your autoresponder.
- Trigger: “Incoming Webhook” (Thrive Automator)
- Setup: Configure your autoresponder to send a webhook to Thrive Automator after the confirmation link is clicked. Use the “Find or create user” action in Thrive Automator to process the data.
Recipe: Auto-Grant Access on Registration
- Goal: Instantly grant access to a Thrive Apprentice product when a user registers via the “Login & Registration” element.
- Trigger: Thrive Automator -> “Registration form submitted”
- Condition: Specific form (linked via Form Identifier)
- Action: Thrive Apprentice -> “Grant access to product”
Recipe: Auto-Create Pages via Webhooks (Advanced)
- Goal: Automatically create a new WordPress page (e.g., a custom dashboard) for a user when they get access to a product.
- Trigger: Thrive Apprentice -> “User receives access to a product”
- Action: “Send Webhook”
- Setup: Point the webhook to your own site’s WordPress REST API (
/wp-json/wp/v2/pages). You will need to use Basic Authentication (Application Passwords) in the webhook headers.