You can very easily create a video post, using the “Post Format” option from WordPress, especially when using a Thrive Theme Builder Theme.
Add a New Video Post
In order to do that, in your WordPress admin dashboard, go to “Posts” -> “Add New”:

If the theme supports post formats, you will see the “Post Format” option on the right sidebar, under the “Status & Visibility” section from the page editor. Click on the field next to the option:

This will open a small list with all the available post formats. From the available formats, select “Video”:

Then, you’ll see a few additional post options appear below the editor.
Choose the Video Source
The options that appear after you choose “Video” as the post format type may vary, depending on the source of the video.
Youtube Video
If the video that you want to add to the post is a Youtube video, check this option. The following options will be available for a Youtube video:

a) Video URL: this is the field where you have to enter the URL to the YouTube video you want to display in the post (note: this is the link to the video, not the embed code for the video).
b) Options: This section contains some options that you can check or uncheck in order to customize the way the video plays on the post:
- Auto-hide Youtube Logo: if you check this option, the “YouTube” logo from the video will not be visible anymore;
- Auto-hide player controls: if you want the play controls (such as volume, play/pause) to not be visible, check this option;
- Optimize Related Videos: checking this option will make the related videos show at the end of the video;
- Autoplay: if this option is selected, the video will automatically start playing when someone accesses the page;
- Hide full-screen button: if you want the full-screen button to not be visible anymore, check this option.
c) Video Start Time: Just like in the case of a Youtube video, the video can be set to start at a certain minute and second. In order to use it, simply enter the minutes and seconds timestamp into the fields.
Vimeo Video
If the video that you want to upload comes from Vimeo, make sure to check that option:

Here is how you can use the Vimeo video options:
a) Video URL: input the video URL in this field;
b) Options: This section contains some options that you can check or uncheck in order to customize the way the video:
- Autoplay: if this option is selected, the video will automatically start playing when someone accesses the page;
- Hide the user image: if you do not want the user image to be shown, make sure to check this option;
- Hide the “by” line: when selected, this option will not display the author of the video;
- Hide title bar: if you check this option, the title of the video will not be displayed.
c) Video Start Time: Just like in the case of a Youtube video, you can make the video start at a certain minute and second. In order to do that, simply enter the minutes and seconds timestamp into the fields.
Wistia Video
If the video you want to insert into your page comes from Wistia, make sure to go to the “Source” section and select “Wistia”:

Here is how you can use the options for the Wistia video:
a) Video URL: just like in the cases above, input the video URL in this field;
b) Options: This section contains some options that you can check or uncheck in order to customize the way the video:
- Autoplay: if this option is selected, the video will automatically start playing when someone accesses the page;
- Disable the play bar: check this option if you want to hide the play controls of the video;
- Hide full-screen button: if you want to hide the full-screen button from the video, check this option.
c) Video Start Time: Just like in the case of a Youtube or Vimeo video, you can set the start time for the video. In order to do that, simply enter the minutes and seconds timestamp into the fields.
Custom Video
You also have the option of using a custom video. For that, choose the “Custom Video” option, and use the options accordingly:

a) Video Custom URL or Embed Code:
This option is where you can add a video URL, that comes from another source than Youtube/Vimeo/Wistia.
Note: Please be advised that the URL you insert for the externally hosted video, will have to point to a video file that is one of these types:
- mp4
- m4v
- mov
- wmv
- avi
- mpg
- ogv
- 3gp
- 3g2
You can also upload your own video. To do that, click on “Upload Video”:

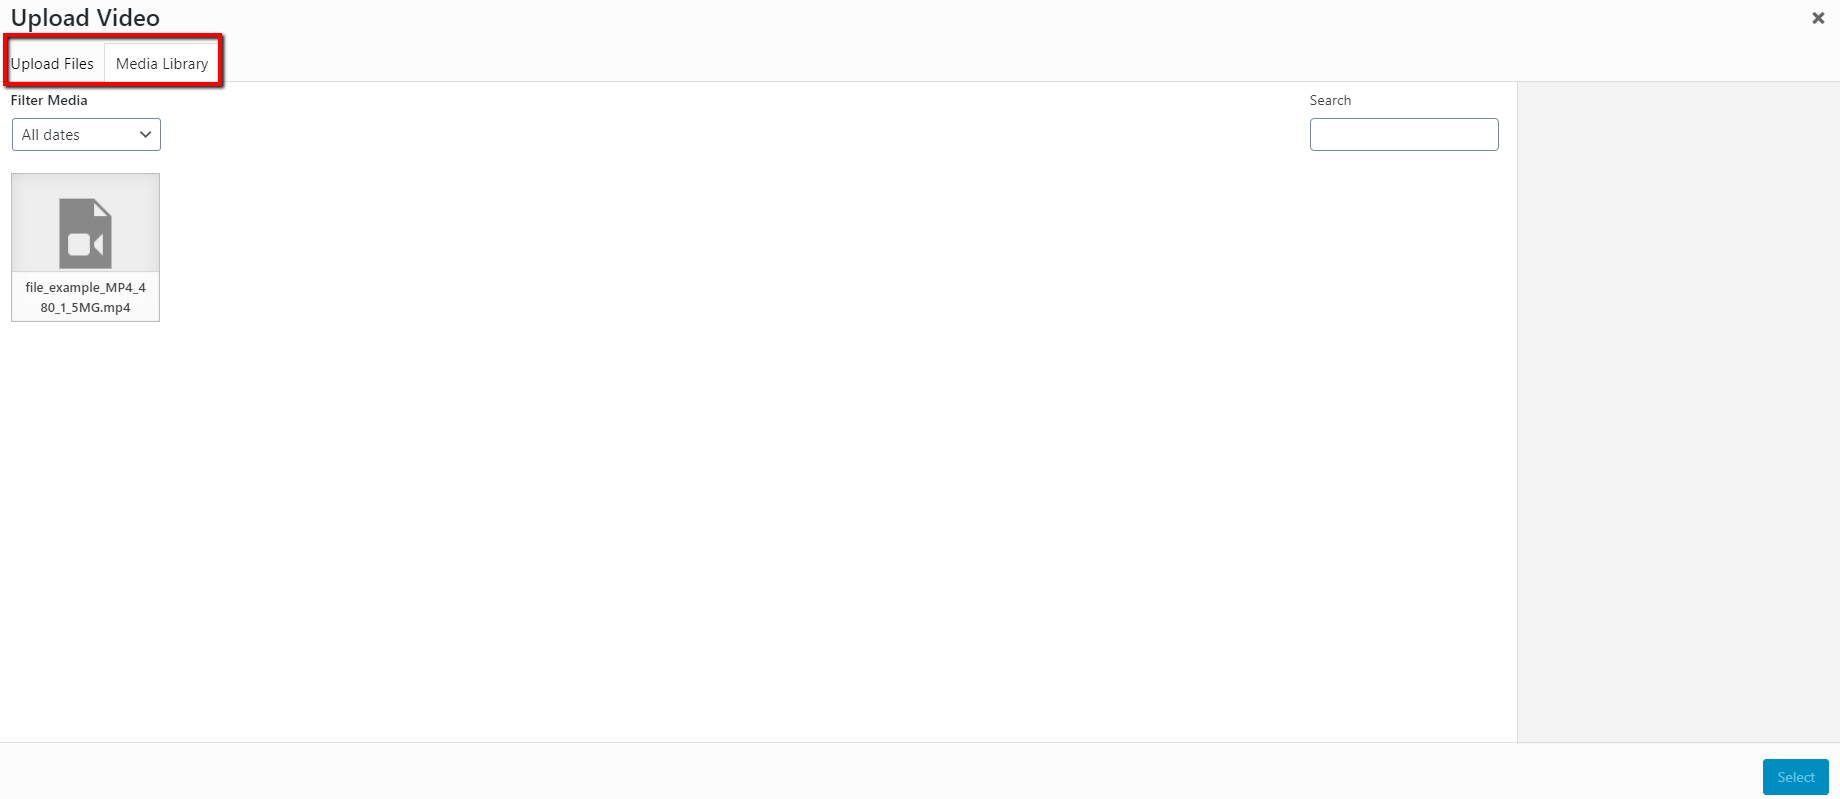
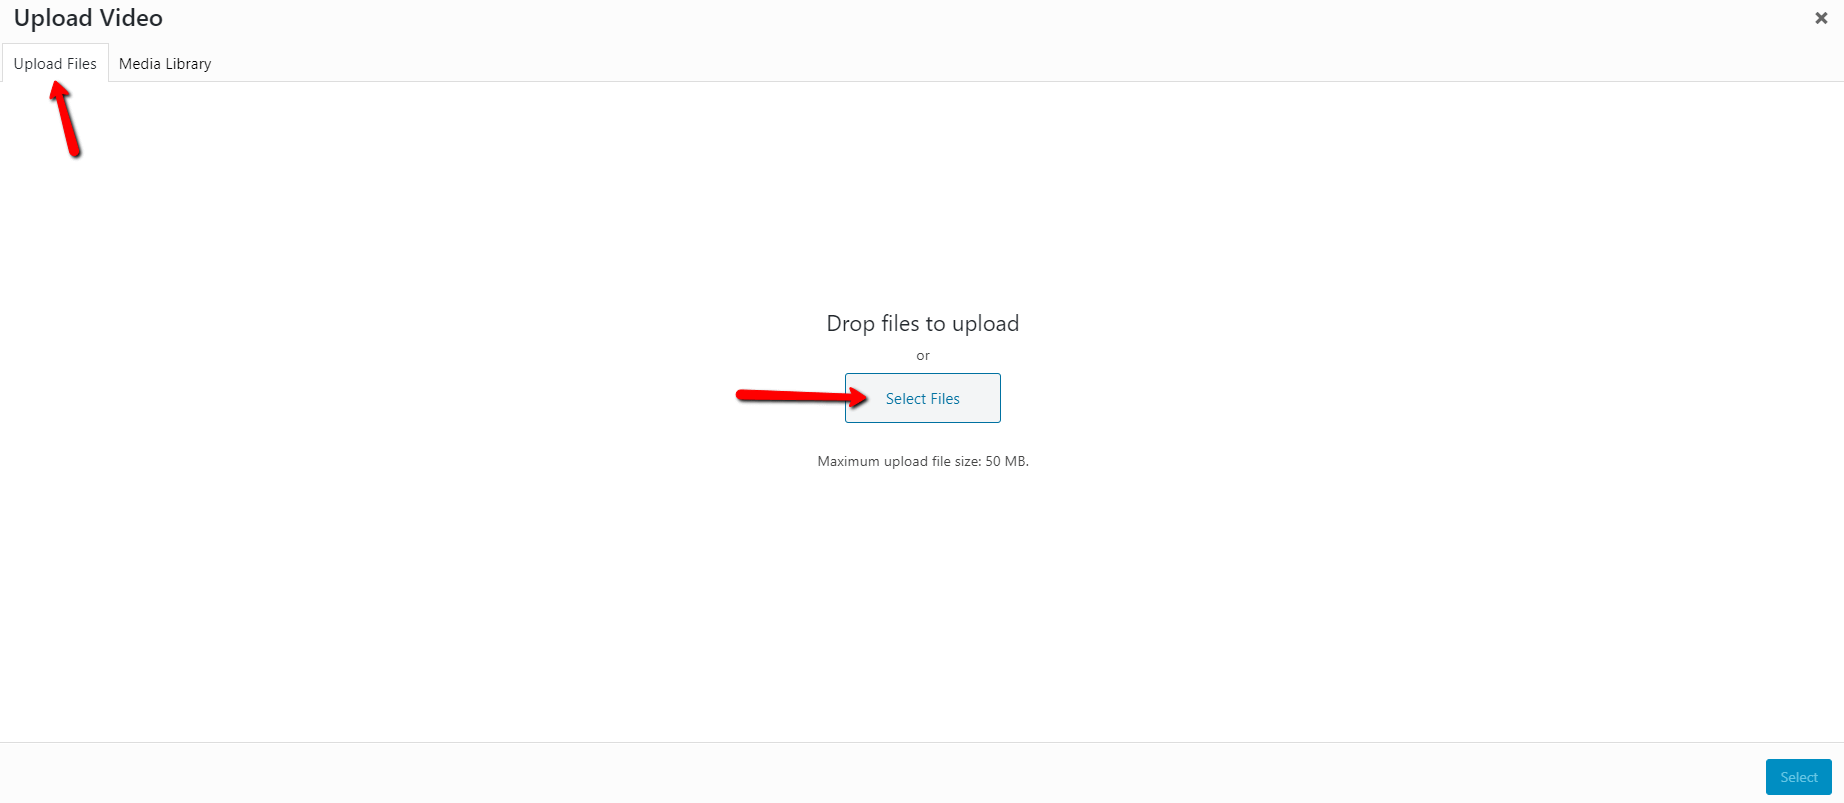
This will open a new pop-up, which will allow you to either upload a picture from your PC or to select a video that you’ve already uploaded into your Media Library:

To upload a video, in the “Upload Files” tab of the pop-up, drag and drop the video or click on “Select Files” in order to browse through your computer and select a video:

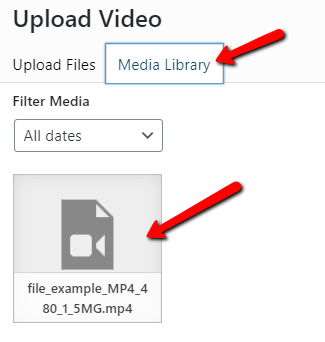
If you’ve already uploaded the video in your Media Library, go to the “Media Library” tab and select the video from there:

After the video has been chosen, click on the blue “Select” button from the bottom right corner:

b) Options: This section contains some options that you can check or uncheck in order to customize the way the video:
- Autoplay: if this option is selected, the video will automatically start playing when someone accesses the page;
- Loop: if you choose this option, the video will start playing in a loop, meaning it will start again once it finishes;
- Hide Controls: the video controls will not be visible anymore when you select this option.
All videos added to a video post (YouTube, Vimeo, Wistia, or Custom) will automatically be responsive and display at the correct size on every screen.
These were all the available video sources and options available when creating a “Video” post with the use of the “Post Format” option.
Note: If you’re using Thrive Theme Builder, you can also customize this video when editing a Video Post Template, as well as switch to Thrive Architect and customize the video from there.
Please take a look at this article, if you need more information about how to do that.
I hope you found this article helpful. If so, don’t forget to leave a smile below 🙂