Thrive Leads allows you to create dynamic, multi-step opt-in forms using the States feature. A State is essentially a different view of your opt-in form, which can be triggered by a user action. This enables complex flows for segmentation, multi-step sign-ups, and displaying different content to existing subscribers.

Understanding States
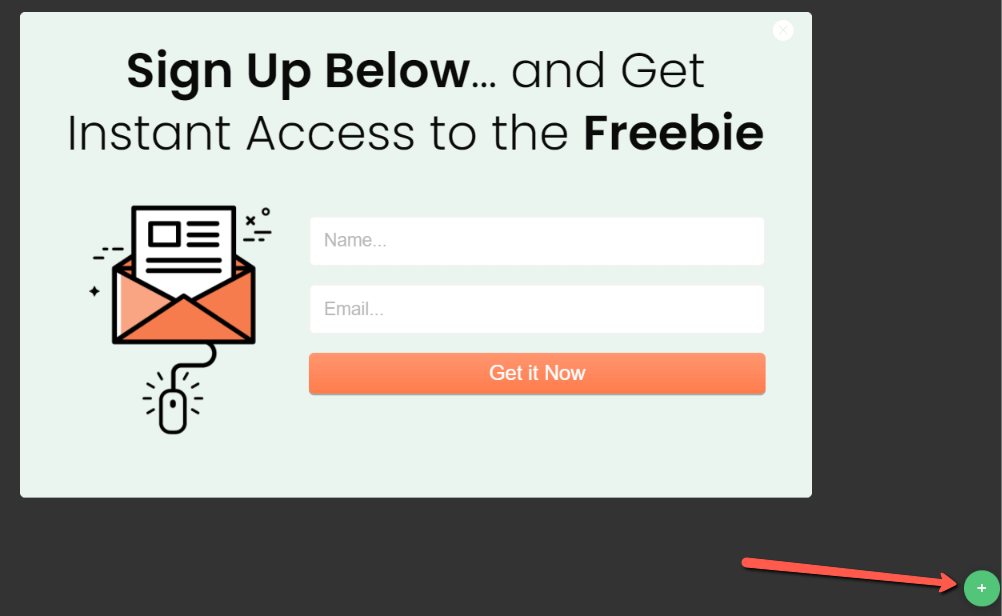
The States feature is accessed via the green “+” icon in the editor. A state is another view of your opt-in form. When a user clicks an element set to trigger a new state, they are prompted with the new view you have configured.

The ability to build multi-step forms applies to every form type in Thrive Leads.
Accessing the States Panel
- Open your opt-in form in the Thrive Architect editor.

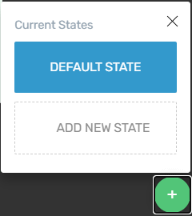
- Look for the green “+” icon in the editor interface and hover over it to display the Current States panel.
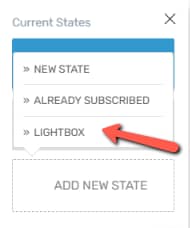
- Click Add New State to view the available state types.

State Types and Their Use Cases
1. New State (Multi-Step Forms)
The New State is used to create a sequence of views, allowing you to build multi-step forms.

Example: Creating a 3-State Flow (Default, SEO, PPC)
- Create the States:
- Default State: The initial view seen by all visitors. Design this state to ask the first question (e.g., “Would you like to learn about SEO or PPC?”).

- SEO State: Click Add New State and select New State. Design this view to contain the SEO-related content or next step.

- PPC State: Repeat the process to create a separate state for PPC-related content.
- Default State: The initial view seen by all visitors. Design this state to ask the first question (e.g., “Would you like to learn about SEO or PPC?”).
- Connect the States with Actions:
- Select the “Learn about SEO” button in the Default State.
- In the left sidebar, open Animation & Action.

- Select Custom Integrations and click Add New Action.

- Choose Switch State as the action and select the SEO State as the target.

- Repeat this process for the “Learn about PPC” button, setting the target to the PPC State.
- Add a Back Button (Optional):
- In the SEO State and PPC State, add a text link (e.g., “Go Back”) to allow users to return to the first step.

- Select the text link and use the Insert Link option.
In the SEO State and PPC State, add a text link (e.g., “Go Back”) to allow users to return to the first step.
- Select the Switch State checkbox and choose the Default State as the target.

- In the SEO State and PPC State, add a text link (e.g., “Go Back”) to allow users to return to the first step.
2. Lightbox State
The Lightbox State is used to trigger a pop-up from within your lead forms.

Note: You cannot trigger a Lightbox State from a lightbox form itself, as this would create a poor user experience.
Example: Triggering a Lightbox from a Button
- Add the State: Click Add New State and select Lightbox. Design the lightbox content as needed.

- Link the Trigger: In your Default State, select the button or element you want to use to open the lightbox.

- Set the Action: In the Animation & Action settings, set the action to Switch State and select the Lightbox State you just created.

- Closing the Lightbox: To allow users to close the lightbox, select an element within the Lightbox State (e.g., a text link or button) and use the Insert Link option. Select the action to Close Lightbox.

3. Already Subscribed State
The Already Subscribed State allows you to show different content to users who have already opted into this specific lead form.
- Add the State: Click Add New State and select Already Subscribed.

- Design the Content: Design this view to show content relevant to an existing subscriber (e.g., “Thanks for subscribing!” or a special download link).
- Hide the Form: You can also use this state to show no content at all, effectively hiding the form from existing subscribers.
Tip: You can learn how to use the feature to show no state at all to already subscribed visitors in this video tutorial.
Important Testing Note
To ensure your multi-step forms and states are working correctly, you must test them using your browser’s Incognito Mode (or Private Browsing). Testing while logged into your WordPress site will not accurately reflect the user experience or record conversions/impressions in Thrive Leads statistics.
Powerful New Possibilities
This functionality provides powerful new options for Thrive Leads users:
- Unlimited States: Create an unlimited number of states to segment visitors and deliver highly relevant content and offers.
- Split Testing: Easily split-test multi-step forms against single-step forms to optimize conversions.
- Lead Group Integration: Use multi-step forms directly within lead groups, replacing the need for multi-step shortcodes.
Related Resources
- Animations & Actions: Video tutorial on using the Animation & Action options.
- Hyperlinks: Learn how to use the Insert Link option for text links.
- Knowledge Base: Explore the full Thrive Themes knowledge base.