Do you want to keep your premium courses exclusive and only visible to select users or members? Hiding premium courses from the main course list allows you to control access and maintain exclusivity, ensuring that only authorized visitors can see and enroll in these courses.
In this article, we’ll show you how to hide premium courses from the list of courses using Thrive Apprentice.
- Creating Courses in Thrive Apprentice
- Premium Courses in Thrive Apprentice
- Adding Course List on a Page
- Hiding Premium Courses in the Course List
Creating Courses in Thrive Apprentice
Before you differentiate and filter courses to be displayed, ensure you’ve created courses on your website using Thrive Apprentice.
Premium Courses in Thrive Apprentice
Among all the courses you create and publish, you may want to mark some as premium courses available for users who’ve purchased them. This can be managed through the Access Restriction Rules in Thrive Apprentice.
If you want to manage the access restriction for a particular product you can refer to our document here.
Note: A product can be a cluster of courses or other content that you want to apply access restrictions to.
Adding Course List on a Page
Thrive Apprentice lets you display your courses within a list using the Course List element on a Course Index page, or any other page, post, or template.
To know more about the Course List element, we’d recommend you to read the document here.
Once you’ve added a course list on the page, post, or template, you’ll see the list of courses displayed there.
Hiding Premium Courses in the Course List
After adding the Course List on page, the Filter Courses setting of the Course List element will let you filter courses displayed inside the list.
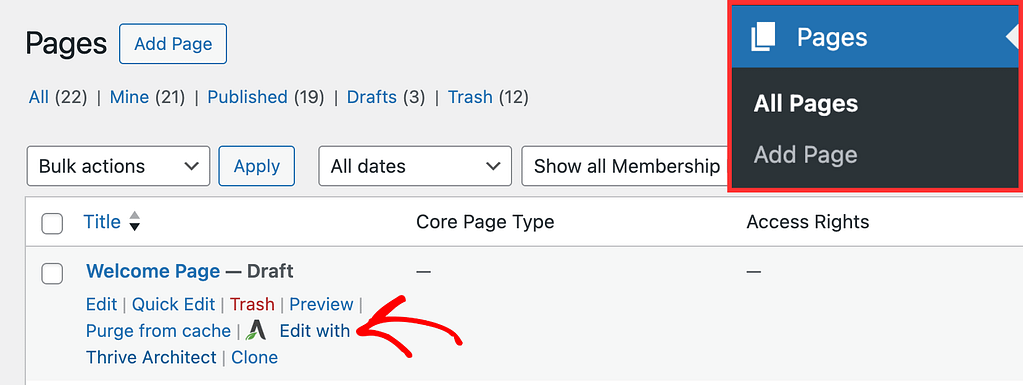
To begin, first open the page in the Thrive Architect editor. To do so, open your WordPress admin area, navigate to Pages >> All Pages, hover on the page that contains the Course list and click on Edit with Thrive Architect.
While in the editor, click on the Course List on the page to open its settings in the left column.

In the left column, under Course List Options, click on the Filter Courses button.
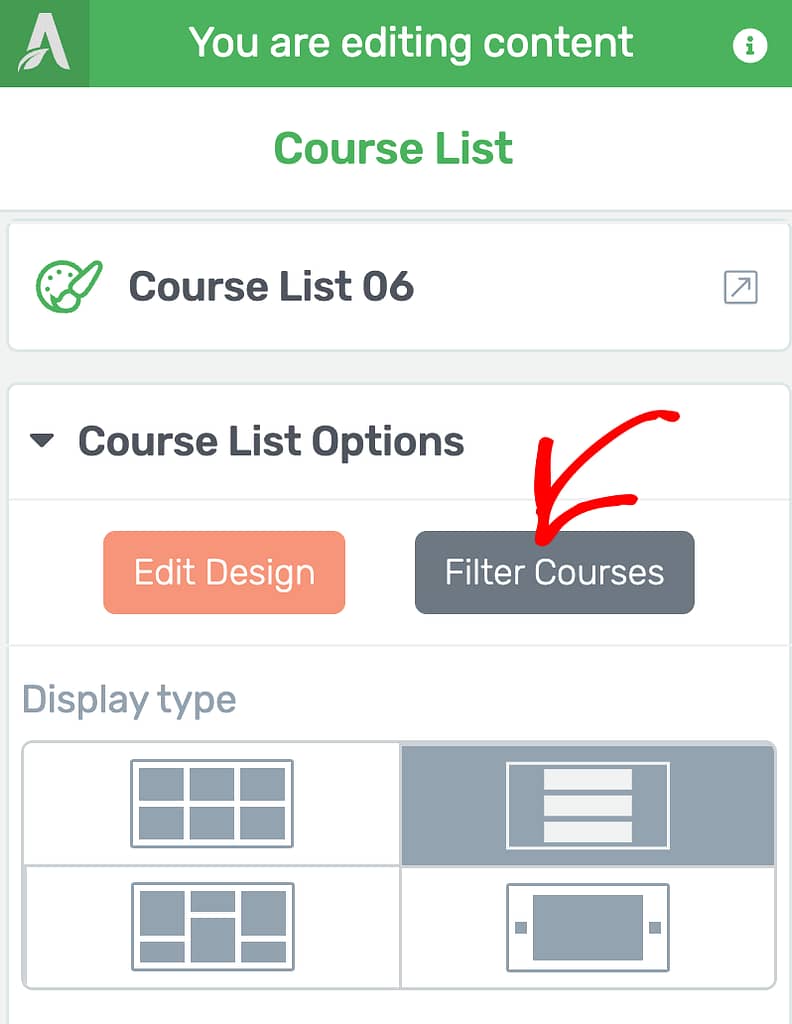
Clicking on the Filter Courses button will open a popup where you can select or deselect the courses you want to display or hide in the course list.

There are two ways in which you can hide premium courses from the course list.
Using Restricted Content Levels
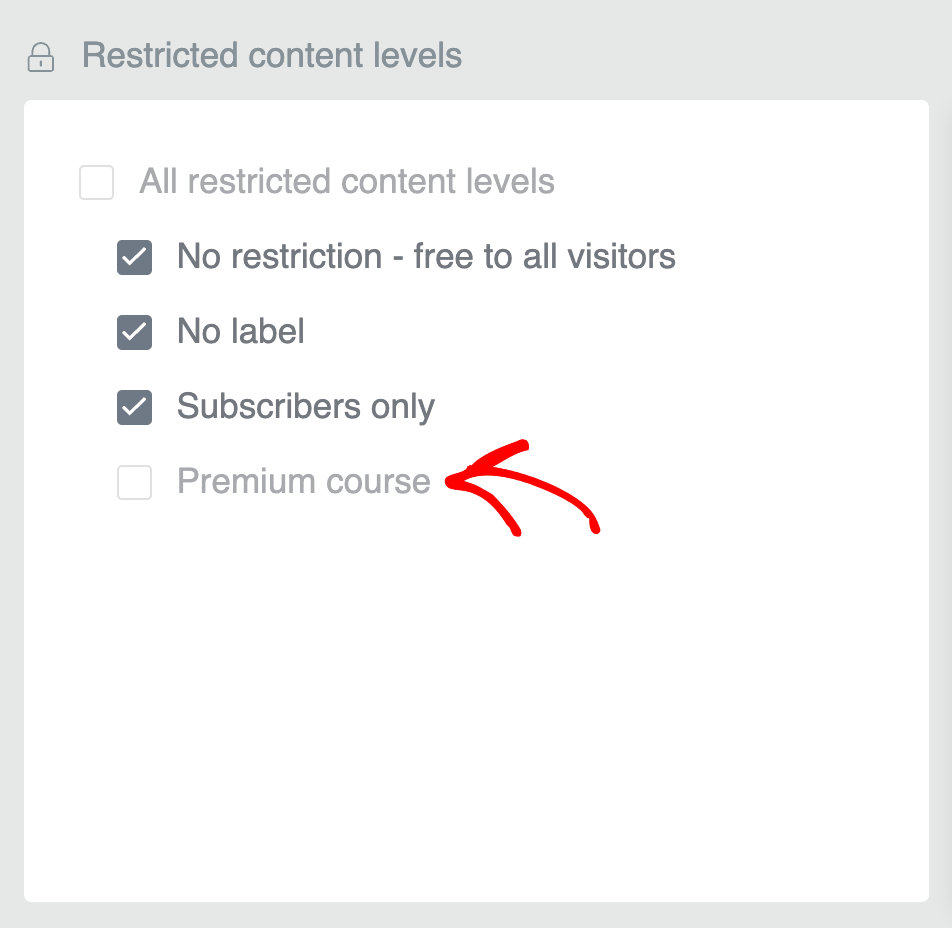
The restricted content levels columns contain levels you have added for courses on your website.
For this example, we’ve labeled the courses as Premium courses and that’s what we want to hide. So, to hide premium courses in this column, deselect that option.
Using Course Access and Progress
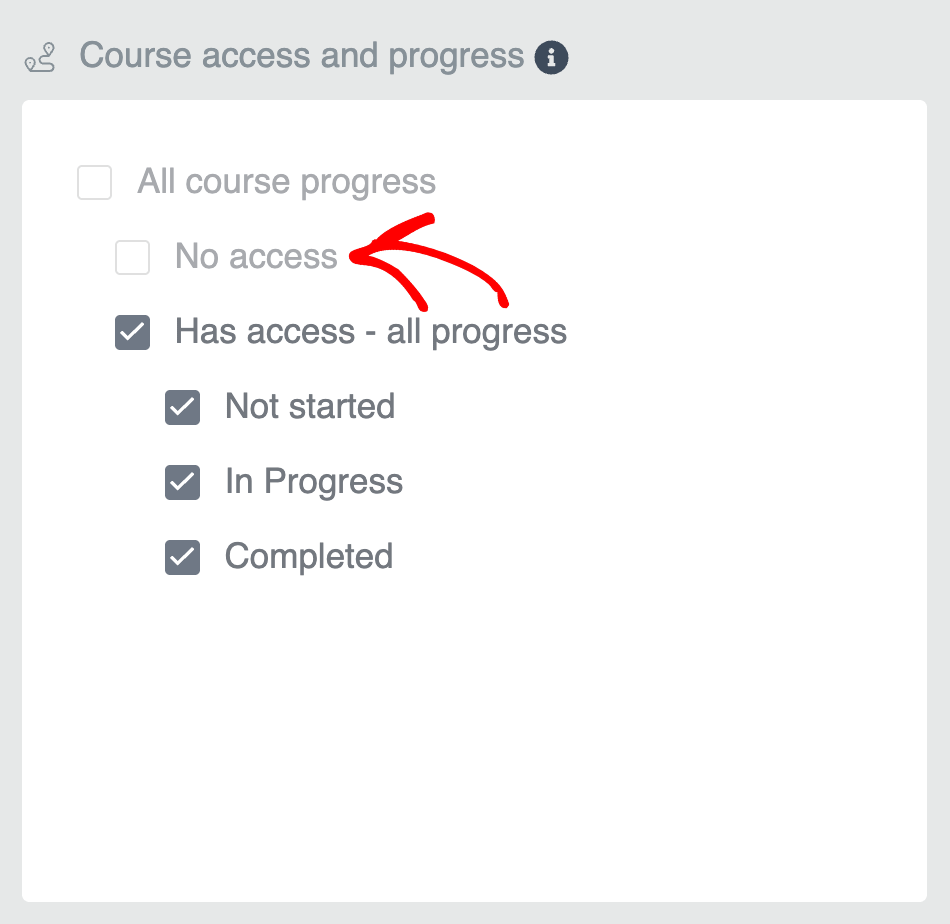
The Course Access and Progress column lets you hide courses depending on whether users have access or have made progress in those courses.
For example, you can hide your premium or paid courses from people who haven’t signed up for them by unchecking the “No access” option. This means that if someone doesn’t have access to a course, they won’t see it listed at all.
However, as soon as a user buys or gets access to that course, it will automatically show up for them. In other words, courses stay hidden until a user is allowed to see them, making your course list cleaner and less confusing for everyone.
After you uncheck the required options in this popup, click the Save and Close button to save the filter and close the popup.
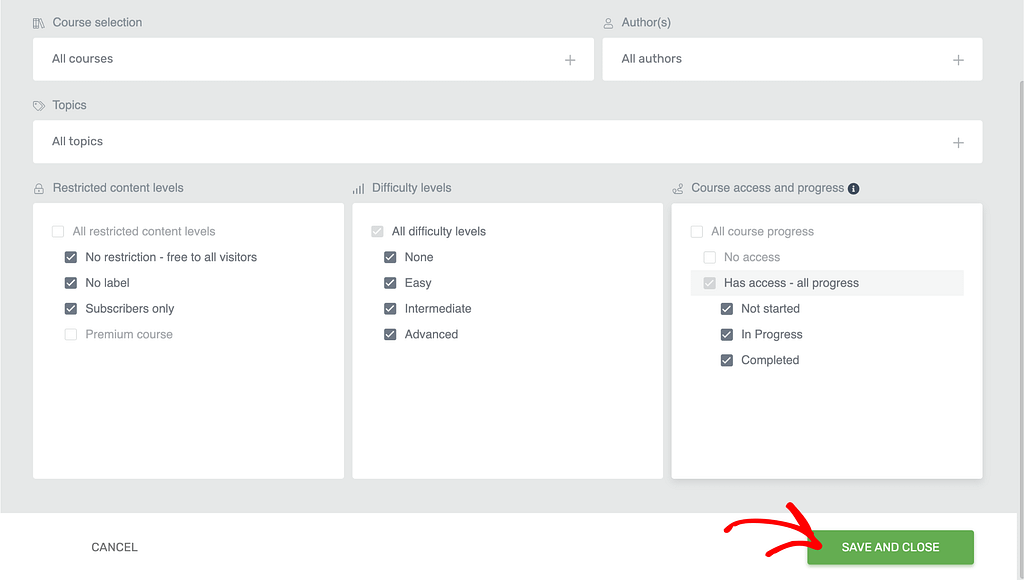
The above steps will ensure the premium courses on your website remain hidden from the course list you display.
We’ve just seen how you can create courses, display course lists and filter the courses being displayed.
Next, are you trying to edit elements inside a course list? Here’s a document that’ll help you understand the elements you can customize and some that you cannot.