In this article, you’ll learn how to attach downloadable files—such as PDFs, worksheets, checklists, and other resources—to your Thrive Apprentice lessons so students can access supplementary materials directly from the lesson page.
Why Attach Downloadable Files?
Downloadable resources enhance the learning experience by providing students with materials they can reference offline. Common examples include:
- PDF guides and workbooks
- Worksheets and checklists
- Slide decks and presentations
- Code files or templates
- Certificates of completion
Attaching Files Using the Resources Feature
Thrive Apprentice provides a built-in resources feature that lets you attach files and links directly to any lesson. Resources are managed through a dedicated modal accessible from the course structure editor.
- Go to Thrive Dashboard > Thrive Apprentice.
- Click Courses in the left sidebar and open the course containing your lesson.
- In the Content tab, locate the lesson you want to add resources to.
- Hover on the lesson and click Add Resources icon on the dropdown in Edit menu.
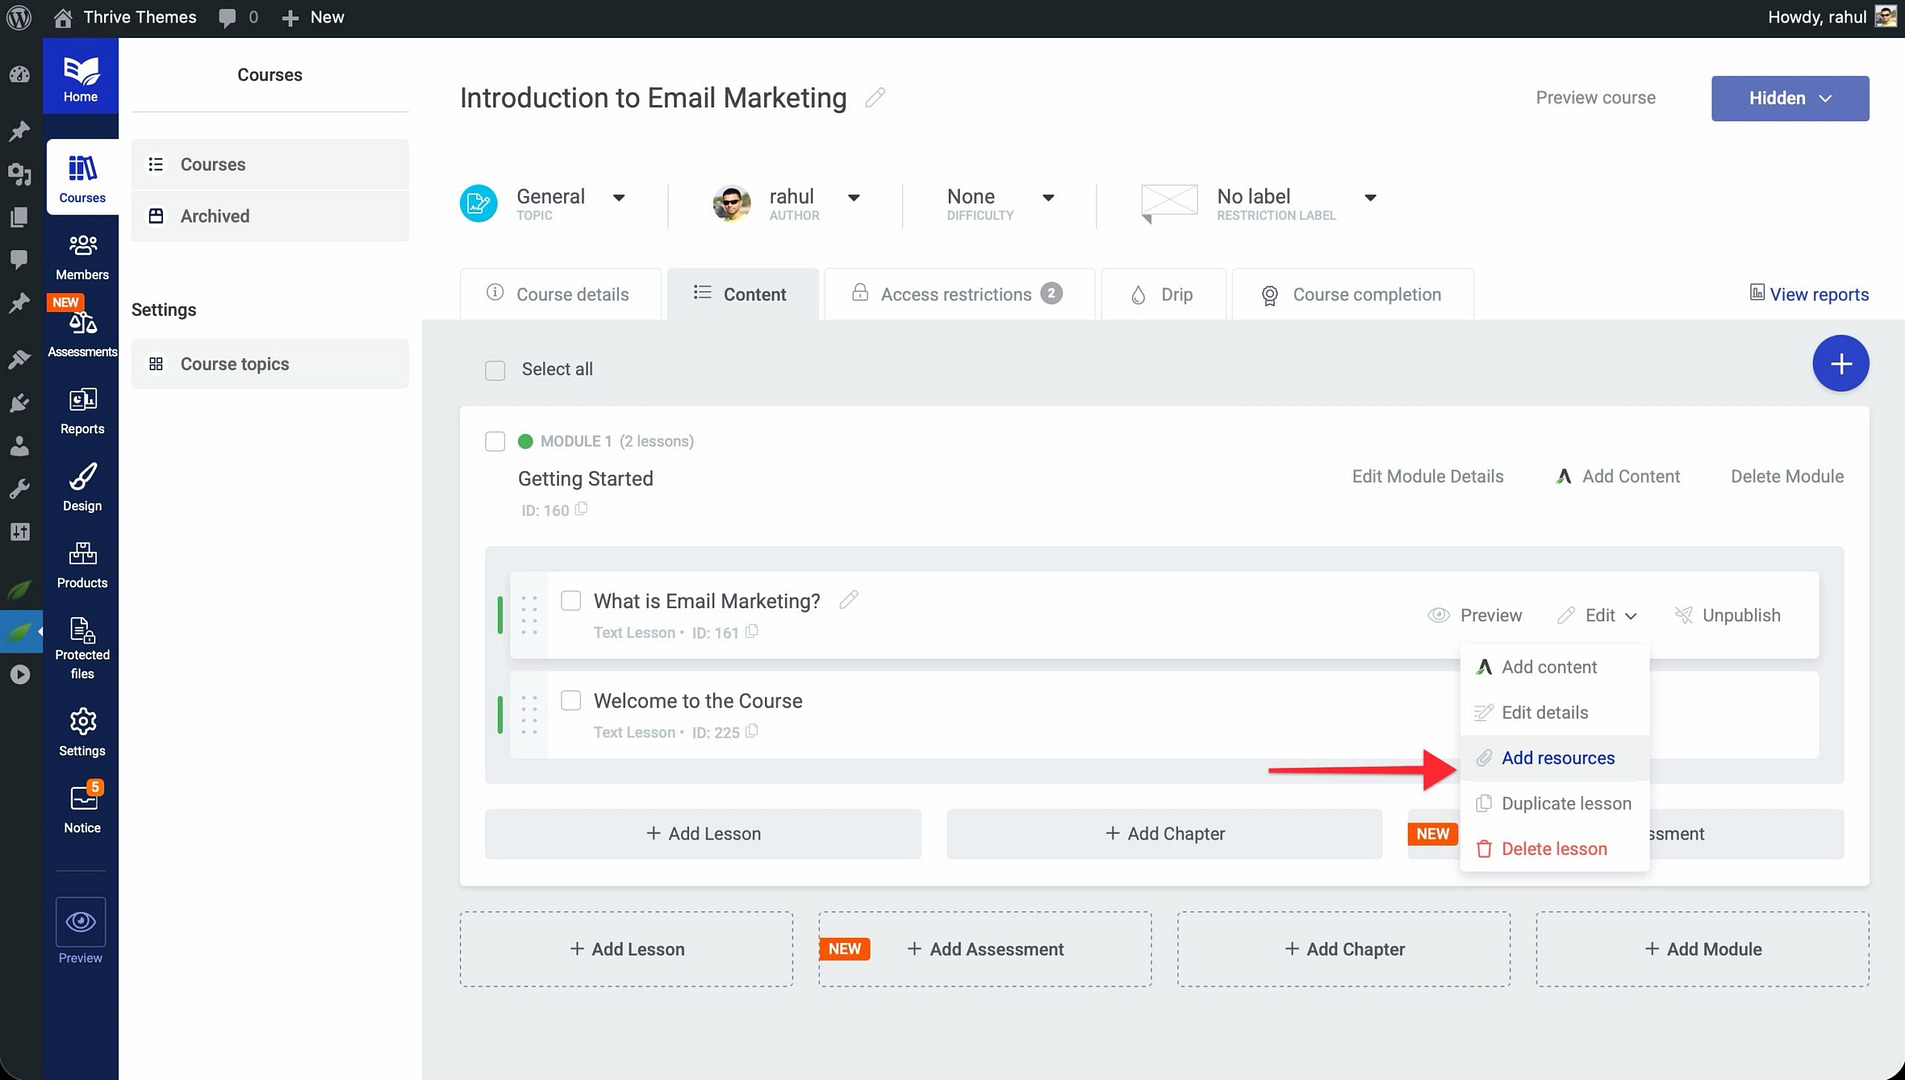
- Click Add new resource inside the modal.
- Choose the resource type:
- File — Upload a file from your computer or select one from the WordPress Media Library.
- URL — Link to an external resource (e.g., a Google Doc, external PDF, or website).
- Content — Link to an existing WordPress page or post on your site.
- Protected File — Upload an access-controlled file that only authorized students can download.
- Give the resource a descriptive label (e.g., “Module 1 Worksheet” or “Lesson Checklist”).
- Click Save to attach the resource to the lesson.
Adding Download Links Within Lesson Content
You can also embed download links directly inside your lesson content for more contextual placement.
- Open the lesson and click Edit Content to launch Thrive Architect.
- Add a Text element or Button element where you want the download link.
- Highlight the text or configure the button, then click the Link icon.
- Upload or select your file from the Media Library and insert its URL.
- Click Save Work, then click Done.
This approach works well when you want to offer a download at a specific point in the lesson—for example, a diploma or certificate link at the end of a final lesson.
Where Students See the Downloads
Files attached via the Resources section appear in a dedicated resources area on the lesson page. The exact placement depends on your lesson template, but typically resources display below or beside the main lesson content. Students can click the file name or a download icon to save the file to their device.
Note: Only students who have access to the lesson can see and download attached files. If a lesson is restricted, the resources remain hidden from unauthorized visitors.
Managing Attached Files
You can update or remove attached files at any time.
- To replace a file: Remove the existing file from the Resources section and upload the updated version.
- To delete a file: Click the Remove icon next to the file in the Resources section, then click Save.
- To reorder files: Drag and drop the files within the Resources section to change their display order.
Important: If you delete a file from your WordPress Media Library, it will also be removed from any lessons where it was attached. Make sure you no longer need a file before deleting it from the library.
That’s it! You’ve successfully attached downloadable files to your Thrive Apprentice lessons, giving students easy access to supplementary materials that support their learning.
Related Resources
- Course Structure: Understand how to organize your course with modules and chapters.
- Lesson Types: Learn about the different lesson types available in Thrive Apprentice.
- Access Restrictions: Explore how to set up login, registration, and access restrictions to control who can view your lessons and downloads.
- Thrive Architect: Browse the full Thrive Architect Knowledge Base for lesson content design options.