The appearance of your quiz is just as important as the content. In this article, you’ll learn how to select a visual style for your quiz and how to use the advanced editor to customize colors and typography.
Step 1: Picking a Unified Quiz Style
Selecting a style ensures that your Splash Page, Questions, Opt-in Gate, and Results Page all share a consistent
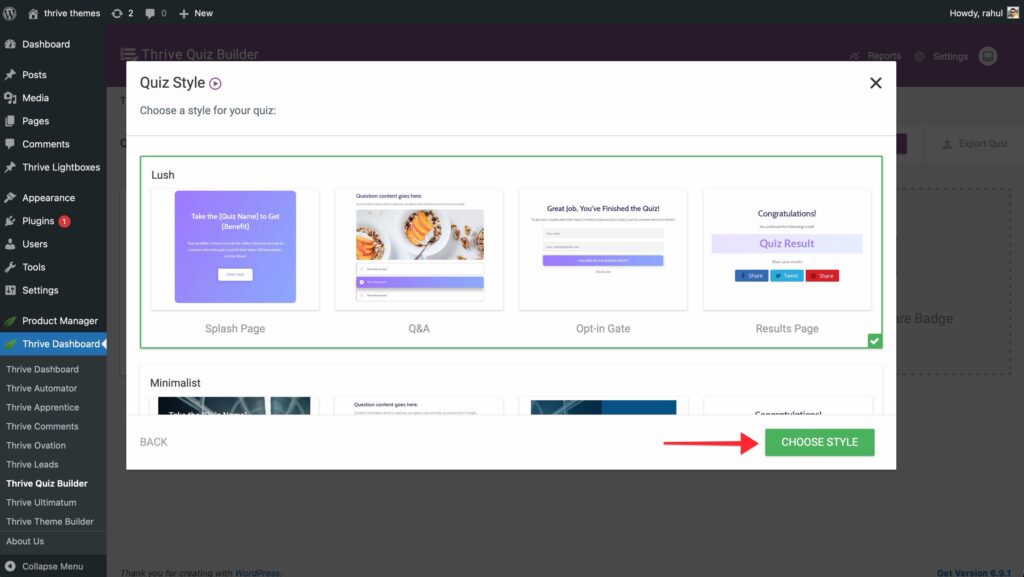
- In your quiz dashboard, find the Quiz Style card and click Choose Style.
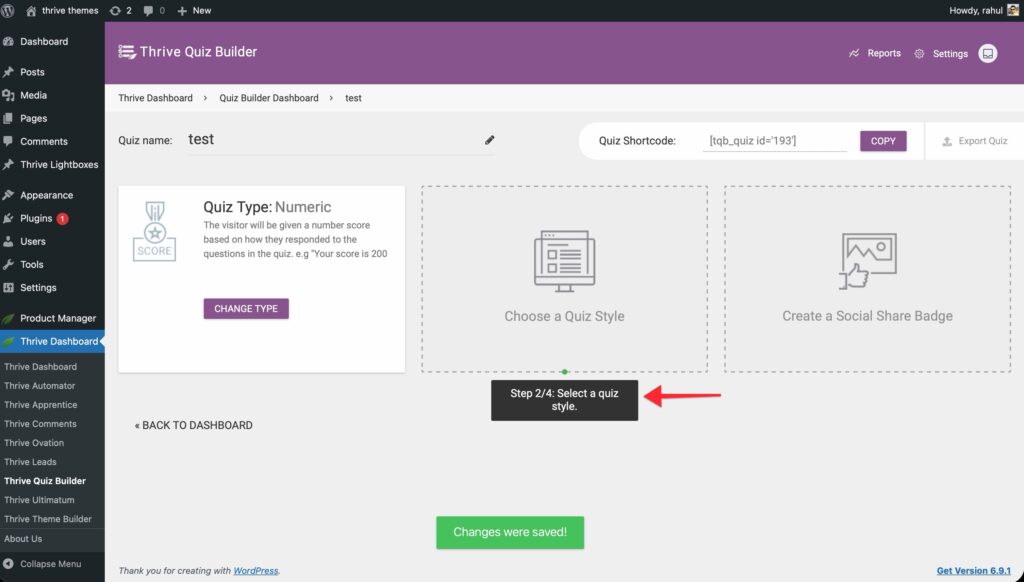
- Browse through the available design templates.
- Click on a style to see a preview of how the different pages (e.g., questions vs. results) will look.
- Once you find a design you like, click the Use this style button.
Step 2: Customizing the Visual Design
If the default style doesn’t perfectly match your brand, you can edit it.
- On the Quiz Style card, click the Edit Design or the Change button.
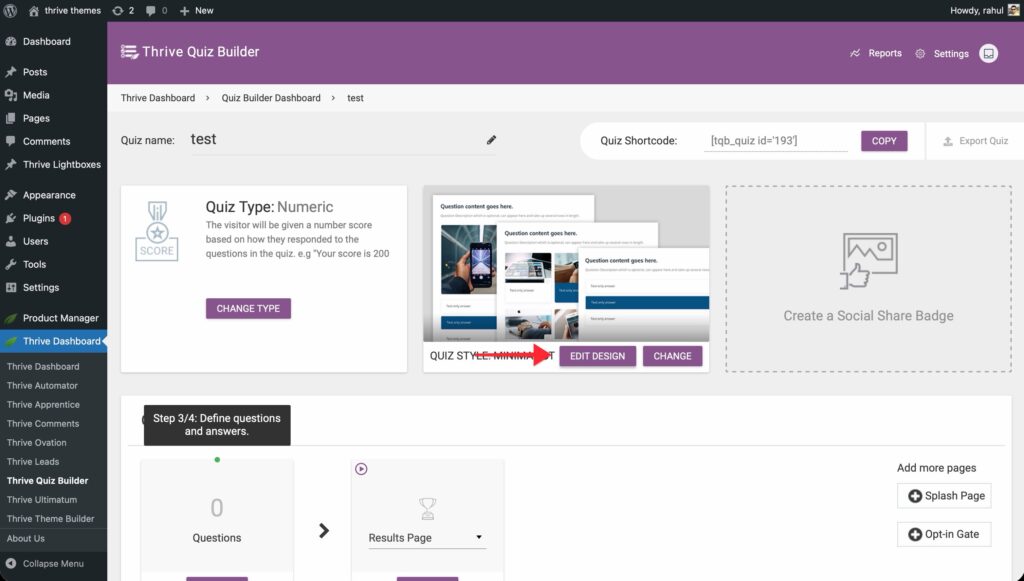
- If you are using the Minimalist style, you can customize the following:
- Colors: Change the primary accent colors used for buttons, progress bars, and highlights.
- Typography: Set the font family, size, and style for both Questions and Answers independently.
- Layout: Adjust the spacing and alignment of elements.
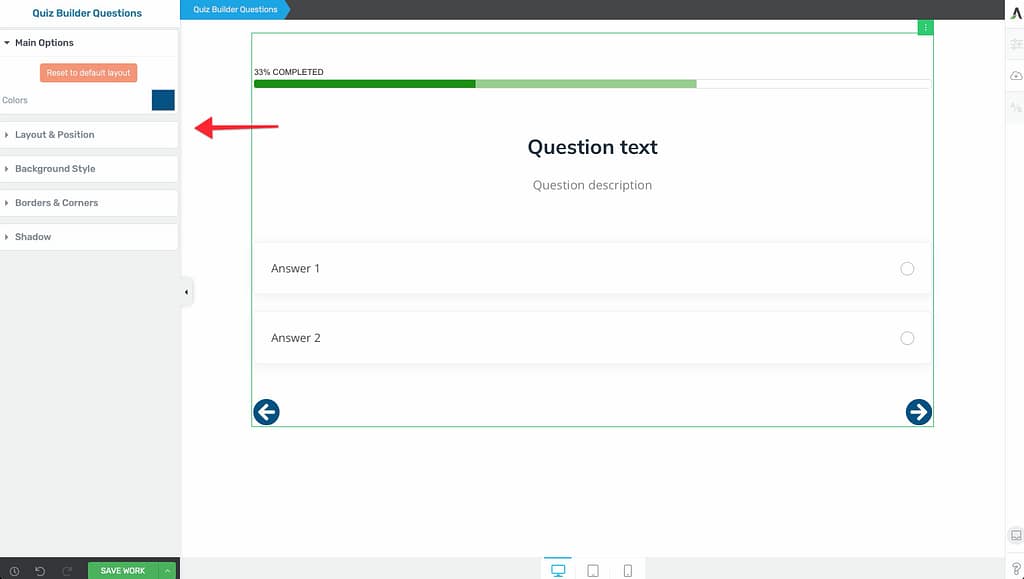
- Click the Save Work button as you make changes to see them in the live preview.
Step 3: Resetting to Defaults
If you’ve made changes and want to start over:
- Open the style editor via the Pencil Icon.
- Look for the Reset to Default Layout option under the Main Options.
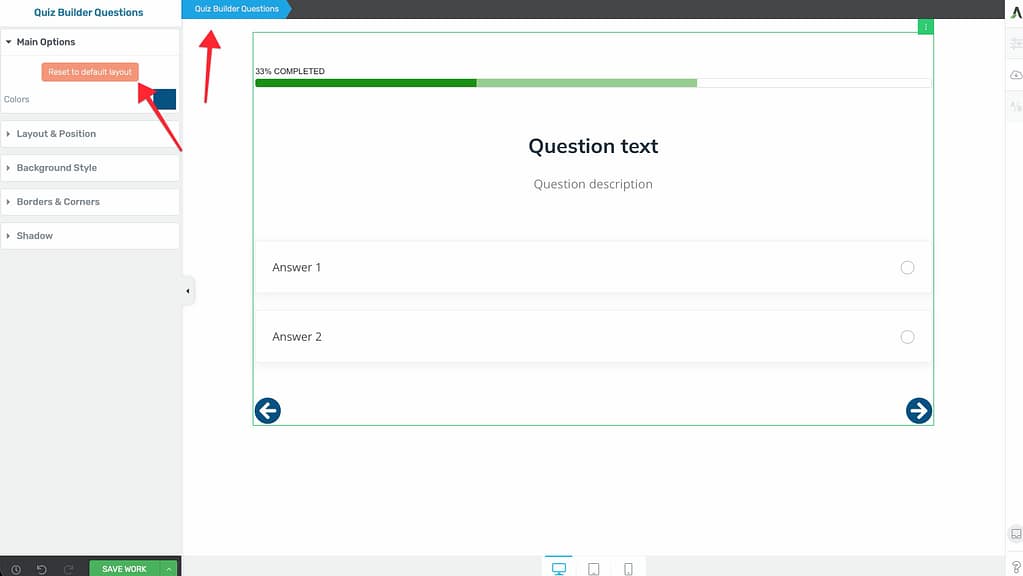
- Confirm the reset to revert all visual customizations to the original template settings.
Related Resources
- Building Your First Quiz: How to Build Your First Quiz Using Thrive Quiz Builder
- Questions: How to Add and Manage Quiz Questions
- Social Badges: Adding and Customizing Social Share Badges
- Thrive Quiz Builder Documentation: Explore the full Thrive Quiz Builder knowledge base