In this article, you’ll learn how to set up the backend “plumbing” for Thrive Ovation. This includes connecting an email delivery service and configuring the automated workflow used to request permission from your customers to use their testimonials.
Connecting an email delivery service is essential if you plan to convert WordPress comments into testimonials and send automated approval requests to your customers.
Accessing Thrive Ovation Settings
To get started, you first need to access the main settings area:
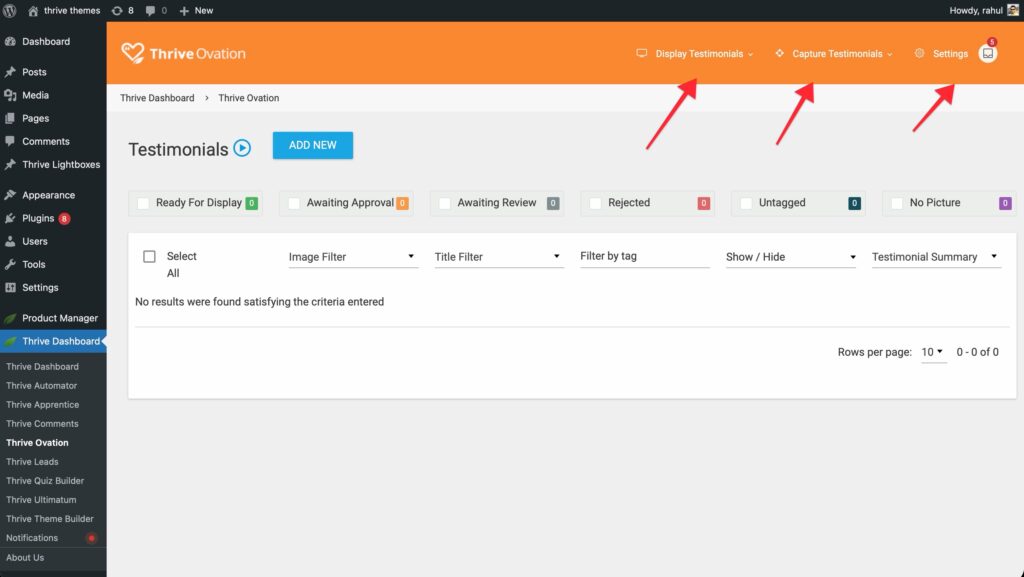
- Navigate to the Thrive Dashboard menu in your WordPress sidebar.
- Select Thrive Ovation.
- In the top-right navigation menu of the Ovation dashboard, click on Settings.
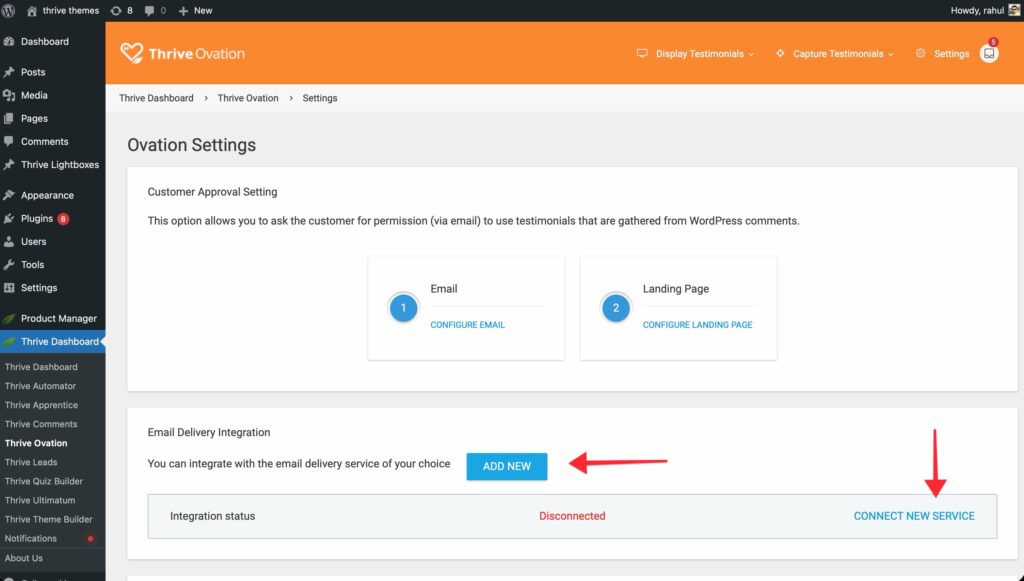
1. Connecting Your Email Delivery Service
Thrive Ovation uses third-party email delivery services (like Mandrill, SendGrid, Mailgun, etc.) to send approval emails. This ensures higher deliverability than standard WordPress mail.
Set Up a New Integration
- In the Email Delivery Integration section, click the Add New button or the Connect New Service link.
- In the Email Delivery Setup window that appears, select your preferred email service from the dropdown list.

- Note: Many services include an I need help with this link. Clicking this will open a video tutorial specifically for that service.

- If a tutorial isn’t available, follow these general steps:
- Log in to your email delivery service account.
- Locate your API Key in the service’s settings.
- Enter the API Key and any other required fields into the Thrive Ovation setup window.
- Click Save to finalize the connection.
Once saved, you will see a success message.
Important: If you set up multiple email delivery services, you must select one to be the Active service by clicking the activation toggle.
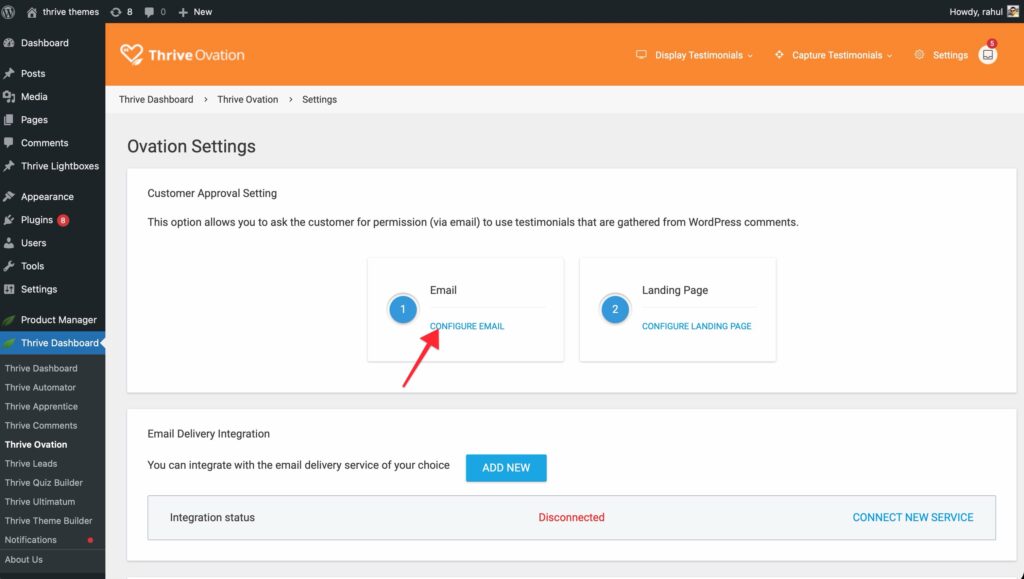
2. Configuring Customer Approval Email Templates
After your email service is connected, you can customize the email sent to customers when asking for permission to use their testimonial.
- In the Customer Approval Settings section, click on the Configure Email link.
- In the popup window, you can customize the following fields:
- Subject: Enter an engaging subject line for the email.
- Message: Write your approval request.
- Use Shortcodes: To personalize the email, use the available shortcodes (e.g.,
[customer_name],[testimonial_text]). Click the Copy button next to a shortcode and paste it directly into your message.
- Preview and Test: Click the Preview Email link to see how your email looks. You can also send a test email to your own address to verify the layout and interpret shortcodes.
- Click Save Email Template when finished.
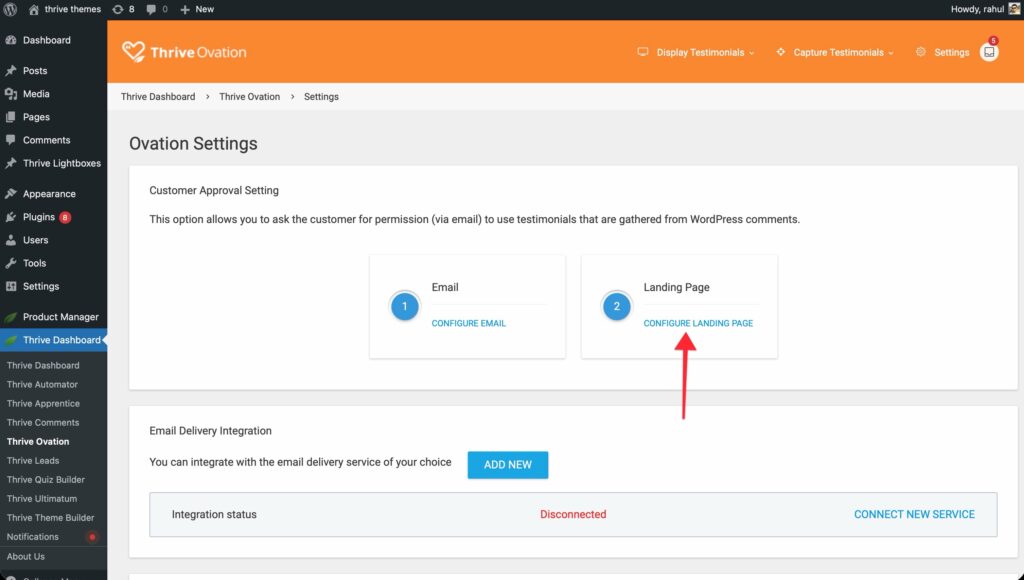
3. Configuring Customer Approval Landing Pages
When a customer clicks the “Approve” or “Reject” link in your email, you can decide which page on your website they see next.
- In the Customer Approval Settings section, click on the Configure Landing Page link.
- You will see two scenarios to configure:
- If the testimonial is approved: Forward the user to a “Thank You” or confirmation page.
- If the testimonial is NOT approved: Forward the user to a feedback page or a generic acknowledgement page.

- For each scenario, you have two options:
- Existing Page: Choose a page already created on your WordPress site.
- Custom URL: Enter a full URL for an external page.
- Click Save to apply your landing page settings.
Related Resources
- Thrive Ovation Dashboard: Learn How to Get Started with Thrive Ovation.
- Collection Guide: Discover how to Convert Comments into Testimonials.
- Knowledge Base: Explore the full Thrive Ovation knowledge base.