In this article, you’ll learn how to create and customize page templates in Thrive Theme Builder, including the default page template and the homepage template.
What Are Page Templates?
Page templates define how individual WordPress pages look on your website. Every Thrive Theme Builder theme includes a default page template called Page, which is used for all standard WordPress pages.
You can create additional page templates for different page designs and assign them to specific pages. You can also create a dedicated Homepage template that controls the appearance of your site’s front page.
Creating a New Page Template
Step 1: Open the Templates Section
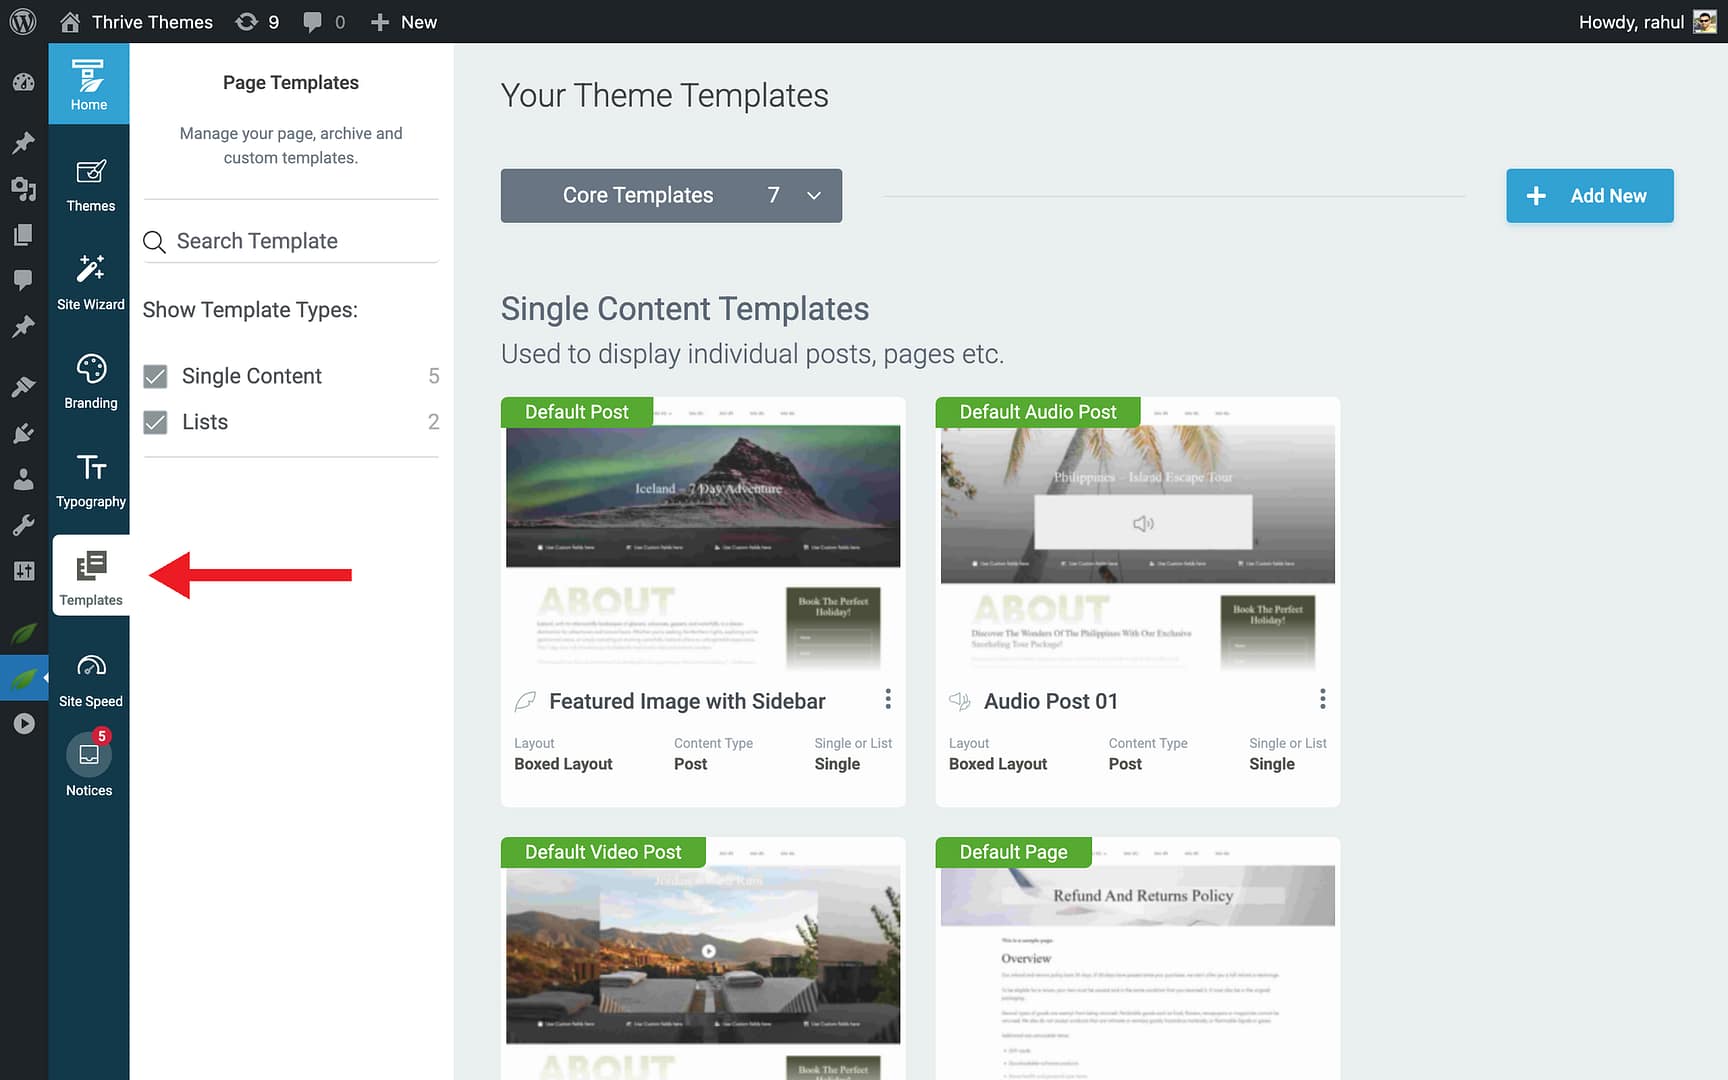
- In the Thrive Theme Builder dashboard, click Templates in the left sidebar.
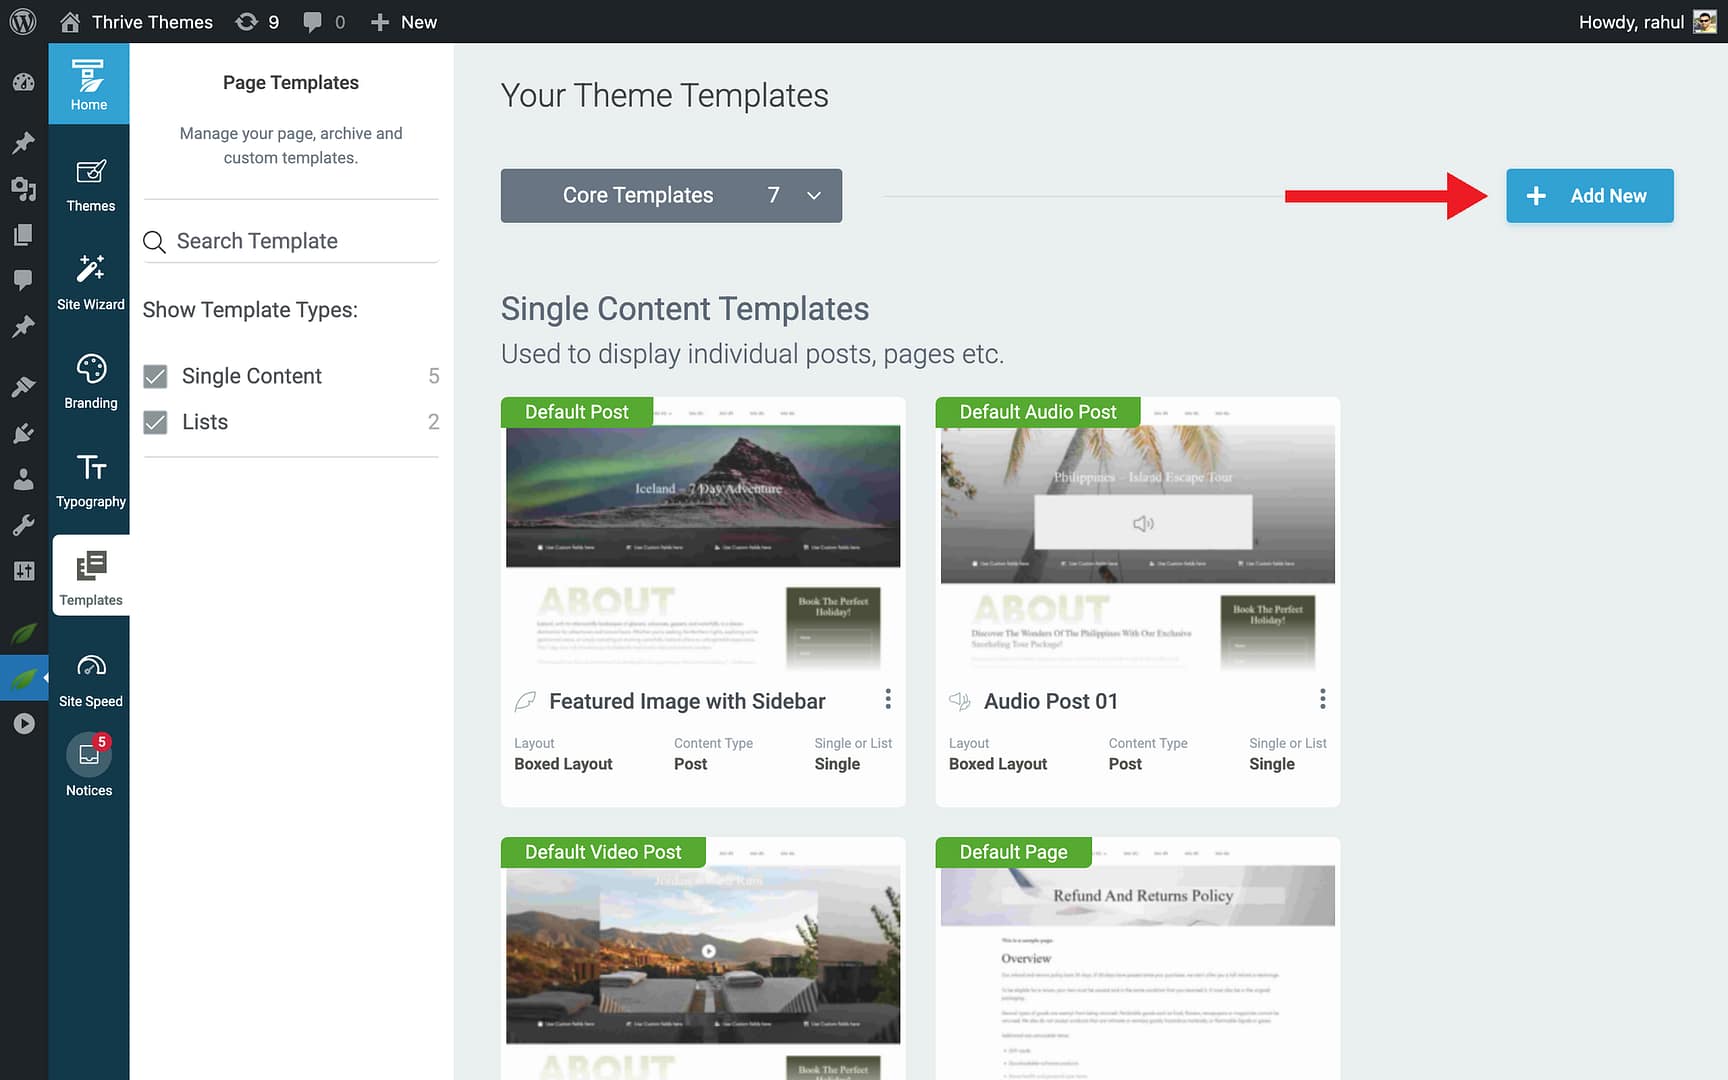
Step 2: Add a New Template
- Click the Add New button in the top-right corner.
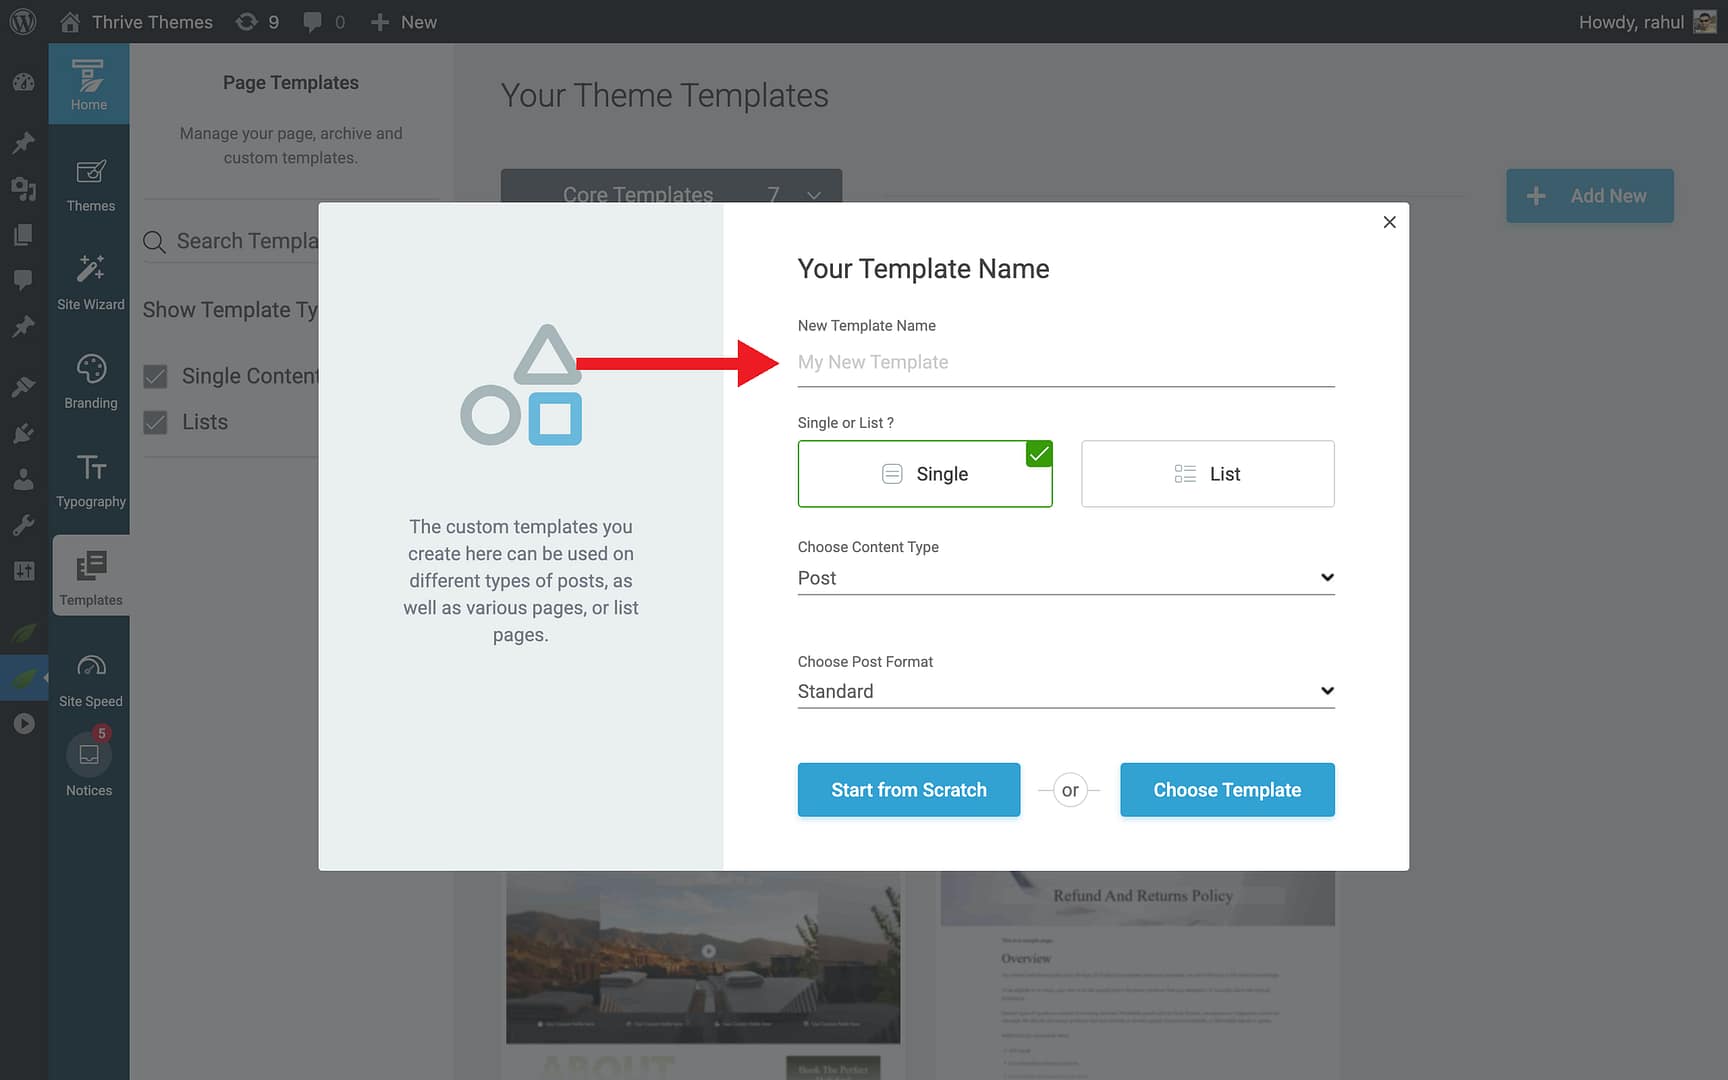
- A setup popup opens.
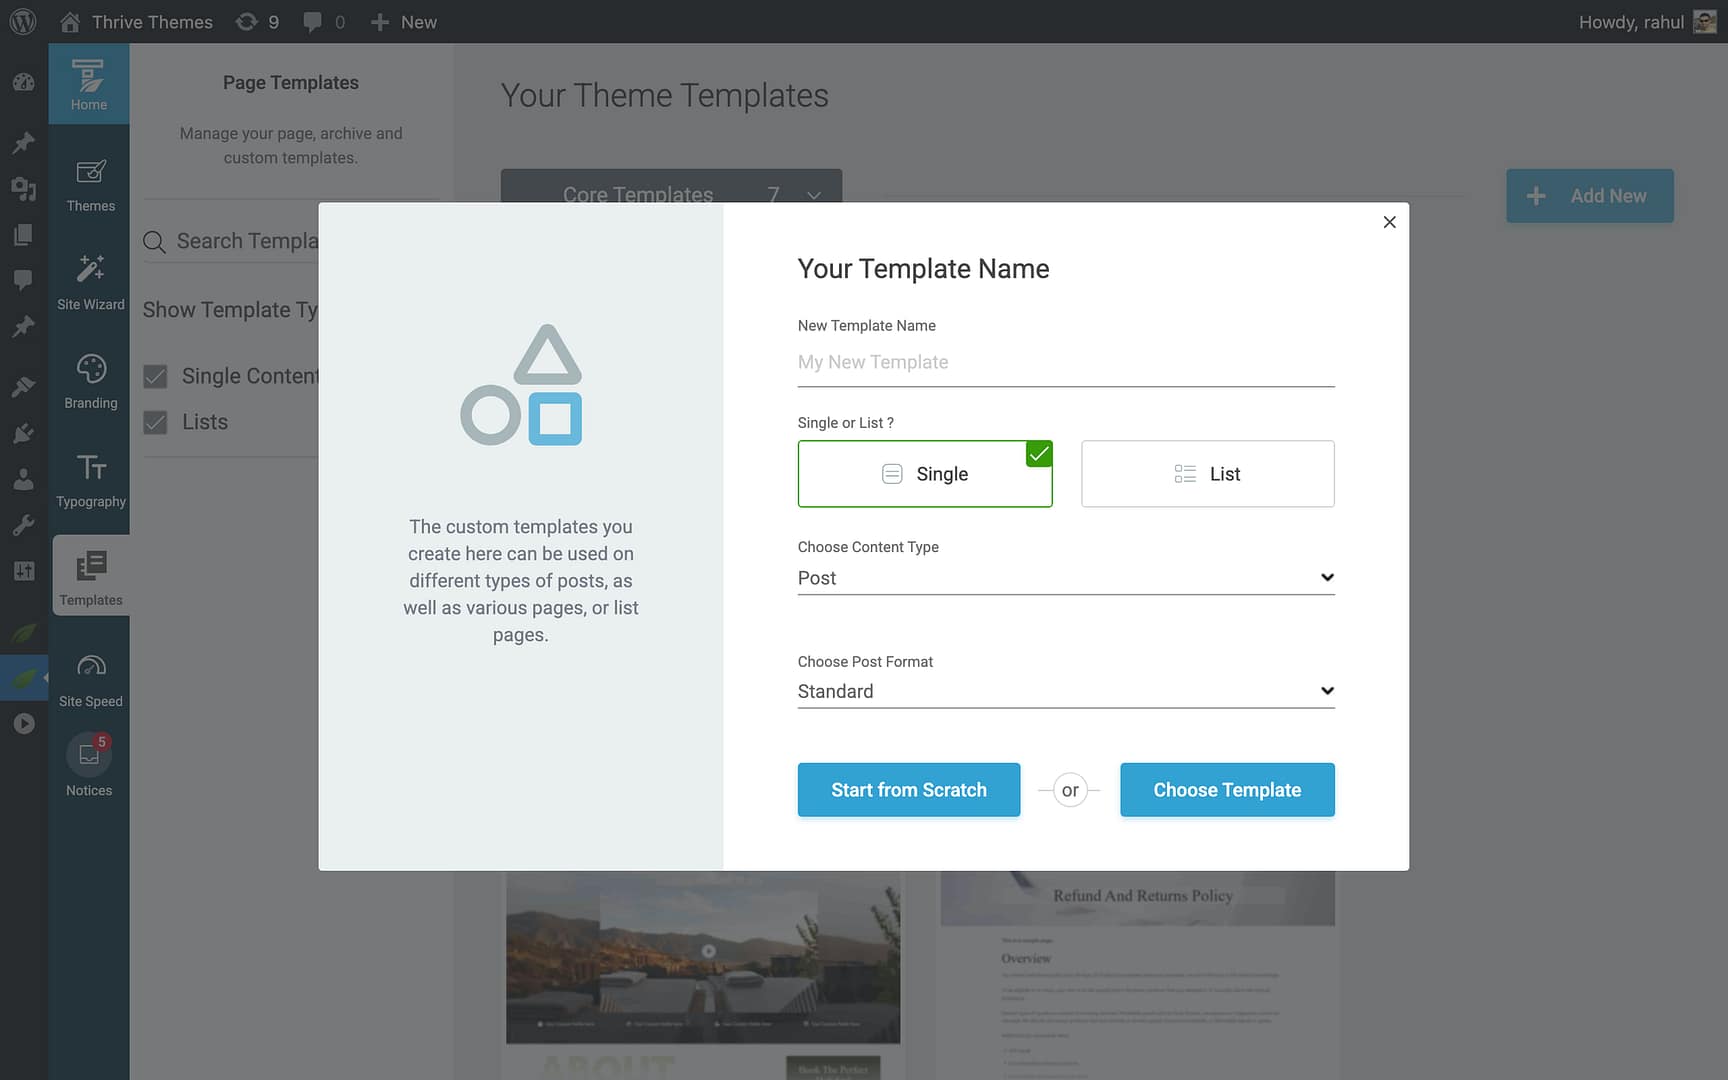
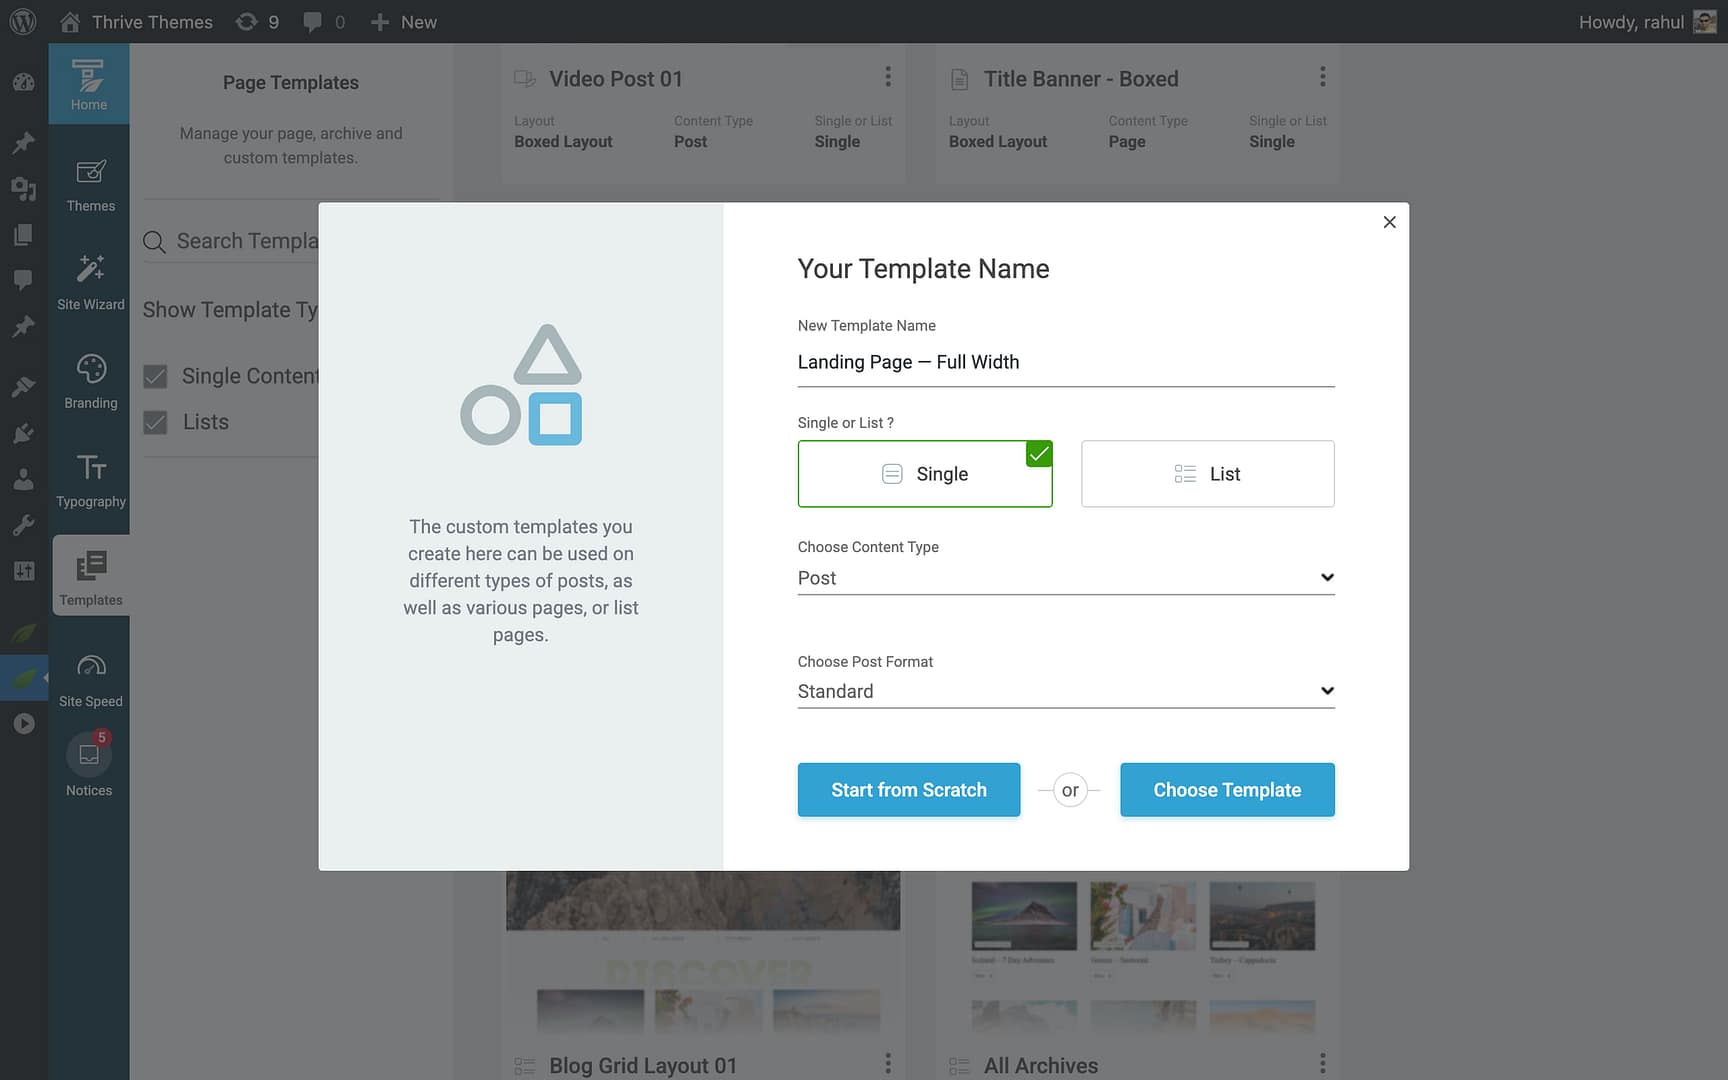
Step 3: Configure the Template
- Enter a descriptive name in the New Template Name field (e.g., “Landing Page — Full Width” or “Service Page — Sidebar”).
- Click Single in the Single or List? toggle.

- In the Choose Content Type dropdown, select Page.
Step 4: Choose a Starting Point
- Start from Scratch — Creates a blank template with the basic structure (header, content area, footer). The template is added to your Templates section.
- Choose Template — Opens the template library with pre-designed page templates. Browse the available designs, hover over one, and click Choose to select it.
The new template appears in the Templates section, ready for customization.
Creating a Homepage Template
Homepage templates control the appearance of your site’s homepage. They work differently from standard page templates because the homepage is configured during the Site Wizard setup (Step 5).
Creating a New Homepage Template
- In the Templates section, click Add New.
- Enter a name in the New Template Name field.
- Click Single in the Single or List? toggle.
- In the Choose Content Type dropdown, select Homepage.

- Choose a starting point (scratch or template library).
Homepage Setup Options
The homepage template is initially configured during Step 5 of the Site Wizard, where you can:
- Select a pre-designed homepage layout from the template library.
- Start with a blank homepage and build it from scratch.
You can change the homepage template at any time by re-running the Site Wizard or by editing the template directly in the Templates section.
Adding a Sidebar to a Homepage Template
By default, most homepage templates use a full-width layout without a sidebar. To add a sidebar:
- Open the homepage template in the Thrive Theme Builder editor.
- Click on the Content Wrapper in the breadcrumbs at the top of the editor.
- In the left sidebar options, enable the Sidebar Visibility toggle.
- Use the Position dropdown to choose whether the sidebar appears on the left or right.
- Save your changes.
Customizing a Page Template
Opening the Template Editor
- In the Templates section, hover over the page template.

- Click Edit.
- The template opens in the Thrive Theme Builder editor.
What You Can Customize
- Header and Footer — Modify or replace the header and footer sections.
- Content Area — Adjust the width, padding, and background of the area where page content appears.
- Sidebar — Add, remove, or reposition the sidebar.
- Layout — Change between full-width, boxed, or sidebar layouts.
- Page Title Display — Control whether and how the page title appears.
- Typography and Colors — All text and color settings inherit from your theme defaults but can be overridden at the template level.
Managing Page Templates
Hover over any page template in the Templates section and click the More option to access:
- Preview — View the template with sample content.
- Set as default — Make this the default page template.
- Rename — Change the template name.
- Delete — Permanently remove the template.
- Duplicate — Create an independent copy of the template.
- Reset — Revert to the original design.
Note: You cannot delete the default page template. To delete it, first set another page template as the default, then delete the old one.
Best Practices
- Use the default templates first — Customize the built-in Page and Homepage templates before creating new ones. This keeps your template count manageable.
- Name templates descriptively — Include the layout type or purpose in the name (e.g., “Full Width Page” or “Contact Page — Sidebar”).
- Keep homepage templates focused — Homepage templates should be visually distinct and highlight your most important content and calls to action.
- Preview before assigning — Always preview your page template before applying it to live pages.
Related Resources
- Understanding Templates: Learn about template types and how they work.
- Applying Templates to Pages: Learn how to assign specific templates to individual pages.
- Template Settings & Defaults: Learn how to set default templates and configure template settings.