In this article, you’ll learn how to create post templates in Thrive Theme Builder, including templates for standard posts and post format variants (video, audio, and image).
What Are Post Templates?
Post templates define how individual blog posts look on your website. Every Thrive Theme Builder theme includes a default post template for the Standard post format. You can create additional post templates and assign them to specific posts for different designs.
Thrive Theme Builder supports four post formats, each with its own template type:
- Standard — The default format for regular blog posts.
- Video — For posts that feature a video as the primary content.
- Audio — For posts that feature an audio player as the primary content.
- Image — For posts that feature an image as the primary content.
Important: A template’s post format must match the format of the posts you want to apply it to. A Video post template can only be applied to Video posts, an Audio template to Audio posts, and so on.
Creating a New Post Template
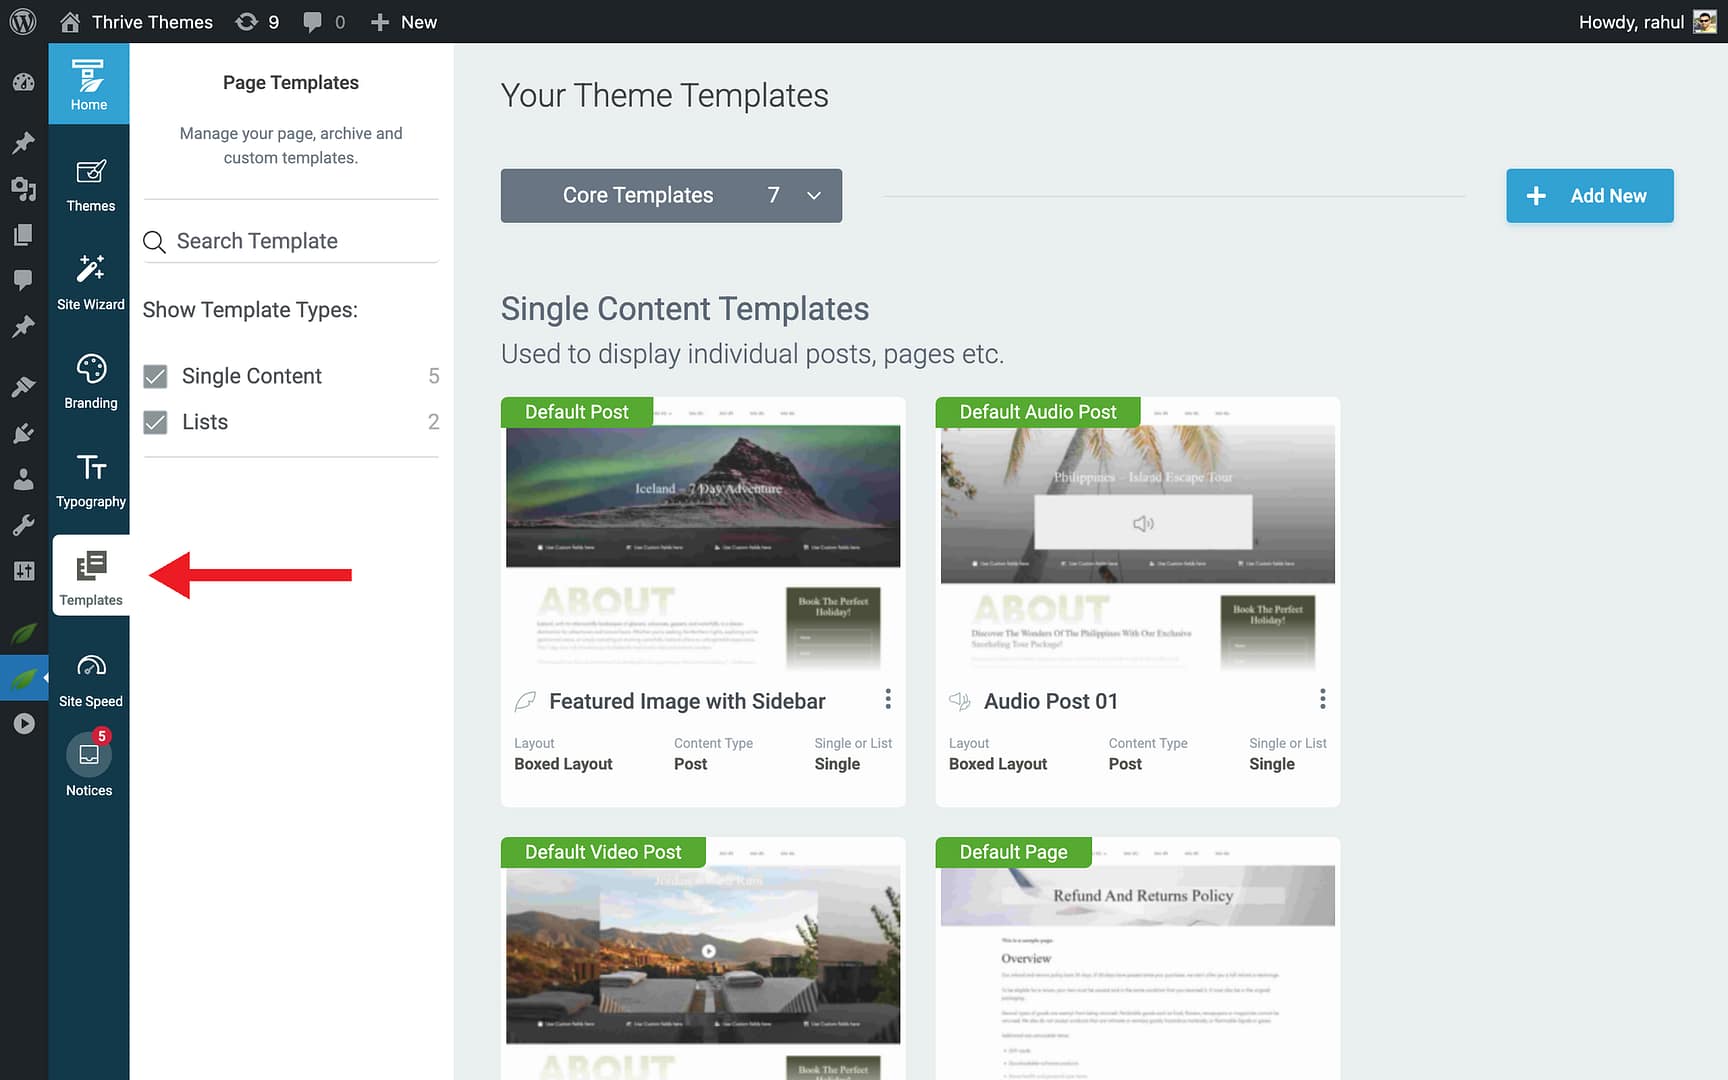
Step 1: Open the Templates Section
- In the Thrive Theme Builder dashboard, click Templates in the left sidebar.
Step 2: Add a New Template
- Click the Add New button in the top-right corner.
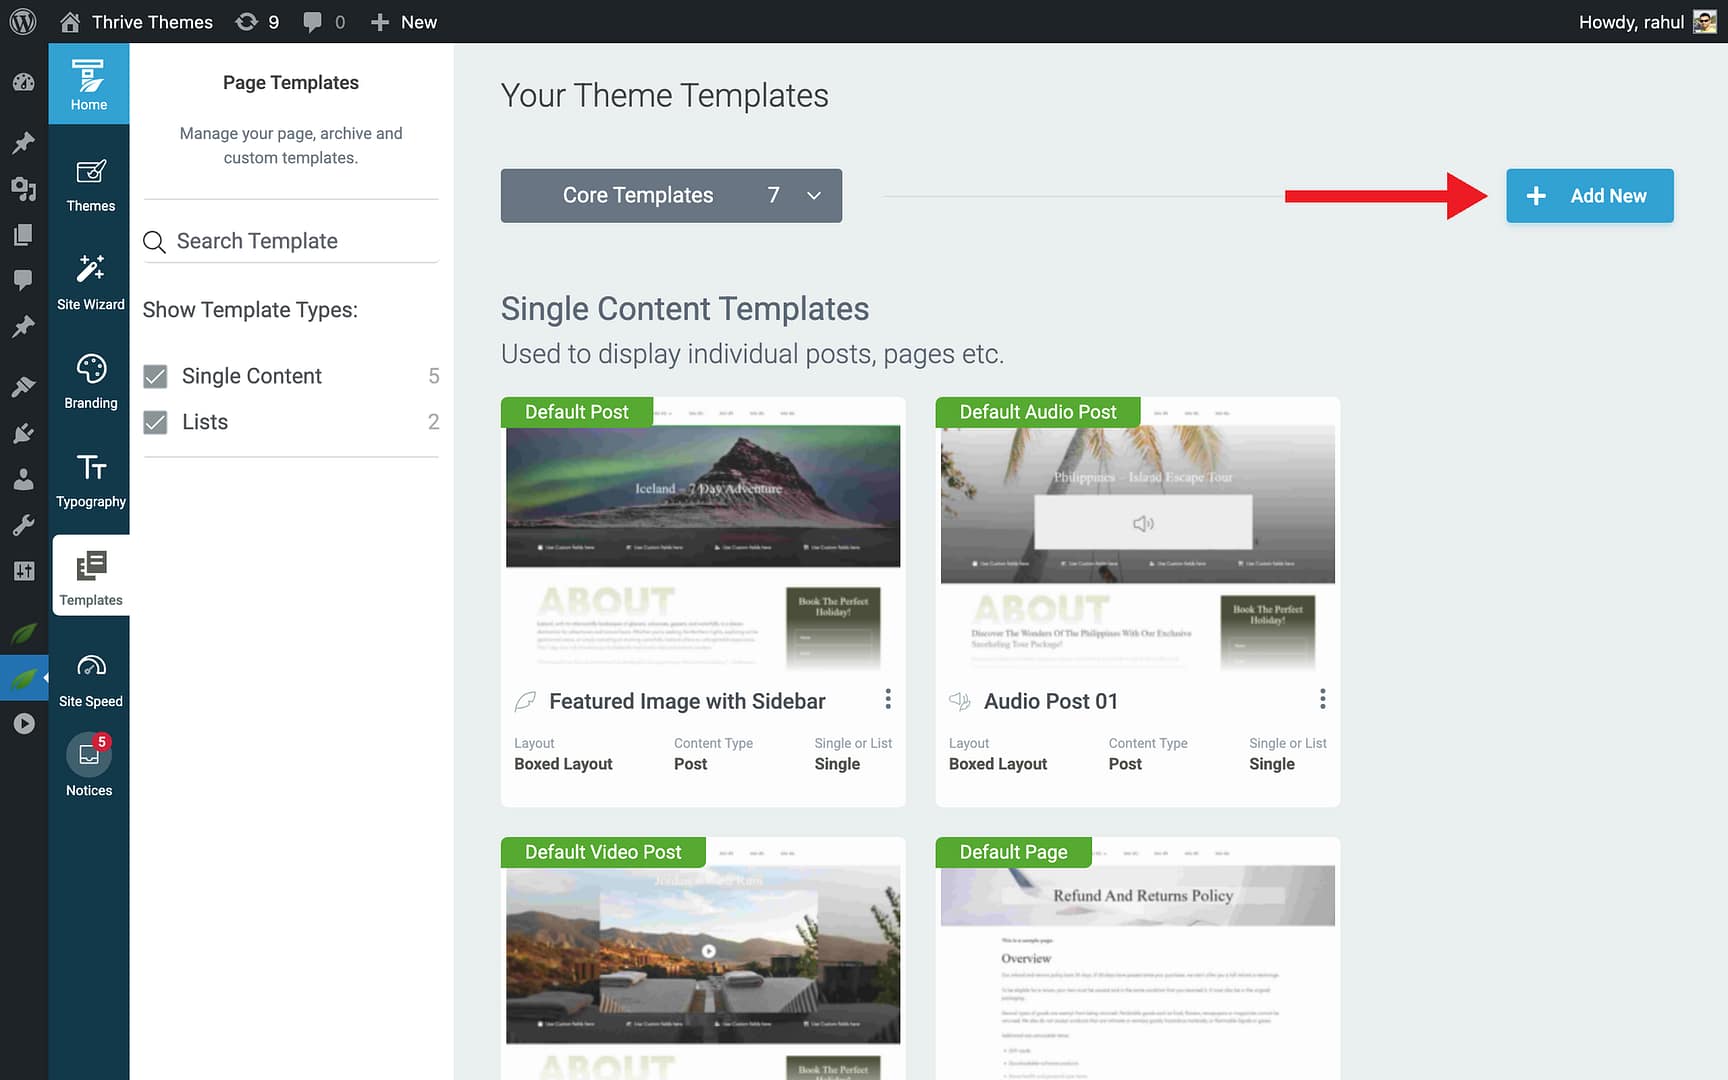
- A setup popup opens.
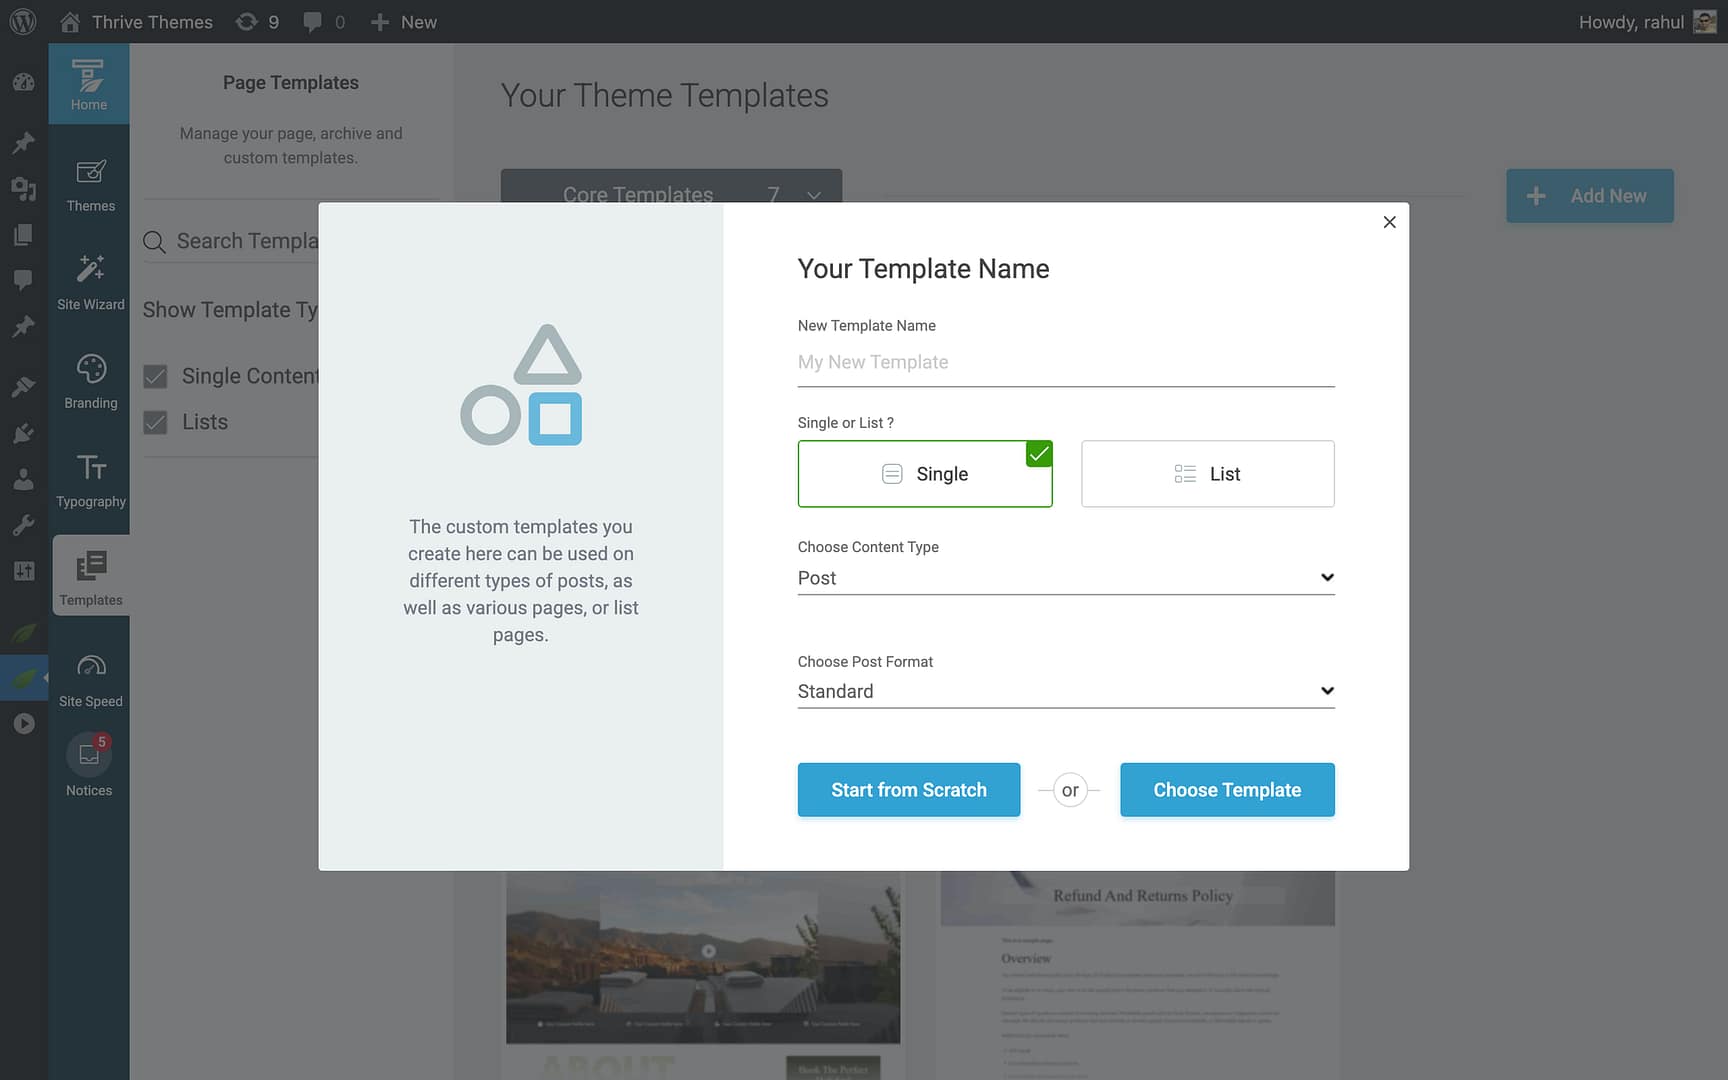
Step 3: Configure the Template
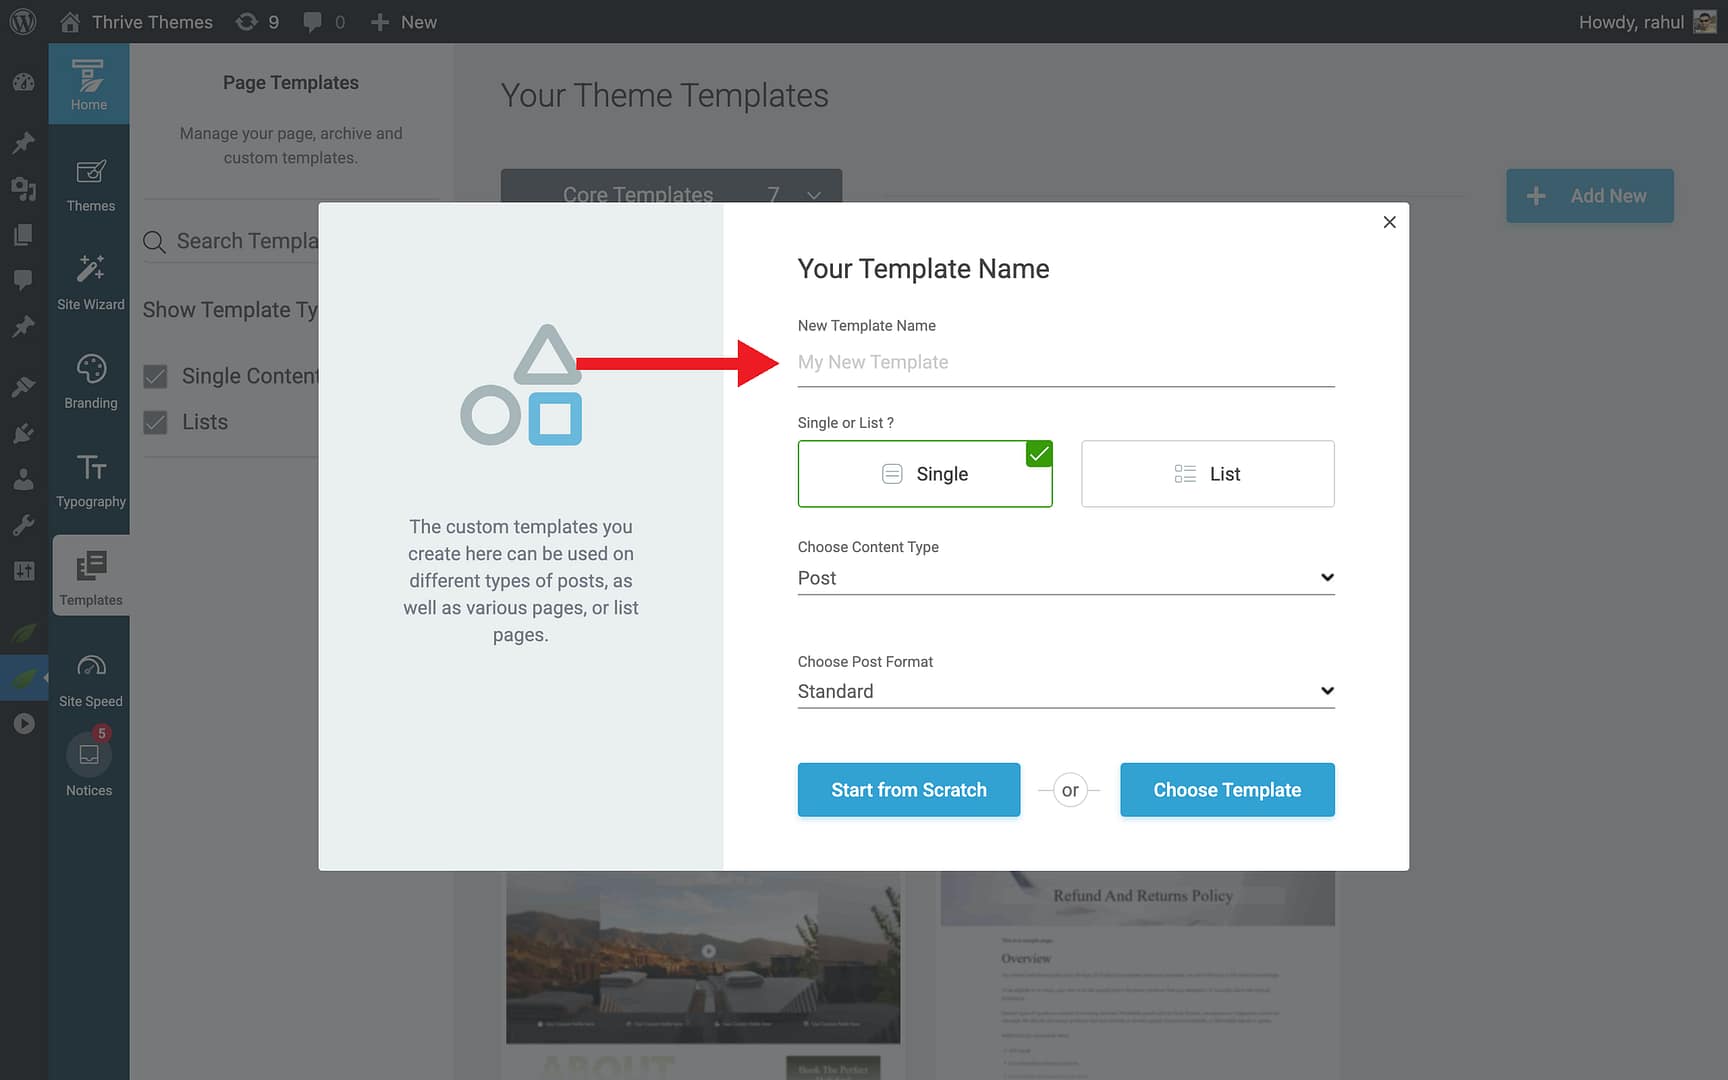
- Enter a descriptive name in the New Template Name field (e.g., “Video Post — Full Width” or “Standard Post — Sidebar”).
- Click Single in the Single or List? toggle.

- In the Choose Content Type dropdown, select Post.
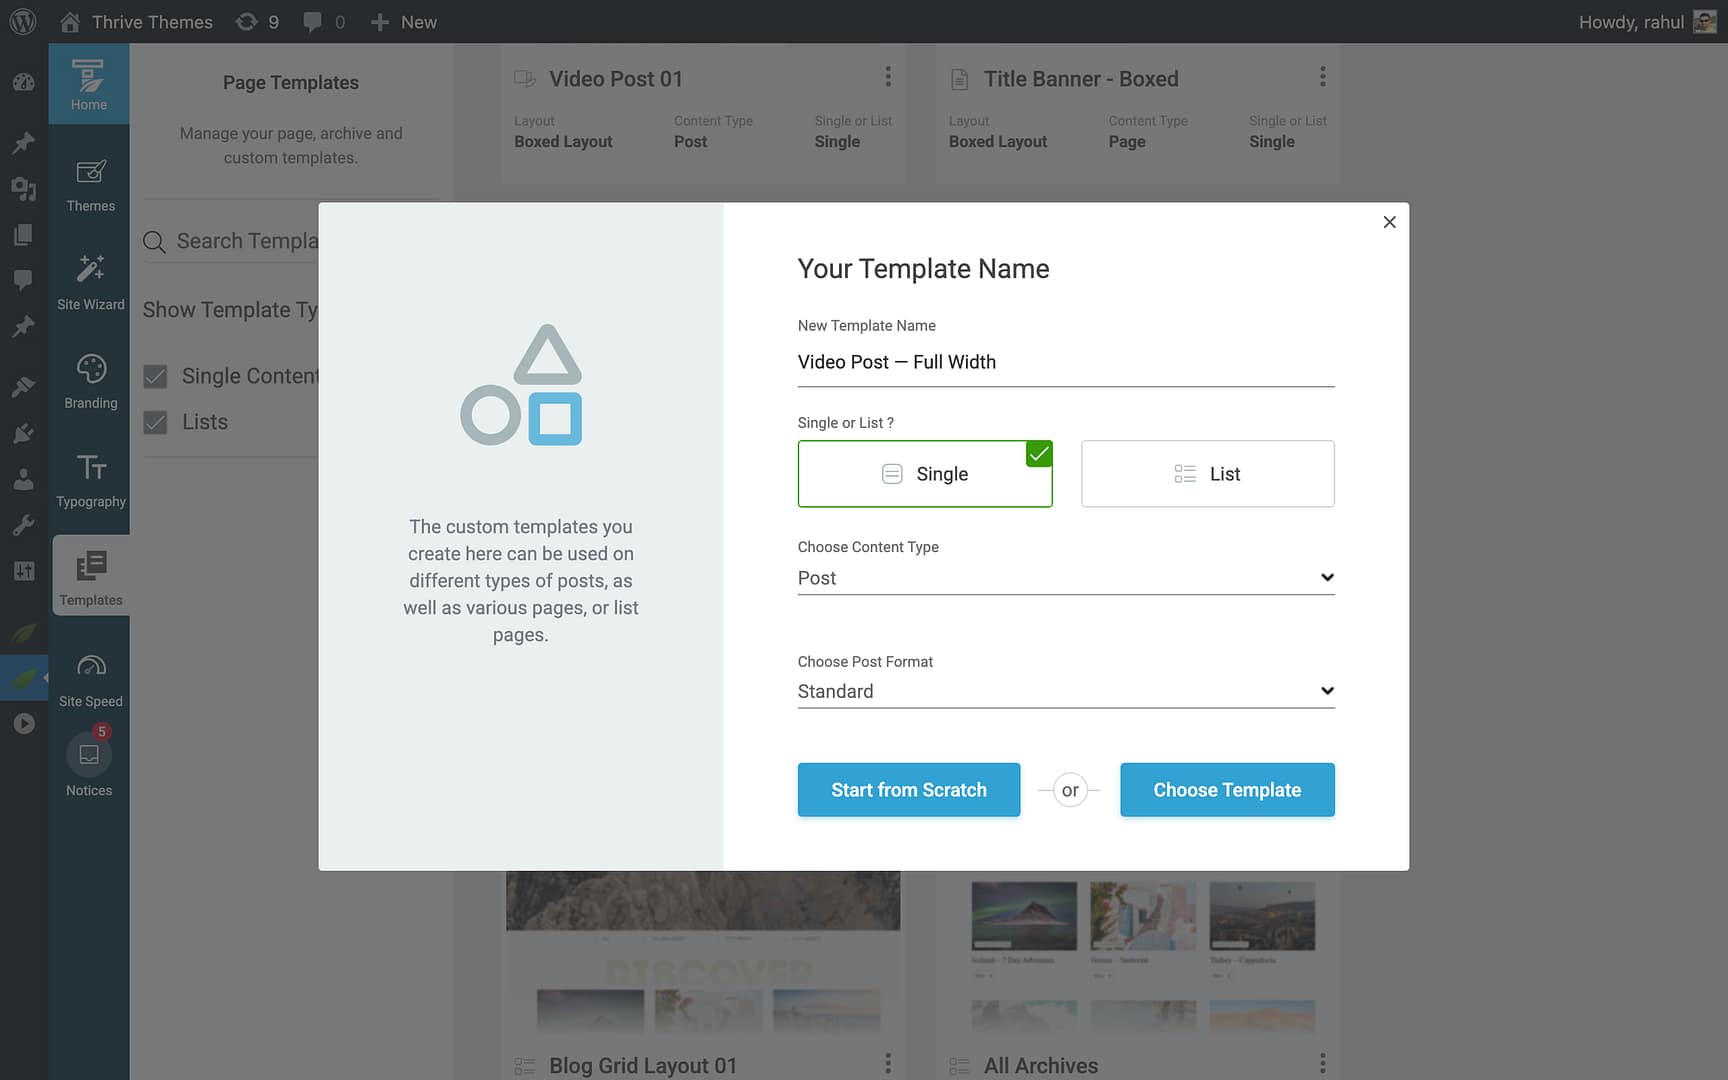
- Open the Choose Post Format dropdown and select the format:
- Standard — For regular blog posts.
- Video — For video-focused posts.
- Audio — For audio-focused posts.
- Image — For image-focused posts.
Step 4: Choose a Starting Point
You have two options:
- Start from Scratch — Creates a blank template with the basic structure (header, content area, footer). The template is added directly to your Templates section, ready for editing.
- Choose Template — Opens the template library with pre-designed post templates. Browse the available designs, hover over the one you want, and click Choose to select it.
The new template appears in the Templates section, ready for customization.
Customizing a Post Template
Once created, open your post template in the editor to customize its design.
Opening the Template Editor
- In the Templates section, hover over the post template.

- Click Edit.
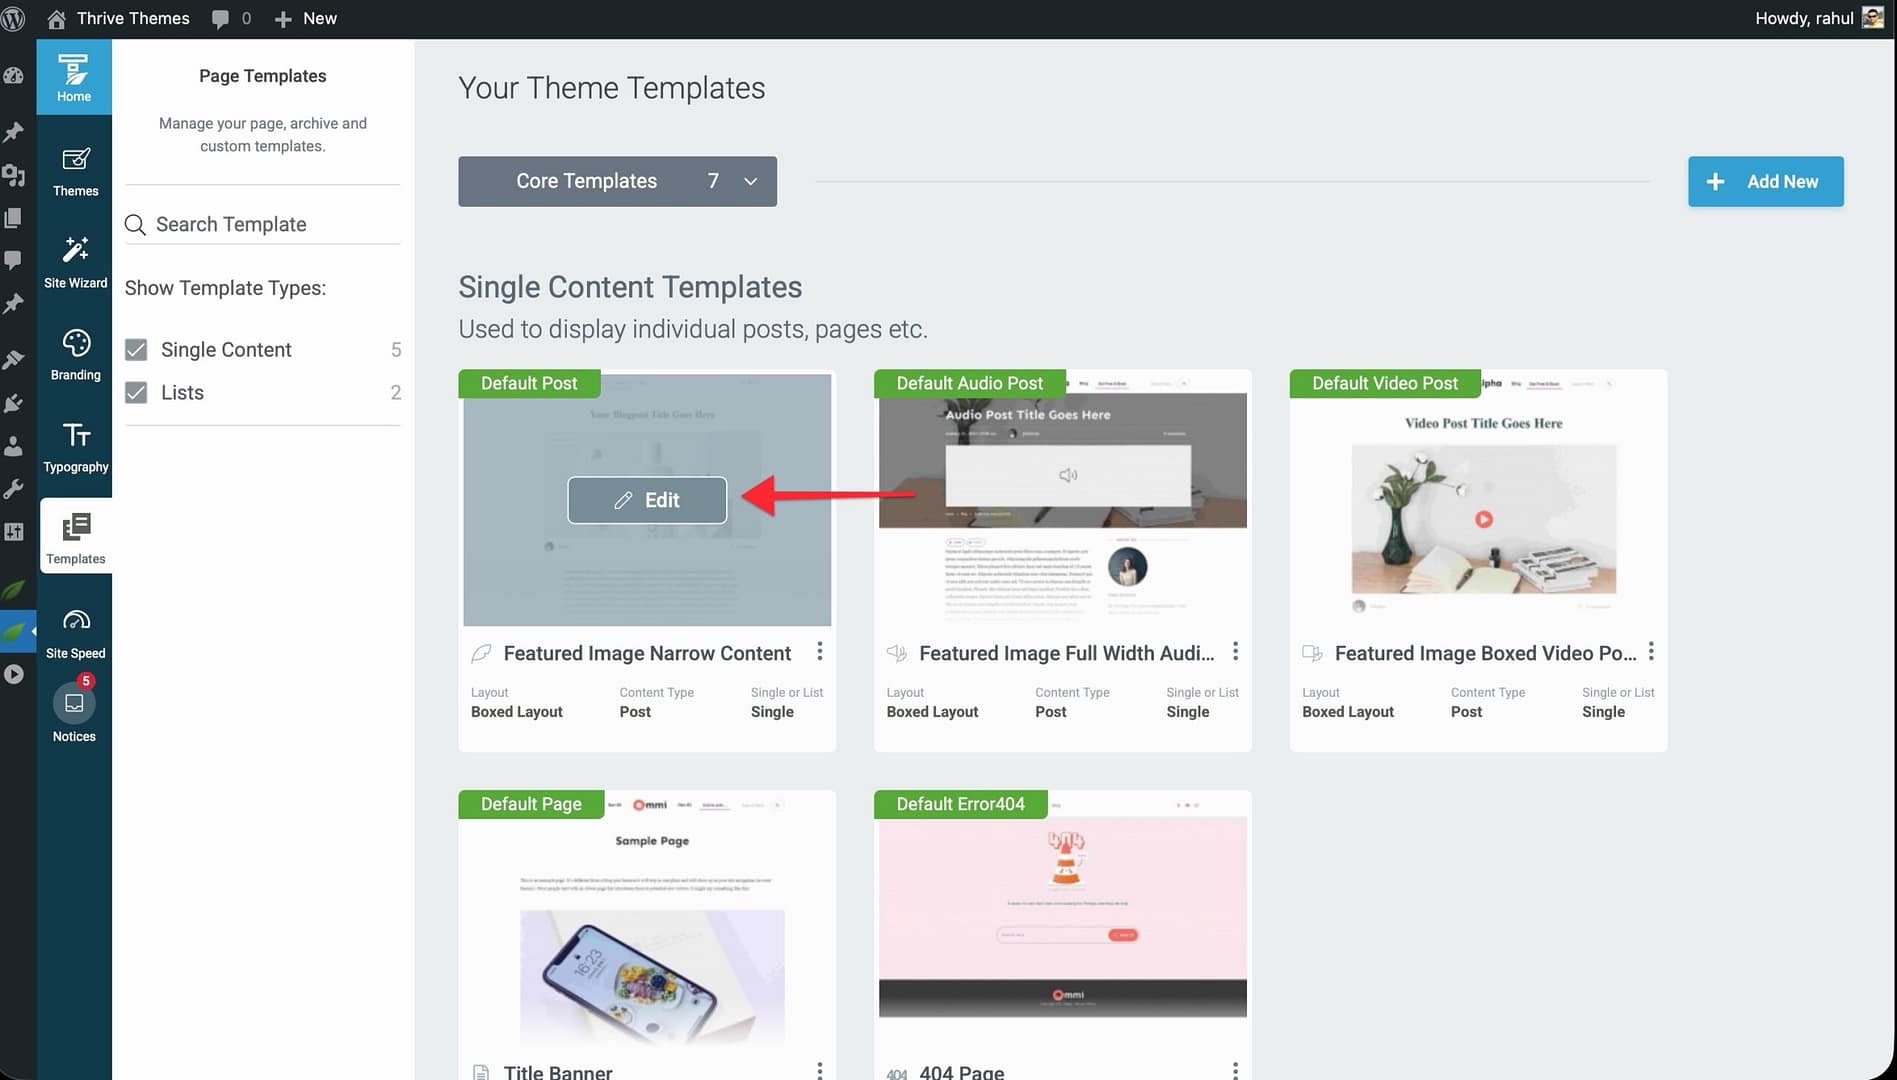
- The template opens in the Thrive Theme Builder editor.
What You Can Customize
- Header and Footer — Modify or replace the header and footer sections.
- Content Area — Adjust the width, padding, and styling of the area where post content appears.
- Sidebar — Add, remove, or reposition the sidebar.
- Post Meta — Configure how the author name, publish date, categories, and tags display.
- Featured Image — Control the placement and sizing of the featured image.
- Comments Section — Add or customize the comments area.
- Related Posts — Add a related posts element below the content.
- Typography and Colors — All text and color settings inherit from your theme’s typography and color palette, but can be overridden at the template level.
Post Format–Specific Content
For Video, Audio, and Image post formats, the template includes a format-specific content area at the top of the post:
- Video templates display a video player above the post content.
- Audio templates display an audio player above the post content.
- Image templates display a featured image above the post content.
This format-specific content is pulled from the post’s format settings in the WordPress editor.
Managing Post Templates
Hover over any post template in the Templates section and click the More option to access:
- Preview — View the template with sample content.
- Set as default — Make this the default template for its post format. New posts using that format will automatically use this template.
- Rename — Change the template name.
- Delete — Permanently remove the template.
- Duplicate — Create an independent copy of the template.
- Reset — Revert to the original design.
Best Practices
- Name templates descriptively — Include the post format and layout type in the name (e.g., “Video Post — No Sidebar” or “Standard Post — Full Width”).
- Match formats carefully — A Video post template will only be used for posts set to the Video format. Make sure your posts’ formats match their intended templates.
- Set defaults thoughtfully — The default template for each format is used automatically for all posts of that format unless you manually assign a different template.
- Preview before applying — Always preview your template with real content before making it the default or applying it to live posts.
Related Resources
- Understanding Templates: Learn about template types and how they work.
- Applying Templates to Posts: Learn how to assign specific templates to individual posts.
- Template Settings & Defaults: Learn how to set default templates and configure template settings.