In this article, you’ll learn how to use drip content scheduling in Thrive Apprentice—what drip content is, how the drip system works, which campaign templates are available, how to configure unlock conditions, and how to sell a dripped course using Products.
What Is Drip Content?
Drip content lets you release course lessons and modules over time rather than making everything available at once. Instead of giving students immediate access to your entire course, you schedule content to unlock at specific intervals—daily, weekly, monthly, or based on custom triggers.
This approach keeps students engaged over a longer period, prevents overwhelm, encourages consistent progress, and allows you to align your course delivery with a structured learning path.
How the Drip System Works
The drip system in Thrive Apprentice controls when students can access each piece of course content. Here is how the core mechanics work:
- Locked content: When a lesson or module has not yet reached its unlock date, students see it as locked. They can see the lesson title in the course outline (unless you hide locked lessons), but they cannot access the content itself.
- Unlock triggers: Each drip campaign uses a trigger event—such as enrollment date, course purchase, or a specific calendar date—to determine when the countdown begins for unlocking content.
- Progressive access: As students meet the unlock conditions, lessons become available in the order and timing you define. Once a lesson is unlocked, it remains accessible permanently.
- Per-student timelines: With evergreen drip templates, each student gets their own personalized unlock schedule based on when they enrolled or purchased, rather than everyone unlocking content on the same date.
Note: Drip schedules apply to the course content structure you have already built. You should create your course, modules, and lessons before setting up a drip campaign.
Available Drip Campaign Templates
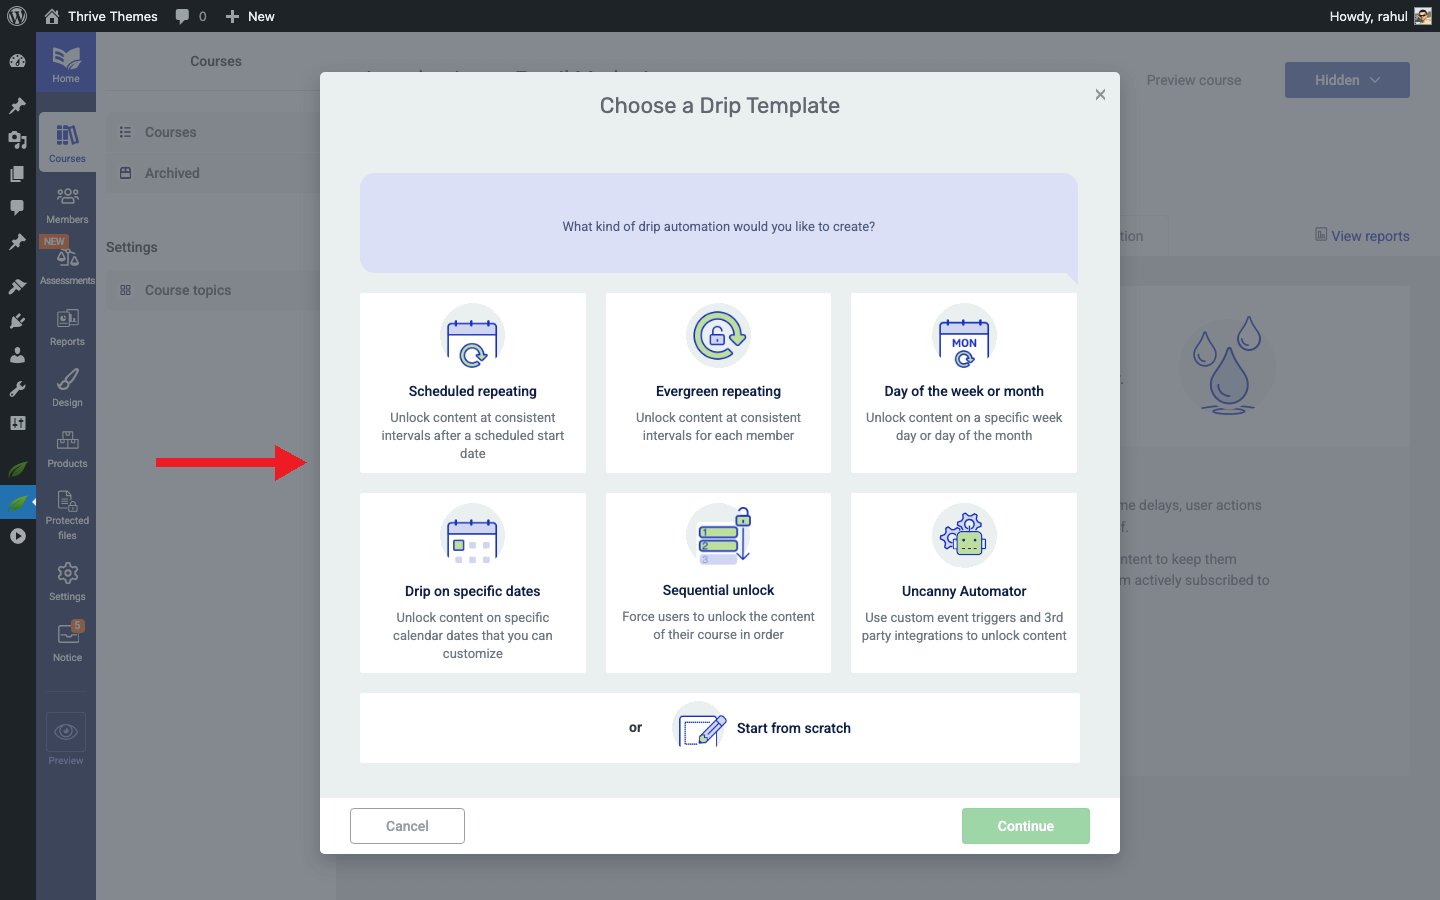
Thrive Apprentice provides seven pre-built drip campaign templates. Each template offers a different scheduling logic to match your course delivery goals.
- Sequential Unlock — Lessons unlock one after another at set intervals. Each student progresses through the course in a fixed order.
- Evergreen Repeating — Content unlocks at consistent intervals (e.g., one lesson per week) relative to each student’s enrollment or purchase date.
- Scheduled Repeating — Content unlocks at regular intervals starting from a specific calendar date and time that you define.
- Day of the Week or Month — Lessons unlock on specific recurring days, such as every Monday or the 15th of each month.
- Drip on Specific Dates — Each lesson unlocks on an exact calendar date that you choose.
- Start From Scratch — A blank-slate template that gives you full control over triggers, intervals, and custom unlock conditions.
- Thrive Automator Unlock — Content unlocks through automation triggers using Uncanny Automator (formerly Thrive Automator), enabling third-party integration-based scheduling.
Tip: If you are unsure which template to choose, the Sequential Unlock template is the most straightforward option for beginners. For a detailed setup guide on each template, see the Drip Schedule Templates Reference.
Setting Up a Drip Campaign
Follow these steps to create your first drip campaign:
- Navigate to Thrive Dashboard > Thrive Apprentice.
- Click Courses in the left sidebar and open the course you want to drip.
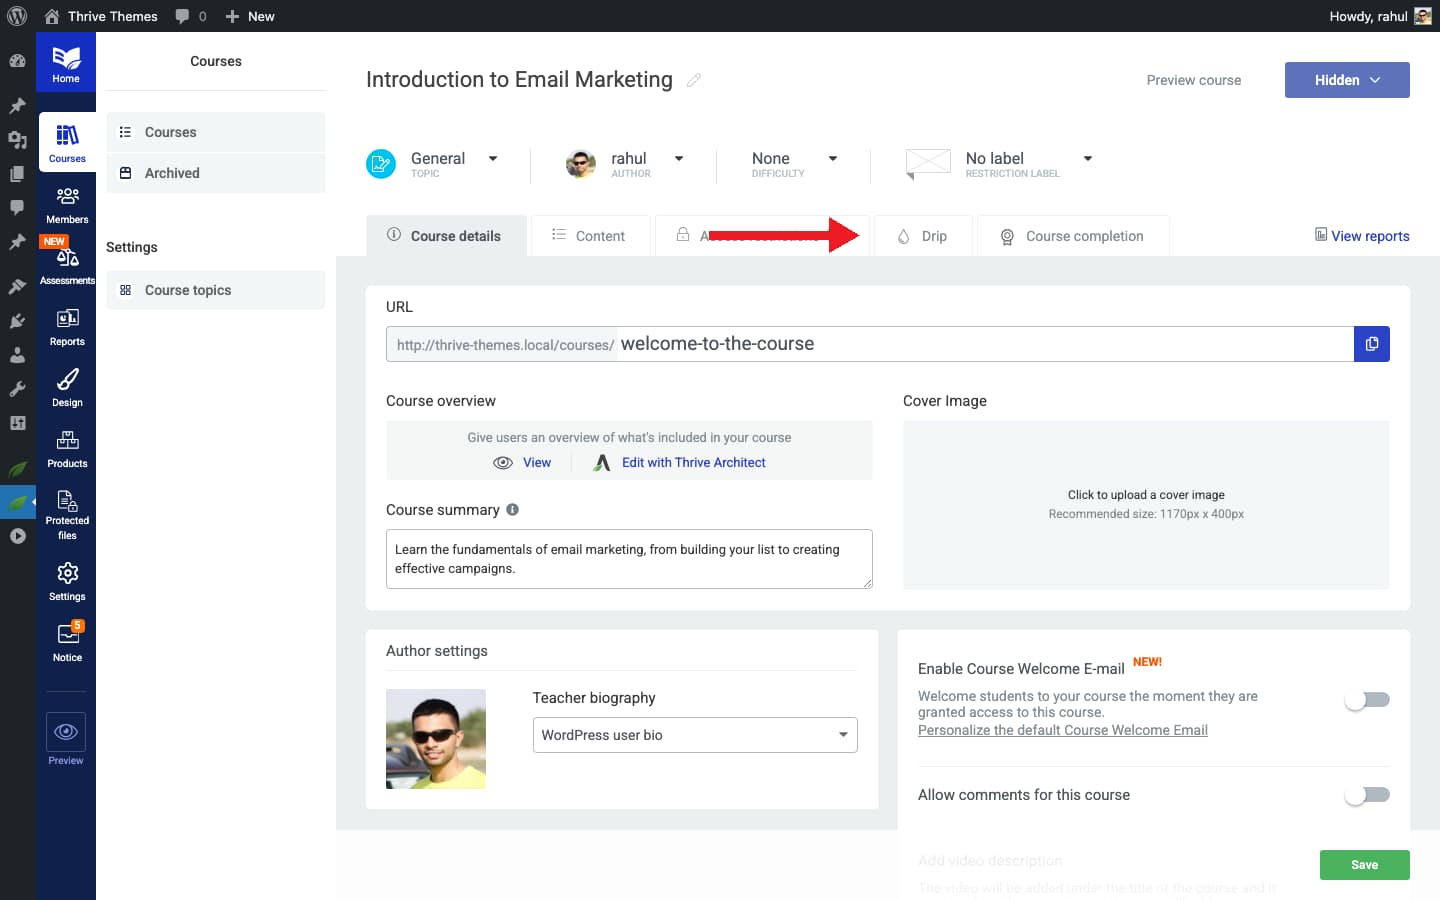
- Click the Drip tab at the top of the course overview.
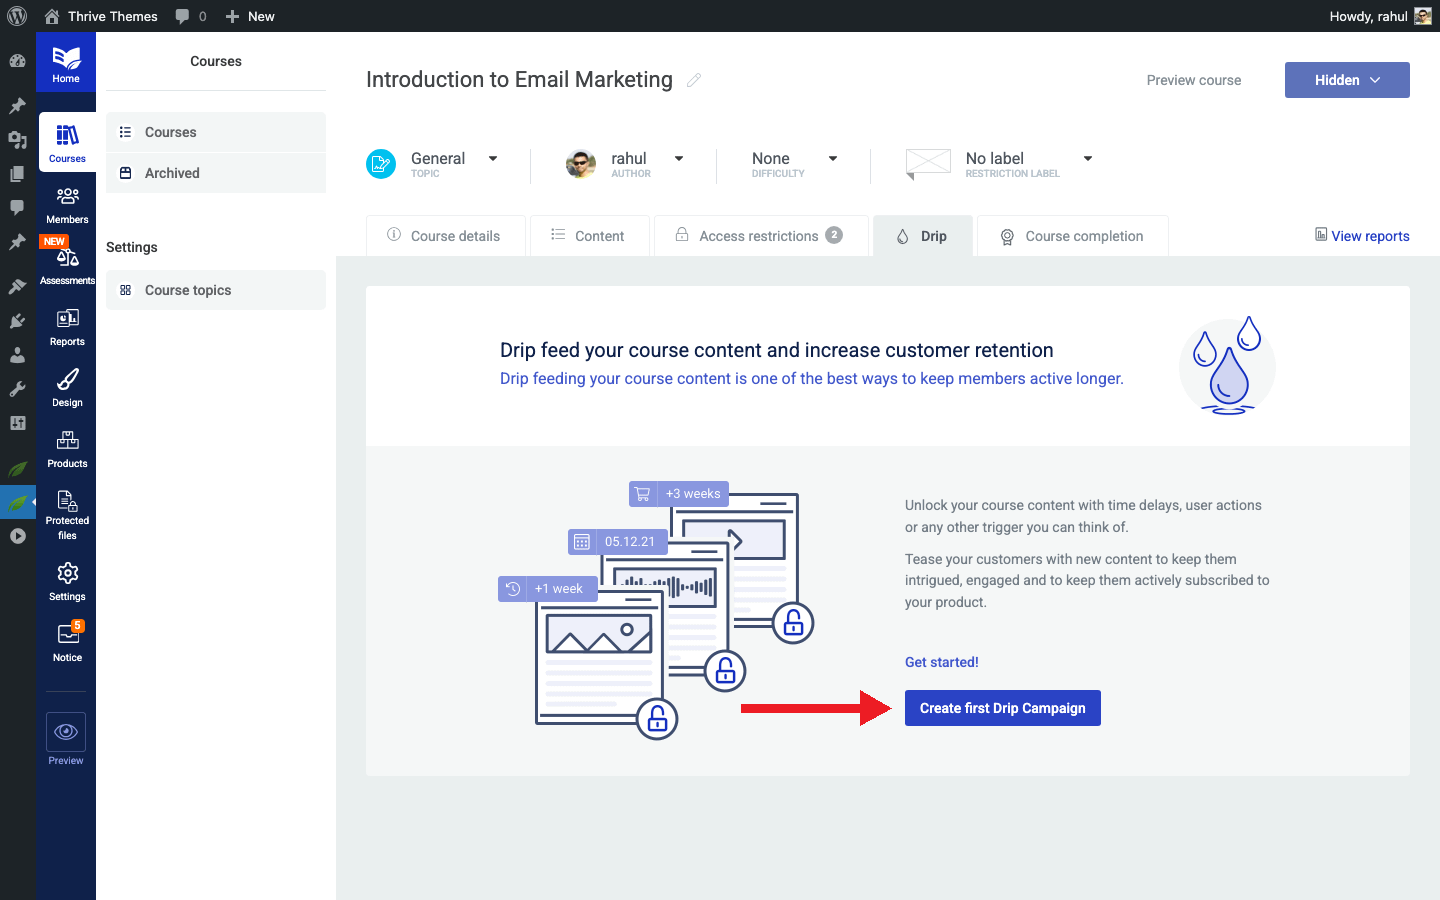
- Click Create first Drip Campaign (or Add Campaign if you already have one).
- In the lightbox that appears, select one of the seven drip campaign templates.
- Enter a Campaign Name to identify this schedule.
- Click Continue to open the campaign configuration screen.
- Configure the Start Event—this determines when the drip countdown begins (e.g., on product purchase, on enrollment, or on a specific date).
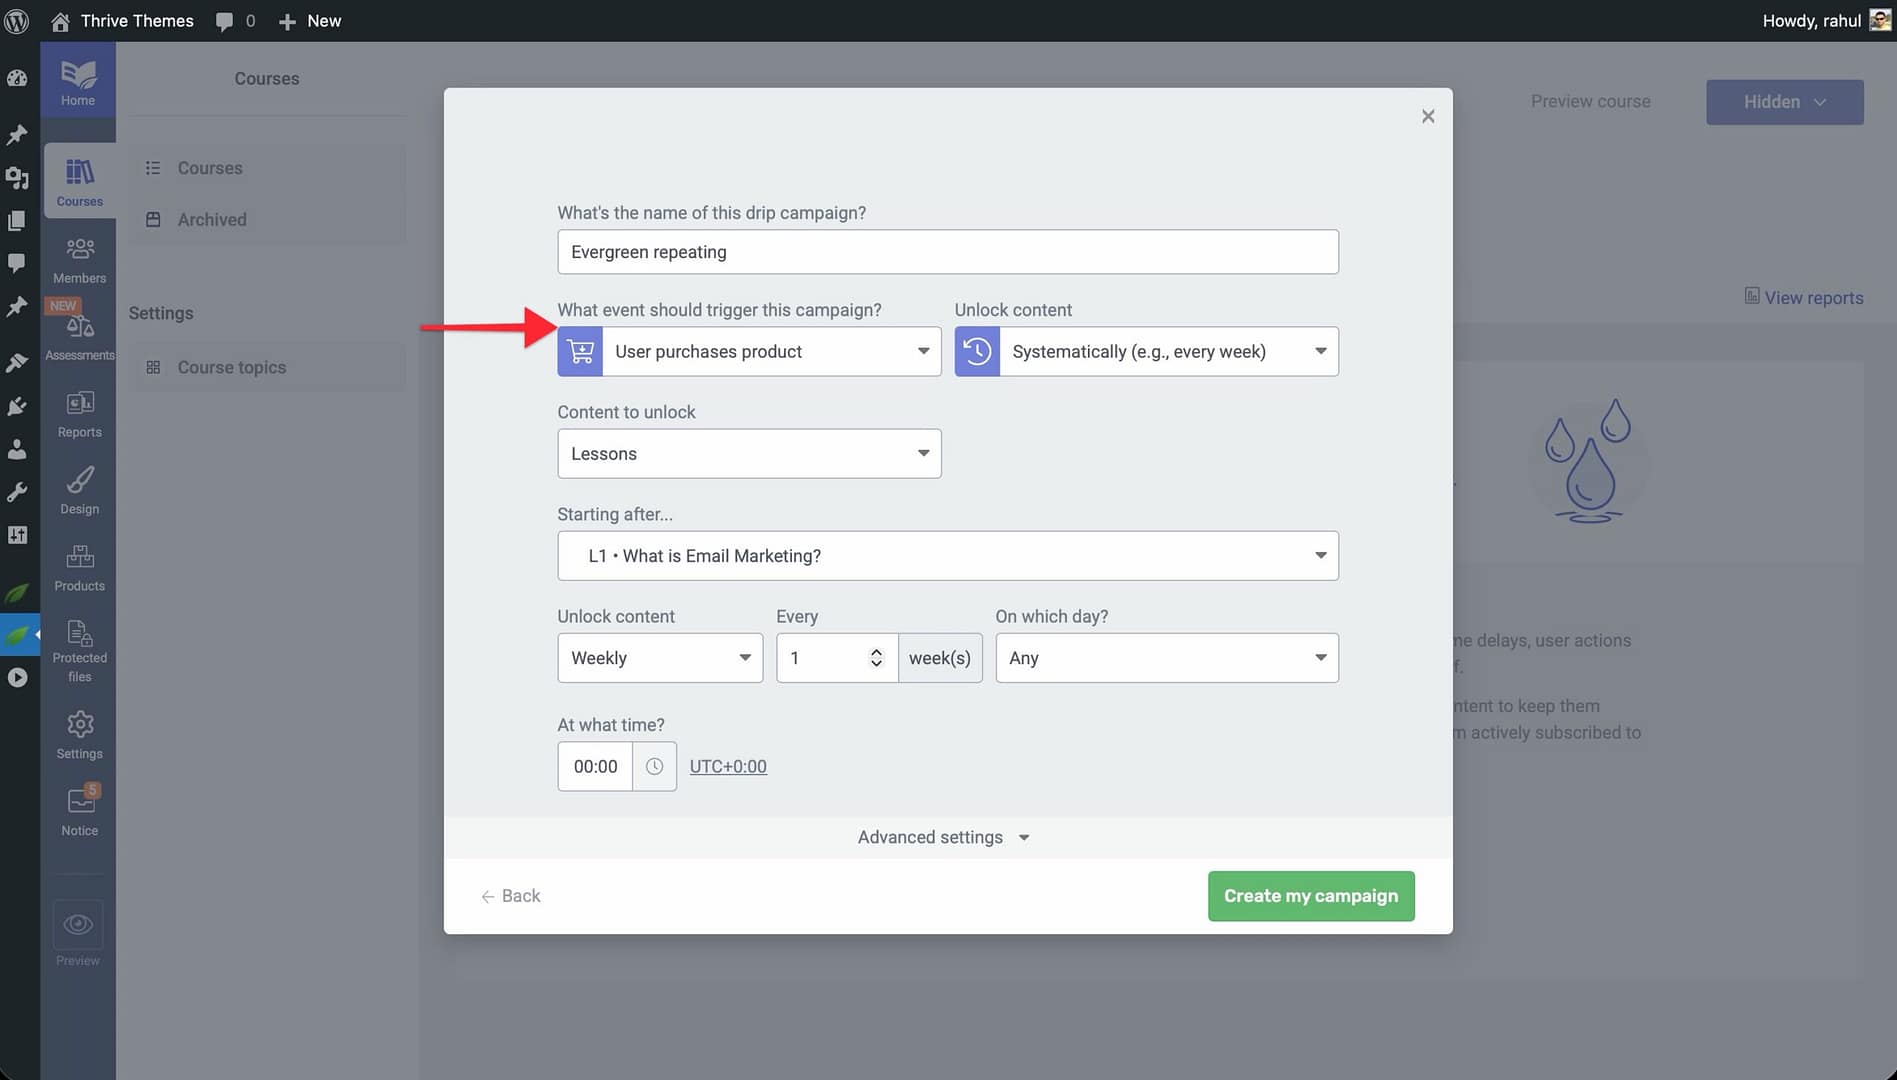
- Set the Unlock Intervals—define how much time passes between each content unlock (e.g., 1 day, 1 week, 1 month).
- Click Save to apply the drip schedule to your course.
Configuring Unlock Conditions
Unlock conditions let you customize when individual lessons or modules become available within your drip schedule. You can apply a single condition or combine multiple conditions for more complex scheduling.
- Open your course and go to the Drip tab.
- Locate the lesson or module you want to customize within the drip timeline.
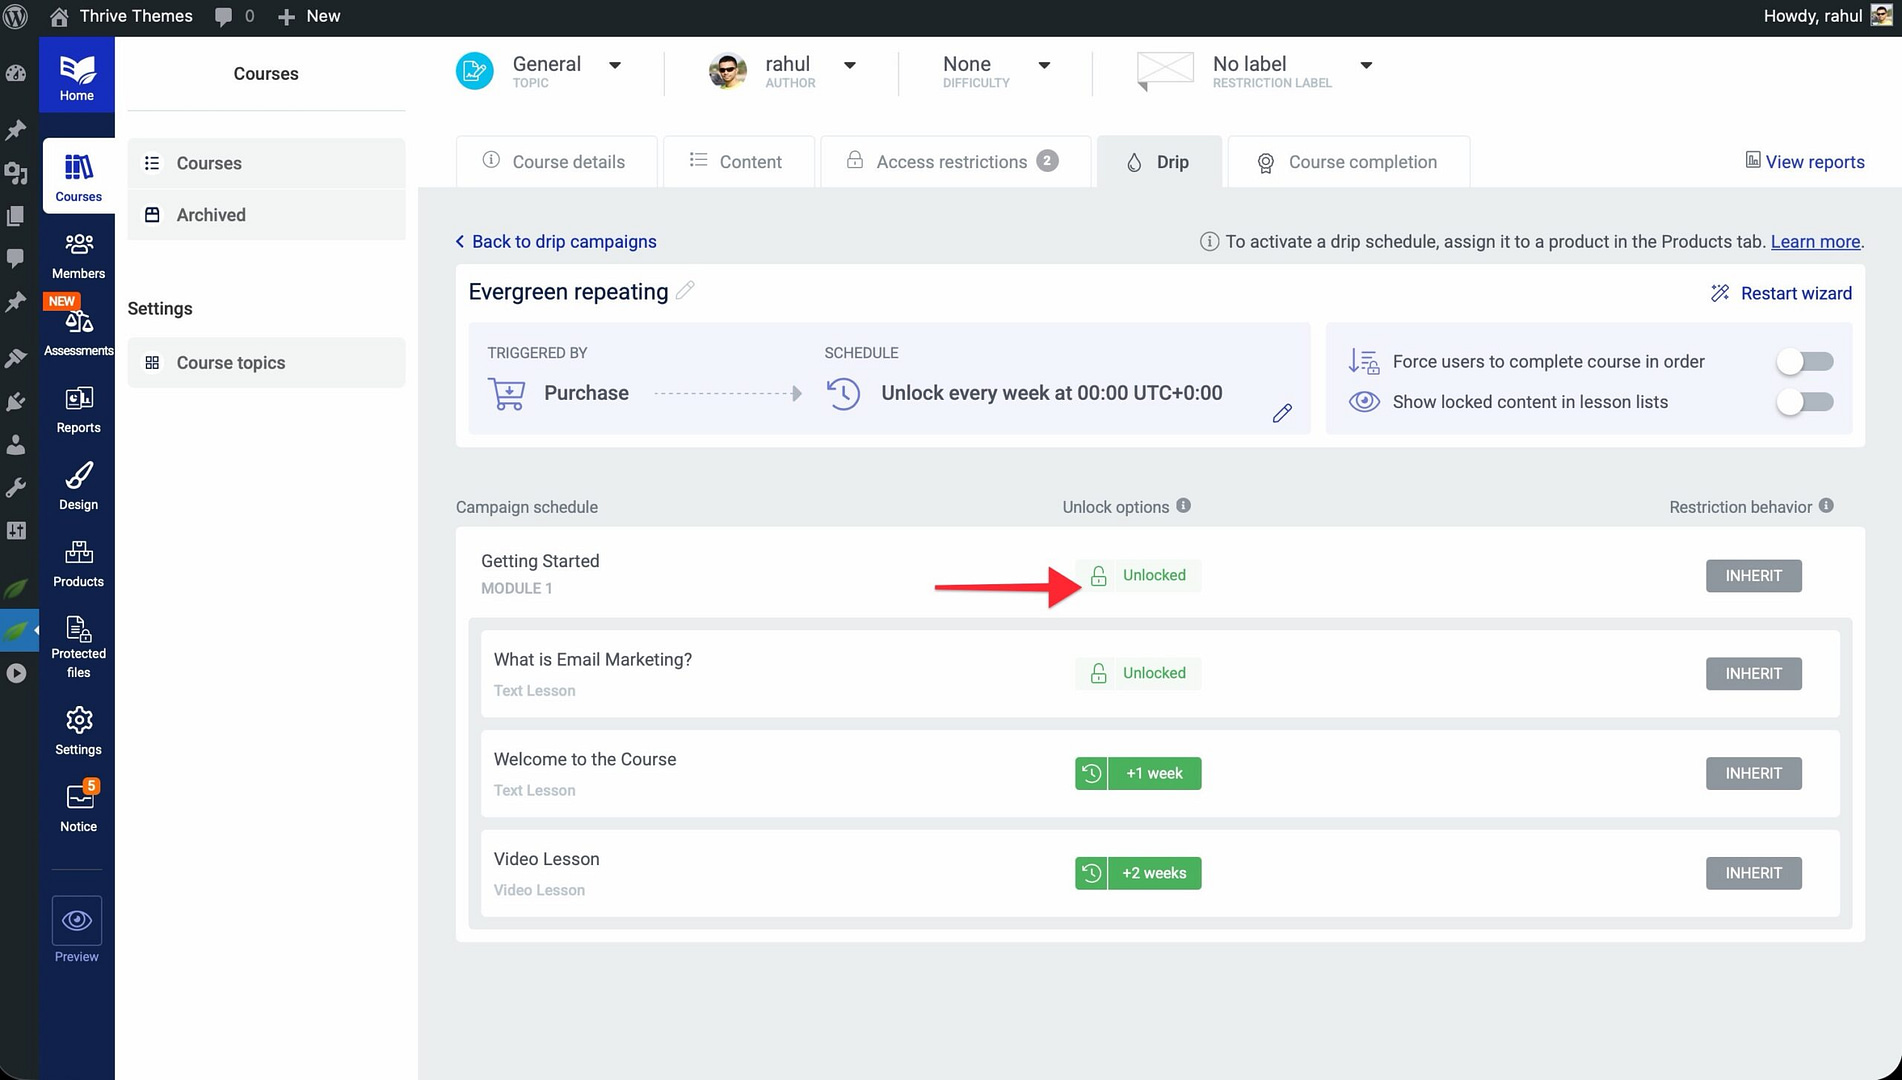
- Click the lesson to open its Unlock Conditions settings.
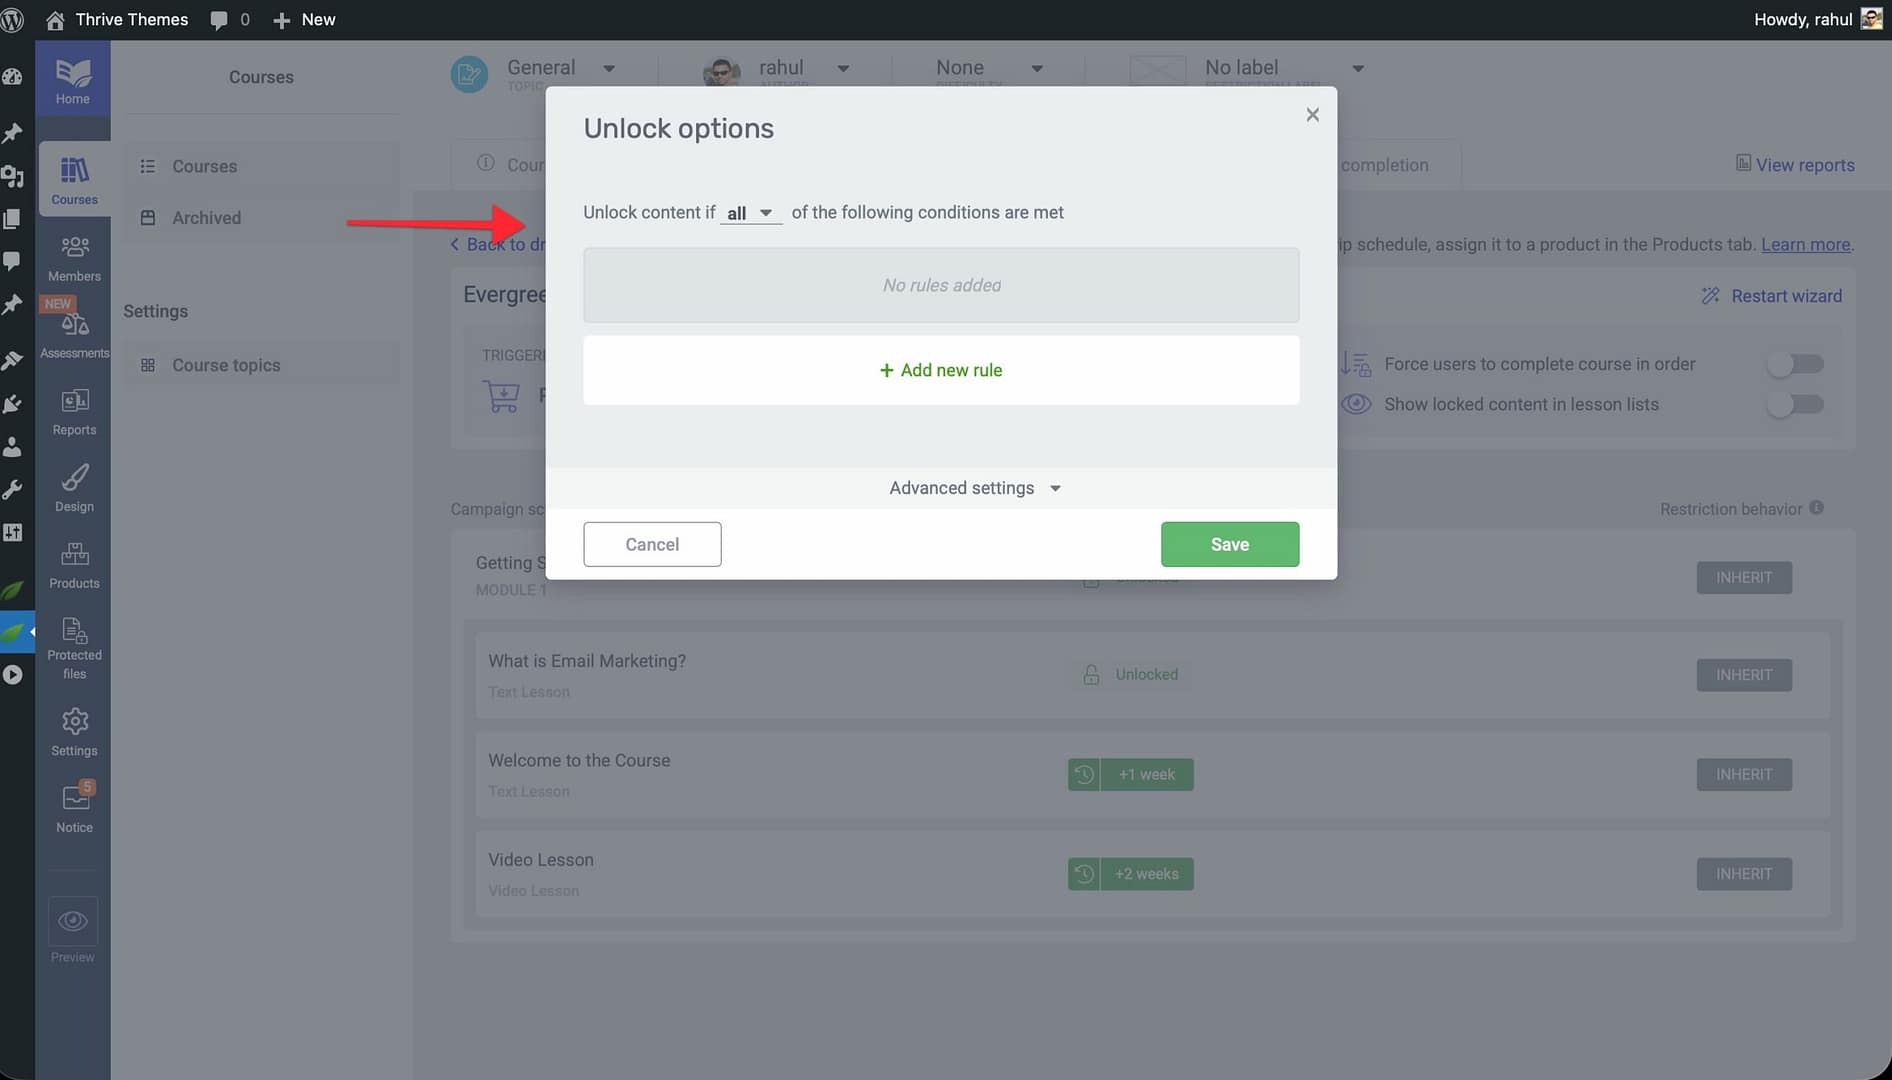
- Choose a condition type—options include time-based delays, completion of a previous lesson, or a specific calendar date.
- To add multiple conditions, click Add Condition and configure each one. When multiple conditions are set, the lesson unlocks only after all conditions are met.
- Click Save to apply the custom unlock conditions.
Selling a Dripped Course
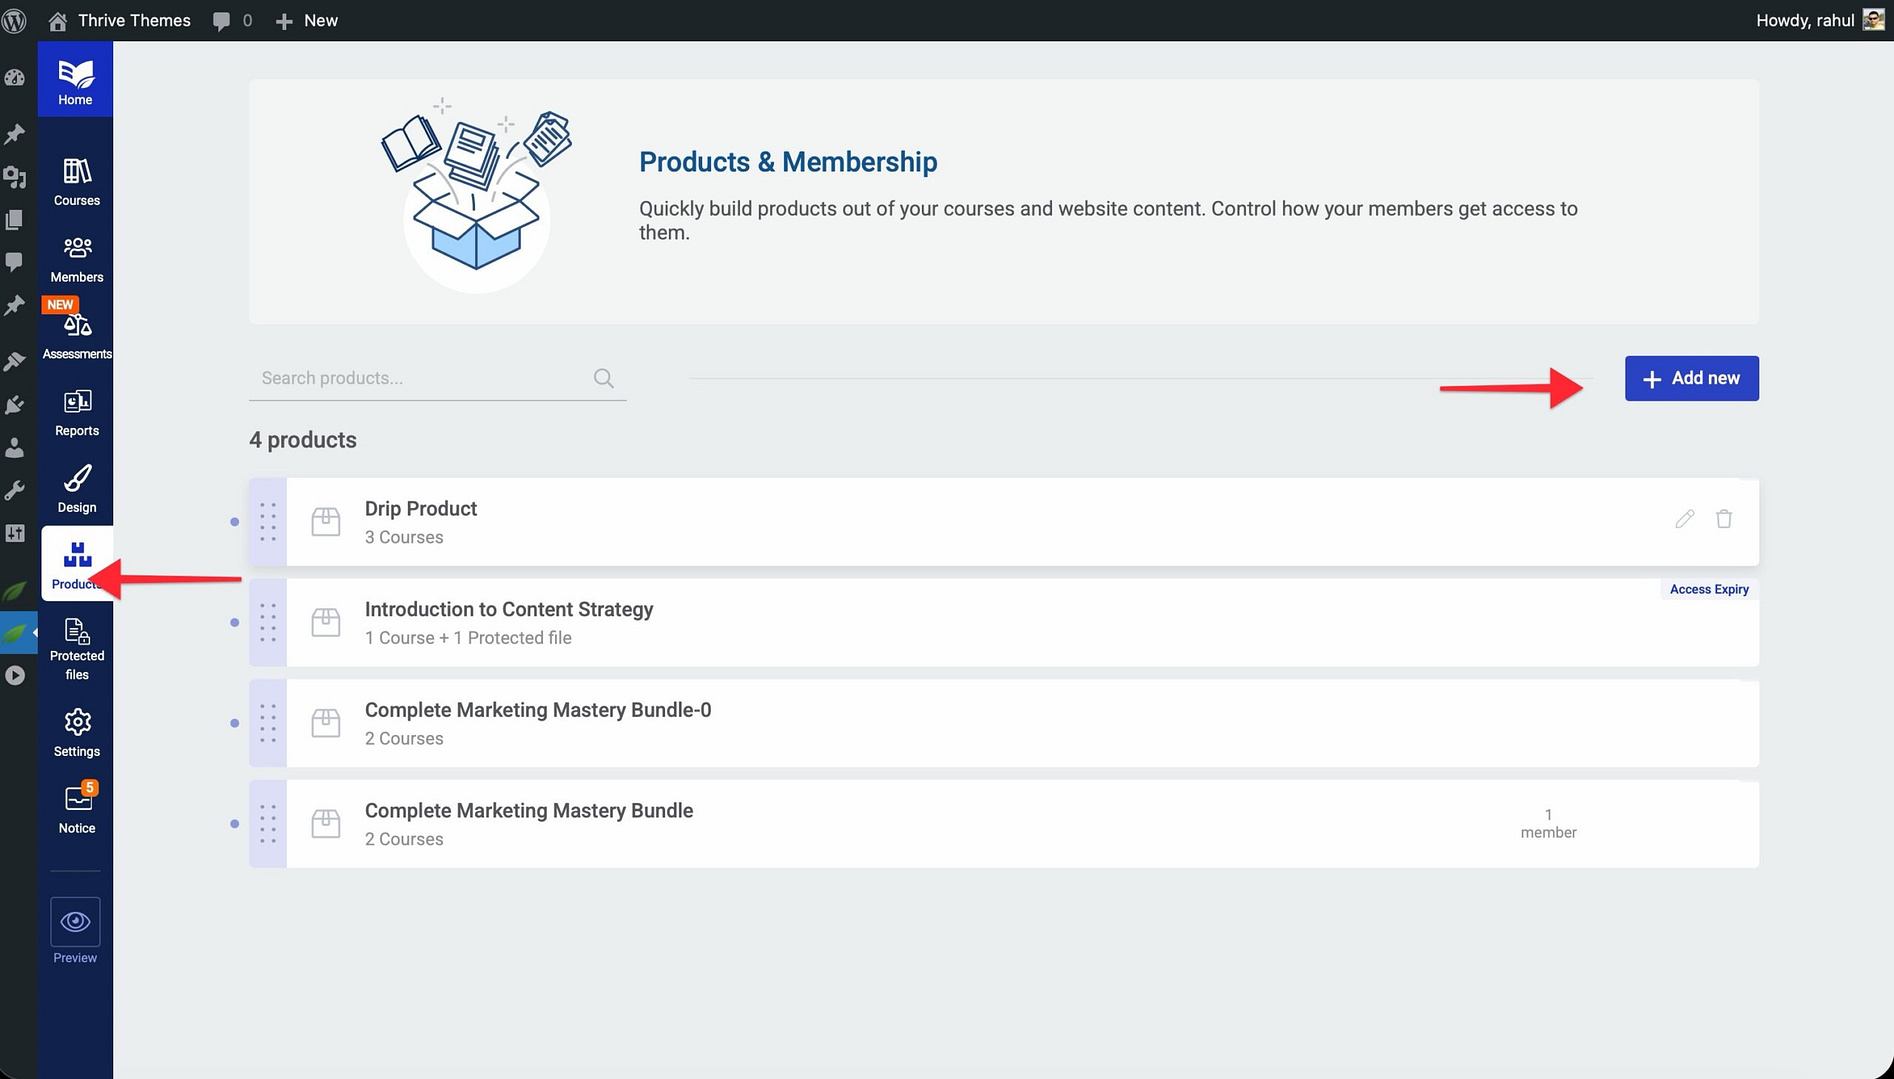
To monetize a dripped course, you connect it to a Product in Thrive Apprentice. Products define the purchase experience and control which students get access.
- Navigate to Thrive Dashboard > Thrive Apprentice.
- Click Products in the left sidebar and then click Add Product.
- Name your product and configure the pricing through your payment integration (e.g., WooCommerce, ThriveCart, or SendOwl).
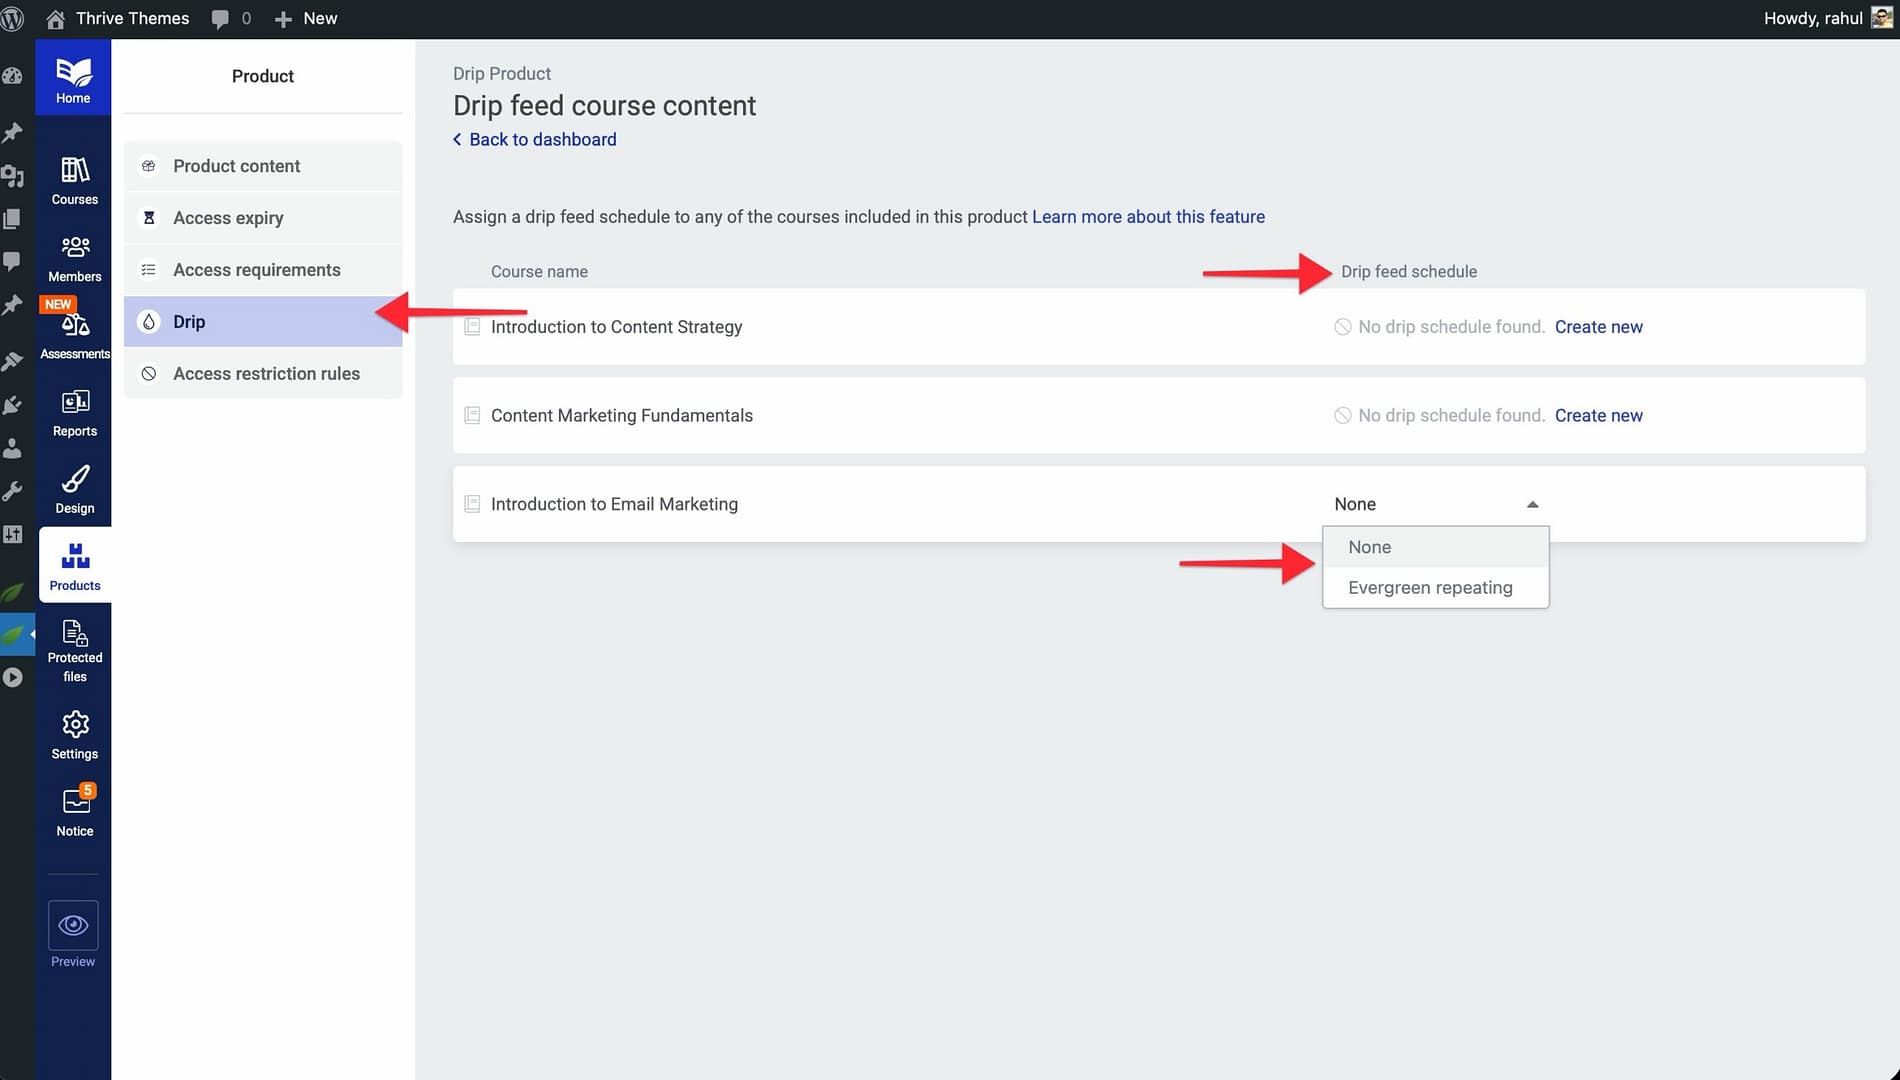
- Under the product’s Drip settings, add your dripped course as protected content.
- Assign the drip campaign to the product—this ensures that students who purchase this product follow the drip schedule you configured.
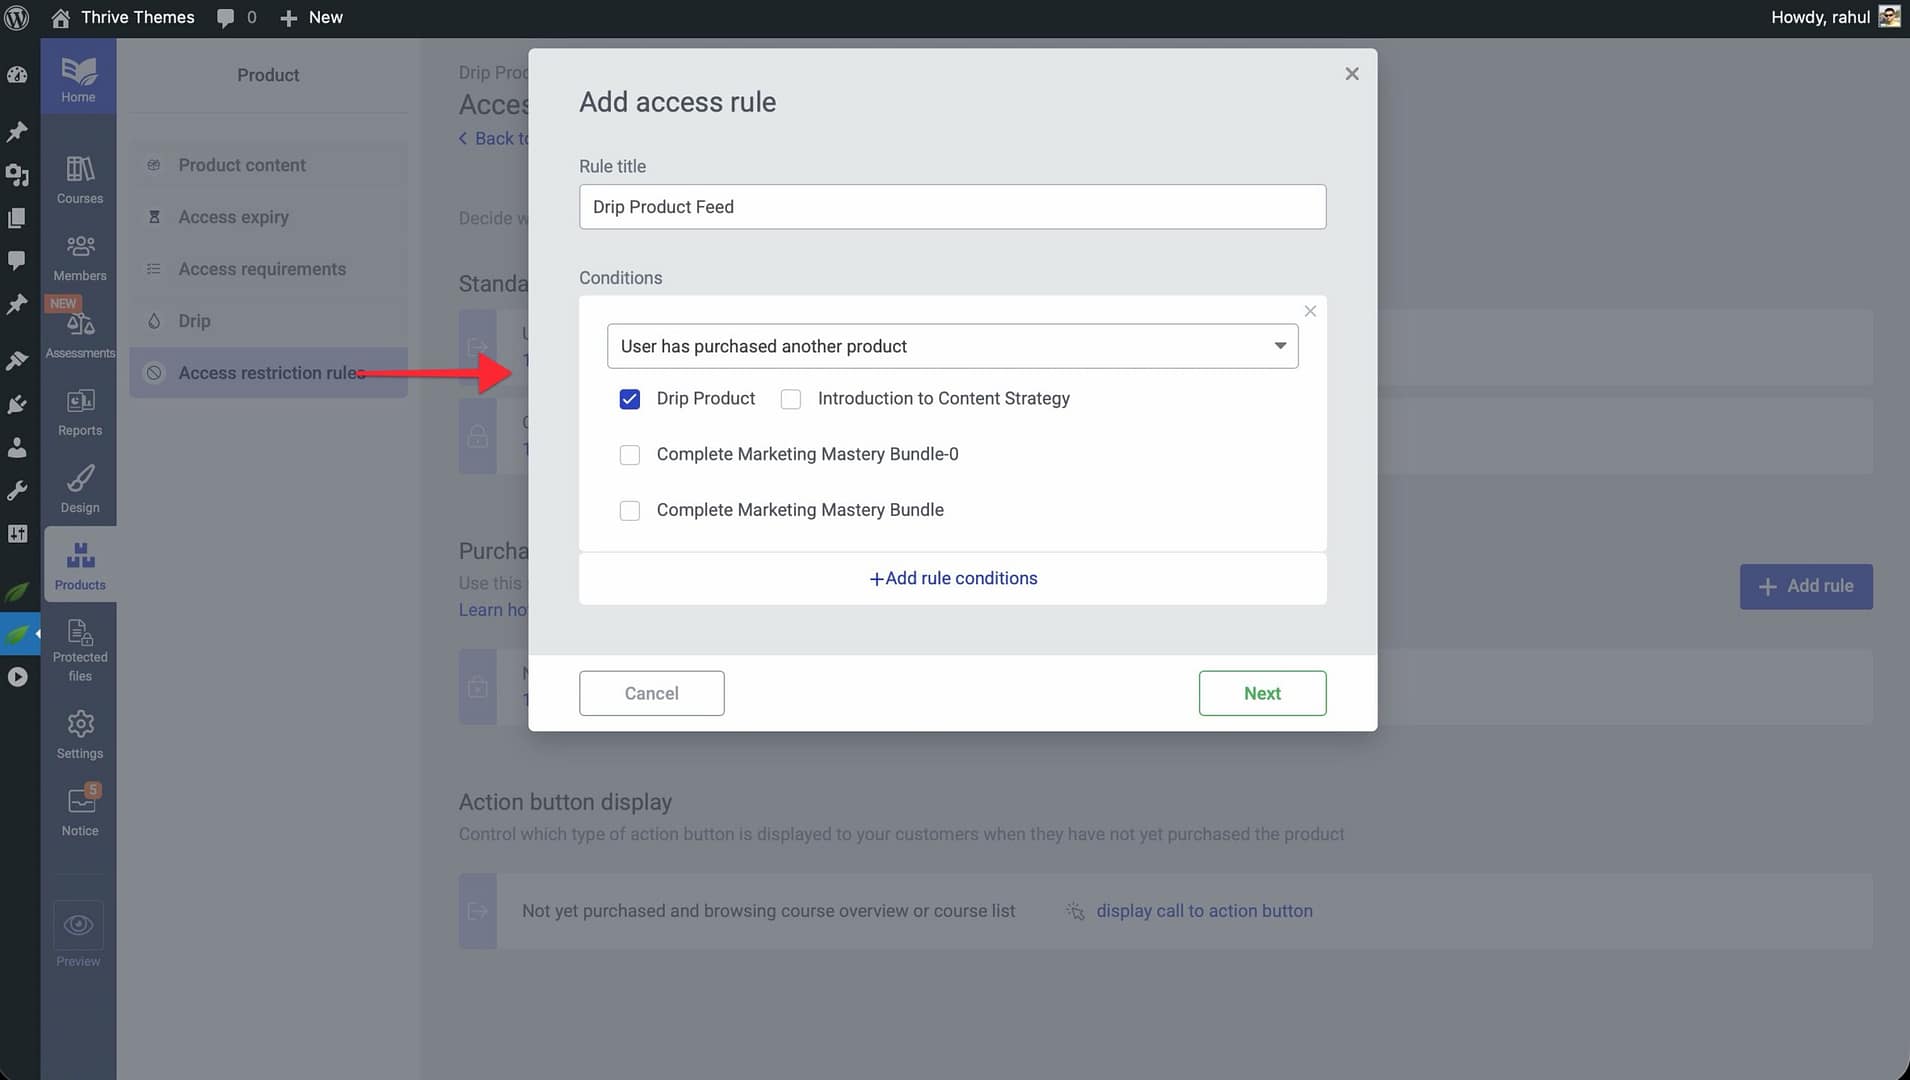
- Set up Access Restriction Rules so that only students who have purchased the product can view the course content.
- Click Save to finalize your product configuration.
Tip: You can create multiple products for the same course, each with a different drip schedule. This is called a decoupled drip schedule, and it allows you to offer different pacing options—such as a self-paced version and a structured weekly version—without duplicating the course. See Advanced Drip Techniques for details.
That’s it! You’ve successfully learned how drip content works in Thrive Apprentice, explored the available campaign templates, configured unlock conditions, and connected your drip schedule to a sellable product.
Related Resources
- Drip Schedule Templates Reference: Learn how to set up each of the seven drip templates in the Drip Schedule Templates Reference.
- Advanced Drip Techniques: Explore cohort-based classes, weekday-only dripping, and more in Advanced Drip Techniques.
- Access Restrictions and Rules: Control who can access your courses with the Access Restrictions and Rules guide.
- Creating Your First Course: New to Thrive Apprentice? Start with How to Create Your First Course.
- Thrive Apprentice Knowledge Base: Browse the full Thrive Apprentice Knowledge Base for more tutorials.