In this article, you’ll learn how to integrate the Advanced Custom Fields (ACF) plugin with Thrive Architect. ACF lets you create custom field groups and attach structured data to your posts, pages, and custom post types. Thrive Architect can then pull that data into your designs using the External Fields feature, enabling you to build dynamic, data-driven layouts — such as custom post templates, portfolio pages, and team member profiles — without writing any code.
By combining ACF’s flexible field types with Thrive Architect’s visual editor, you can create reusable templates that automatically populate with unique content for each post or page.
What Is Advanced Custom Fields (ACF)?
Advanced Custom Fields is a popular WordPress plugin that lets you add custom data fields to your posts, pages, users, taxonomy terms, and other WordPress content types. Instead of cramming all your content into the standard WordPress editor, you can define structured fields — such as text, images, URLs, dates, and more — and fill them in through a clean, organized interface in the WordPress admin.
Thrive Architect integrates with ACF through its External Fields feature, which lets you map ACF field values directly to element properties on the canvas.
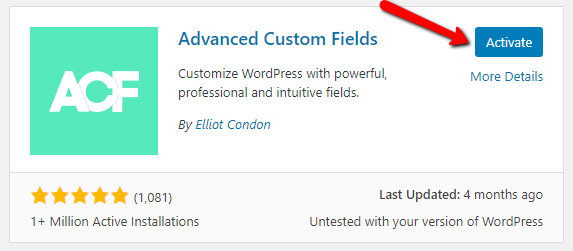
Installing and Activating ACF
Before you can use ACF fields in Thrive Architect, you need to install and activate the plugin.
Installing ACF from the WordPress Plugin Repository
- Log in to your WordPress admin dashboard.
- Navigate to Plugins > Add New in the left sidebar.
- In the search field, type Advanced Custom Fields.
- Locate the Advanced Custom Fields plugin by WP Engine (formerly Delicious Brains) in the results.
- Click Install Now, then click Activate once the installation completes.
After activation, a new ACF menu item appears in the left sidebar of your WordPress admin area.
Creating a Field Group
A field group is a collection of custom fields that you assign to specific content types. For example, you might create a “Team Member Details” field group with fields for job title, department, phone number, and headshot photo.
Step-by-Step: Creating a New Field Group
- In your WordPress admin, navigate to ACF > Field Groups.
- Click the Add New button at the top of the page.
- Enter a descriptive title for your field group in the Field Group Title field (e.g., “Portfolio Project Details” or “Team Member Info”).
- Click + Add Field to begin adding individual fields to the group.
- For each field, configure the following:
- Field Label — A human-readable name displayed in the admin (e.g., “Job Title”).
- Field Name — The machine-readable slug used internally (e.g.,
job_title). This is auto-generated from the label but can be customized. - Field Type — The type of data the field accepts (e.g., Text, Image, URL). See the full list of supported types below.
- Repeat step 4 for each additional field you want in the group.
Setting Location Rules
After adding your fields, scroll down to the Location Rules section to define where the field group appears:
- Under Show this field group if, set the first dropdown to the content type (e.g., Post Type).
- Set the operator to is equal to.
- Select the specific post type, page, template, or taxonomy where the fields should appear (e.g., Post, Page, or a custom post type like Portfolio).
- Click Add rule group to create additional location rules if needed.
Publishing the Field Group
- Review your fields and location rules.
- Click the Publish button (or Update if editing an existing group) in the top-right corner.
- Navigate to a post or page that matches your location rules to verify the custom fields appear in the editor.
Supported ACF Field Types for Thrive Architect
Thrive Architect supports a wide range of ACF field types through its External Fields integration. Each ACF field type maps to specific Thrive Architect element properties.
Text-Based Fields
- Text — A single-line text input. Maps to text content, headings, button labels, and other text-based element properties.
- Textarea — A multi-line text input. Maps to longer text content such as paragraphs, descriptions, and text element content.
- Number — A numeric input. Maps to text content where numbers are displayed (e.g., statistics, counts, pricing).
- Email — An email address field. Maps to text content and link URLs (e.g., mailto: links on buttons or text links).
- URL — A URL input with validation. Maps to link URLs on buttons, images, and text links, as well as text content.
Rich Content Fields
- WYSIWYG — A full WordPress editor field with formatting tools. Maps to text element content, preserving HTML formatting such as bold, italic, lists, and links.
- oEmbed — An embed URL field that accepts URLs from supported providers (YouTube, Vimeo, Twitter, etc.). Maps to video and embed elements in Thrive Architect.
Selection Fields
- Select — A dropdown selection field. The selected value maps to text content in Thrive Architect elements.
- Checkbox — A multi-select checkbox field. Selected values are returned as a comma-separated list and map to text content.
- Radio Button — A single-select radio button field. The selected value maps to text content.
- True/False — A toggle switch that returns true or false. Can be used for conditional logic or mapped to text content displaying “Yes”/”No” or custom values.
Media Fields
- Image — An image upload field. Maps to the image source in Image elements, background images, and other image-based element properties.
- File — A file upload field. Maps to download links on buttons and text links, providing the file URL.
- Gallery — A multi-image field (ACF PRO only). Maps to image gallery elements, displaying multiple images from a single field.
Specialized Fields
- Color Picker — A color selection field. Maps to color properties in Thrive Architect elements (e.g., text color, background color).
- Date Picker — A date selection field. The formatted date string maps to text content.
- Date Time Picker — A combined date and time selection field. Maps to text content with both date and time information.
- Time Picker — A time-only selection field. Maps to text content.
Mapping ACF Fields to Thrive Architect Elements
Once you have created your ACF field group and populated field values on a post or page, you can map those fields to Thrive Architect elements using the External Fields feature.
Accessing External Fields
- Open the post or page containing ACF data in the Thrive Architect editor.
- Select the element you want to bind to an ACF field (e.g., a Text element, Image element, Button, or Heading).
- In the left sidebar, look for the External Fields option. Depending on the element type, this may appear as:
- A small cylinder icon next to specific property fields (such as the image source or link URL)
- An External Fields section within the element’s sidebar options
Binding a Text Element to an ACF Field
- Add a Text element to your page.
- Select the text element and click the External Fields icon (cylinder icon) in the sidebar or within the inline editing toolbar.
- In the dropdown that appears, look for the ACF or Custom Fields section.
- Select the ACF field you want to display (e.g., “Job Title” or “Project Description”).
- The text element content will be replaced with the value from the ACF field.
Binding an Image Element to an ACF Field
- Add an Image element to your page.
- Select the image element.
- In the left sidebar, locate the image source property and click the External Fields icon (cylinder icon) next to it.
- Select your ACF Image field from the dropdown.
- The image element will display the image uploaded through the ACF field.
Binding a Button Link to an ACF Field
- Add a Button element to your page.
- Select the button and open its link settings.
- Click the External Fields icon next to the URL field.
- Select an ACF URL or File field from the dropdown.
- The button link will dynamically point to the URL or file stored in the ACF field.
Binding Other Element Properties
The same External Fields workflow applies to other element properties:
- Heading content — Bind to a Text or Textarea ACF field
- Background image — Bind to an Image ACF field
- Video source — Bind to an oEmbed ACF field
- Link URL — Bind to a URL or File ACF field
- Color properties — Bind to a Color Picker ACF field
Building Dynamic Layouts with ACF and Thrive Architect
Custom Post Type Templates
One of the most powerful use cases for the ACF and Thrive Architect integration is building templates for custom post types. For example, if you have a “Portfolio” custom post type with ACF fields for project image, client name, project URL, and description:
- Create a custom post type (using a plugin like Custom Post Type UI or code).
- Create an ACF field group with all the fields you need, assigned to the custom post type.
- In Thrive Theme Builder, create a custom template for the post type.
- Use Thrive Architect to design the template layout, mapping each element to its corresponding ACF field via External Fields.
- Every portfolio post will automatically use the template and display its unique ACF data.
Portfolio Pages
For a portfolio or project showcase:
- Create ACF fields for project details: Project Image (Image field), Client Name (Text field), Project URL (URL field), Technologies Used (Checkbox field), and Project Description (Textarea field).
- Design a template in Thrive Architect with elements for each piece of information.
- Map each element to its corresponding ACF field.
- Use the Post List element on an archive page to display all portfolio items in a grid, with each item pulling its data from ACF fields.
Team Member Profiles
For a team or staff directory:
- Create ACF fields for team member details: Headshot (Image field), Job Title (Text field), Department (Select field), Bio (WYSIWYG field), Email Address (Email field), and LinkedIn URL (URL field).
- Assign the field group to a “Team Member” custom post type or to specific pages.
- Design a profile card layout in Thrive Architect, mapping each element to the appropriate ACF field.
- Use Post List elements to display all team members dynamically.
Frequently Asked Questions
Does Thrive Architect Work with ACF PRO?
Yes. Thrive Architect works with both the free version of ACF and ACF PRO. ACF PRO provides additional field types such as Gallery, Repeater, and Flexible Content, some of which are supported through External Fields.
Can I Use ACF Fields in Thrive Theme Builder Templates?
Yes. ACF fields are available through External Fields in both Thrive Architect page designs and Thrive Theme Builder templates. This is the recommended approach for custom post type layouts, as the template automatically applies to all posts of that type.
Why Don’t I See My ACF Fields in the External Fields Dropdown?
Verify the following:
- The ACF field group is published and its location rules match the post or page you are editing.
- The ACF fields have values entered on the specific post or page. Some fields may not appear if they have no data.
- You are looking in the correct section of the External Fields dropdown (ACF fields are typically grouped under “Custom Fields” or “ACF”).
Can I Use ACF Repeater Fields in Thrive Architect?
ACF Repeater fields (ACF PRO) have limited support in Thrive Architect. Standard single-value fields are fully supported. For repeating content, consider using separate ACF field groups combined with Thrive Architect’s Post List element.
Do ACF Fields Update Dynamically?
Yes. When you update an ACF field value on a post or page, the Thrive Architect elements bound to that field will automatically display the updated value on the front end. No additional steps are needed.
Related Resources
- Dynamic Text and Links: How to Use Dynamic Links and Dynamic Text — Using dynamic content features alongside ACF fields
- Post List Element: How to Use the Post List Element — Displaying ACF-powered posts in dynamic list layouts
- Conditional Display: How to Use Conditional Display — Showing or hiding content based on field values and user conditions
- Getting Started: Getting Started with Thrive Architect — Overview of the editor and element panel
That’s it! You’ve successfully learned how to integrate Advanced Custom Fields with Thrive Architect. By creating ACF field groups, mapping fields to Thrive Architect elements through External Fields, and building dynamic templates, you can create data-driven layouts for portfolios, team directories, custom post types, and any other structured content your site requires.