In this article, you’ll learn what the Lesson List and Course List elements are, how to add them to your templates and pages, how to customize them, and where they appear in the student experience.
The Lesson List and Course List elements are two of the most useful building blocks in Thrive Apprentice. They allow you to dynamically display your courses and lessons anywhere on your site—inside templates, on standalone pages, or even on your main website pages outside the school.
What Is the Course List Element
The Course List element displays a list of your available courses. You can place it on any page or template to give students a quick overview of what your school offers. It is especially useful on:
- School Homepage templates — Show all available courses as the primary navigation for your school.
- Sales pages — Display your course catalog to drive enrollments.
- Sidebar widgets — Provide a quick-access list of courses from any page on your site.
- Blog posts — Embed a course list in content marketing articles to promote your school.
The Course List element automatically pulls in your courses from Thrive Apprentice, so it stays up to date as you add or remove courses.
What Is the Lesson List Element
The Lesson List element displays the lessons within a specific course. It is ideal for showcasing the curriculum or table of contents for a course. Common placements include:
- Course Overview templates — Show the full lesson lineup so students know what to expect.
- Course sales pages — Let prospective students see exactly what they will get if they enroll.
- Module templates — Display the lessons contained within a specific module.
- Landing pages — Highlight your course content as part of a marketing funnel.
The Lesson List element is dynamic—it automatically reflects your current course structure, including any lessons you add, reorder, or remove.
Adding the Elements to a Template
You can add either element to any Thrive Apprentice template using the visual editor:
- Go to Thrive Dashboard > Thrive Apprentice.
- Click on the Design tab and open your design by clicking Edit Design.

- Choose the template you want to edit (e.g., School Homepage or Course Overview).
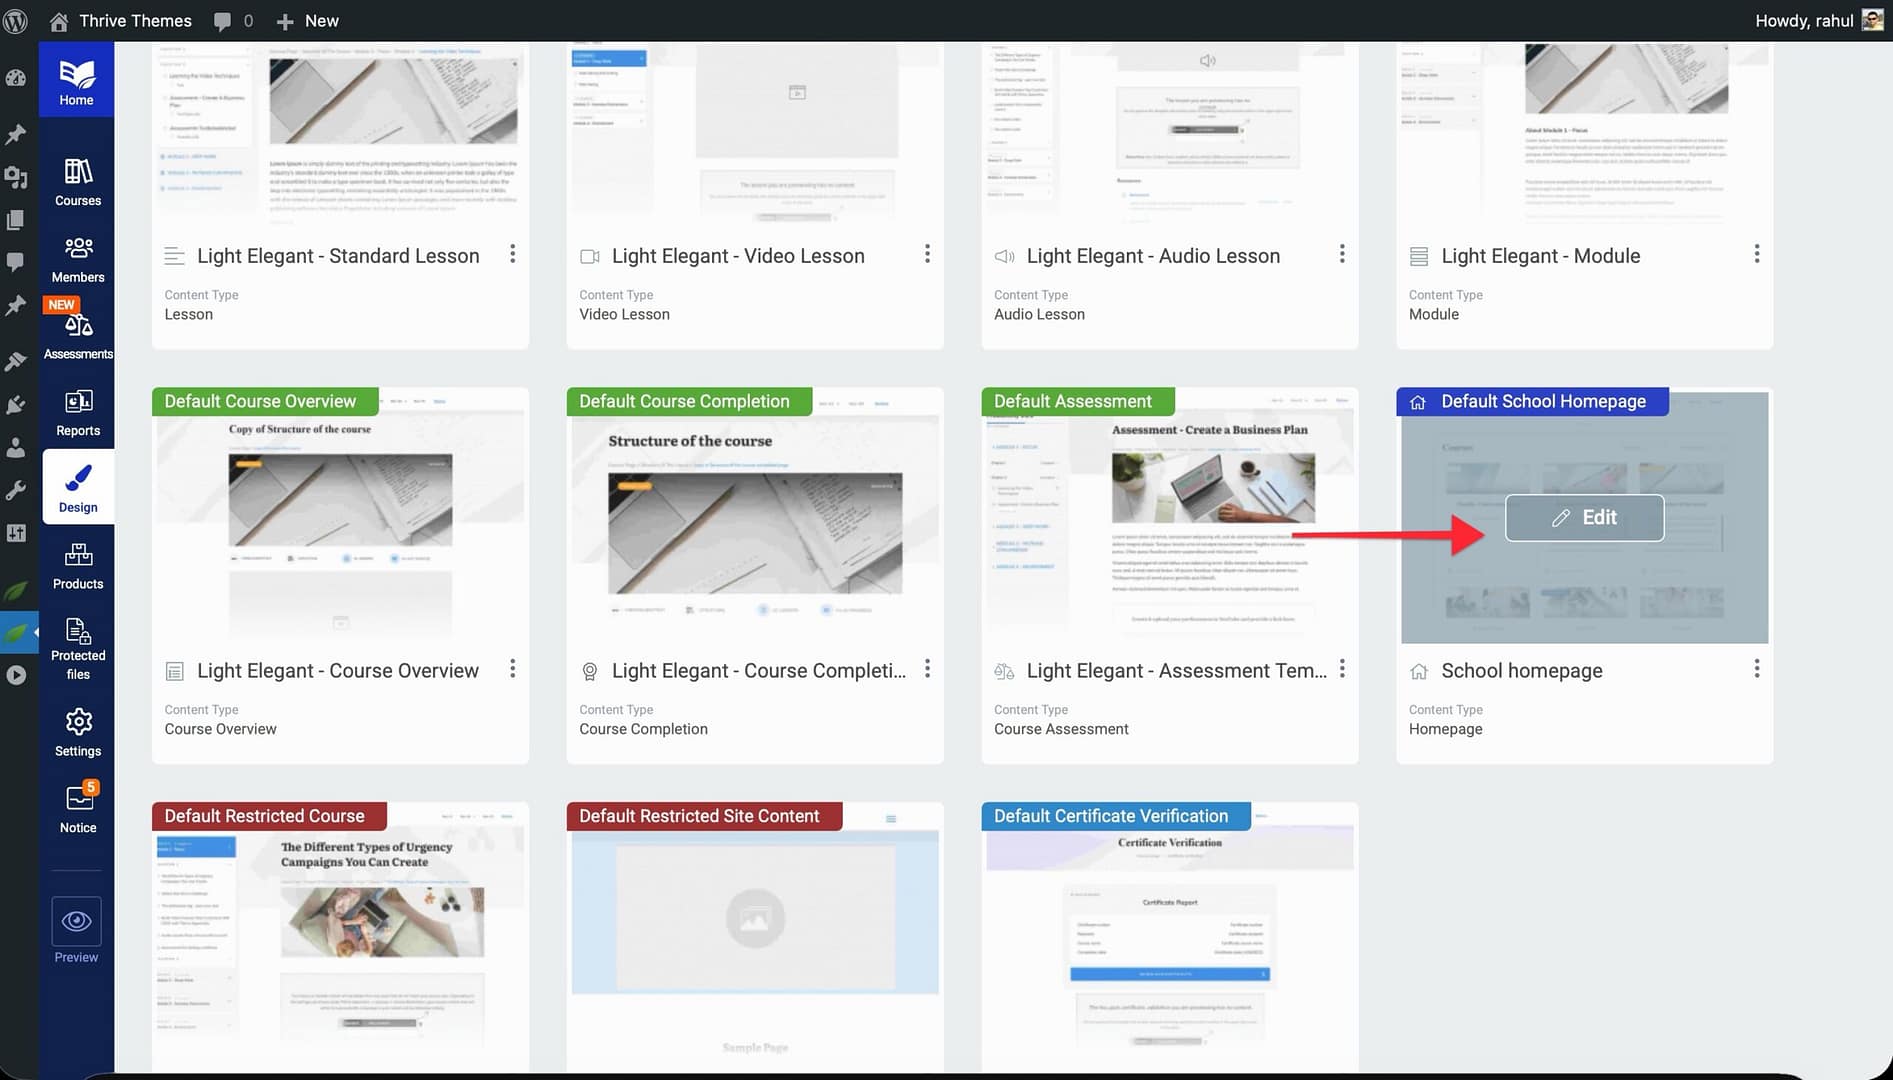
- Open the template in the visual editor.
- From the elements panel on the right side, search for Course List or Lesson List.
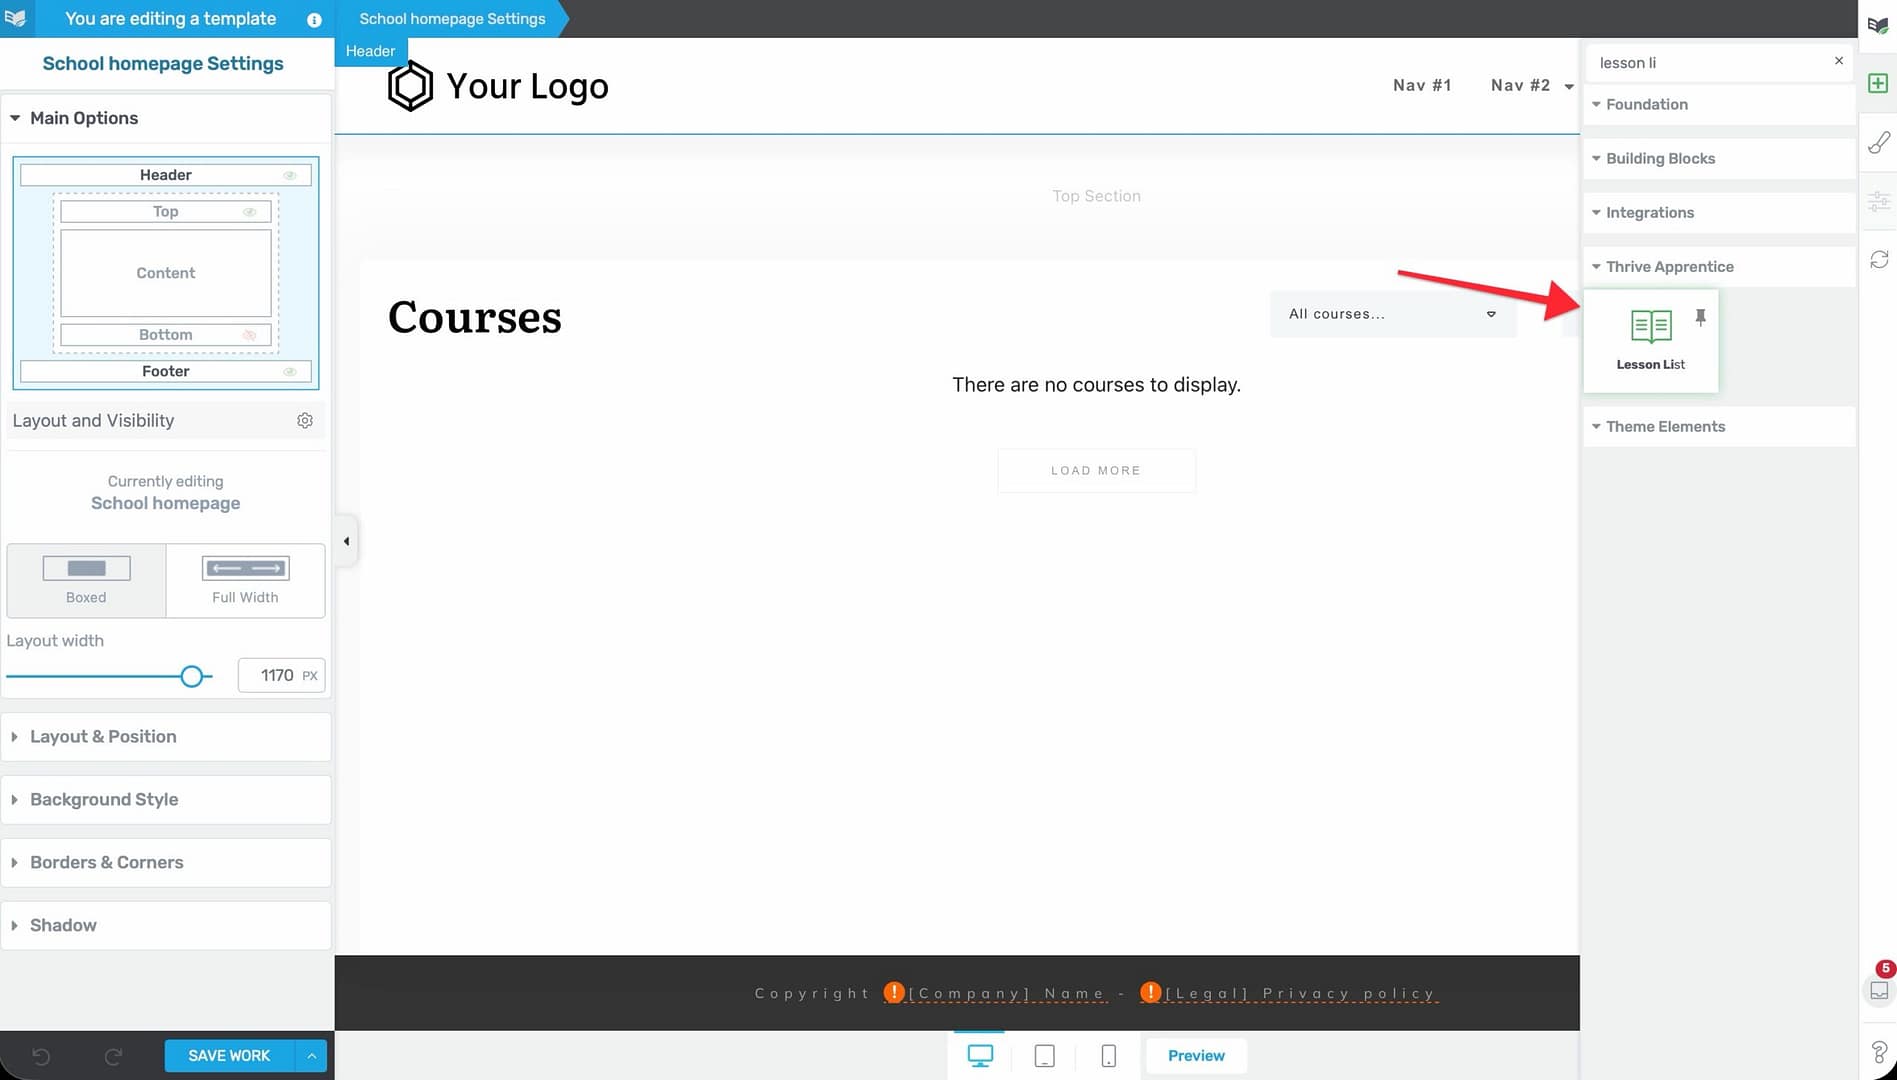
- Drag the element onto your template and drop it in the desired location.
- The element will automatically populate with your course or lesson data.
- Save your changes.
Adding the Elements to a Standalone Page
You can also add these elements to any page on your WordPress site using Thrive Architect:
- Open the page you want to edit in Thrive Architect.
- From the elements panel, search for Course List or Lesson List.
- Drag the element onto the page.
- Configure the element settings as needed.
- Save and publish the page.
Tip: Adding a Course List to a blog post or landing page is a great way to cross-promote your school from your main website content.
Customizing the Elements
Both the Course List and Lesson List elements offer a range of customization options:
Course List Customization
- Layout — Choose between grid, list, or card-style layouts.
- Columns — Set the number of columns for grid displays.
- Course information — Control which details appear—such as course title, description, thumbnail, author, and progress indicators.
- Filtering — Choose which courses to display (all courses, specific categories, or hand-picked selections).
- Styling — Adjust colors, fonts, spacing, and borders to match your brand.
Lesson List Customization
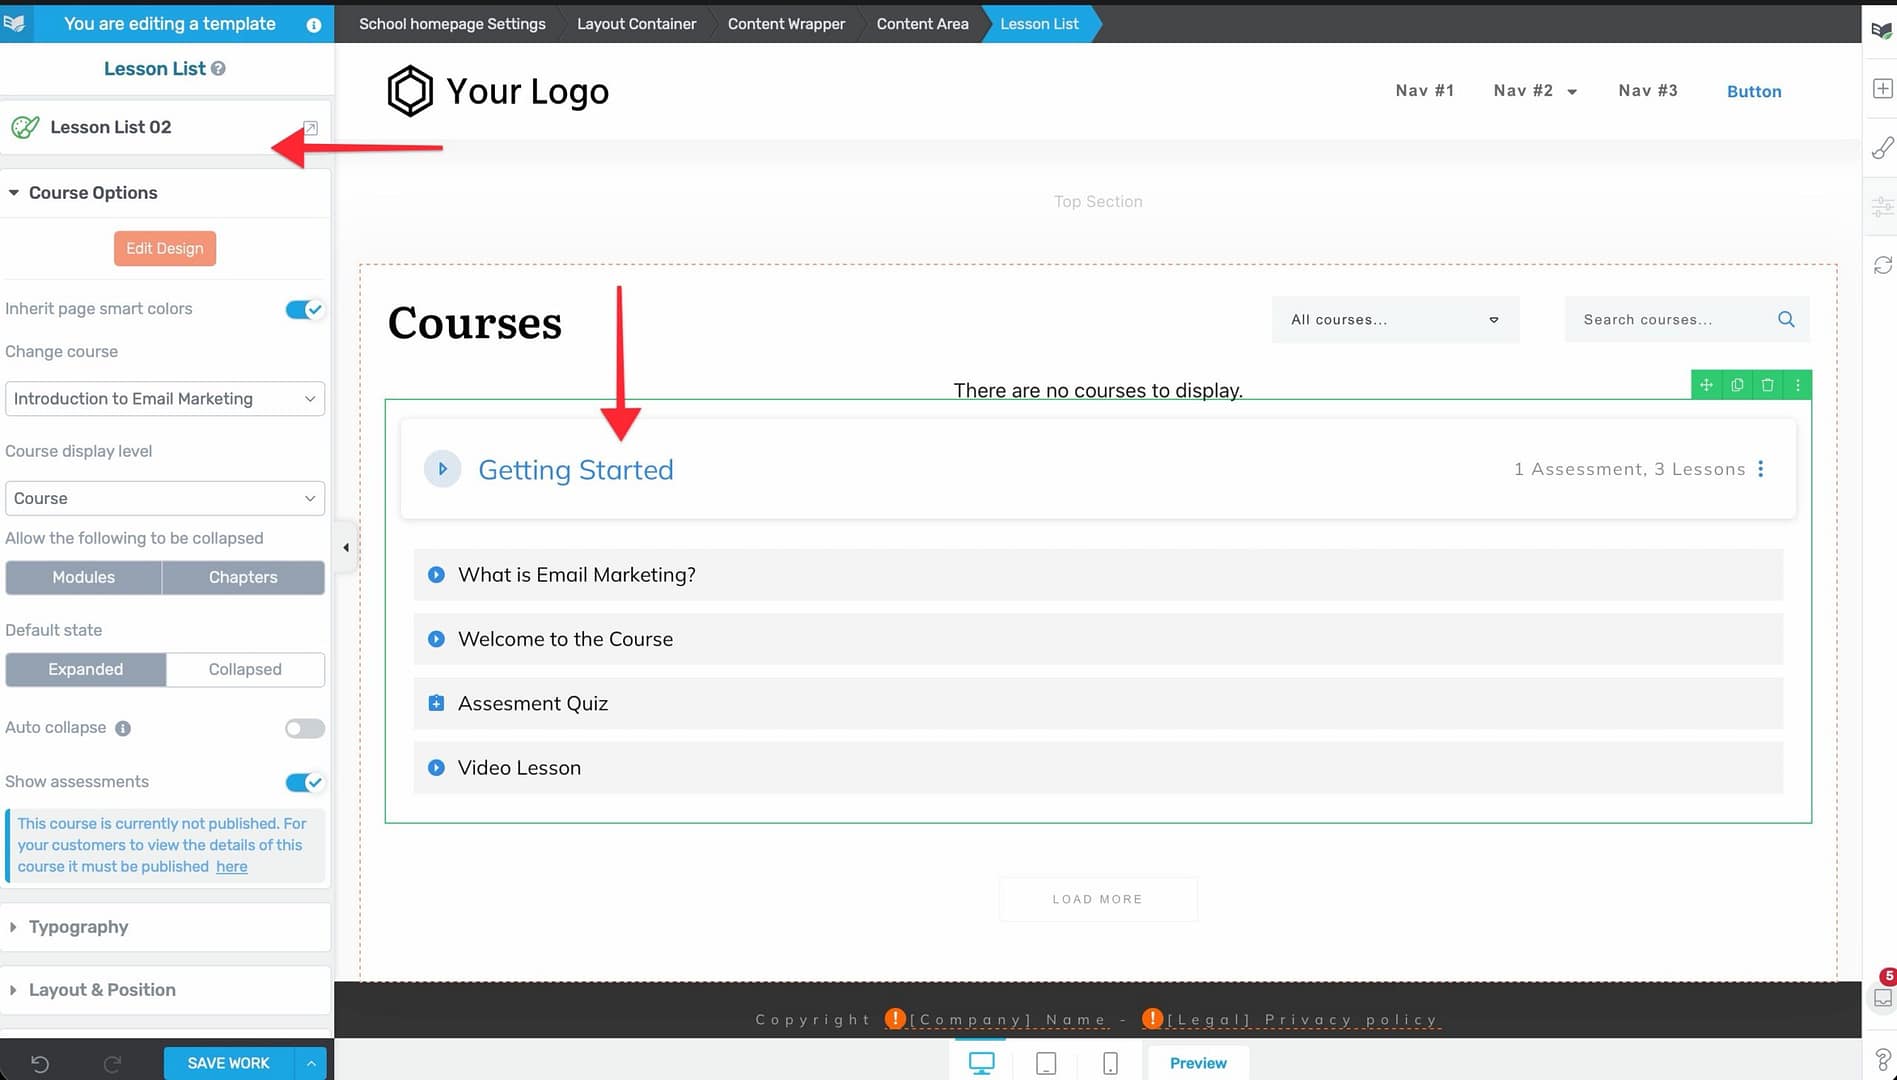
- Source course — Select which course’s lessons to display.
- Layout — Choose how lessons are arranged on the page.
- Lesson details — Control which information appears—such as lesson title, duration, type (video, text, audio), and completion status.
- Progress indicators — Show checkmarks or progress bars to reflect each student’s completion status.
- Styling — Customize the visual appearance to match the rest of your template.
Where Students See These Elements
From the student’s perspective, these elements create a clear, navigable structure:
- The Course List appears wherever you place it—typically on the School Homepage, a sales page, or a sidebar—and serves as the main entry point for browsing courses.
- The Lesson List appears on Course Overview pages, module pages, or any other location you choose, showing students what content awaits them inside a course.
- Both elements update in real time as students progress through your content. For example, completed lessons may display a checkmark, and courses may show a progress percentage.
Conclusion
That’s it! You’ve successfully learned how to integrate the Lesson List and Course List elements into your Thrive Apprentice templates and pages. These elements are essential for creating a well-organized, easy-to-navigate school that helps students find and engage with your content.
Related Resources
- Template Types Reference — Learn about all seven template types, including School Homepage and Course Overview where these elements are most commonly used.
- Creating and Managing Templates — Build and customize the templates that house your list elements.
- Getting Started with the Visual Editor — Master the visual editor to place and style your Course List and Lesson List elements.