In this article, you’ll learn how to offer the first lesson of a paid Thrive Apprentice course for free, giving prospective students a preview of your content before they purchase.
Why Offer a Free First Lesson
Making the first lesson of a paid course free is one of the most effective strategies for increasing enrollments. A free preview lets potential students:
- Experience your teaching style — Students get a feel for how you present material before committing financially.
- Evaluate content quality — A high-quality free lesson builds trust and demonstrates the value of the full course.
- Reduce purchase hesitation — Offering a taste of the content lowers the barrier to entry and can significantly boost conversion rates.
- Build curiosity — A well-chosen preview lesson can leave students wanting more, motivating them to buy the full course.
This approach works especially well when your first lesson covers an engaging, foundational topic that hooks students and sets the stage for the rest of the course.
Prerequisites
Before you begin, make sure you have:
- A paid course set up in Thrive Apprentice with at least one lesson.
- Access requirements configured for the course (e.g., the course is restricted to paying customers or members).
If you have not yet configured access requirements for your course, review the access requirements and restriction rules documentation first.
Making the First Lesson Free
To mark the first lesson in a paid course as free, follow these steps:
- From your WordPress admin area, navigate to Thrive Dashboard > Thrive Apprentice.
- Open the course that contains the lesson you want to make free.
- Locate the first lesson in the course curriculum.
- Click on the lesson to open its settings.
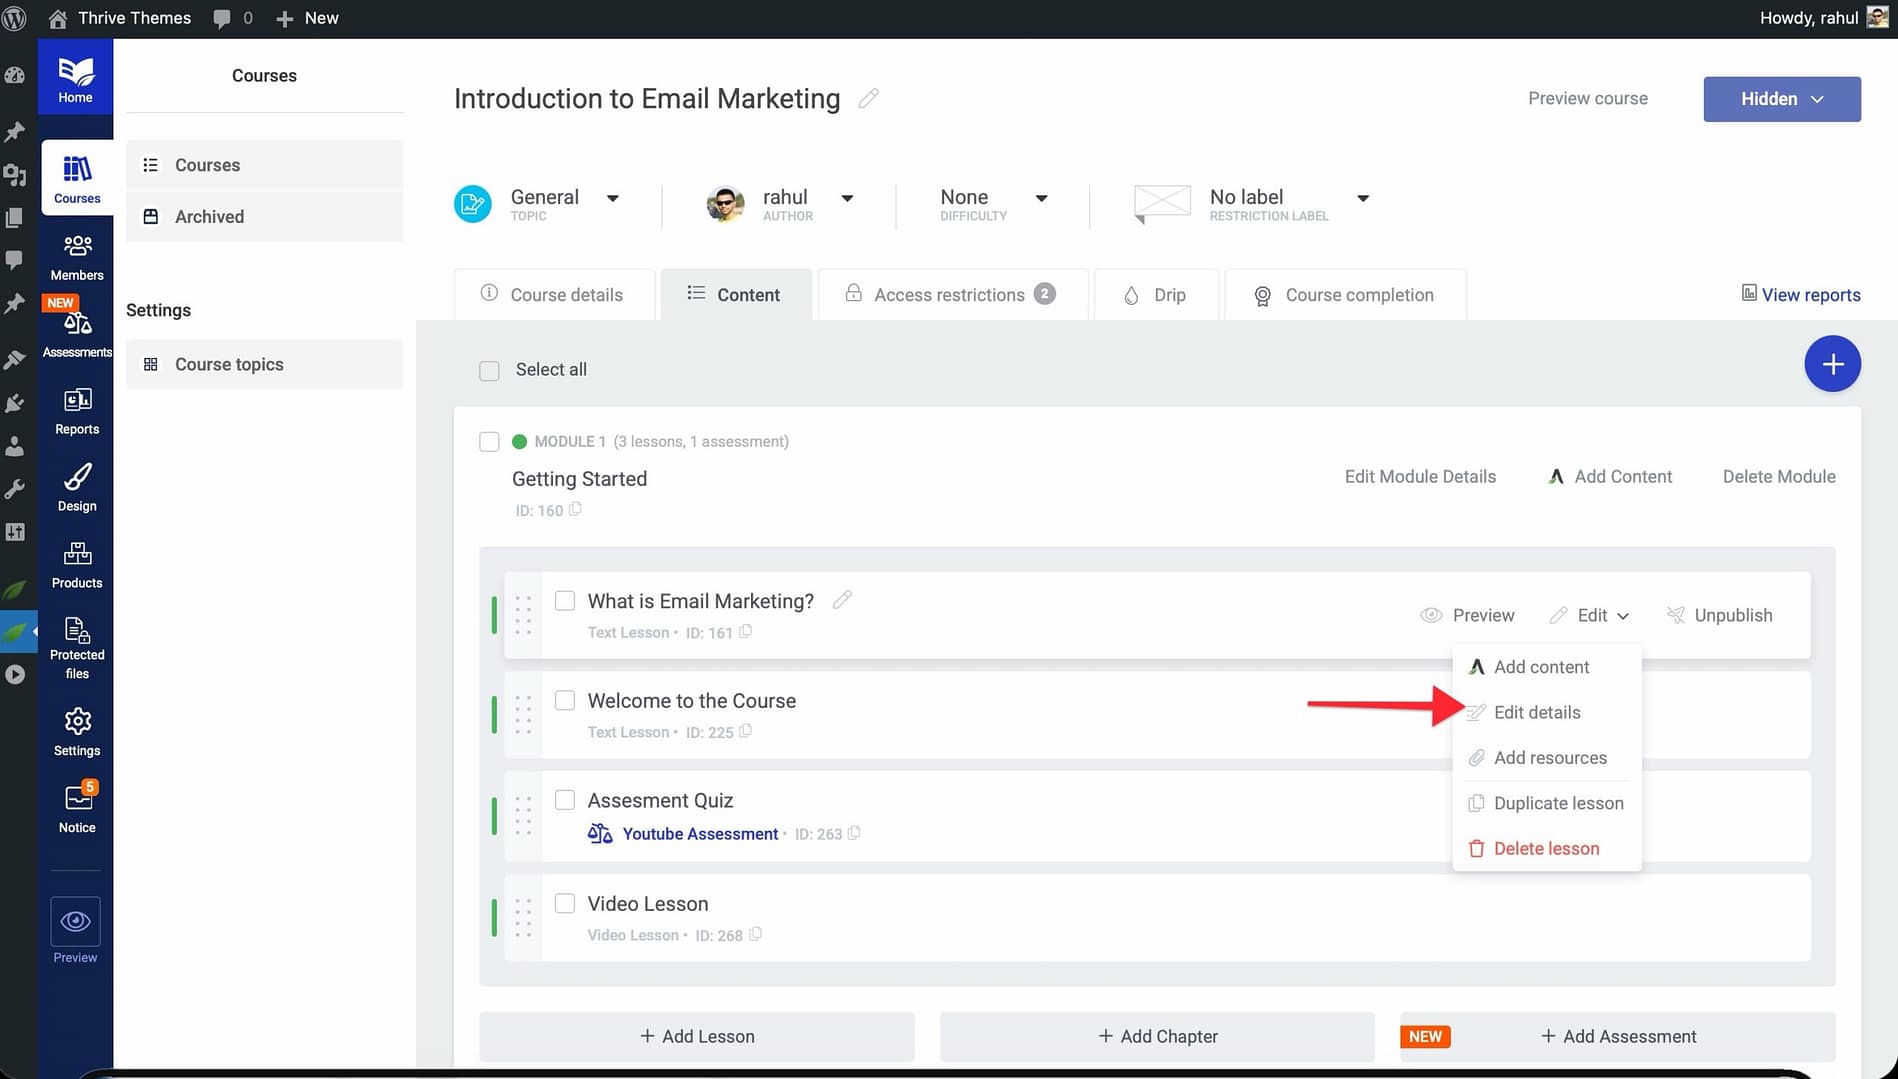
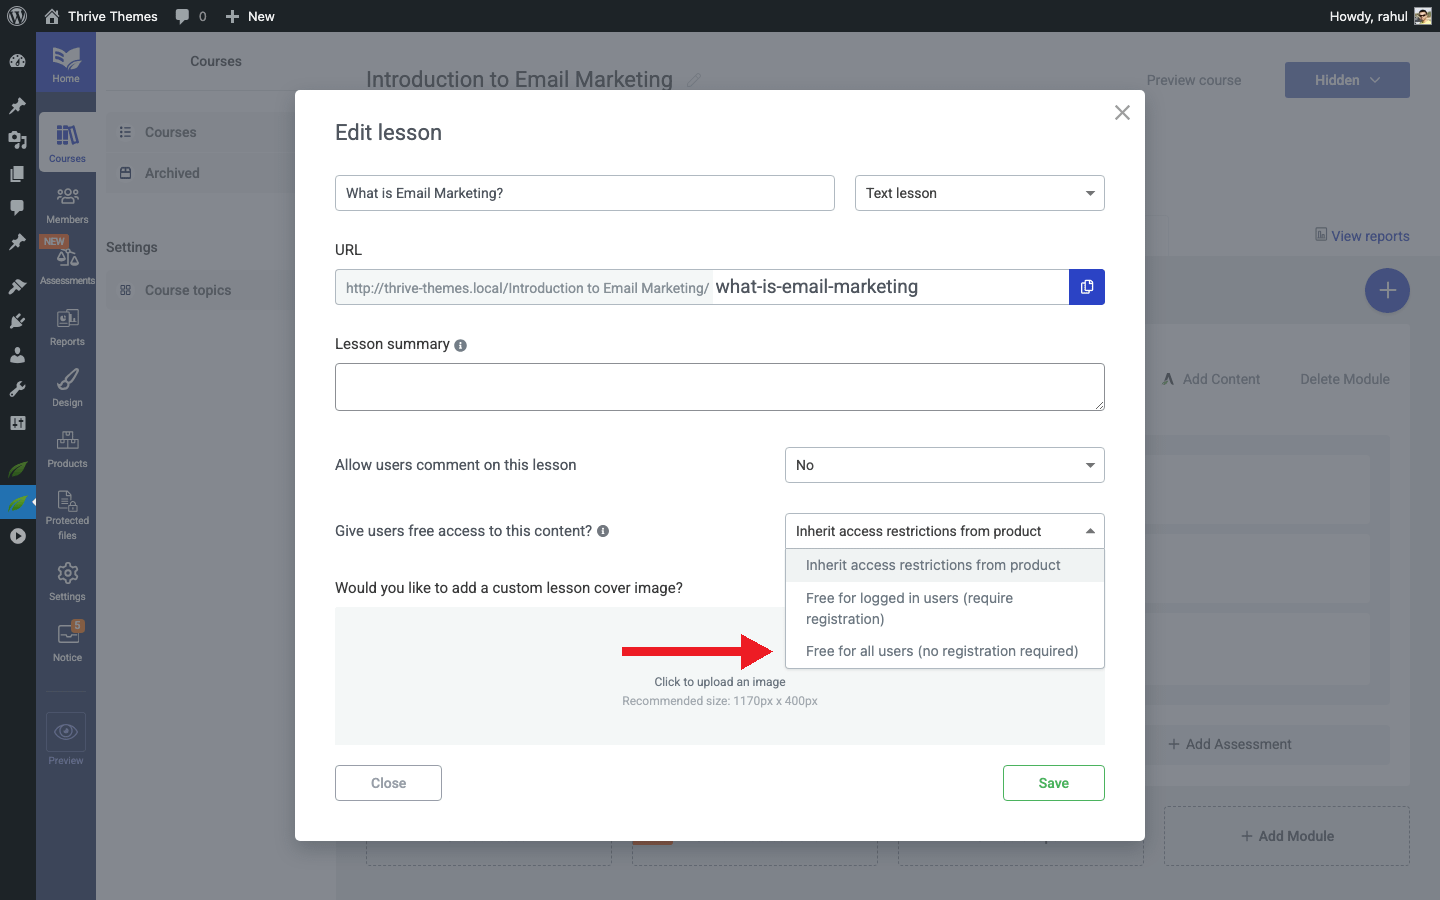
- Look for the Access or Restriction settings for the lesson.
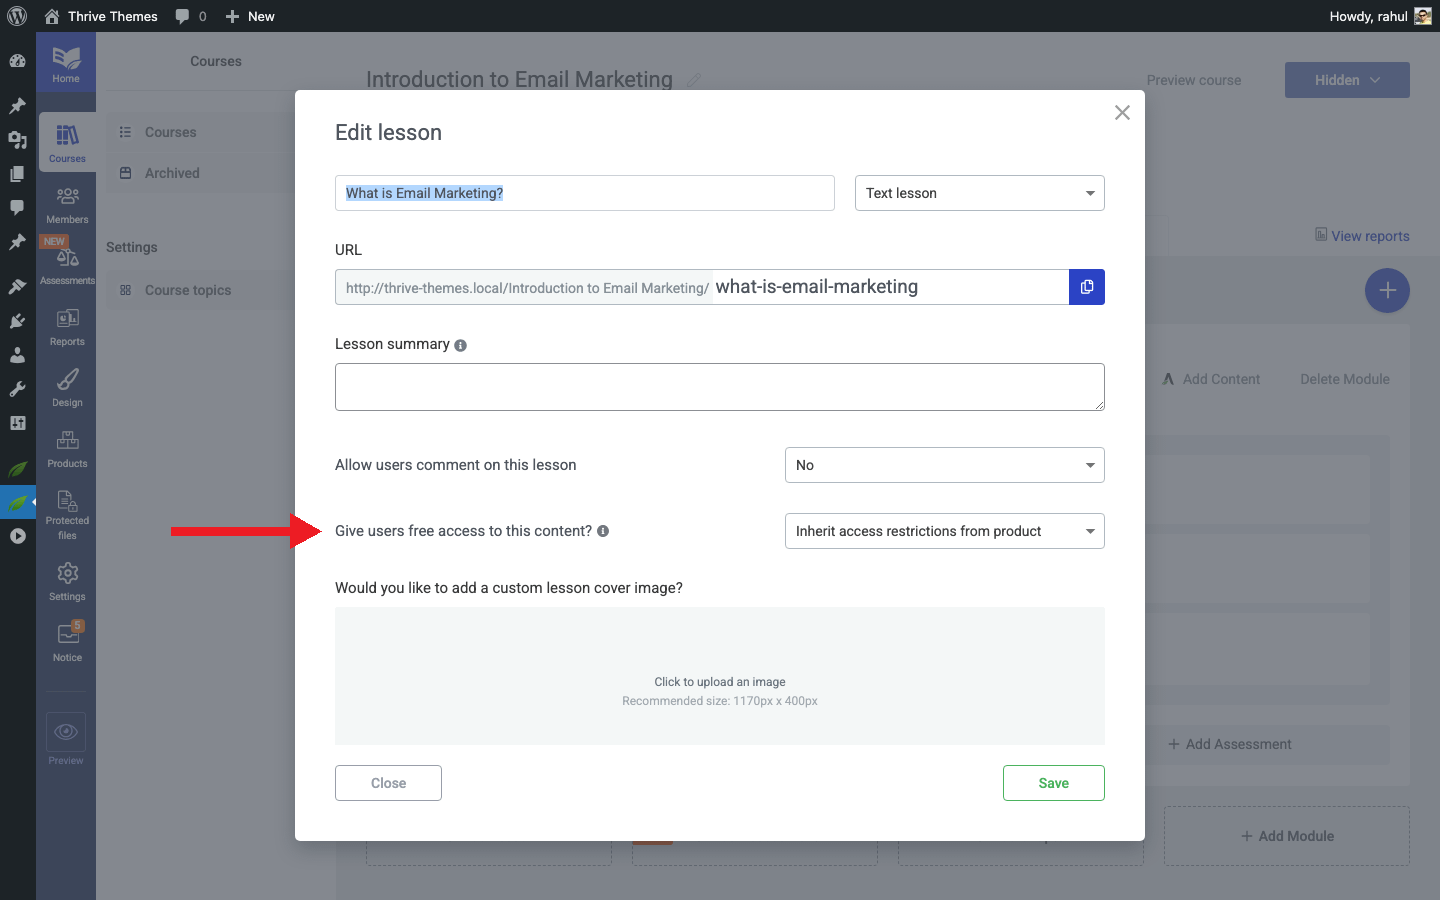
- Set the lesson access to Free or remove the access restriction for this specific lesson, while keeping the rest of the course restricted.
- Save your changes.
How It Works for Students
After you configure the free lesson, here is what your students will experience:
- Non-enrolled visitors can access and view the free lesson without purchasing or signing up.
- The remaining lessons will display the Access Restricted template when a non-enrolled visitor tries to access them.
- Enrolled or paying students will continue to have full access to all lessons as usual.
This creates a natural funnel: students can sample your content, and if they want more, they are directed to purchase or enroll.
Tips for Choosing the Right Free Lesson
- Start strong — Pick a lesson that showcases the best of what your course offers. First impressions matter.
- Keep it self-contained — The free lesson should deliver value on its own, even if the student does not purchase the full course.
- End with a hook — Close the free lesson with a teaser or reference to what comes next in the course, motivating students to continue.
- Avoid giving away too much — The free lesson should demonstrate your expertise without delivering the entire course’s core value.
Conclusion
That’s it! You’ve successfully configured a free first lesson for your paid Thrive Apprentice course. This simple change can dramatically improve your conversion rates by letting students experience your content before they commit to a purchase.
Related Resources
- Template Types Reference — Learn about the Access Restricted template that non-enrolled students will see on paid lessons.
- Displaying Lesson Resources by Progress — Control which resources students can access based on their completion status.
- Getting Started with the Visual Editor — Customize the look and feel of your free lesson using the Visual Editor.