In this article, you’ll learn how to set up a registration form that creates a WordPress account for new users and subscribes them to your email autoresponder at the same time. This streamlines your onboarding process—new students register, get site access, and join your mailing list in a single step.
Why Combine Registration with an Autoresponder?
When someone signs up for your Thrive Apprentice courses, you typically want two things to happen: a WordPress account gets created so they can access course content, and their email address gets added to your mailing list so you can send welcome sequences, course updates, and promotional offers. Doing both at once saves the user from filling out multiple forms and ensures no leads slip through the cracks.
Prerequisites
Before setting up the combined registration form, make sure you have:
- Thrive Apprentice installed and activated with at least one published course
- An email marketing service (e.g., Mailchimp, ActiveCampaign, ConvertKit, AWeber, or any autoresponder supported by Thrive Themes)
- Your email service connected via the API Connections in the Thrive Dashboard
Step 1: Connect Your Email Service
If you haven’t already connected your autoresponder, do that first:
- Navigate to Thrive Dashboard > API Connections.
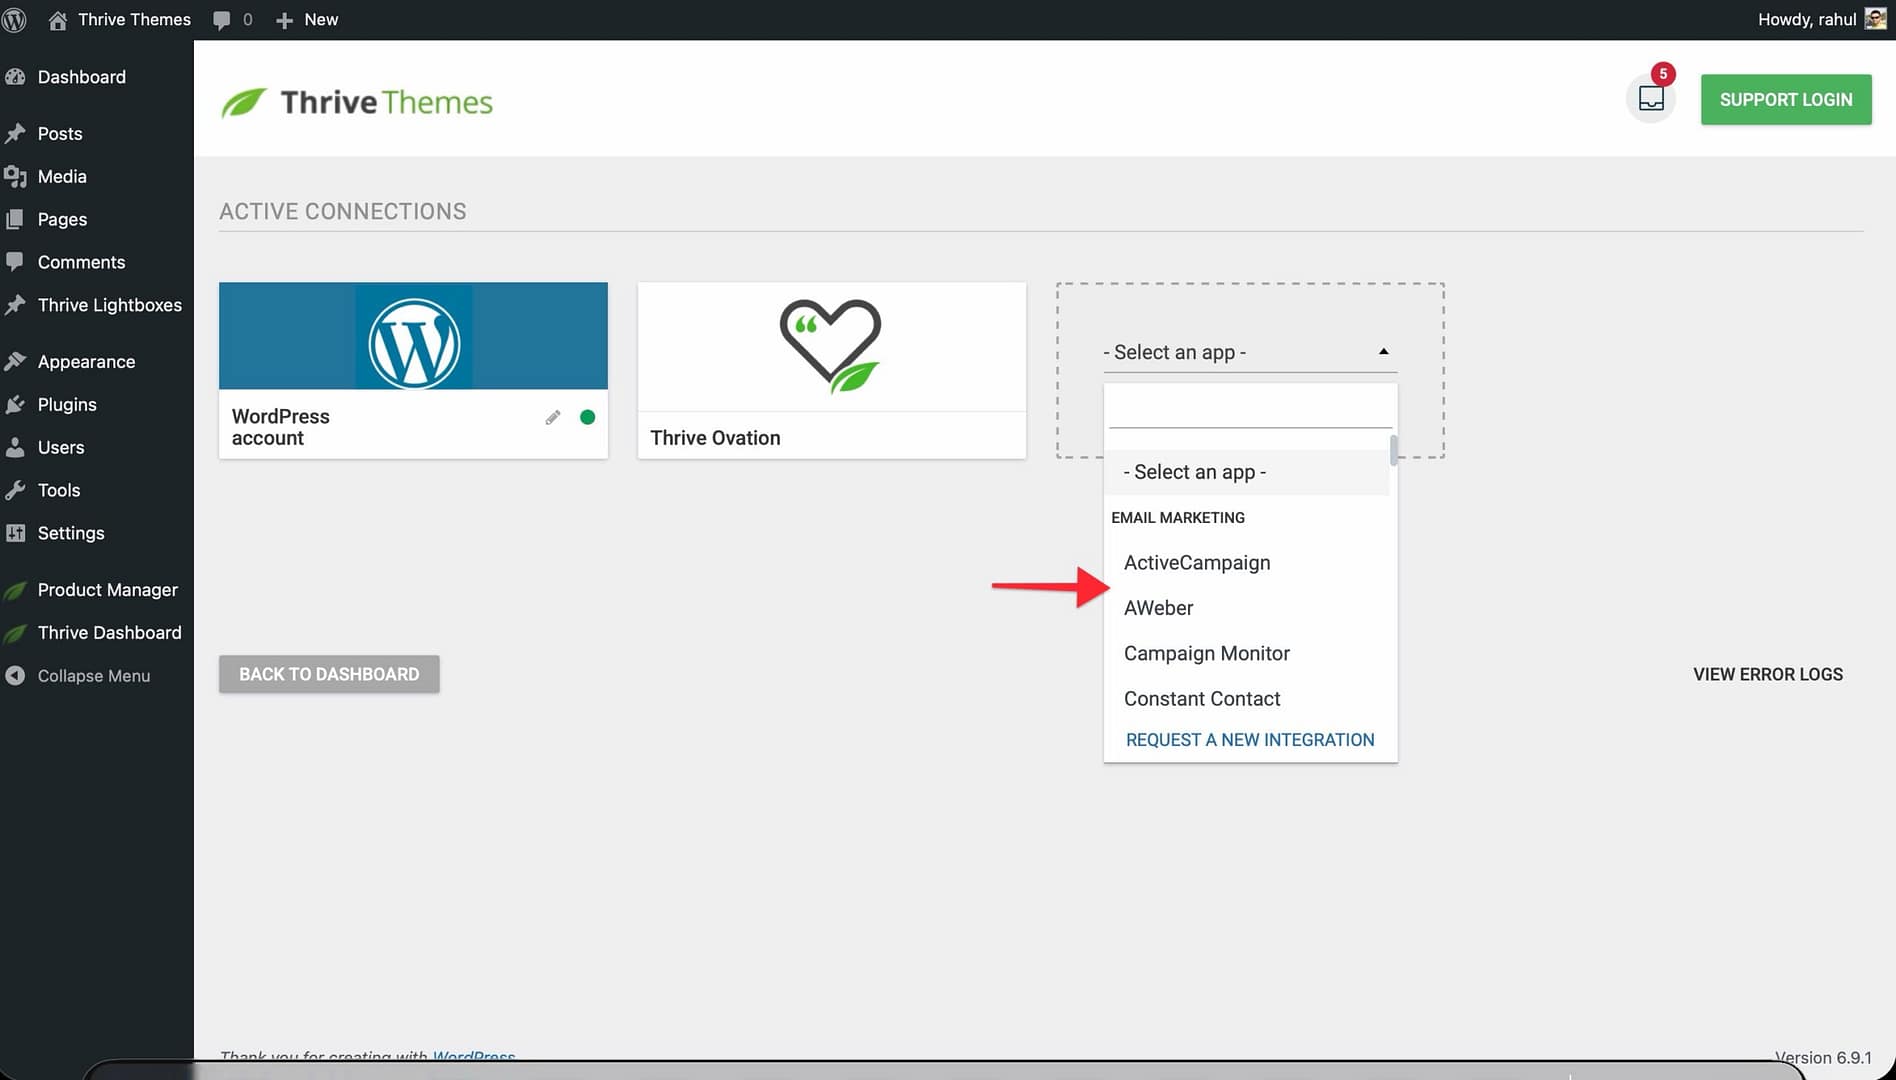
- Click + Add New Connection.
- Select your email marketing service from the list.
- Enter the required API credentials (API key, secret, or OAuth authorization—depending on the service).
- Click Connect and wait for the confirmation message.
Once connected, your email service will be available as an option in Thrive’s form elements.
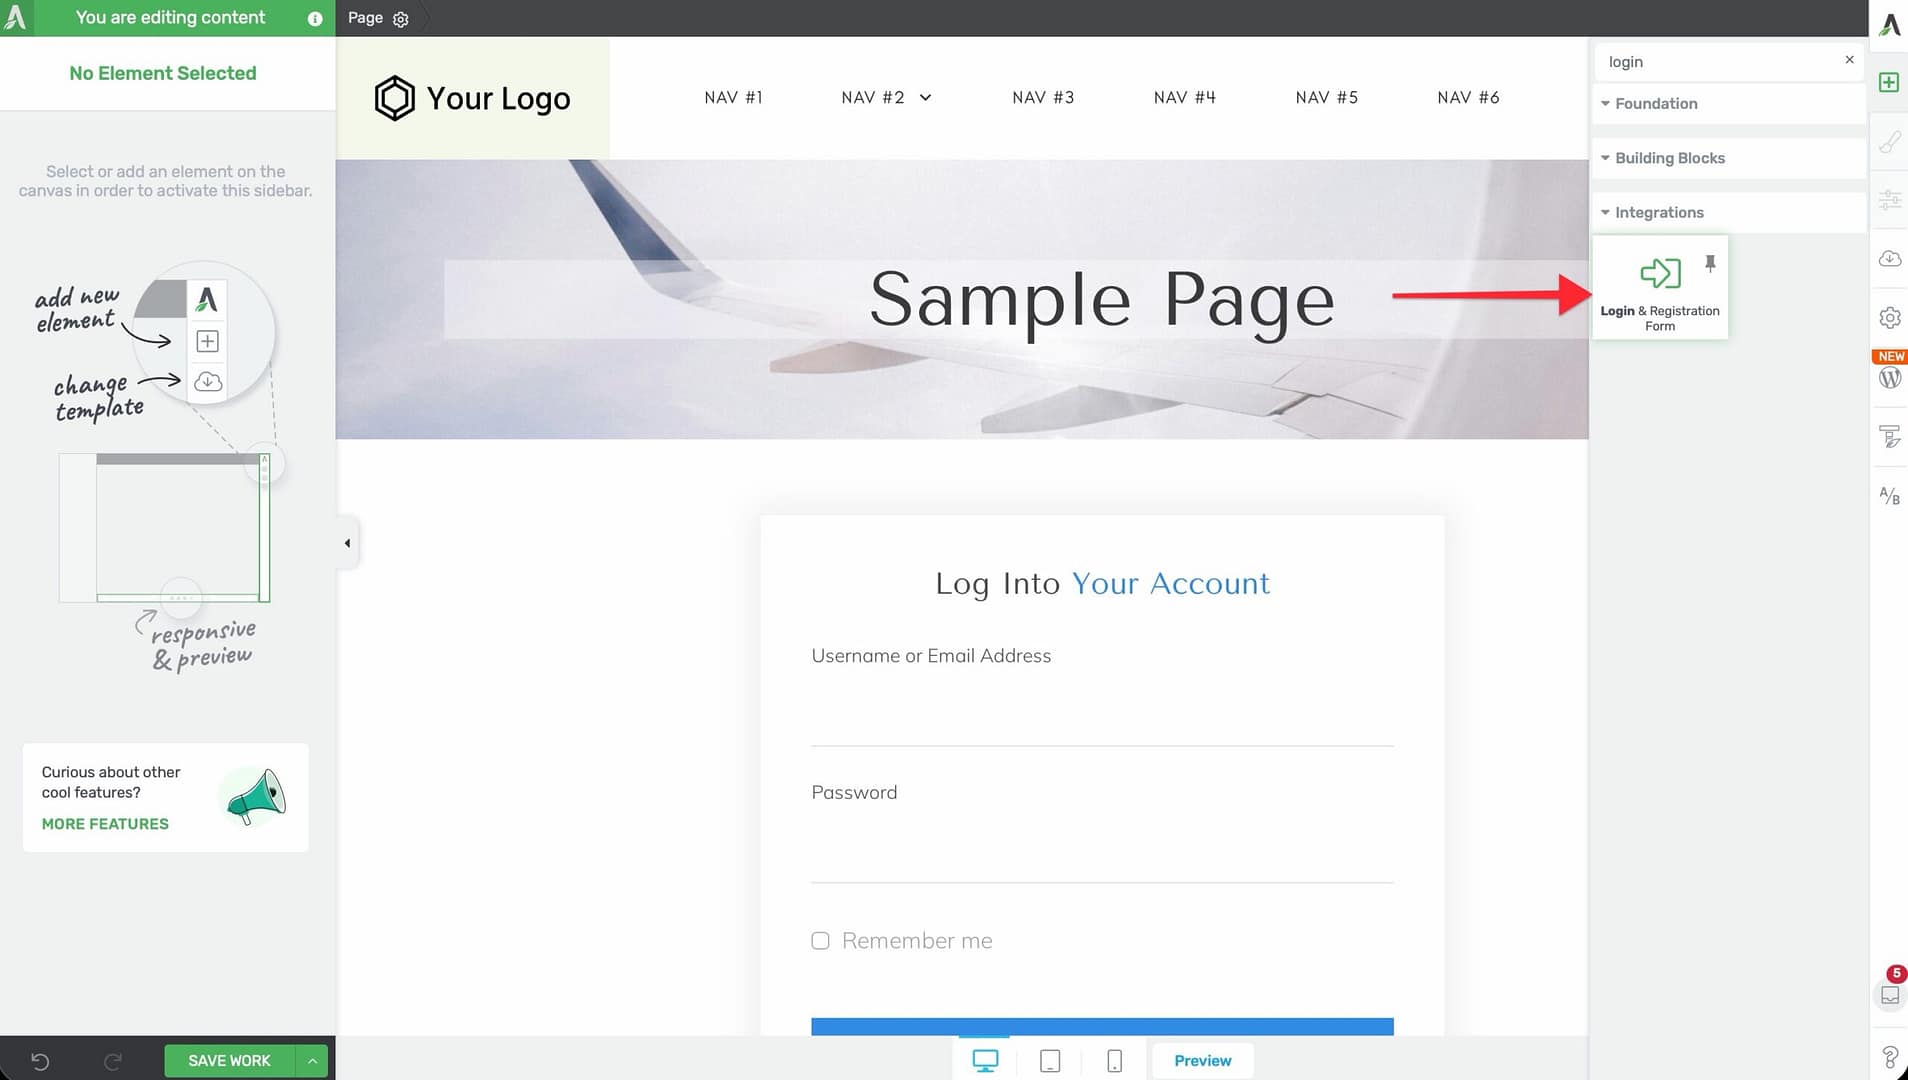
Step 2: Create the Registration Form
Thrive provides a Login & Registration form element that handles both WordPress user creation and autoresponder subscription. Here’s how to set it up:
- Open the page where you want the registration form to appear using Thrive Architect (or the editor of your choice within the Thrive Suite).
- Add the Login & Registration element to your page by dragging it from the element panel.
- Select the Registration Form tab in the element settings.
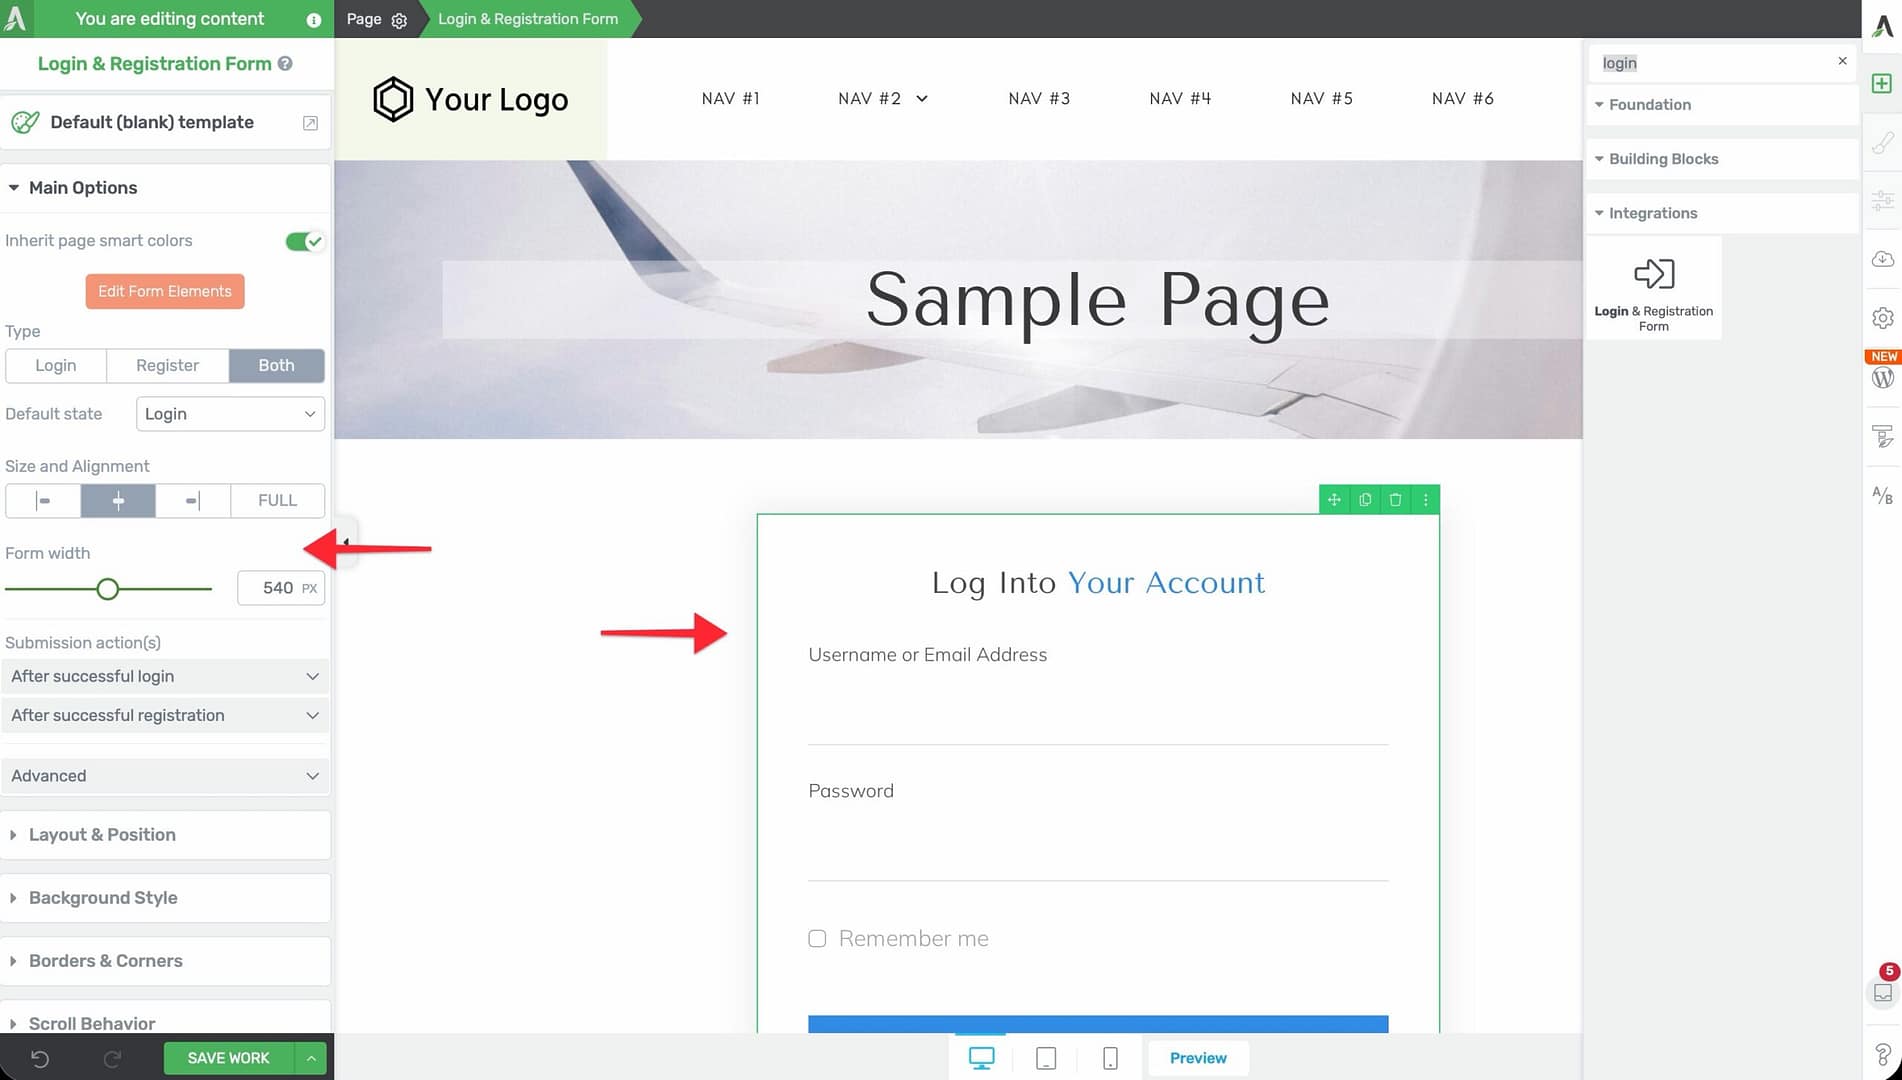
- Configure the form fields:
Name — the user’s display name
Email — used for both the WordPress account and the autoresponder subscription
Password — the user’s chosen password for site login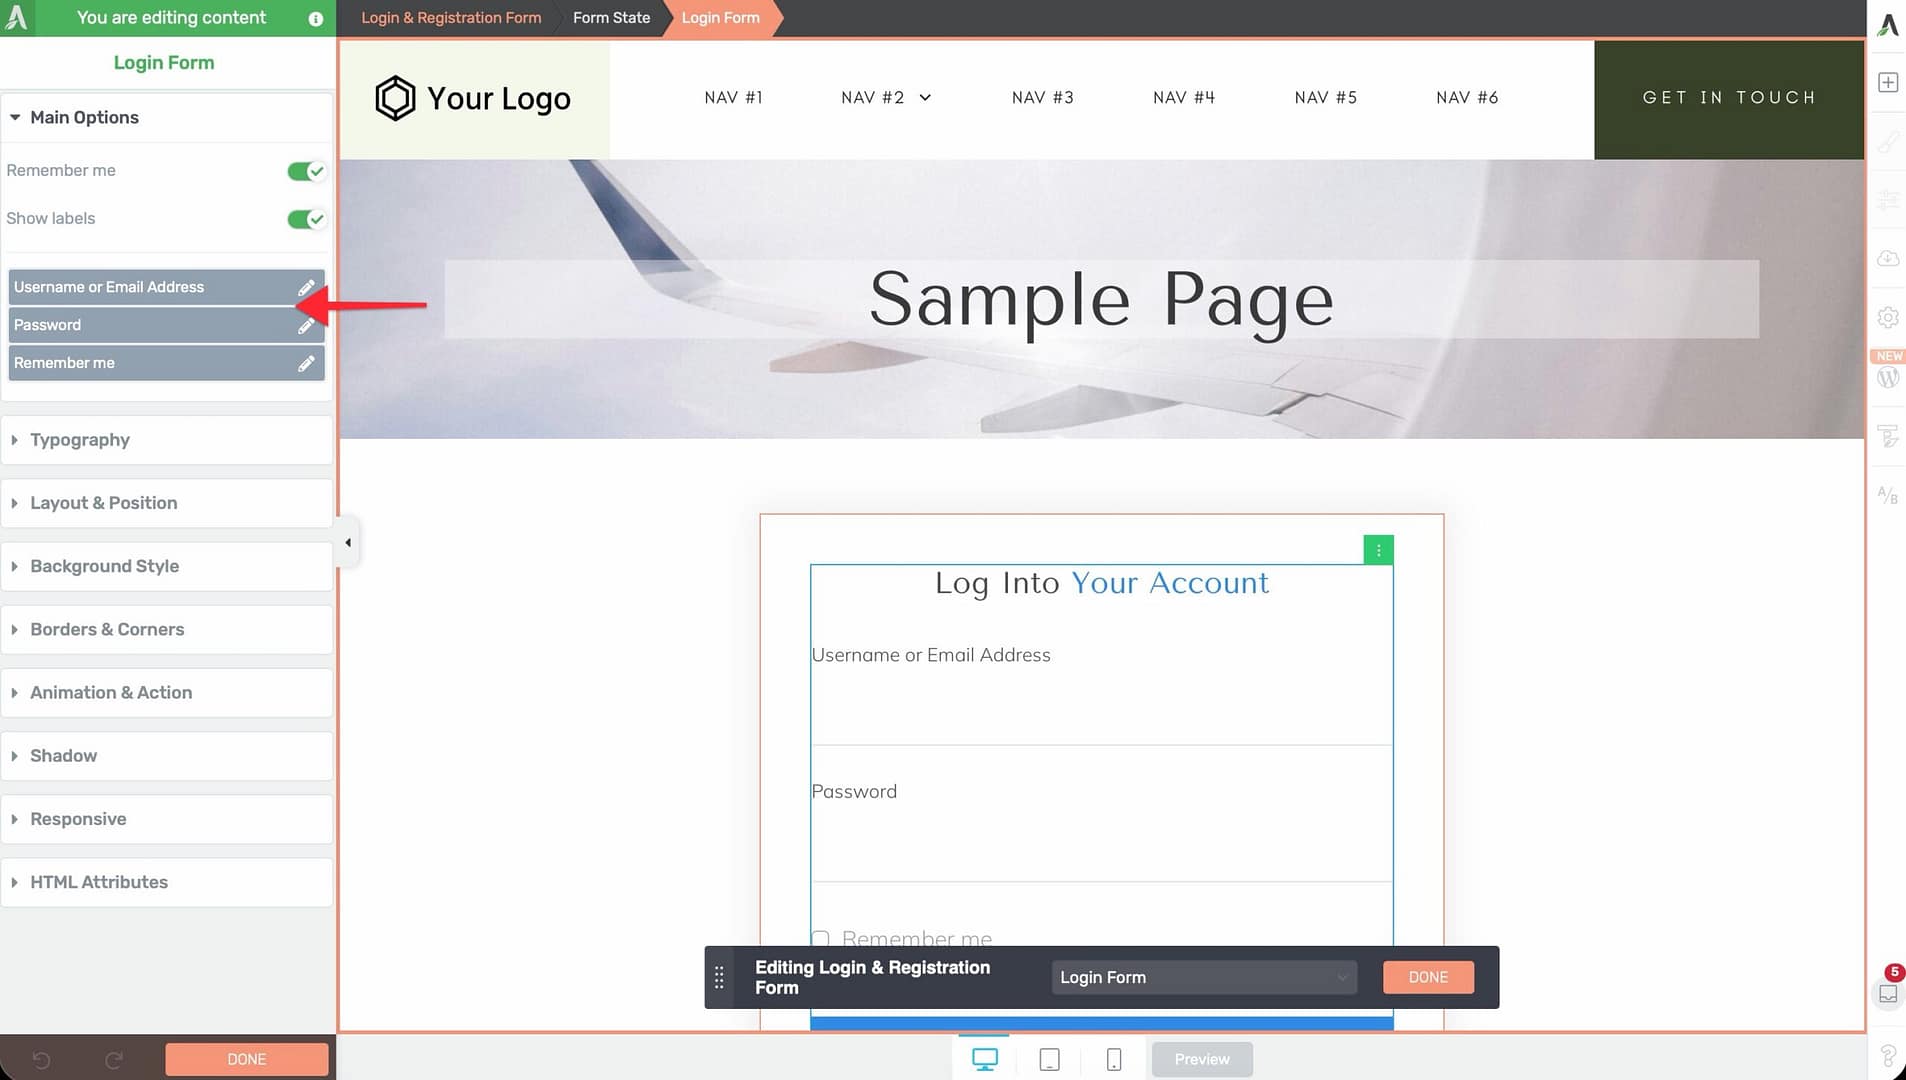
- Under the After Registration settings, enable the Add to autoresponder option.
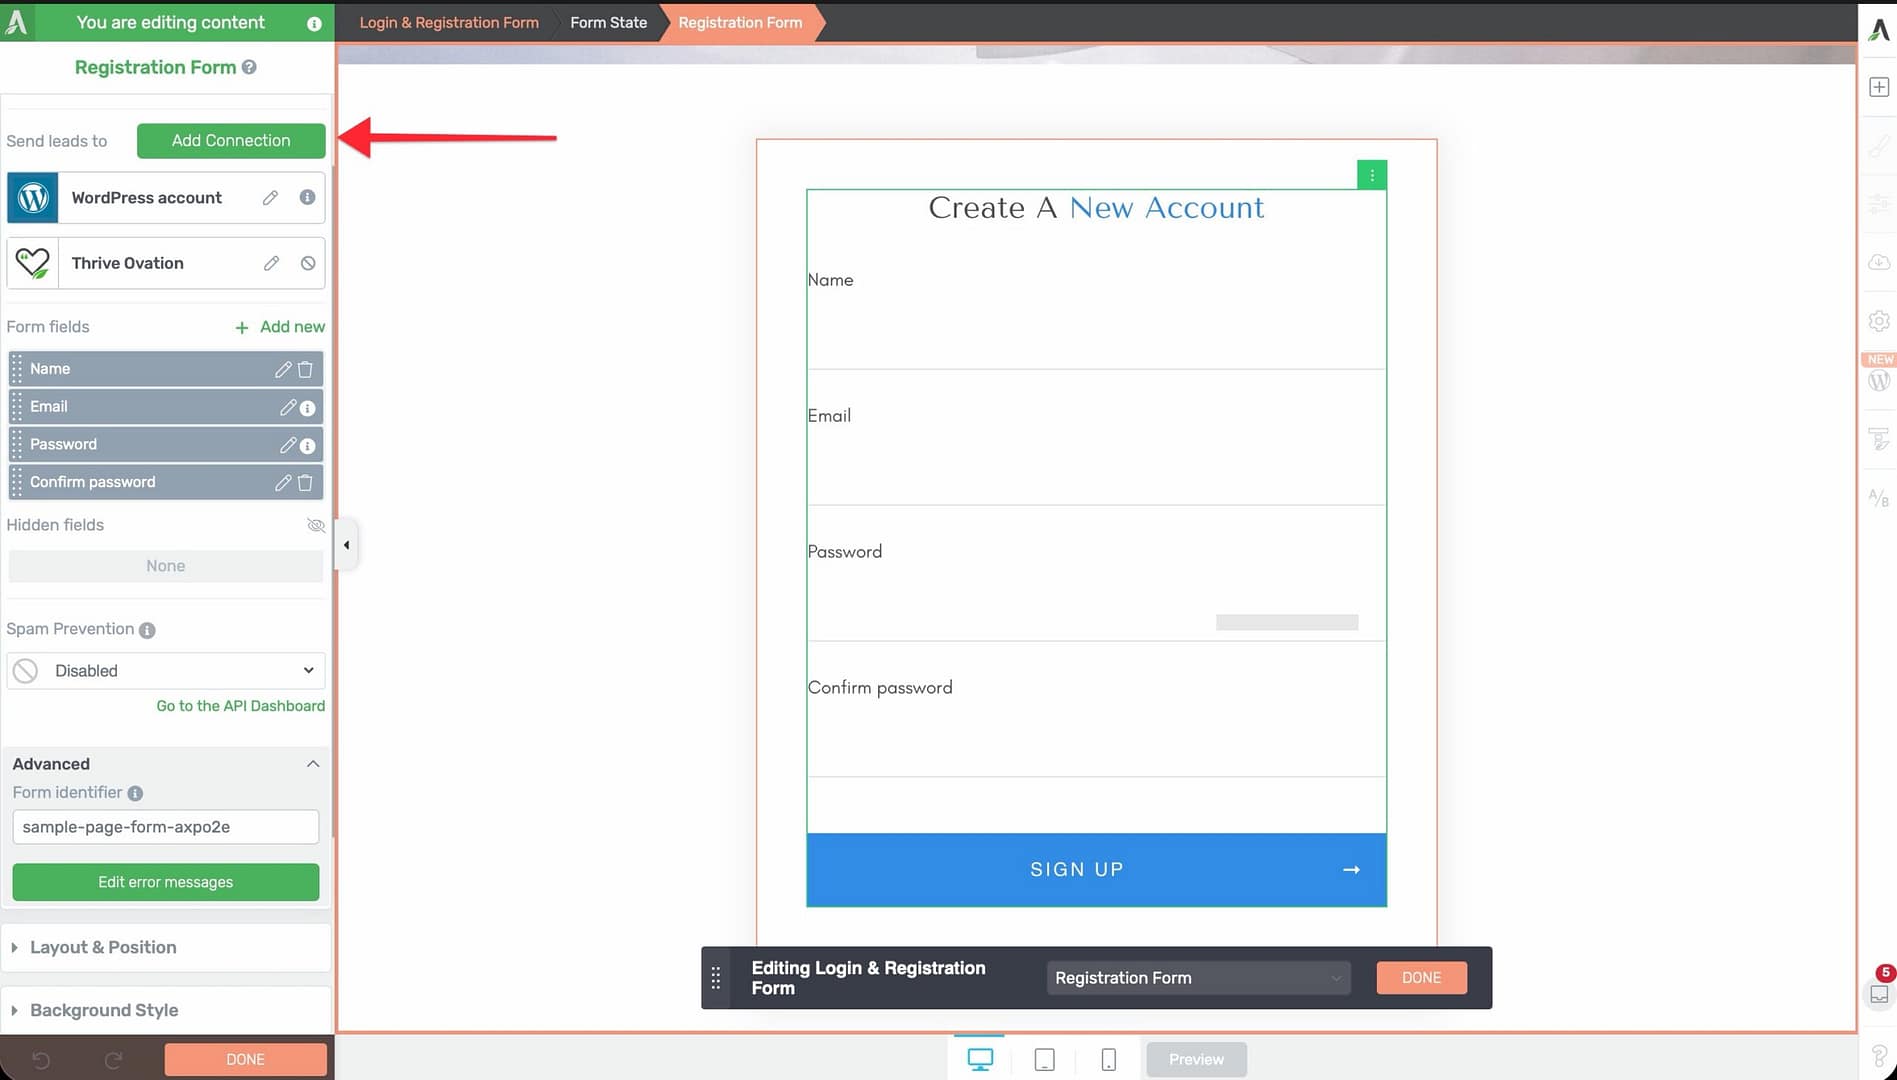
- Select your connected email service from the dropdown.
- Choose the specific Mailing List or Tag you want new registrants added to.
- Optionally, map additional form fields to your autoresponder’s custom fields (e.g., first name, last name).
- Save your page.
Step 3: Configure Post-Registration Behavior
After the form is set up, decide what happens when a user completes registration:
- In the Login & Registration element settings, scroll to the After Successful Registration section.
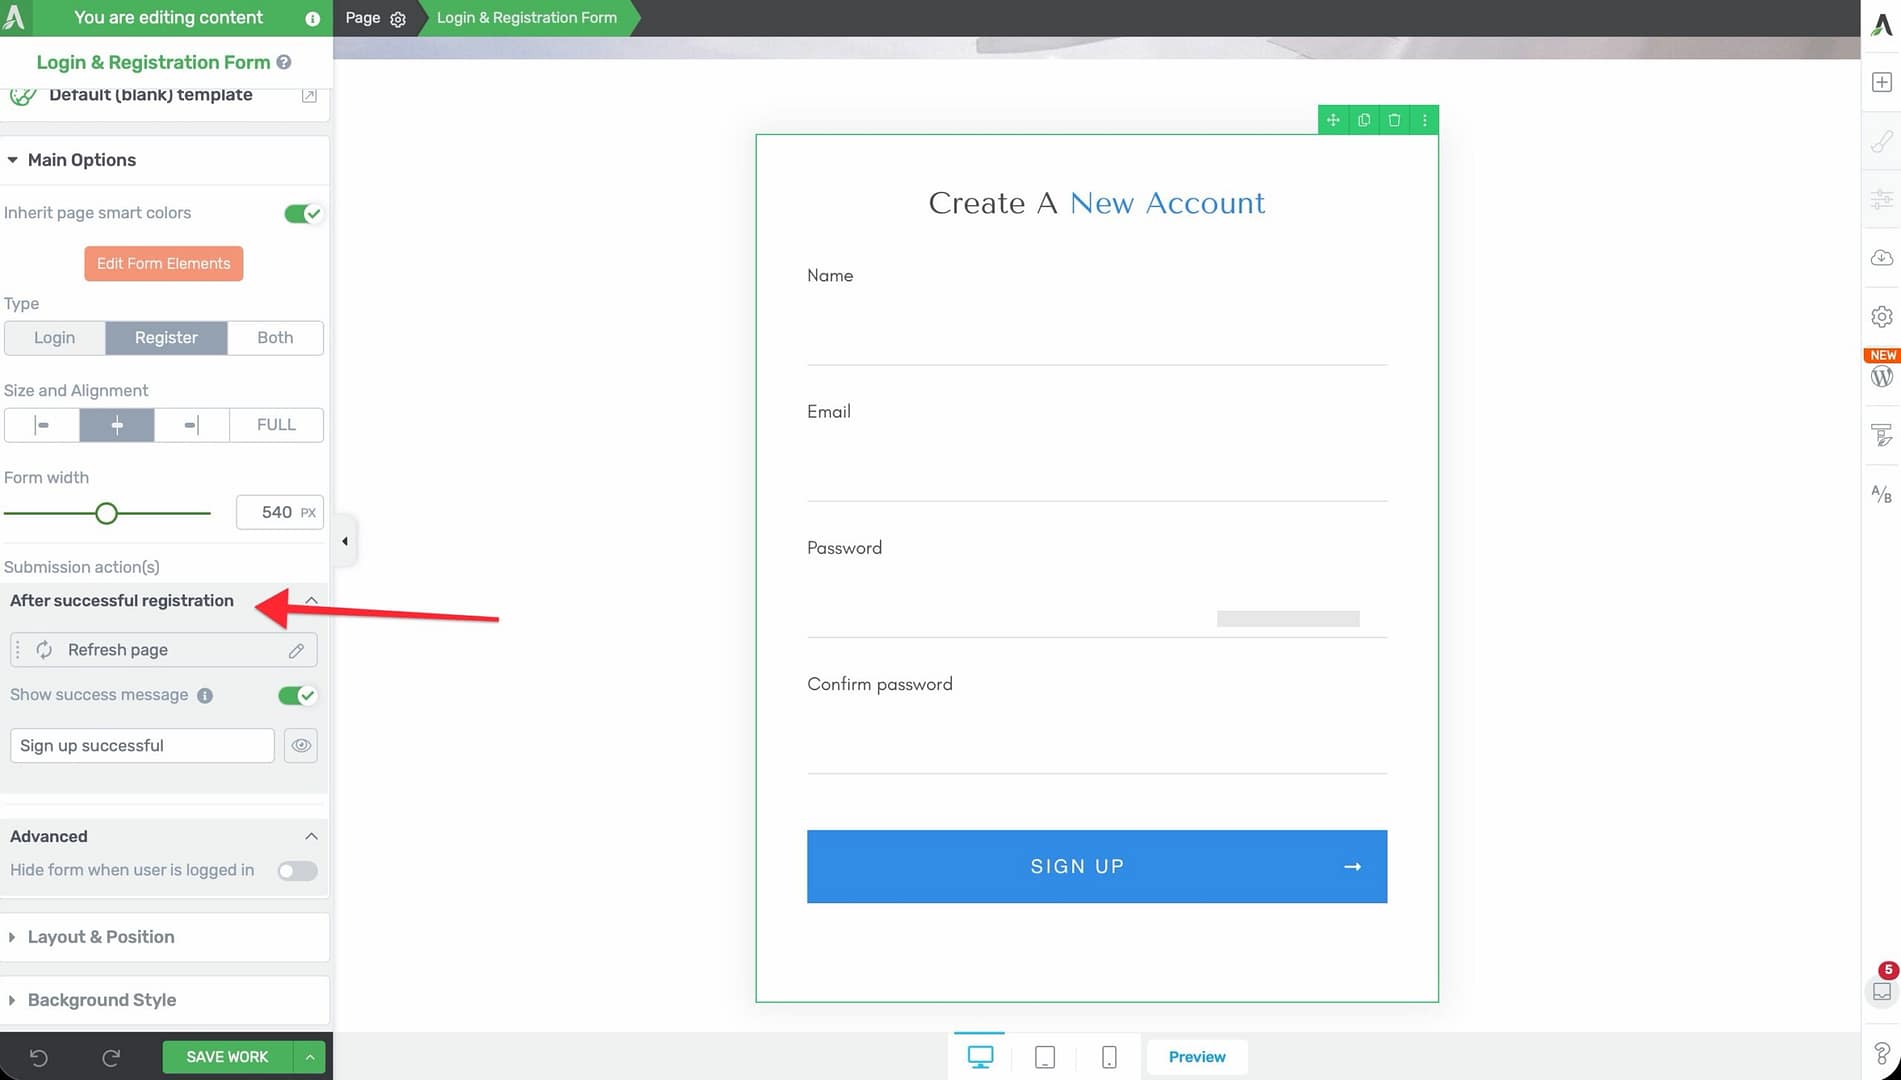
- Choose one of the following options:
Redirect to a page — send the user to a welcome page, course dashboard, or specific course
Show a success message — display a confirmation message on the same page
Auto-login — automatically log the user in and redirect them to the course - Save your settings.
Step 4: Test the Form
Before going live, verify that everything works:
- Open the page with the registration form in a private/incognito browser window.
- Fill out the form with a test email address and submit it.
- Check that a new WordPress user was created under Users in the WordPress admin dashboard.
- Confirm that the test email address appeared in your autoresponder’s mailing list.
- Verify that the post-registration redirect or success message works as expected.
Important: Use a real email address you control for testing so you can also confirm that the autoresponder’s welcome email arrives correctly.
Conclusion
That’s it! You’ve successfully set up a registration form that creates a WordPress account and adds the user to your email autoresponder in one step. This gives your students a smooth onboarding experience while ensuring your mailing list stays in sync with your course enrollment.
Related Resources
- API connections: Managing API Connections in Thrive Dashboard
- Automator recipes: How to Use Thrive Automator Recipes with Thrive Apprentice
- Login & Registration element: Thrive Architect Login & Registration Documentation
- Course access setup: Setting Up Products and Access in Thrive Apprentice