In this article, you’ll learn how to control who can access your course content using Thrive Apprentice’s access restriction system. This comprehensive guide covers everything from basic content protection to advanced multi-product restriction rules, dynamic labels, and overrides for non-logged-in users.
What Are Access Restrictions?
Access restrictions are rules you define to control who can view your courses, lessons, and other protected content. When a visitor doesn’t meet the requirements you’ve set, Thrive Apprentice automatically blocks them from viewing the restricted material and displays a customizable message instead.
You can use access restrictions to sell courses behind a product, create subscribers-only content, gate premium lessons, or build complex membership tiers—all without additional plugins.
Protecting Course Overview Pages
A course overview page displays key details about your course—learning outcomes, lesson listings, and other important information. By default, this page is visible to everyone. However, you may want to restrict it so only enrolled students or paying members can see the full details.
To protect a course overview page:
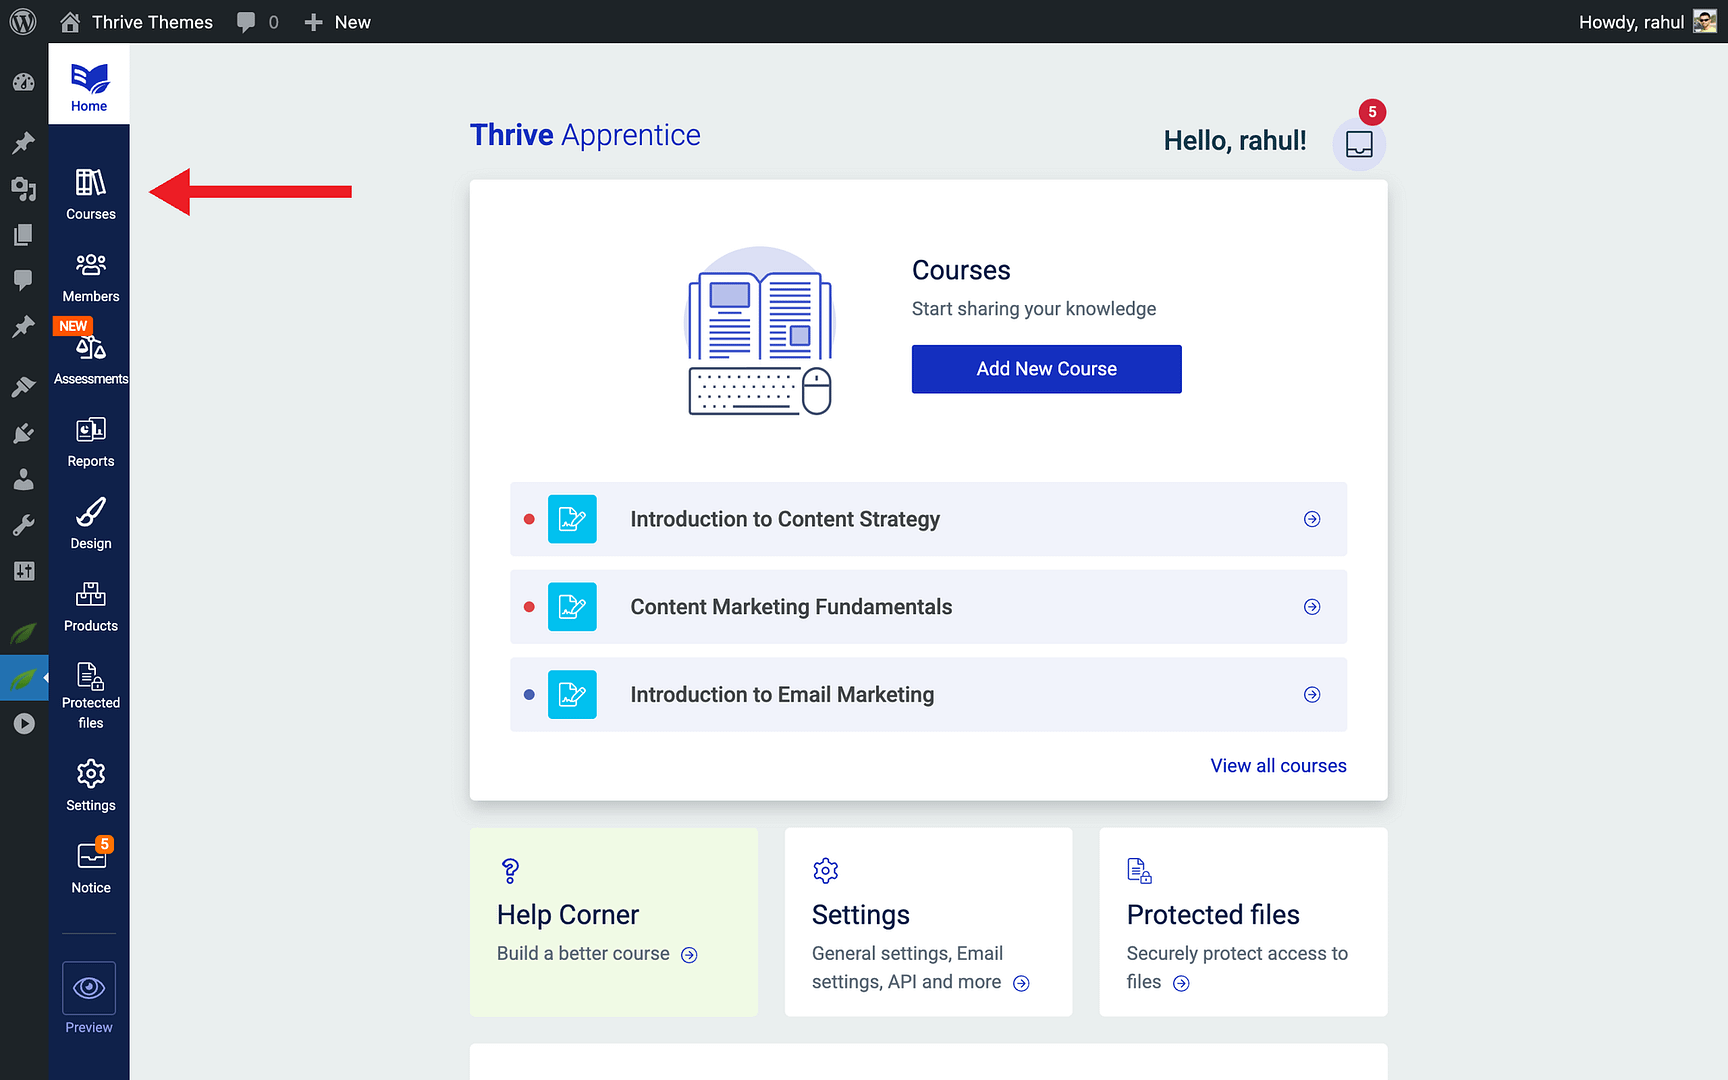
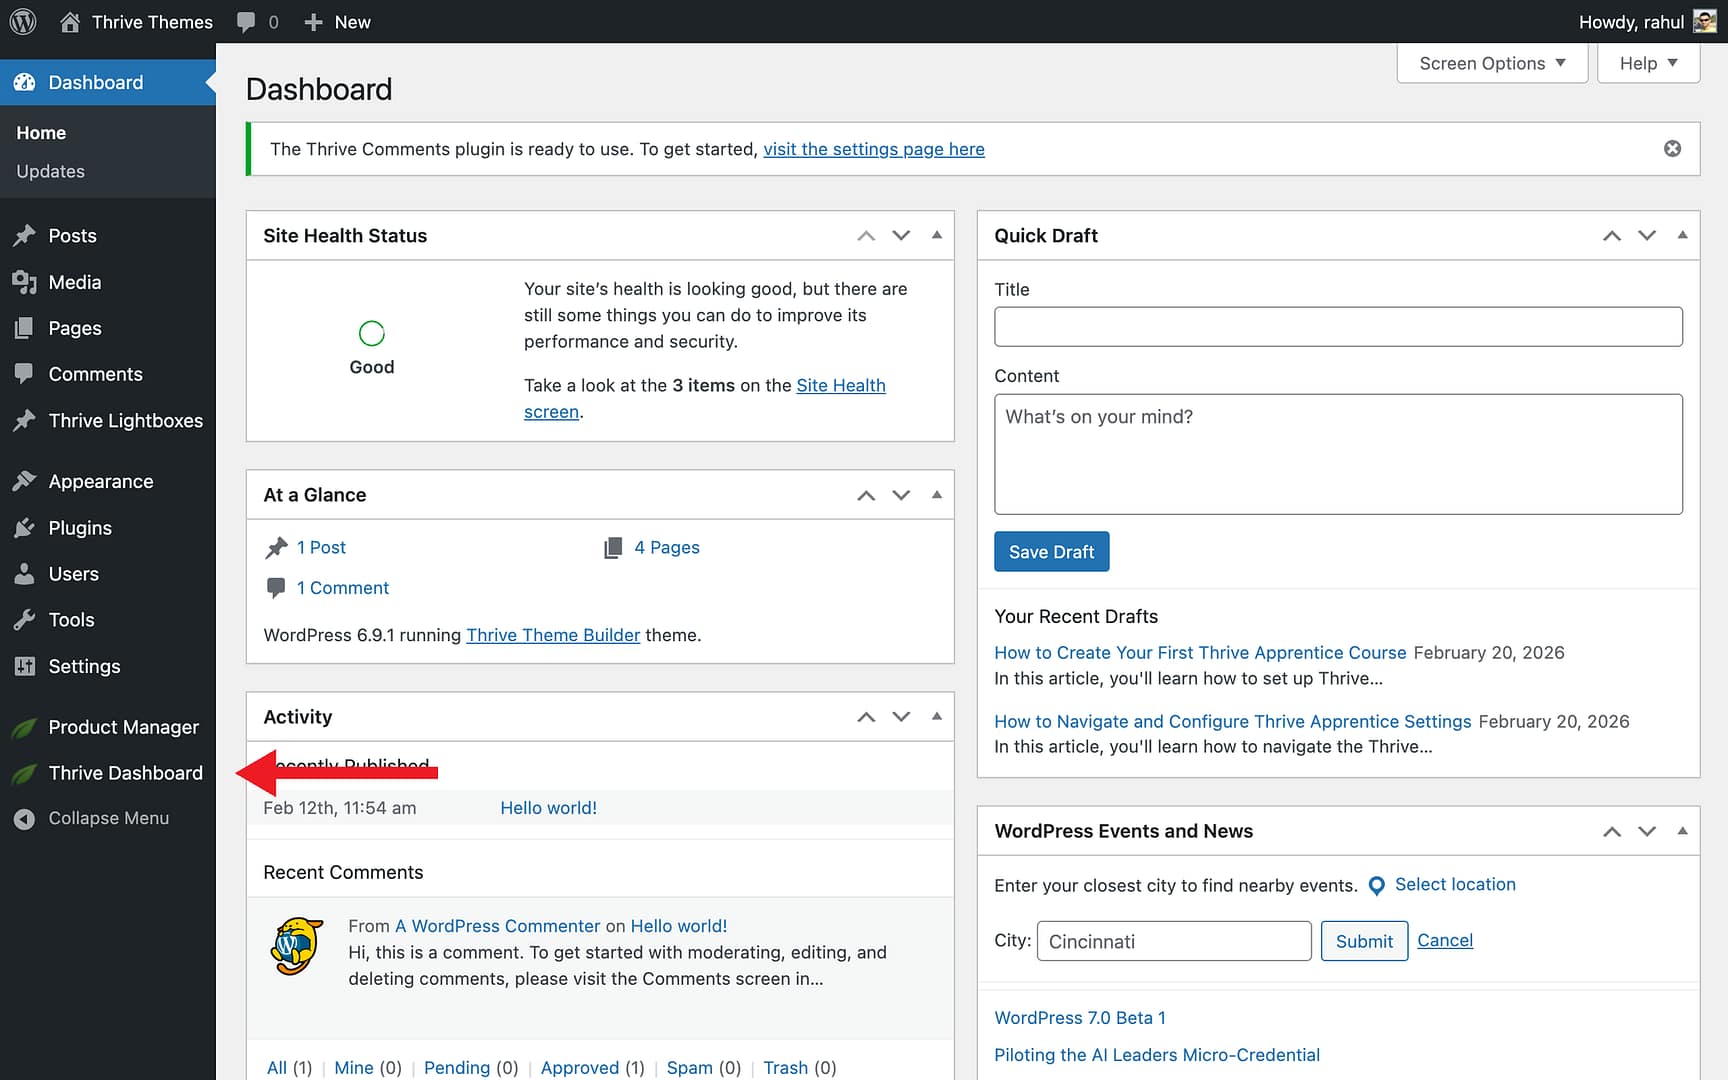
- Navigate to Thrive Dashboard > Thrive Apprentice.

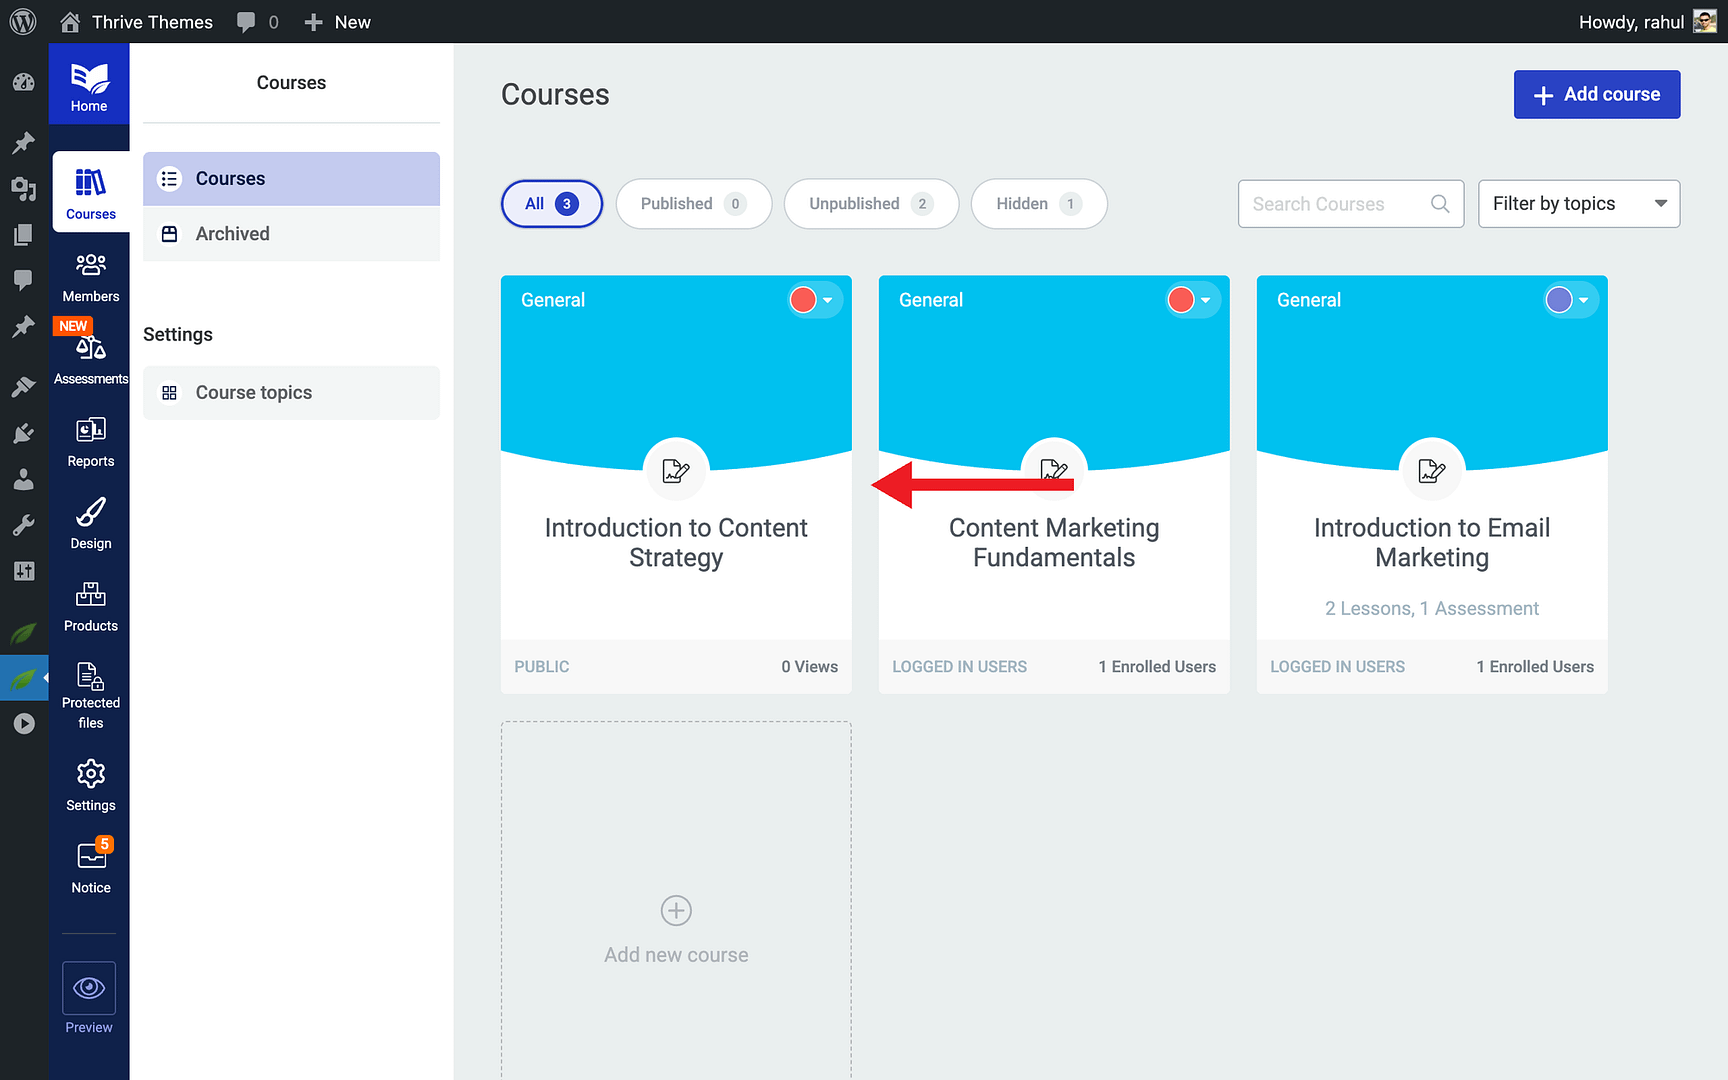
- Select Courses from the left sidebar and click on the course you want to protect.
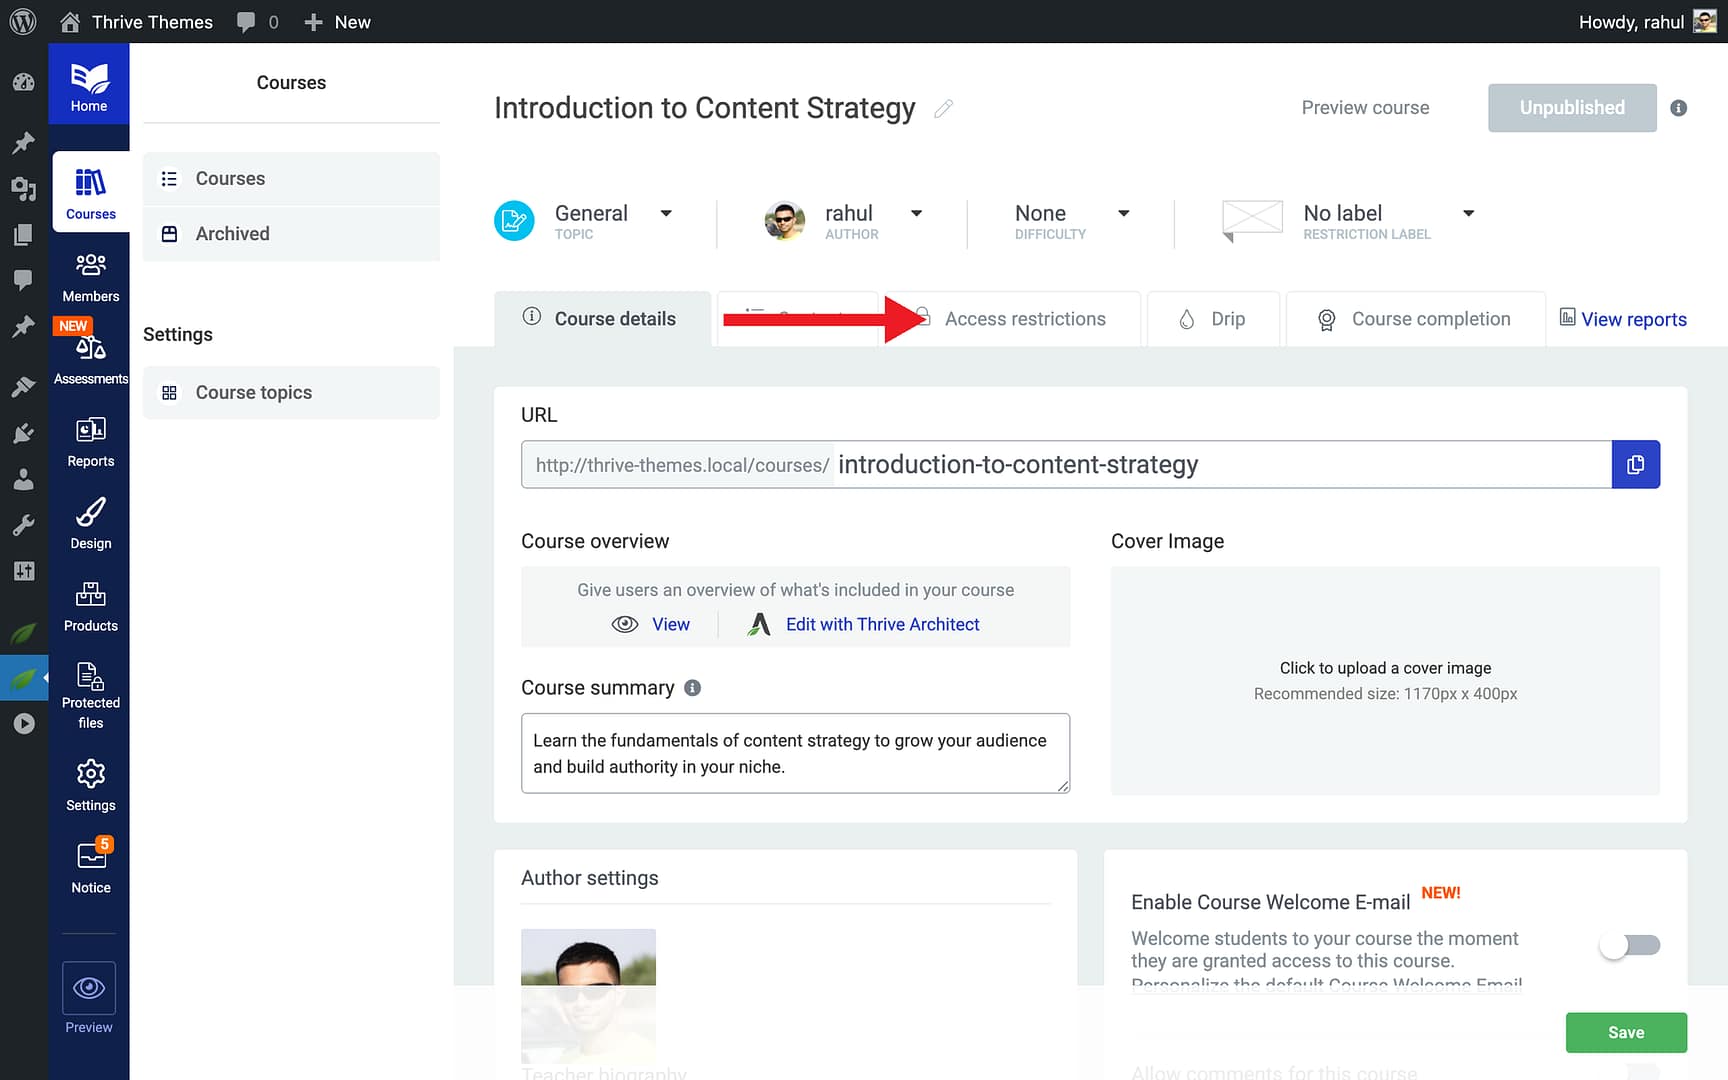
- Open the Access Restrictions tab within the course settings.
- Enable the Protect course overview page toggle.
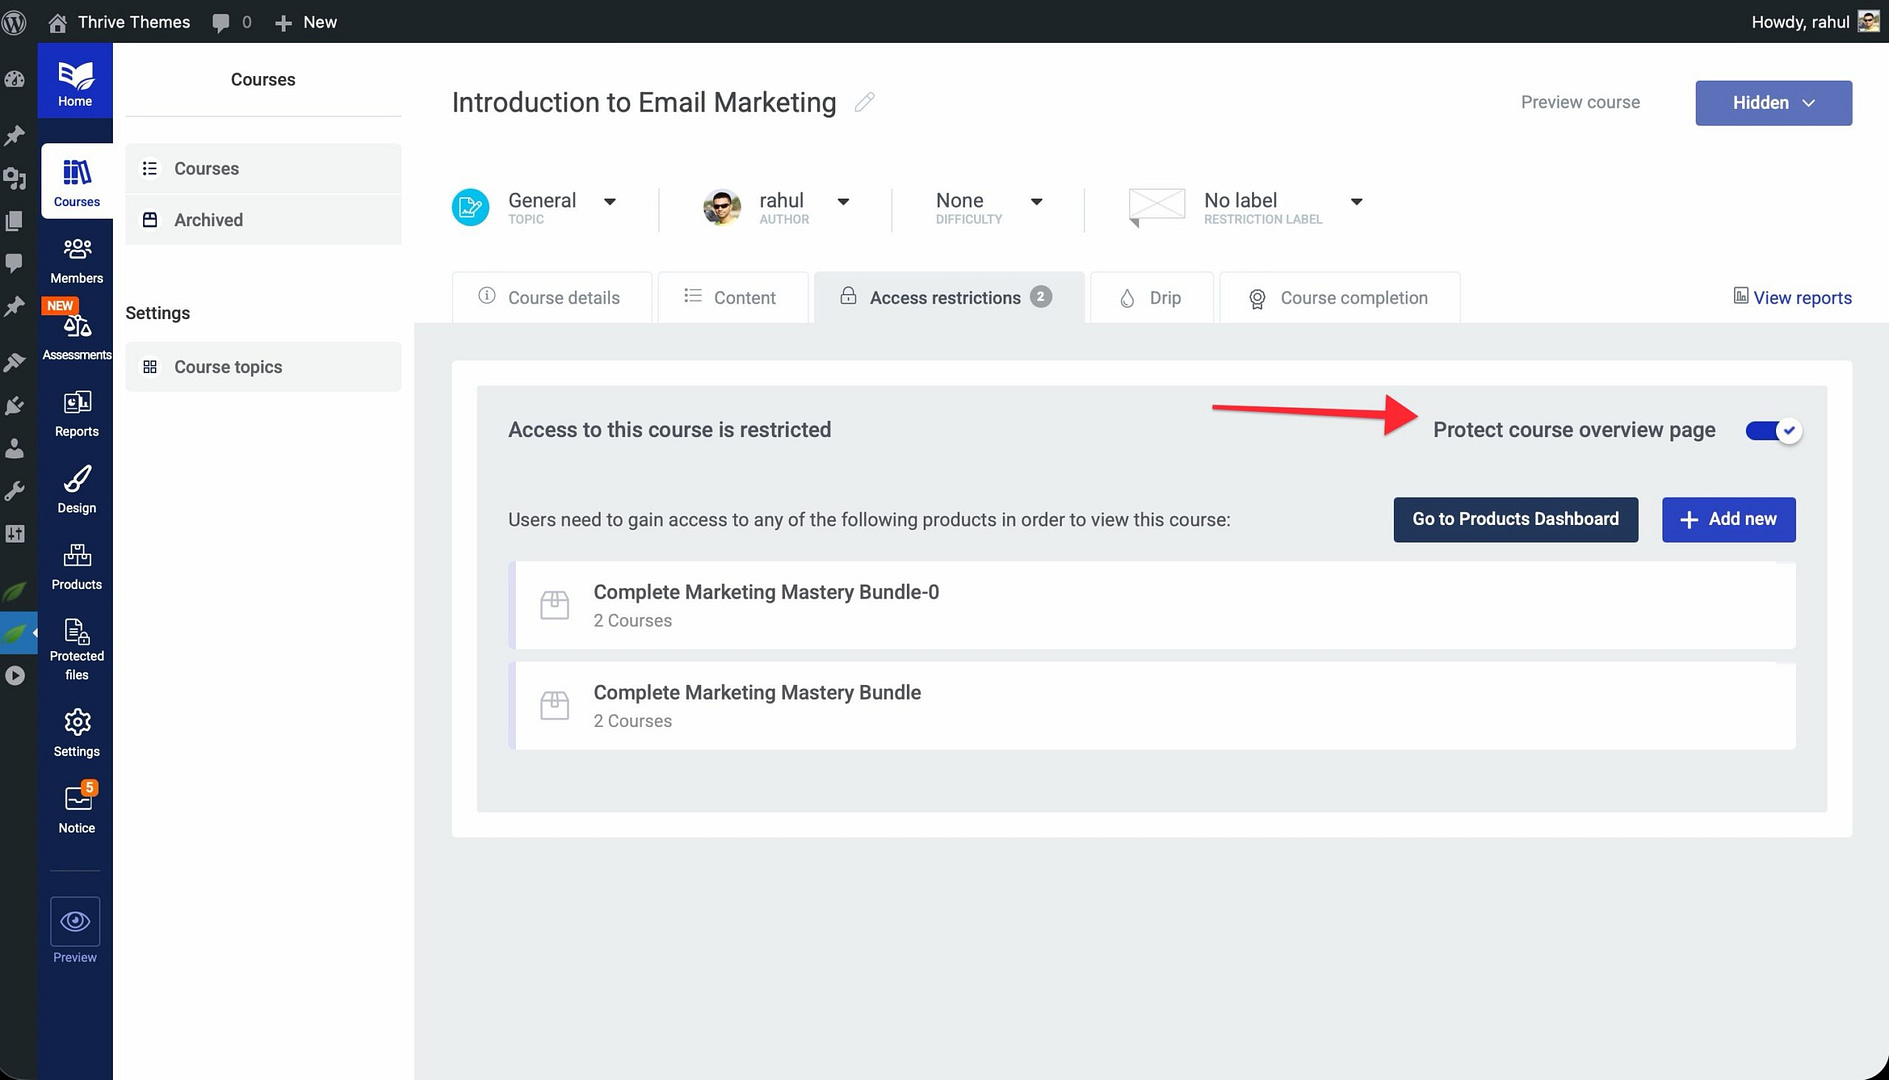
- Choose the restriction type—for example, require a product purchase or a logged-in status.
Creating Subscribers-Only Courses
One of the most popular access control strategies is offering free preview lessons while gating the rest behind an email subscription. This approach grows your email list while giving visitors a taste of your content.
To set up a subscribers-only course:
- Navigate to Thrive Dashboard > Thrive Apprentice.
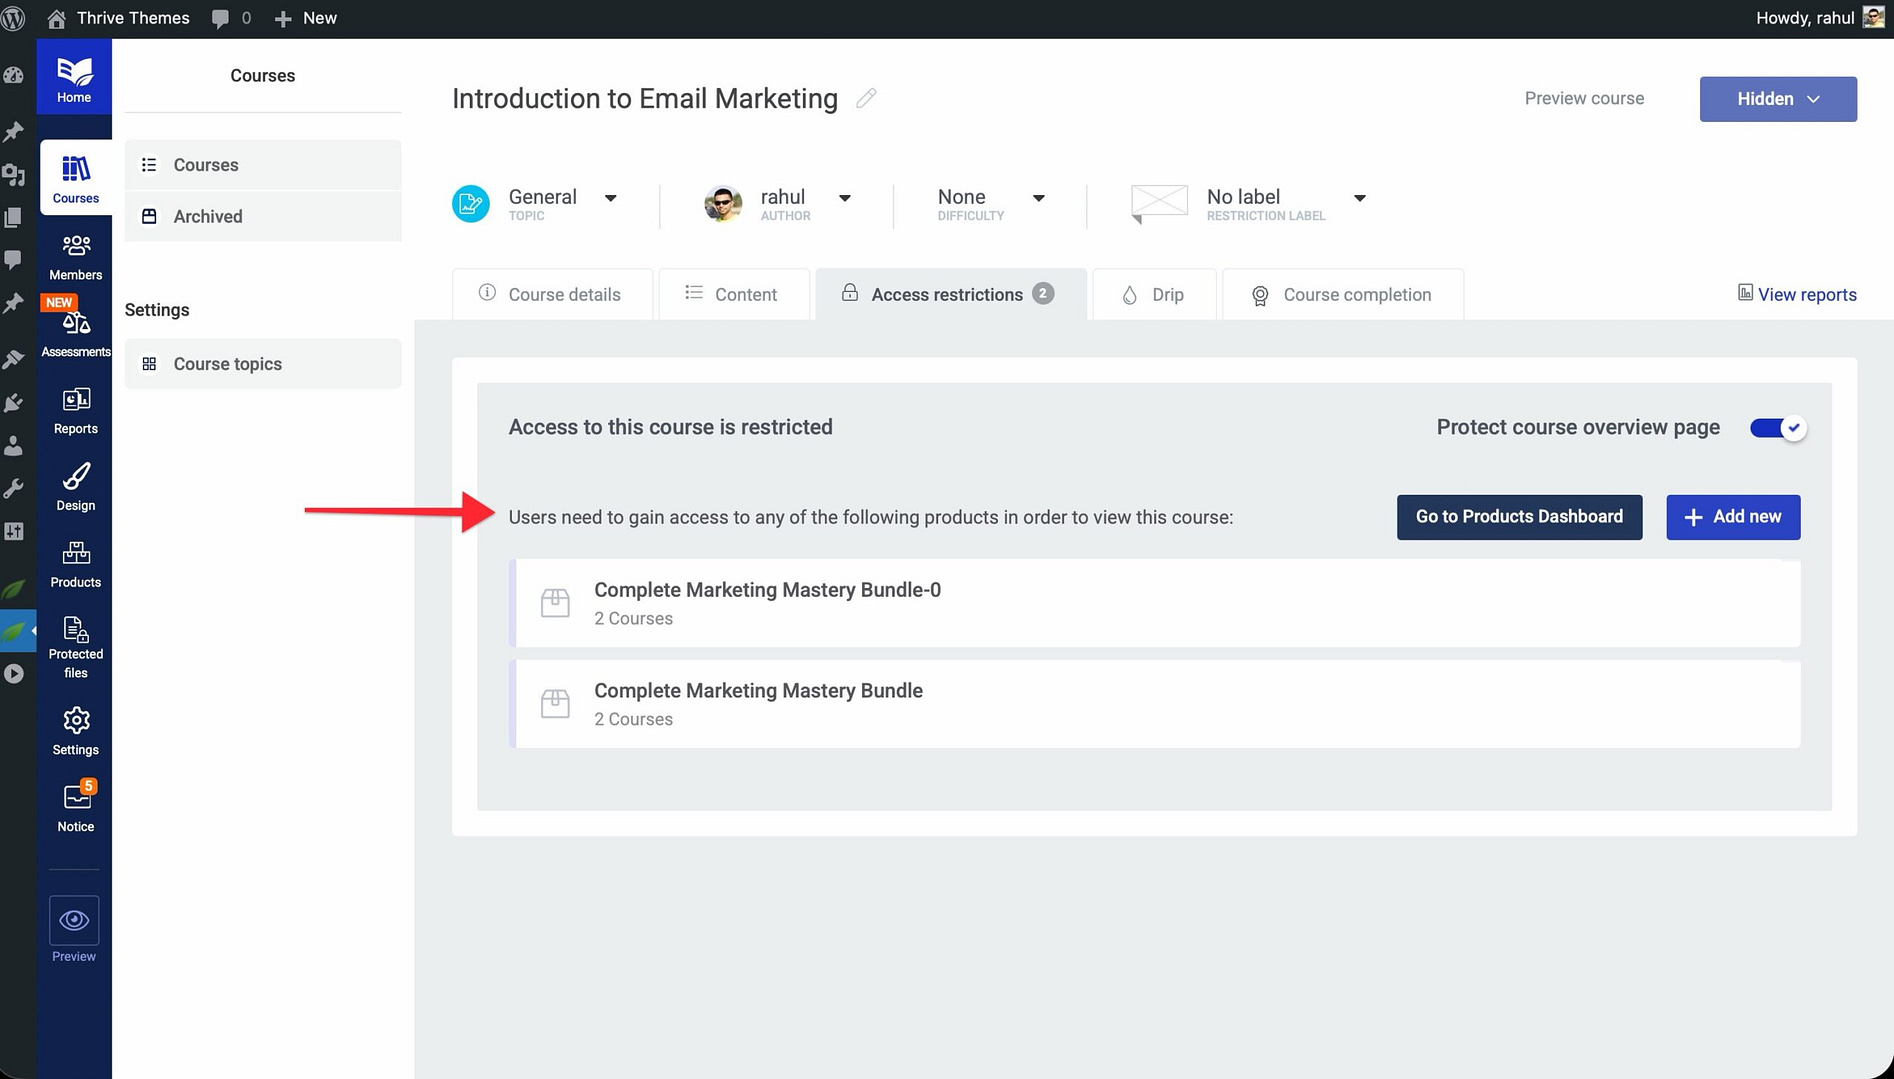
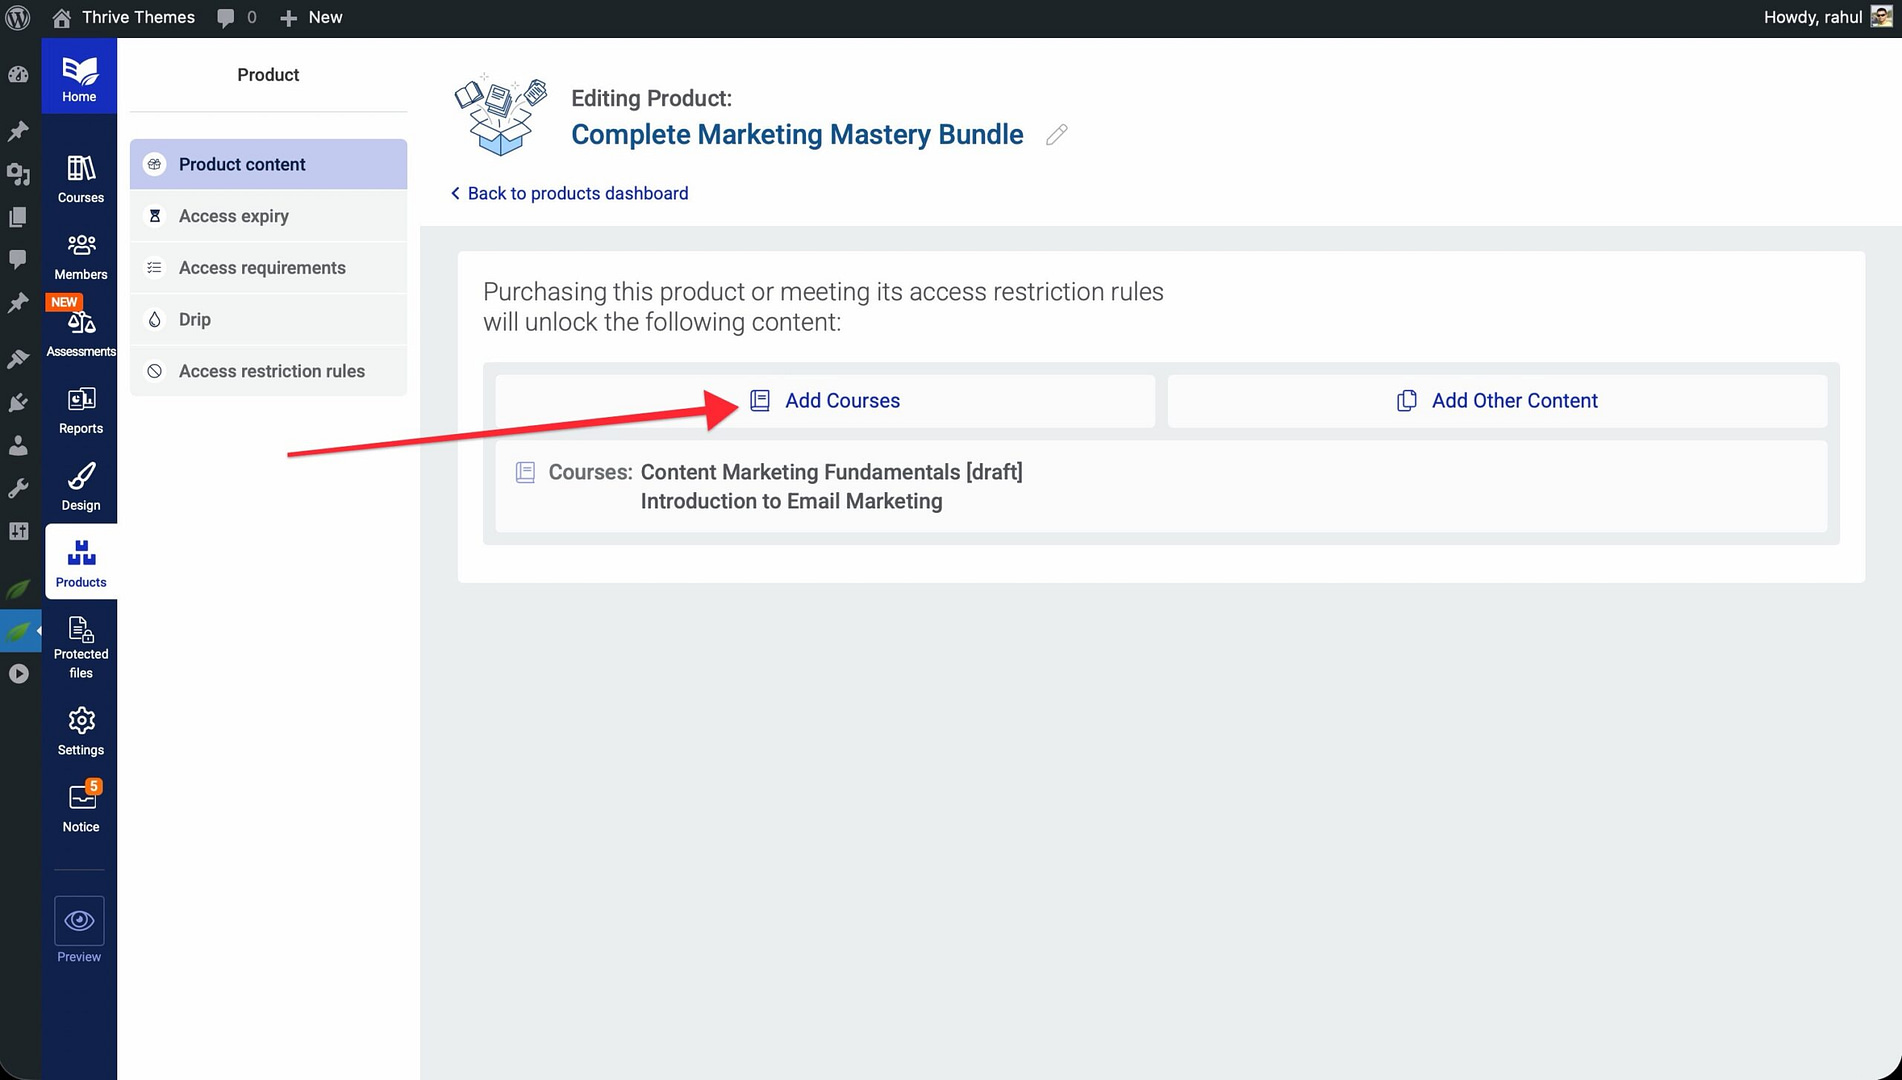
- Go to Products and create a new product (or select an existing one).
- Assign the course you want to protect to this product.
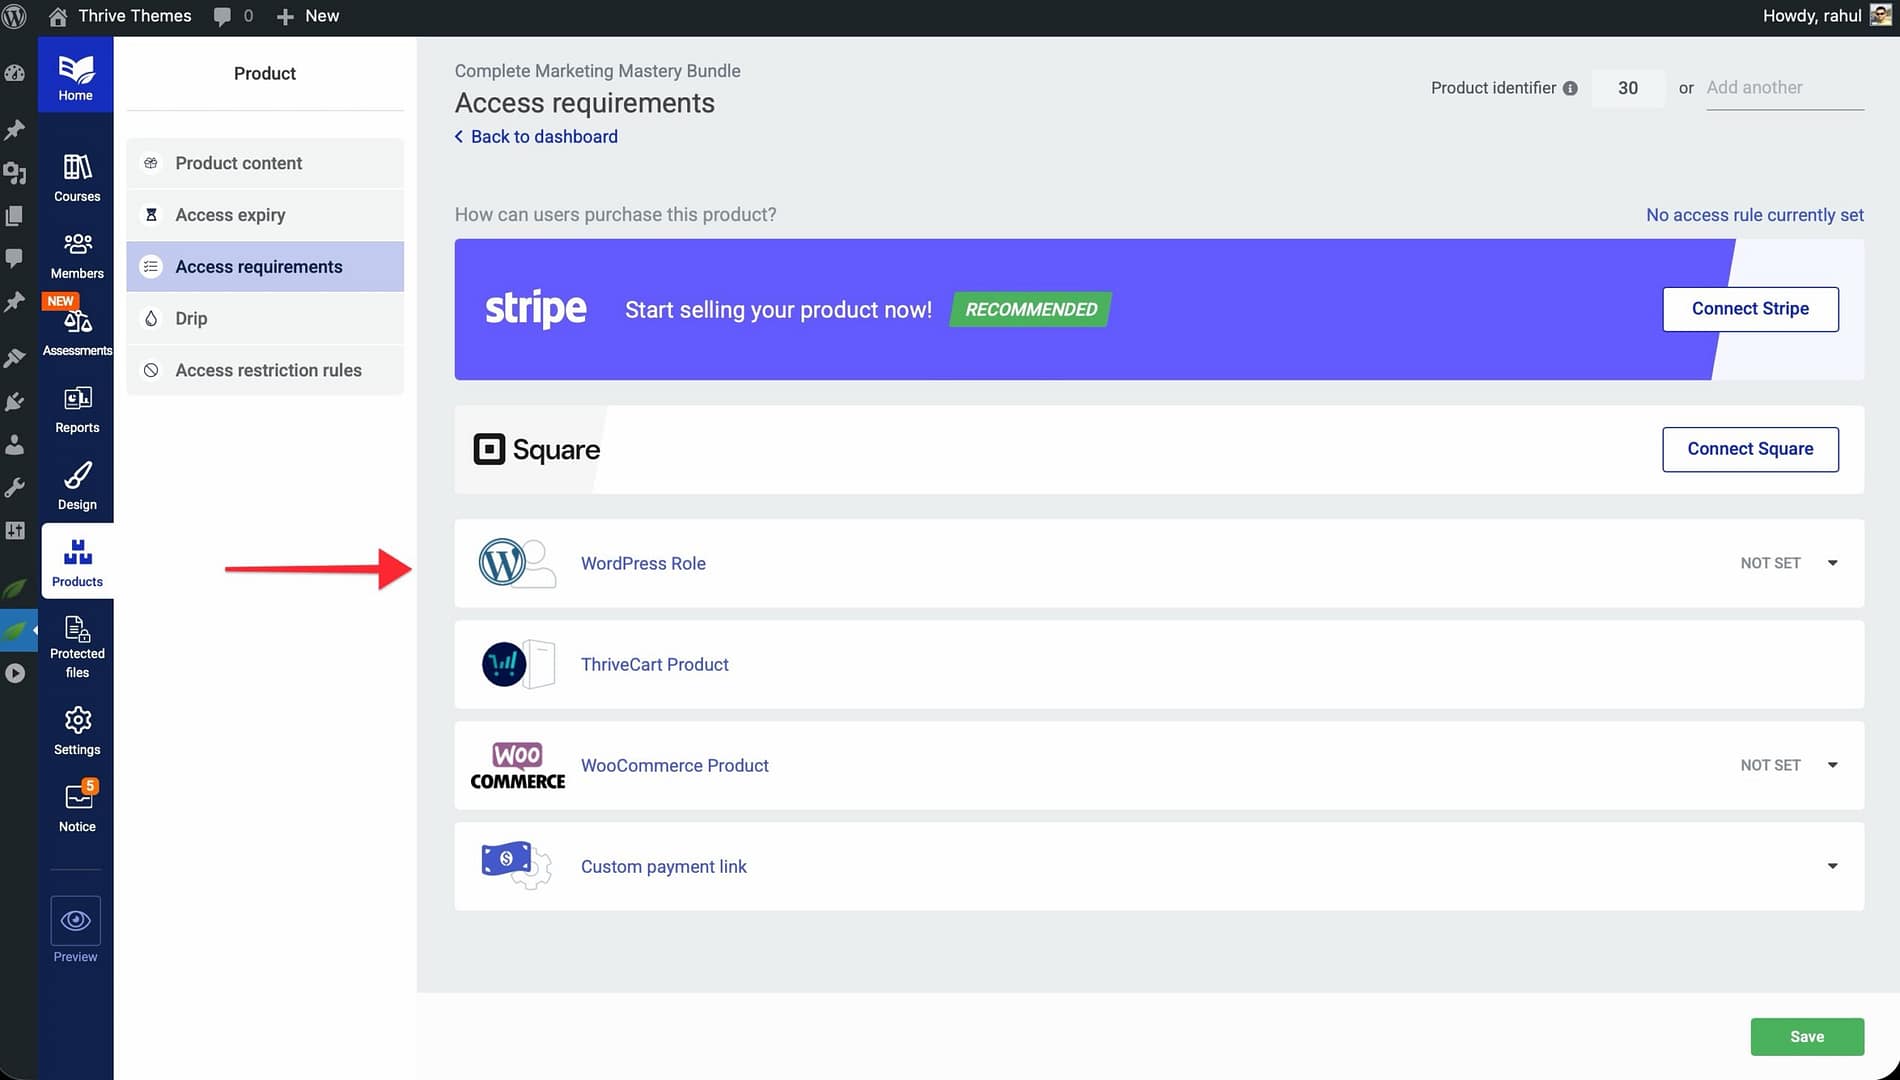
- Under the product’s Access Requirements, set the requirement to subscription or the appropriate condition for your setup.
- Open your course and mark selected introductory lessons as Free Preview so they remain accessible to everyone.
- Save your settings.
With this configuration, visitors can view your free preview lessons without restriction. When they try to access the remaining lessons, they’ll be prompted to subscribe before gaining access.
Setting Restriction Rules at the Product Level
Product-level restriction rules let you define what happens when a user who hasn’t purchased a product tries to access its protected content. These rules control the messaging, redirects, and call-to-action buttons visitors see.
To access product-level restriction rules:
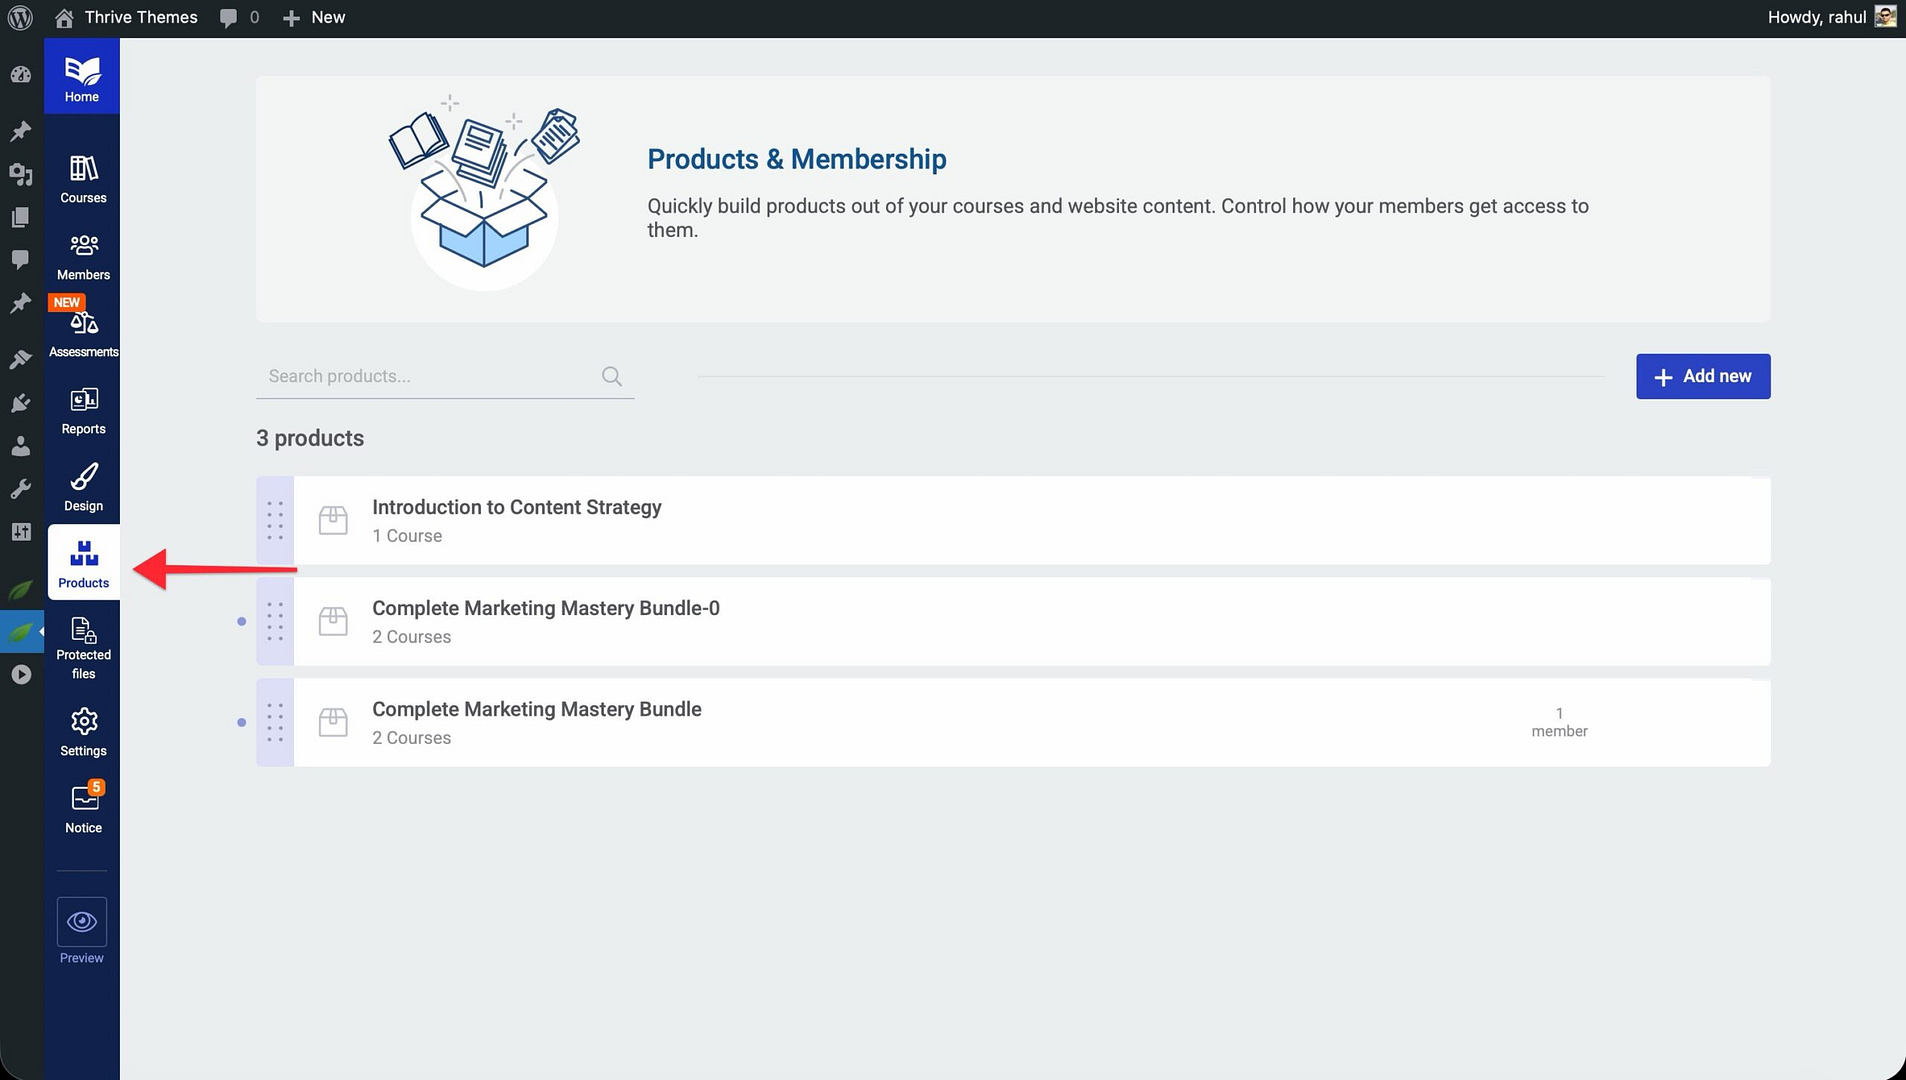
- Navigate to Thrive Dashboard > Thrive Apprentice > Products.

- Click on the product you want to configure.

- Open the Access Restriction Rules section.
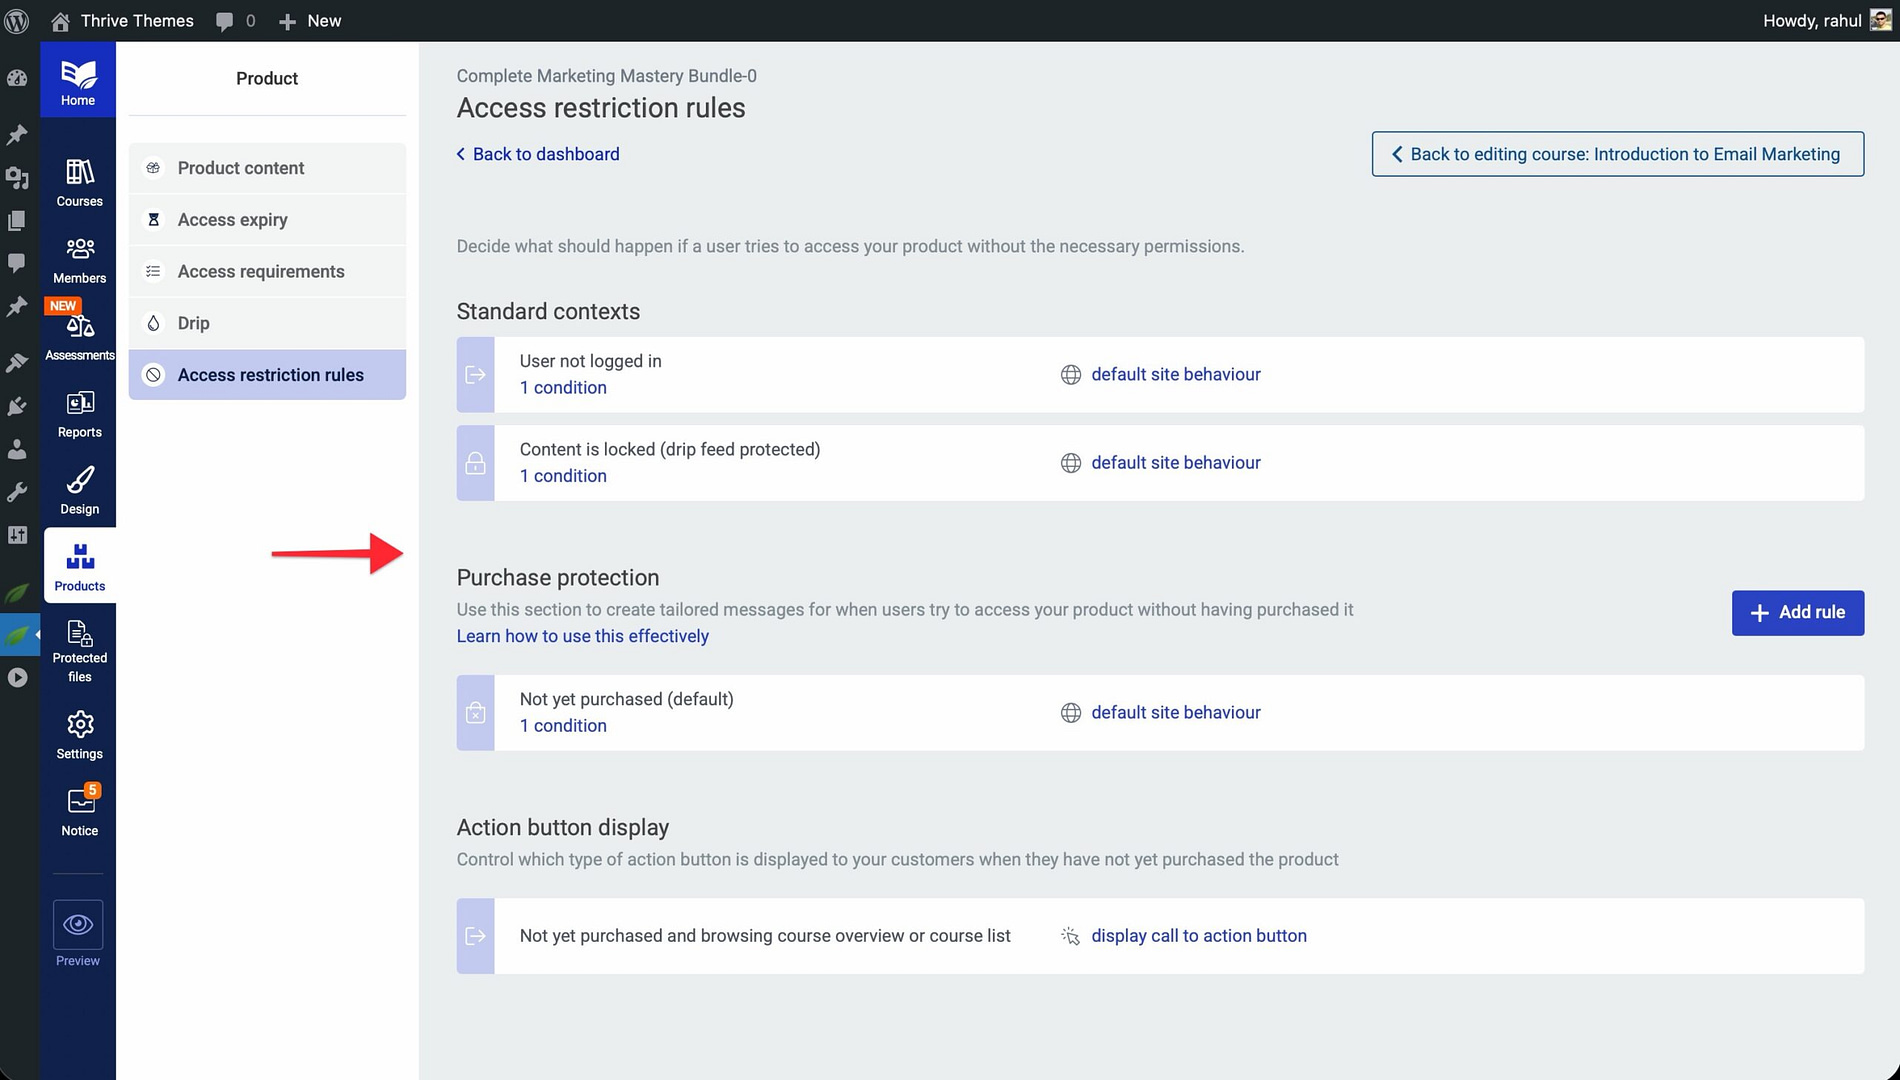
- Configure the following options:
- Standard Contexts — Define what restricted visitors see on course pages, lesson pages, and module pages.
- Purchase Protection — Set up messaging that encourages visitors to purchase the product to unlock content.
- Action Button Display — Choose whether to show a call-to-action button (such as a “Buy Now” or “Subscribe” button) and configure its destination URL.
Note: Product-level restriction rules apply to all courses assigned to that product. If you need different rules for specific courses, you can override them at the course level.
Understanding Access Rule Priority with Multiple Products
When a single course is assigned to more than one product, each with its own access rules, Thrive Apprentice uses a priority system to determine which restriction applies. Understanding this hierarchy is essential to avoid unexpected behavior.
The priority order works as follows:
- Course-level overrides — If you’ve set specific restriction rules directly on a course, those take the highest priority.
- Product-level rules — If no course-level override exists, the rules of the product that the visitor is most likely trying to access apply.
- Global default rules — If neither course-level nor product-level rules are configured, Thrive Apprentice falls back to the global access restriction defaults set in your general settings.
Important: When a course belongs to multiple products, Thrive Apprentice evaluates the visitor’s context—such as the referral link or the page they came from—to determine which product’s rules to display. If the context is ambiguous, the first matching product’s rules take effect.
Tip: To keep things simple, avoid assigning the same course to products with conflicting restriction rules. If you must, test the visitor experience from each entry point to ensure the correct messaging appears.
Using Dynamic Access Restriction Labels
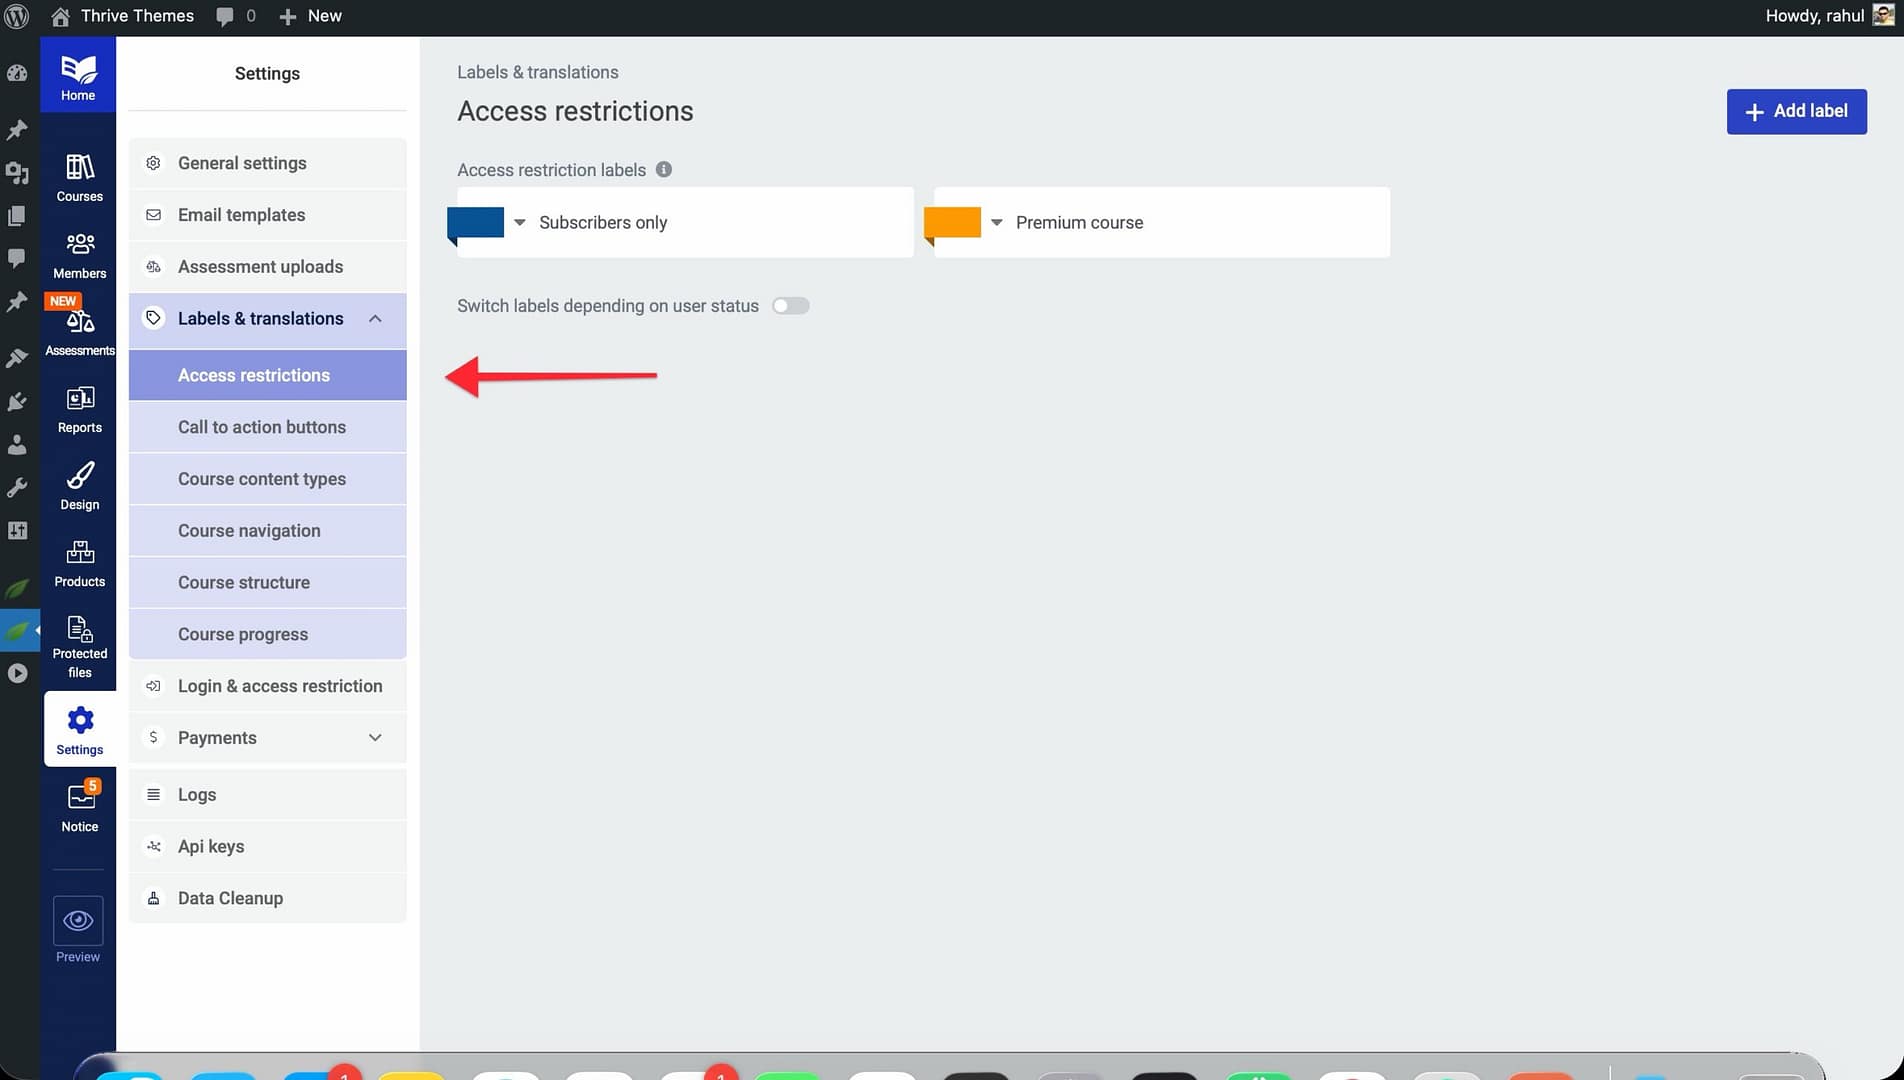
Access restriction labels are colored badges that appear on your course listings to indicate access status. By default, Thrive Apprentice includes three labels: Subscribers only, Premium course, and Restricted — each with its own color. You can create additional labels, customize their titles and colors, and assign them to individual courses.

To configure access restriction labels:
- Navigate to Thrive Dashboard > Thrive Apprentice and click Settings in the left sidebar.
- Click the Labels & Translations tab.
- Scroll down to the Access restrictions section. Here you can create new labels, edit existing ones, and set a title and color for each.
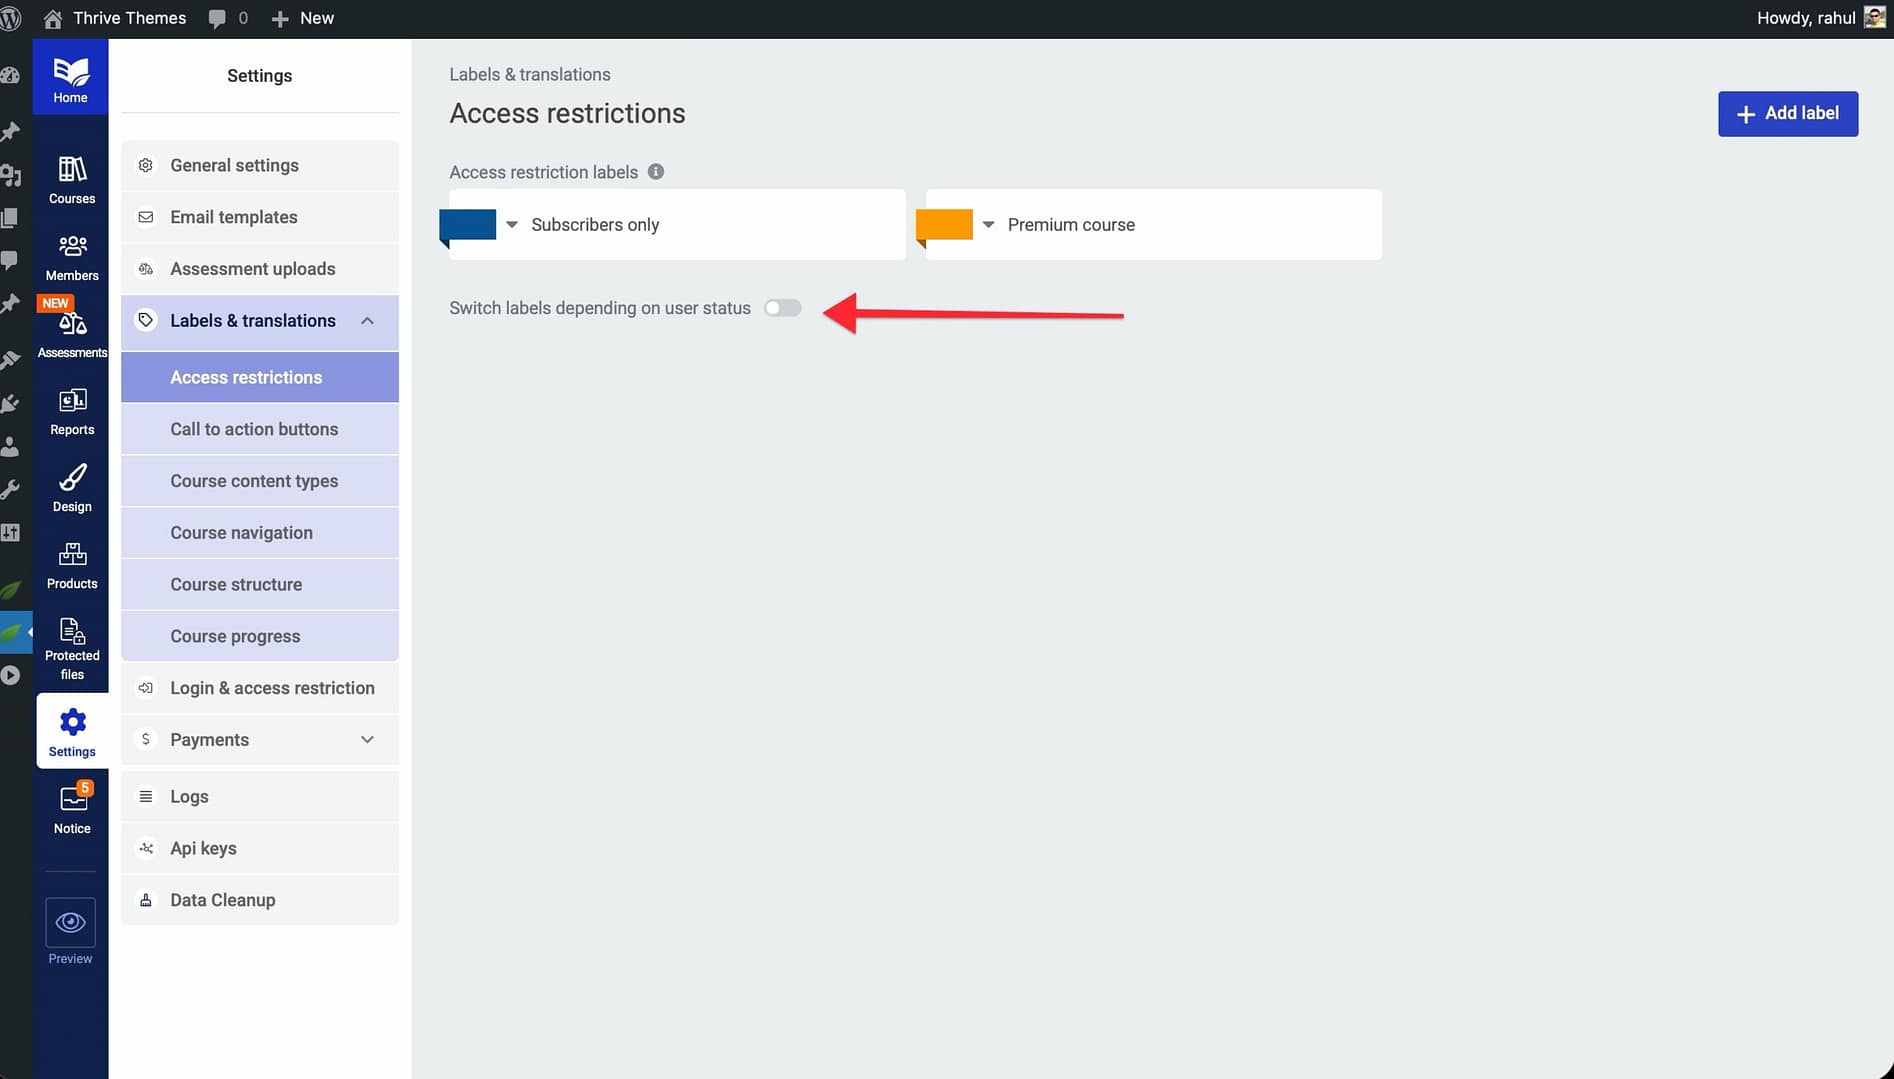
- To make labels change automatically based on a user’s progress, enable the Switch labels depending on user status toggle. When enabled, the label on a course card updates dynamically based on five user states:
- Not started yet — The user has access but hasn’t begun the course.
- In progress — The user has started but not finished the course.
- Course complete! — The user has finished the course.
- Expires in [days] days — The user’s access is about to expire.
- Expired — The user’s access has expired.
When the switch toggle is off, each course simply displays whatever label you assigned to it. When it’s on, logged-in users with access see a progress-based label instead of the base label, while visitors without access still see the original assigned label.
Overriding Restrictions for Non-Logged-In Users
In some cases, you may want to allow non-logged-in visitors to access specific lessons even when the rest of the course is restricted. This is useful for offering free previews, sample lessons, or promotional content without requiring a login.
To override restrictions for non-logged-in users:
- Navigate to Thrive Dashboard > Thrive Apprentice.
- Open the course that contains the lesson you want to make publicly accessible.
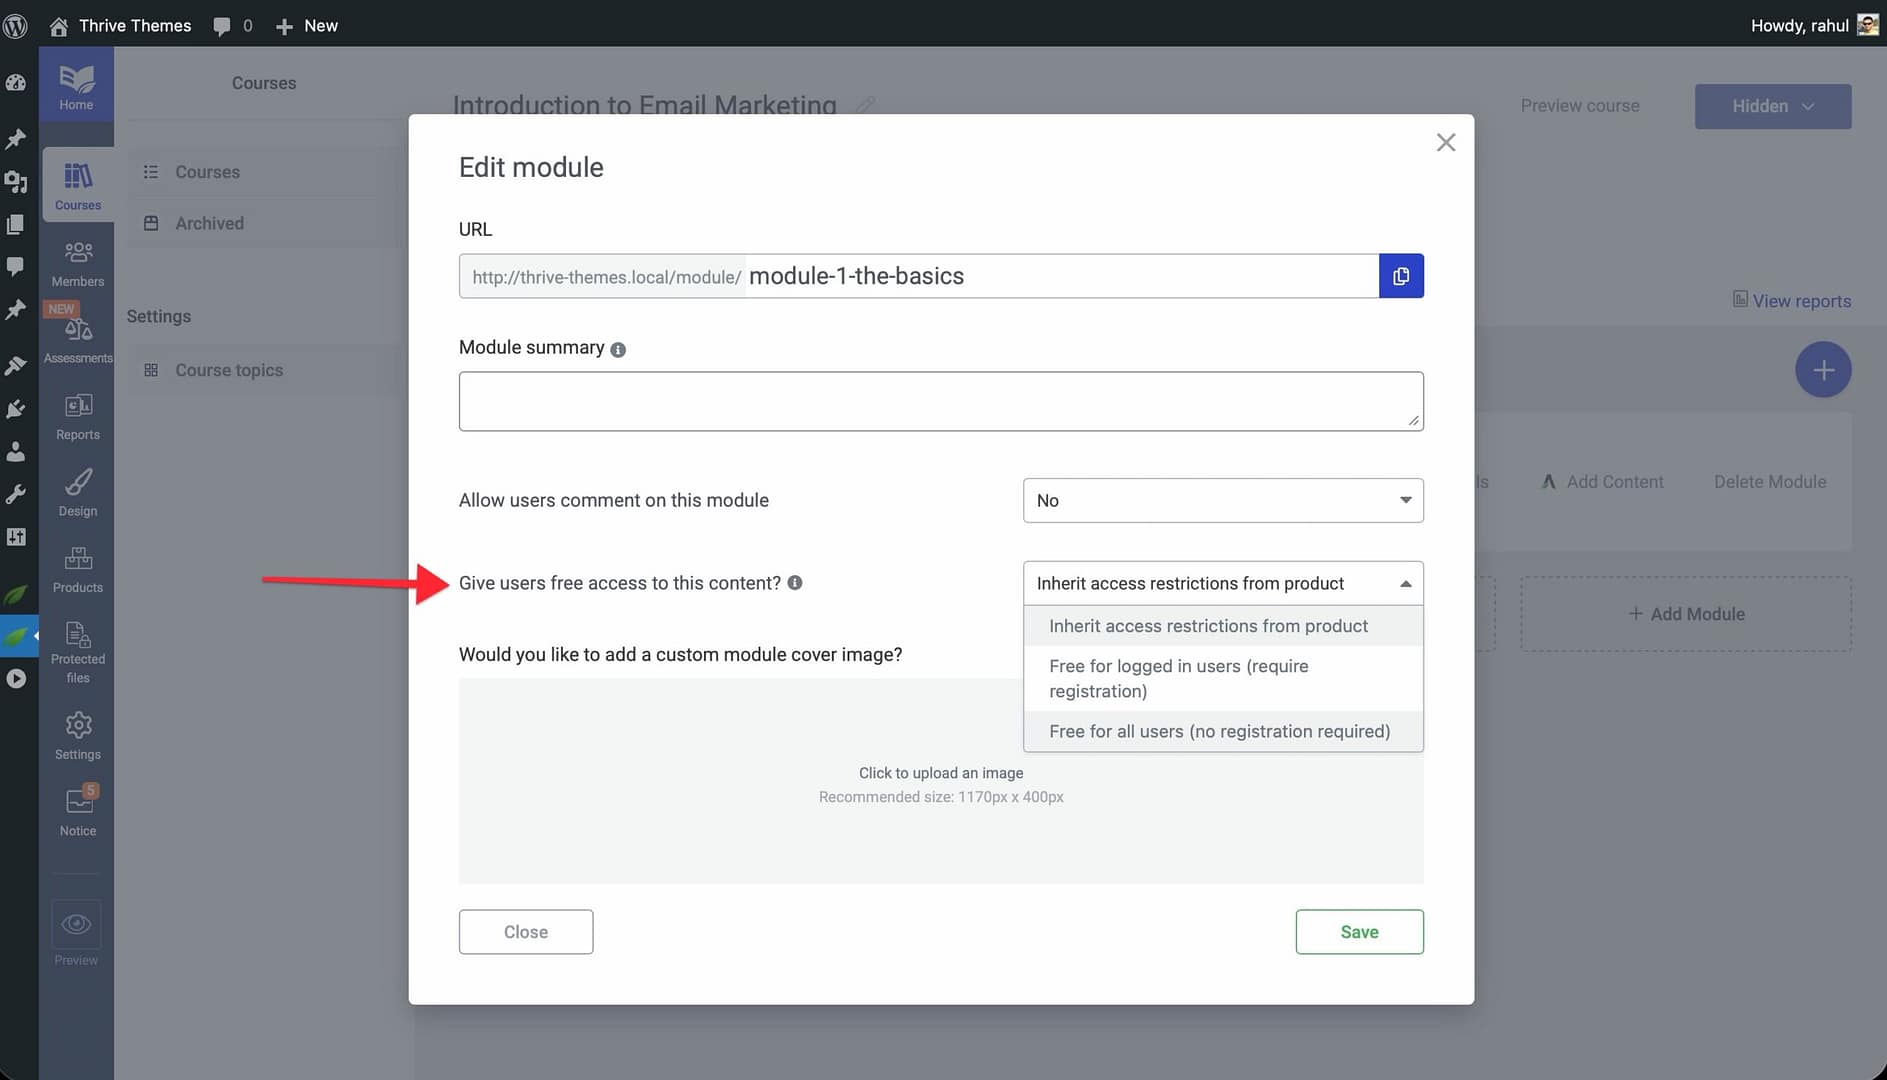
- Click on the specific lesson you want to override.
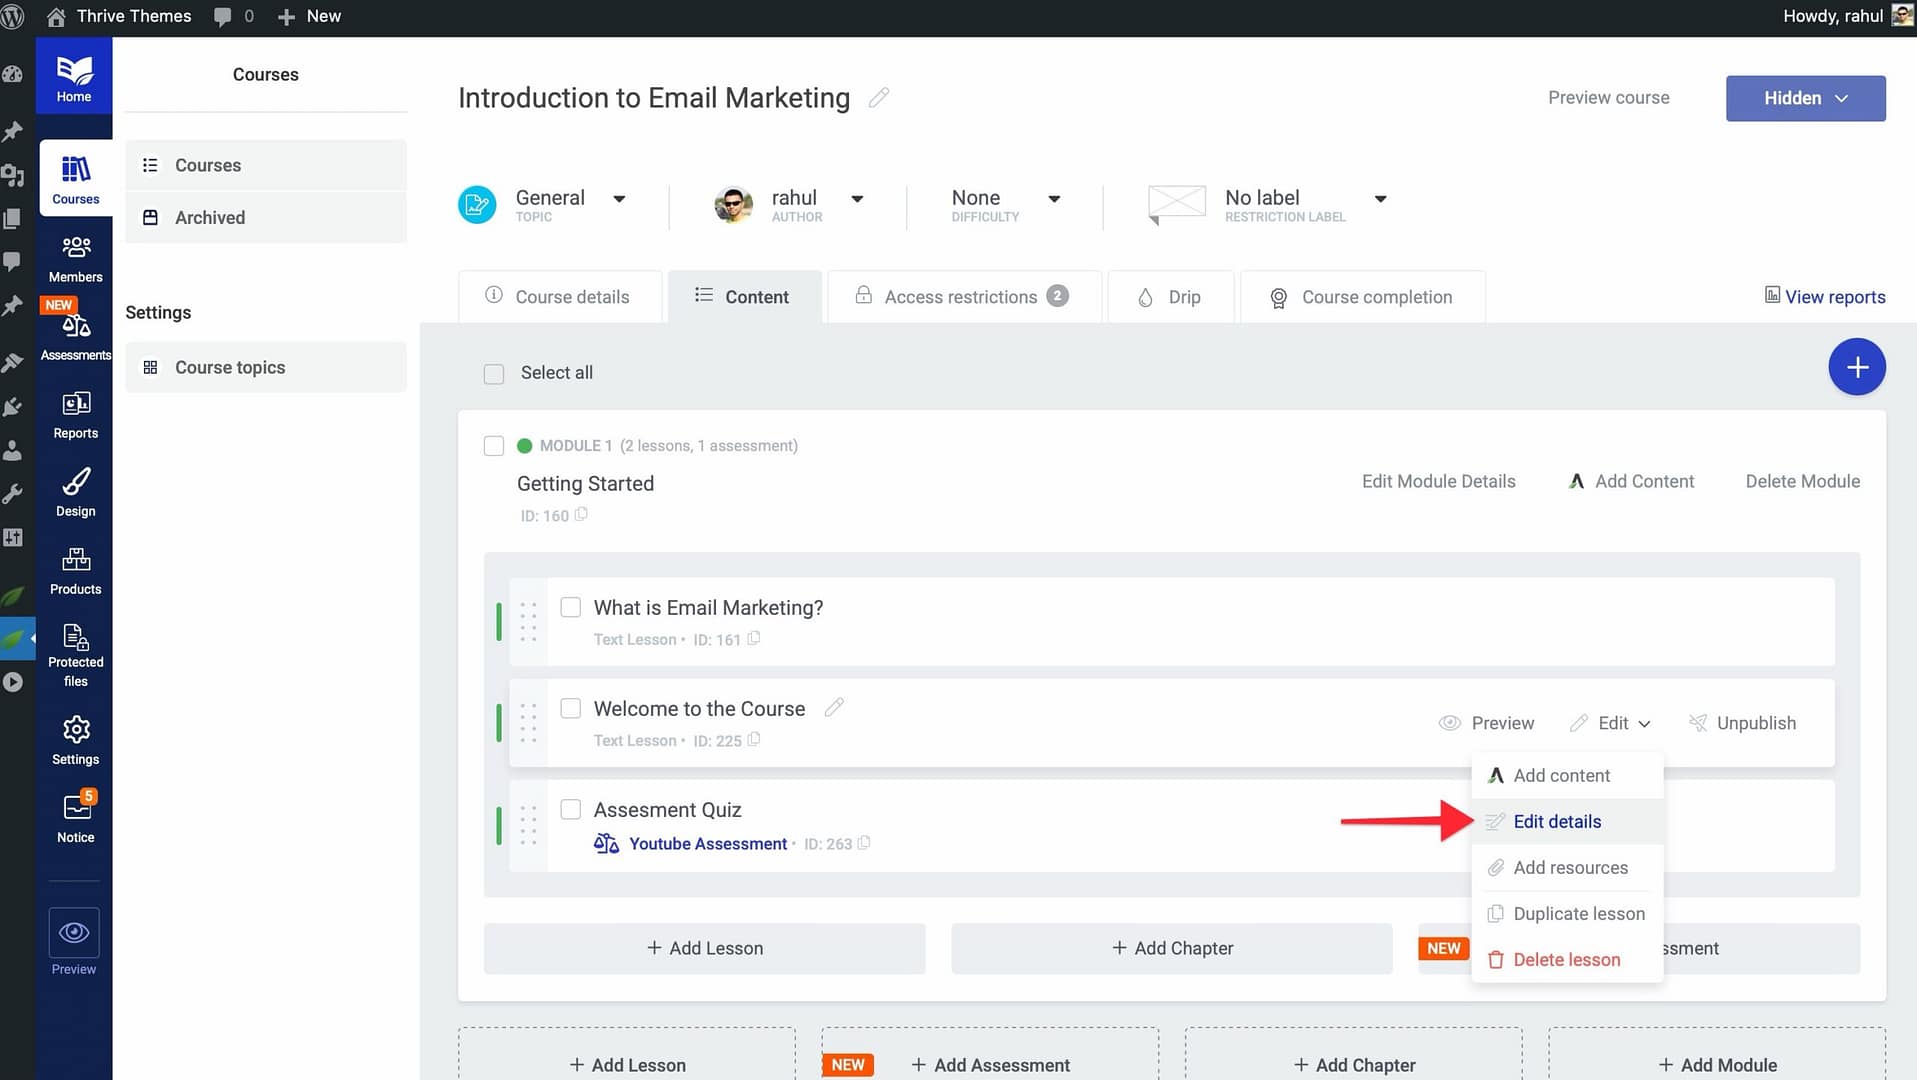
- In the lesson settings, enable the Free Preview or Public Access toggle.
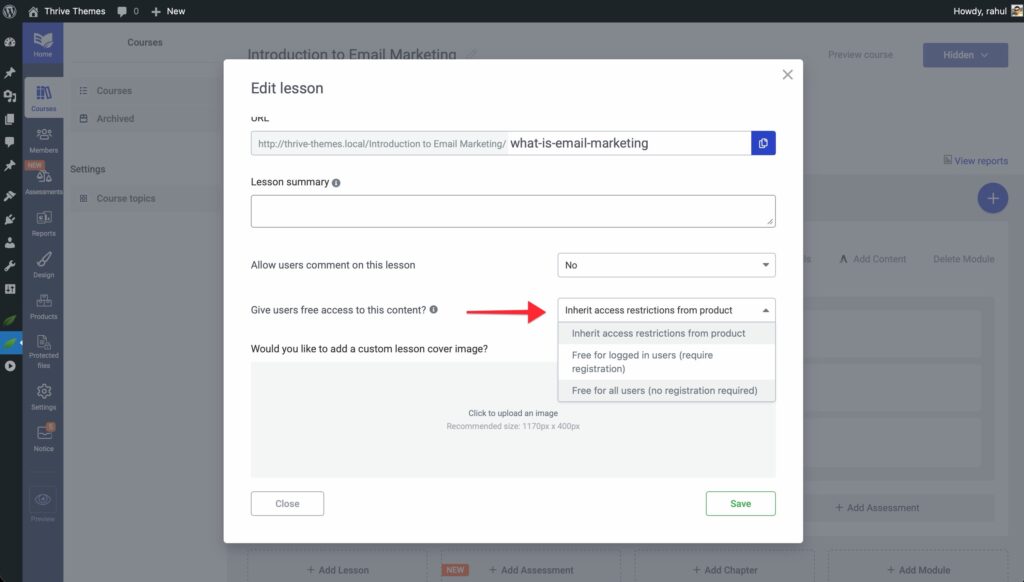
- Save your changes.
When this override is active, the selected lesson bypasses all product-level and course-level restrictions. Non-logged-in visitors can view it freely, while the remaining lessons stay protected.
Advanced Access Control Scenarios
Thrive Apprentice supports a hierarchical three-tier access control system that gives you granular control over your content:
- Global settings — Default rules that apply to all content unless overridden at a lower level.
- Course-level controls — Rules that apply to a specific course and all its lessons, overriding global defaults.
- Individual page restrictions — Rules that apply to a specific lesson, module, or page, overriding both global and course-level settings.
Here are some advanced scenarios you can configure:
Gating individual pages separately from courses — You can restrict specific WordPress pages or posts independently from your course content. This is helpful when you have bonus content, community pages, or resource libraries that should only be accessible to certain product owners.
Limiting dashboard visibility to authenticated users — Restrict the Thrive Apprentice student dashboard so only logged-in users can see their enrolled courses and progress. Non-logged-in visitors are redirected to a login page or a sales page instead.
Building complex rules with multiple conditions — Combine multiple access requirements to create sophisticated restriction logic. For example, require both a product purchase and an active email subscription before granting access to premium content.
Troubleshooting common access control issues — If visitors are seeing unexpected restriction messages or gaining access they shouldn’t have, check the following:
- Verify the priority order of your rules (course-level overrides product-level, which overrides global).
- Confirm that the correct product is assigned to the course.
- Test the experience as a logged-out user, a logged-in user without access, and a logged-in user with access.
- Clear any caching plugins to ensure restriction changes take effect immediately.
Conclusion
That’s it! You’ve successfully learned how to set up and manage access restrictions in Thrive Apprentice. From protecting course overview pages and creating subscribers-only content to configuring product-level rules, understanding priority hierarchies, using dynamic labels, and handling advanced scenarios—you now have the tools to control exactly who sees your content and what experience they have.
Related Resources
- Products in Thrive Apprentice — How to Use the Products Section in Thrive Apprentice
- Access Expiry — How to Manage Product Access Expiry in Thrive Apprentice
- File Protection — How to Protect Files and Grant Access in Thrive Apprentice
- Custom Payment Links — How to Set Up Custom Payment Links in Thrive Apprentice