In this article, you’ll learn how to use the Custom Payments feature in Thrive Apprentice to connect your products to external checkout pages and third-party payment processors. This gives you the flexibility to sell courses through any payment platform while still managing access within Thrive Apprentice.
What Are Custom Payment Links?
Custom payment links let you connect a Thrive Apprentice product to an external checkout or sales page instead of using a built-in payment integration. When a visitor clicks the “Buy” or “Enroll” button on a restricted course, they’re directed to your external checkout page where the transaction is processed by a third-party service.
After a successful payment, the third-party service communicates with Thrive Apprentice (typically through a webhook or integration) to grant the student access to the product.
When to Use Custom Payment Links
Custom payment links are the right choice when:
- You use a third-party payment processor — Services like ThriveCart, SamCart, Paddle, or any checkout platform that isn’t natively integrated with Thrive Apprentice.
- You have a dedicated sales page — You’ve built a standalone sales page (on your site or elsewhere) and want to direct buyers there instead of a generic checkout.
- You sell through an external marketplace — Your courses are listed on platforms that handle their own payment processing.
- You need a custom checkout flow — Your sales funnel includes upsells, order bumps, or multi-step checkout processes handled outside of WordPress.
Setting Up Custom Payment Links
To configure a custom payment link on a product:
- Navigate to Thrive Dashboard > Thrive Apprentice > Products.
- Click on the product you want to connect to an external checkout.
- Open the Access requirements tab.
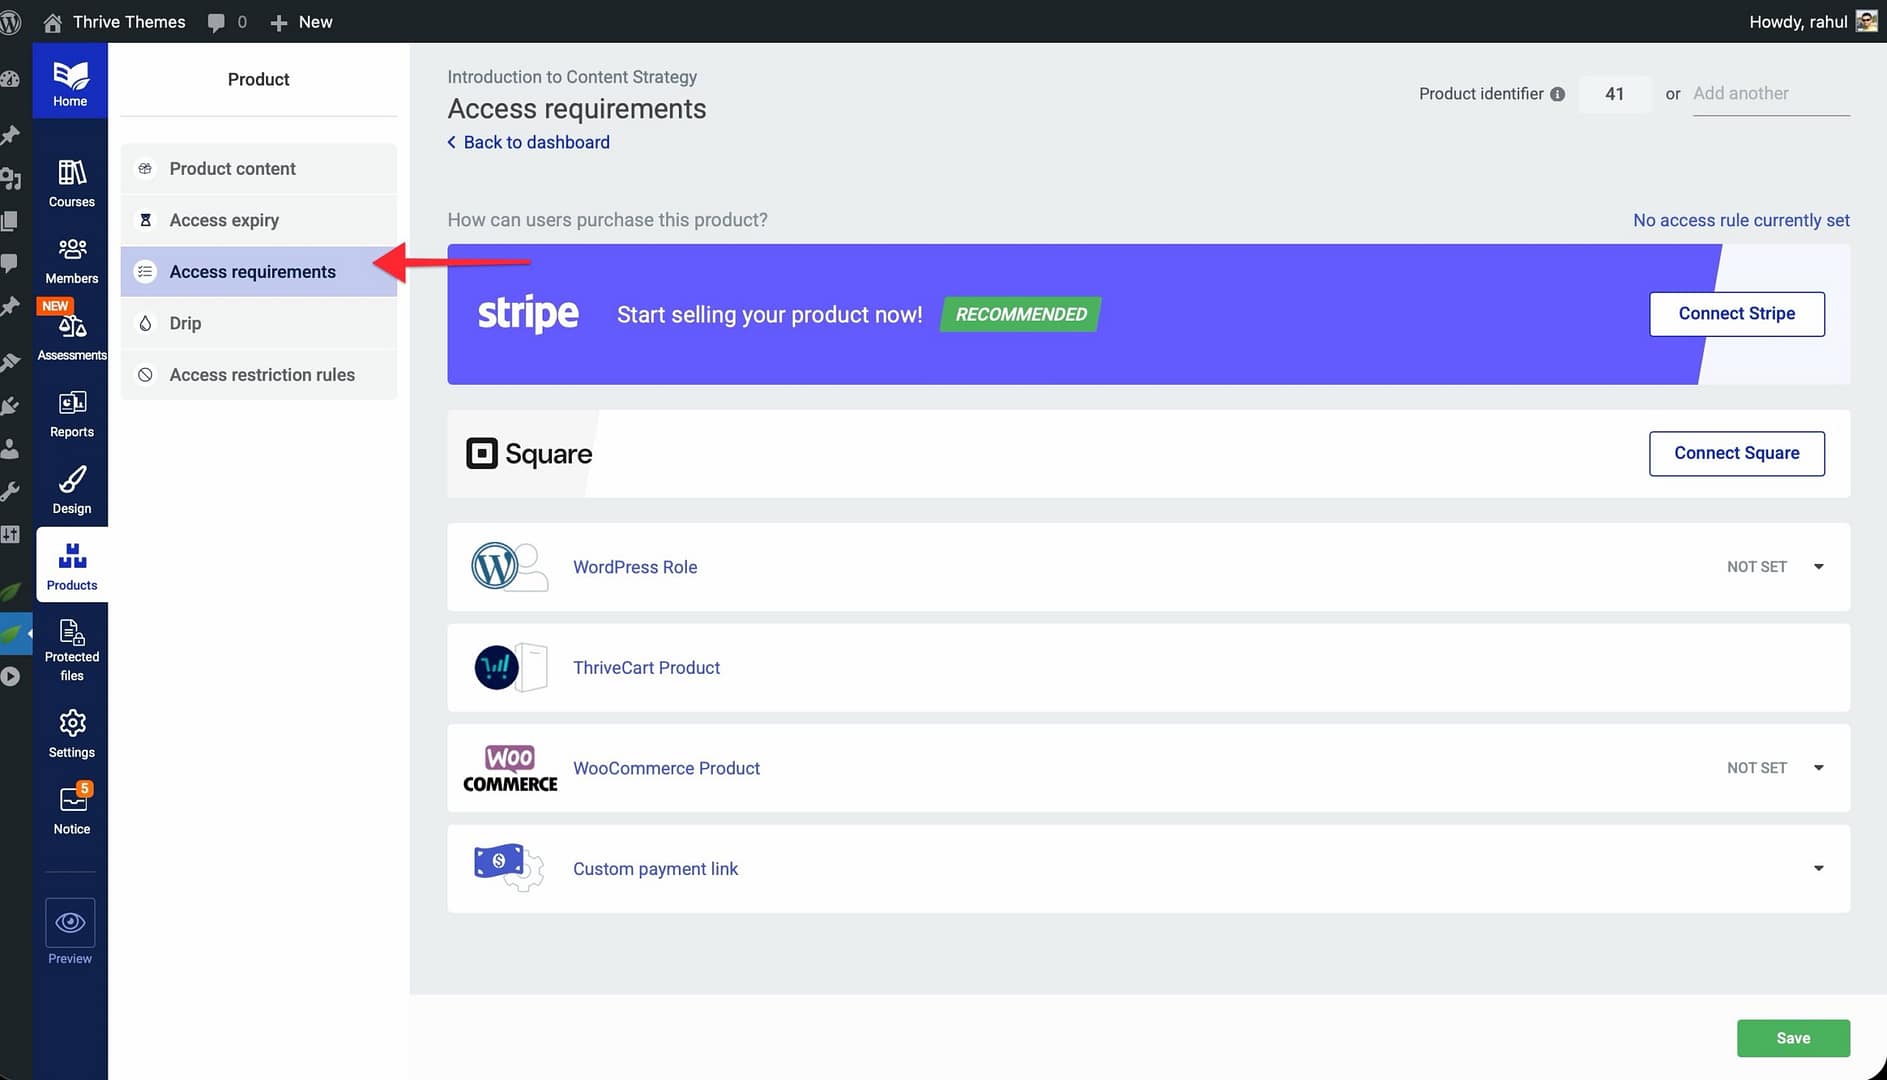
- Under “How can users purchase this product?”, find the Custom payment link integration card and click on it to expand the section.
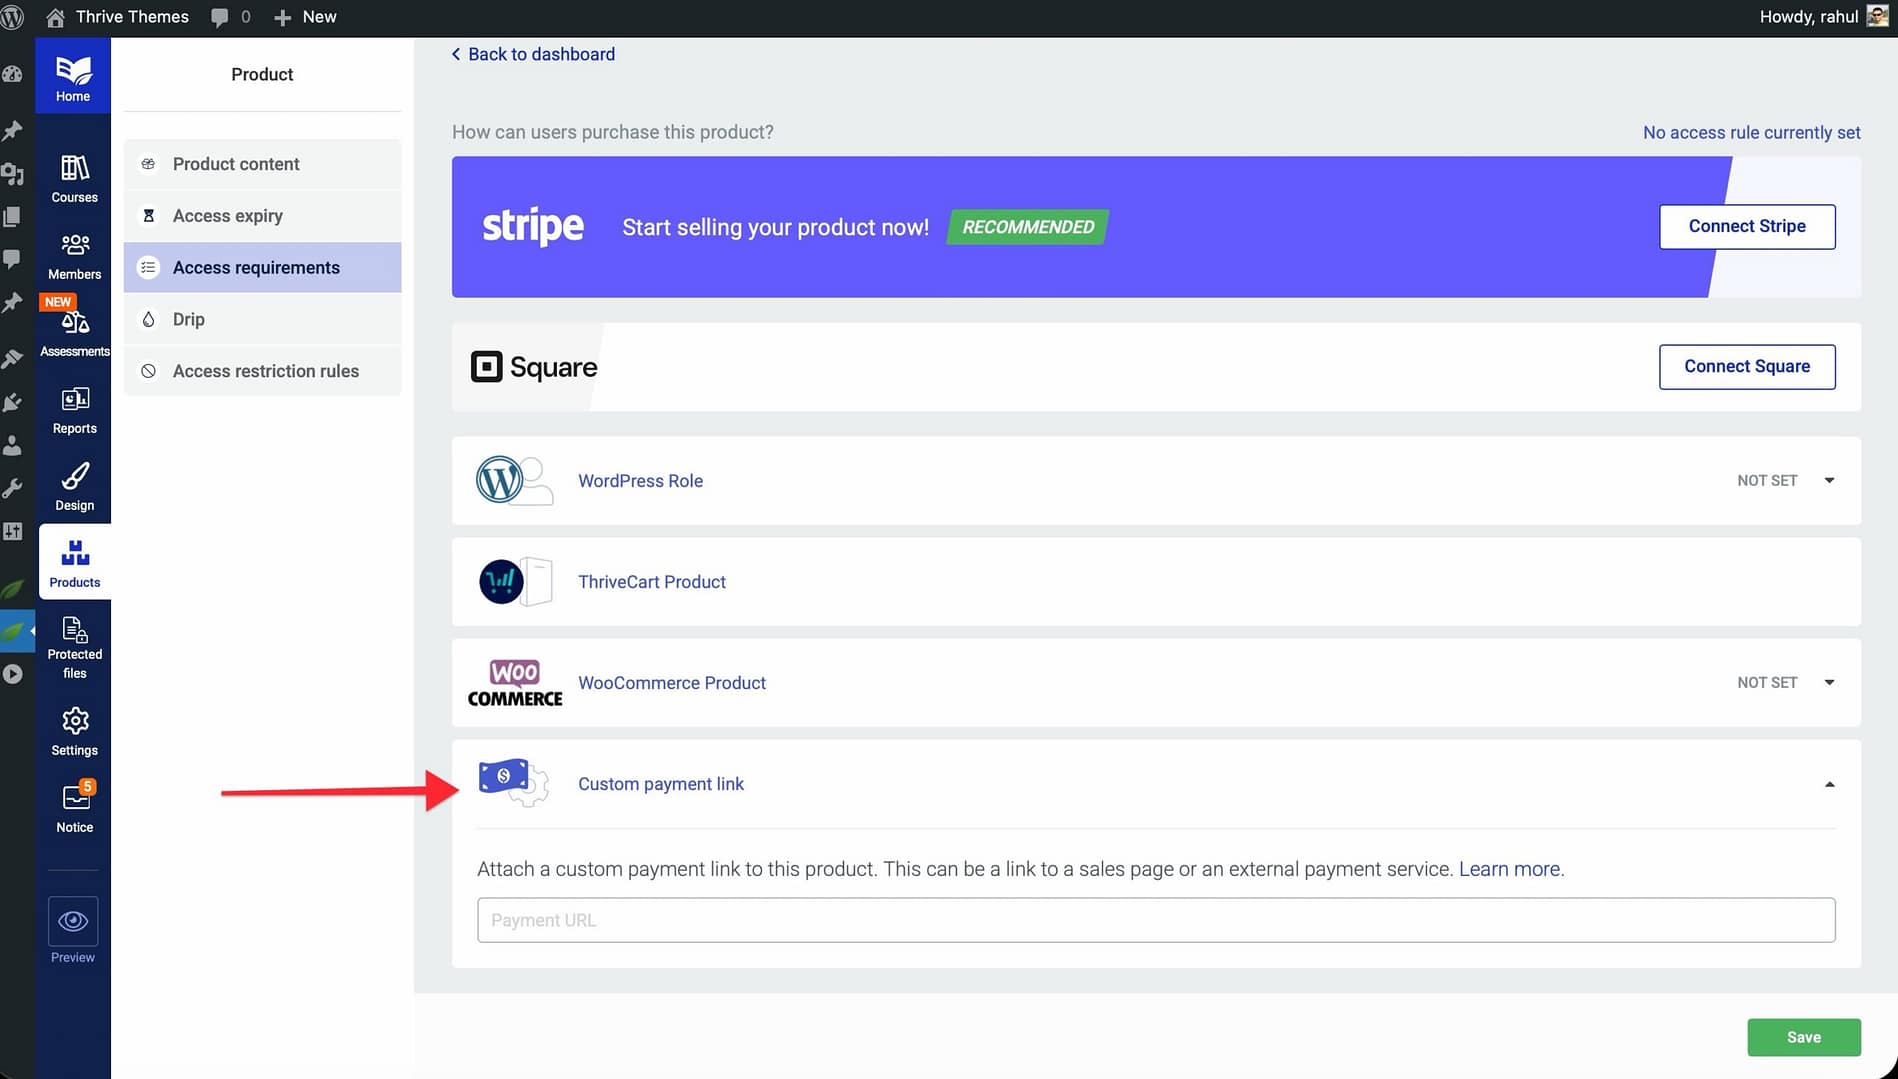
- In the Payment URL field, enter the full URL of your external checkout page or sales page.
- Click Save to apply.
Once saved, any call-to-action buttons associated with this product—such as “Buy Now” or “Enroll”—will direct visitors to the URL you entered.
How the Custom Payment Flow Works
When a visitor without access clicks a buy button on a course tied to this product, Thrive Apprentice redirects them to your external checkout URL. The payment and transaction are handled entirely by your third-party processor.
After a successful purchase, you need a way to tell Thrive Apprentice to grant access. This is typically done through one of the following:
- Thrive Automator — Set up an automation that listens for a webhook from your payment processor and grants the buyer access to the corresponding product.
- Zapier or a similar tool — Connect your payment processor to Thrive Apprentice through a third-party automation platform.
- Manual access — Add the student manually via the Members section in Thrive Apprentice.
Tip: If your payment processor supports webhooks, pairing them with Thrive Automator is the most reliable way to automate access granting immediately after purchase.
Using the Product Identifier
When using external payment processors or Thrive Automator workflows, you need a way for those systems to reference a specific product in Thrive Apprentice. The Product Identifier serves this purpose — it is a unique, human-readable label you assign to a product so external services can identify it.
You’ll find the Product Identifier on the same Access Requirements tab where you set up the custom payment link. It is displayed at the top of the tab with two fields side by side:
- Product ID (left field) — This is the internal numeric ID assigned automatically by WordPress. It is read-only and cannot be changed.
- Custom Identifier (right field) — This is an editable text field where you can enter your own identifier. Type a unique label (minimum 4 characters) and it will be saved automatically.
Either the numeric Product ID or your custom identifier can be used by external systems to reference this product. The custom identifier is especially useful when integrating with third-party payment providers, because it lets you use a meaningful name (like gold-membership or photography-course) instead of a numeric ID.
For example, when setting up a Thrive Automator workflow to grant access after a webhook from your payment provider, you can use the Product Identifier filter to match incoming webhook data to the correct product. This ensures that when a customer completes a purchase, Thrive Automator knows exactly which product to grant access to.
Keep in mind that each identifier must be unique across all your products — Thrive Apprentice will show an error if you try to use an identifier that is already assigned to another product.
Testing the Checkout Flow
Before going live, test the complete experience:
- Visit a restricted course page as a logged-out user.
- Click the call-to-action button (e.g., Buy Now or Enroll).
- Verify that you’re redirected to the correct external checkout page.
- Complete a test purchase using your payment processor’s test or sandbox mode.
- Confirm that product access is granted in Thrive Apprentice after the test purchase (check the Members section).
- Log in as the test student and verify that all course content is accessible.
Important: If access isn’t granted automatically after a test purchase, check your webhook or automation configuration. Make sure the product mapping between your payment processor and Thrive Apprentice is correct.
Conclusion
That’s it! You’ve successfully learned how to set up custom payment links to connect your Thrive Apprentice products to external checkout pages and third-party payment processors. This gives you full flexibility over your sales process while keeping access management centralized in Thrive Apprentice.
Related Resources
- Products — How to Use the Products Section in Thrive Apprentice
- Access Restrictions — How to Set Up Access Restrictions and Rules in Thrive Apprentice
- Access Expiry — How to Manage Product Access Expiry in Thrive Apprentice
- File Protection — How to Protect Files and Grant Access in Thrive Apprentice