In this article, you’ll learn how to configure the login and registration page for your students, and set up access restriction rules that control what happens when visitors try to view content they don’t have permission to see.
Prerequisites
- At least one course created in Thrive Apprentice.
- At least one product set up, since access restrictions are applied at the product level.
Understanding How Access Restrictions Work
Access restrictions in Thrive Apprentice operate at the product level, not at the individual course level. You create products that contain one or more courses, then control what happens when someone tries to access a product they don’t have permission to view.
The Login & Access Restriction settings page lets you configure two things:
- A login and registration page — a single page where visitors can either log into an existing account or register for a new one.
- Access restriction rules — global rules that define what happens when an unauthorized visitor tries to view restricted content. There are three visitor contexts, each with its own behavior setting.
Setting Up a Login and Registration Page
Thrive Apprentice uses a single combined login and registration page — one page that handles both logging in and signing up. Here’s how to set it up:
- Navigate to Thrive Dashboard > Thrive Apprentice.
- Click Settings in the left sidebar.

- Select Login & Access Restriction from the settings menu.

- Under Login & registration page, you’ll see a search field that reads “On what page would you like your login & registration page to be?”
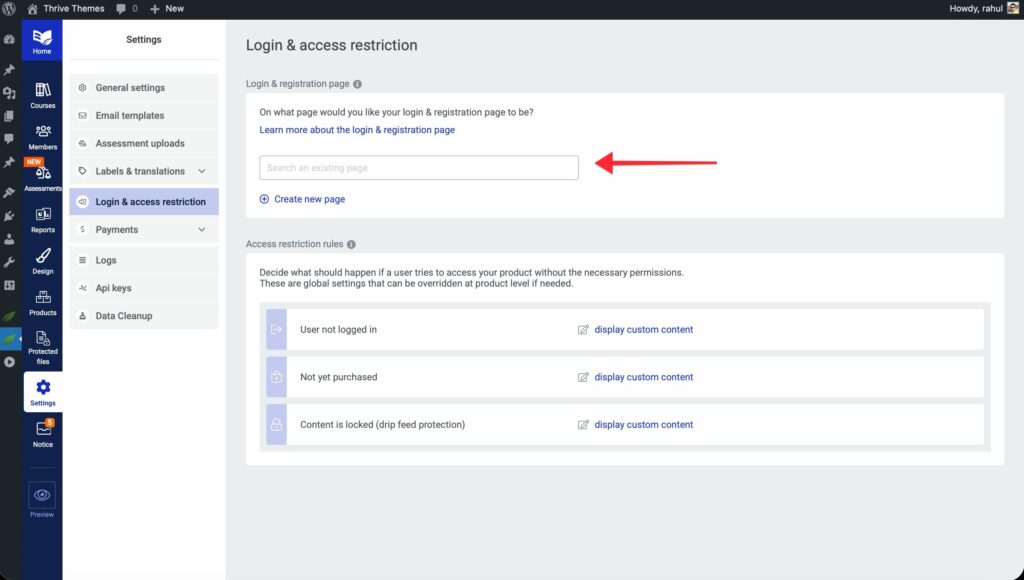
- To use an existing page, type the page name in the search field and select it from the results.

- To create a new page, click Create new page, enter a page title, and click Add page.
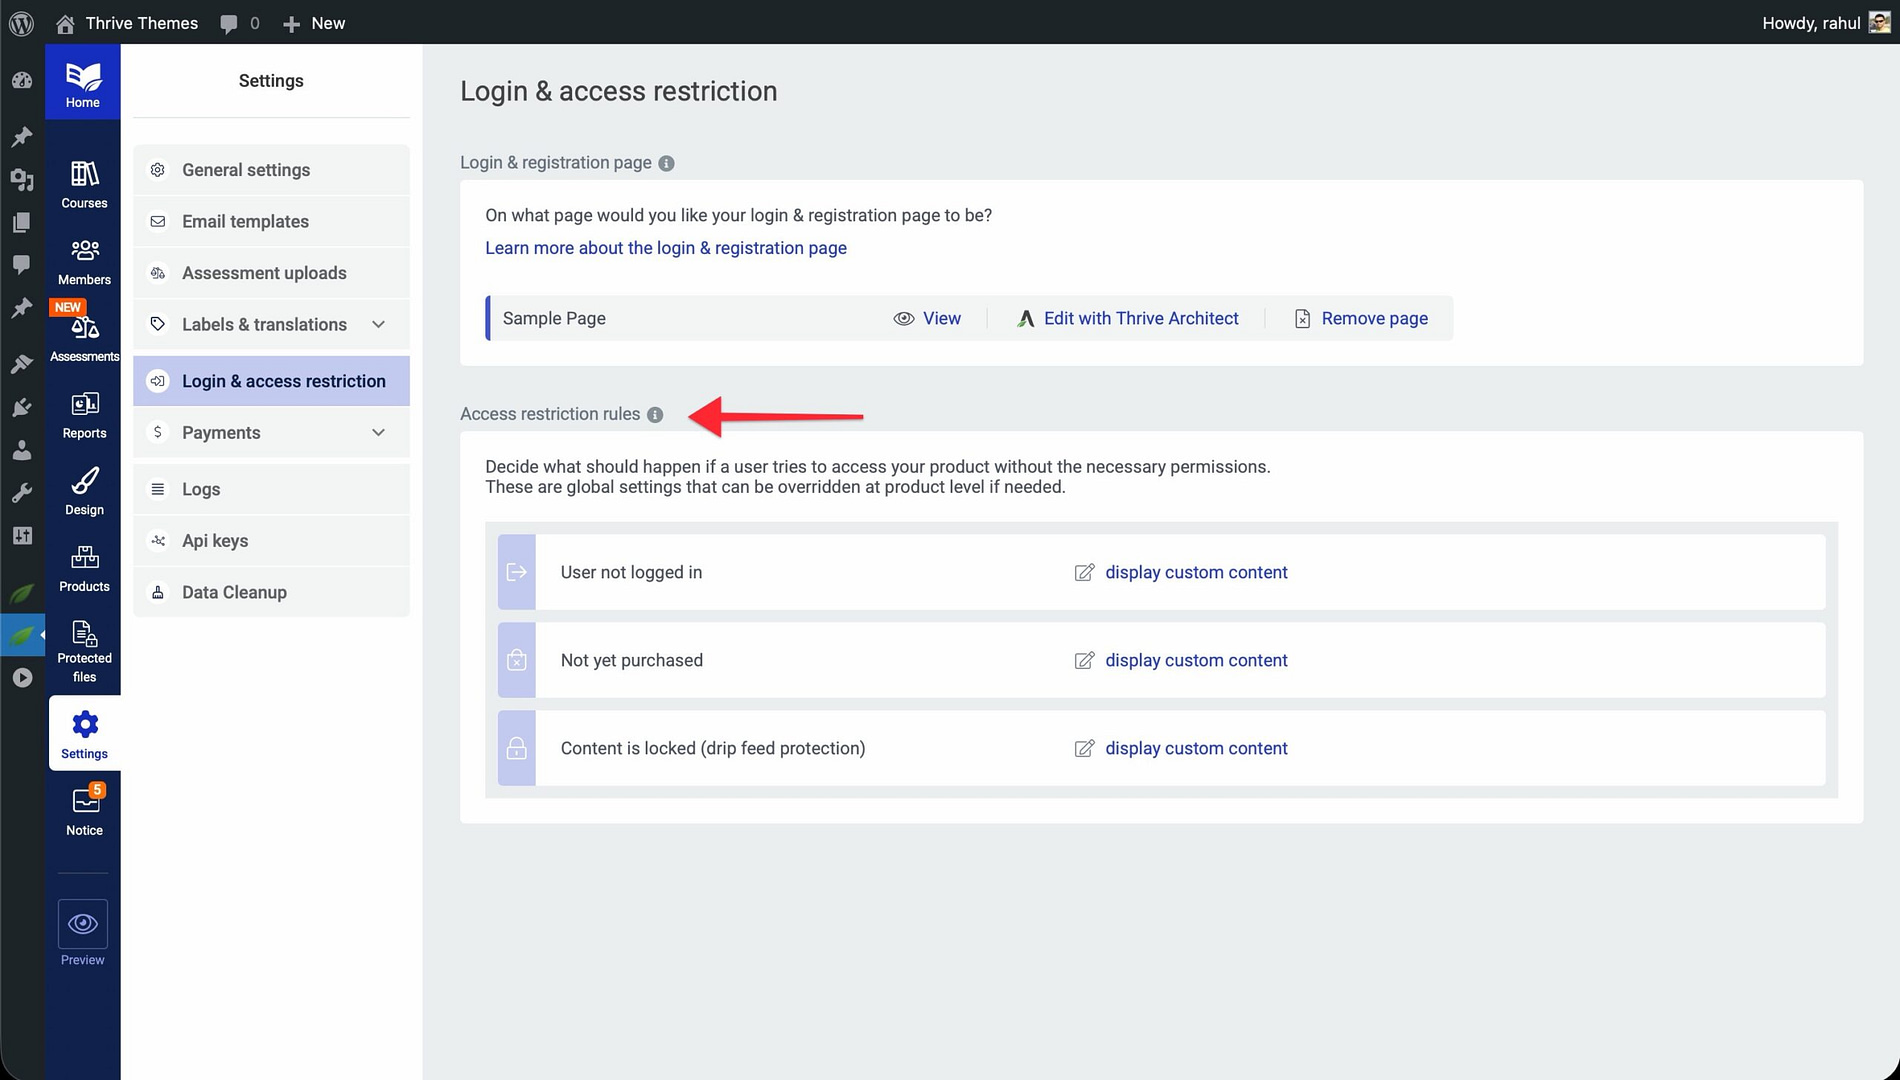
Once a page is set, you’ll see options to View the page, Edit with Thrive Architect to customize its design, or Remove page to unlink it.
Configuring Access Restriction Rules
Access restriction rules determine what happens when a visitor tries to access content they don’t have permission to view. These are global settings that can be overridden at the individual product level if needed.
Thrive Apprentice defines three visitor contexts, each with its own behavior:
User Not Logged In
This rule controls what happens when a guest visitor (someone who isn’t logged in) tries to access restricted course content.
Available behaviors:
- Display custom content — Show a custom-designed restricted content page built with Thrive Architect.
- Redirect to login & registration page — Send the visitor to your login page so they can log in or create an account.
- Redirect to custom page — Send the visitor to a specific page of your choice (e.g., a sales page or membership signup page).
Not Yet Purchased
This rule applies when a logged-in user tries to access a course within a product they haven’t purchased or been granted access to.
Available behaviors:
- Display custom content — Show a custom Thrive Architect page explaining how to get access.
- Redirect to custom page — Send the user to a specific page (e.g., a checkout or upsell page).
Content Is Locked (Drip Feed Protection)
This rule applies when a user has access to the product but tries to view content that isn’t available yet due to drip scheduling.
Available behaviors:
- Display custom content — Show a custom page explaining when the content will become available.
- Redirect to custom page — Send the user to a different page
How to Set a Restriction Rule
- Go to Settings > Login & Access Restriction.

- Scroll down to the Access restriction rules section.
- Click the behavior option next to the visitor context you want to configure (e.g., User not logged in).
- Select the desired behavior from the dropdown — Display custom content, Redirect to login & registration page, or Redirect to custom page.

- If you chose Redirect to login & registration page, you can also configure:
- Default state of form — Choose whether the page opens to the Login or Register form.
- Redirect user to content they were trying to access after login — Toggle this on to send users back to the page they originally tried to visit.
- If you chose Display custom content, you can configure:
- Page title settings — Choose to display the original page title, a custom title, or hide the title entirely.
- Edit with Thrive Architect — Click to design the restricted content page using the visual editor.
Note: These are global settings. If you need different behavior for a specific product, you can override these rules at the product level in that product’s settings.
Registering New Users
There are two primary ways to register new learners in Thrive Apprentice:
Self-Registration
When you set up a login and registration page (as described above), visitors can sign up directly from that page. The combined login/registration form handles both returning and new users. After registering, new users receive an email with their account credentials and can immediately access any courses they’ve been granted through free products or purchased access.
Manually Granting Access
As an administrator, you can manually add users and grant them access to specific products:
- Go to the Members section in Thrive Apprentice.

- Locate an existing WordPress user or add a new one.
- Click Edit access rights to open the access management modal.

- Select the products you want to grant them access to.
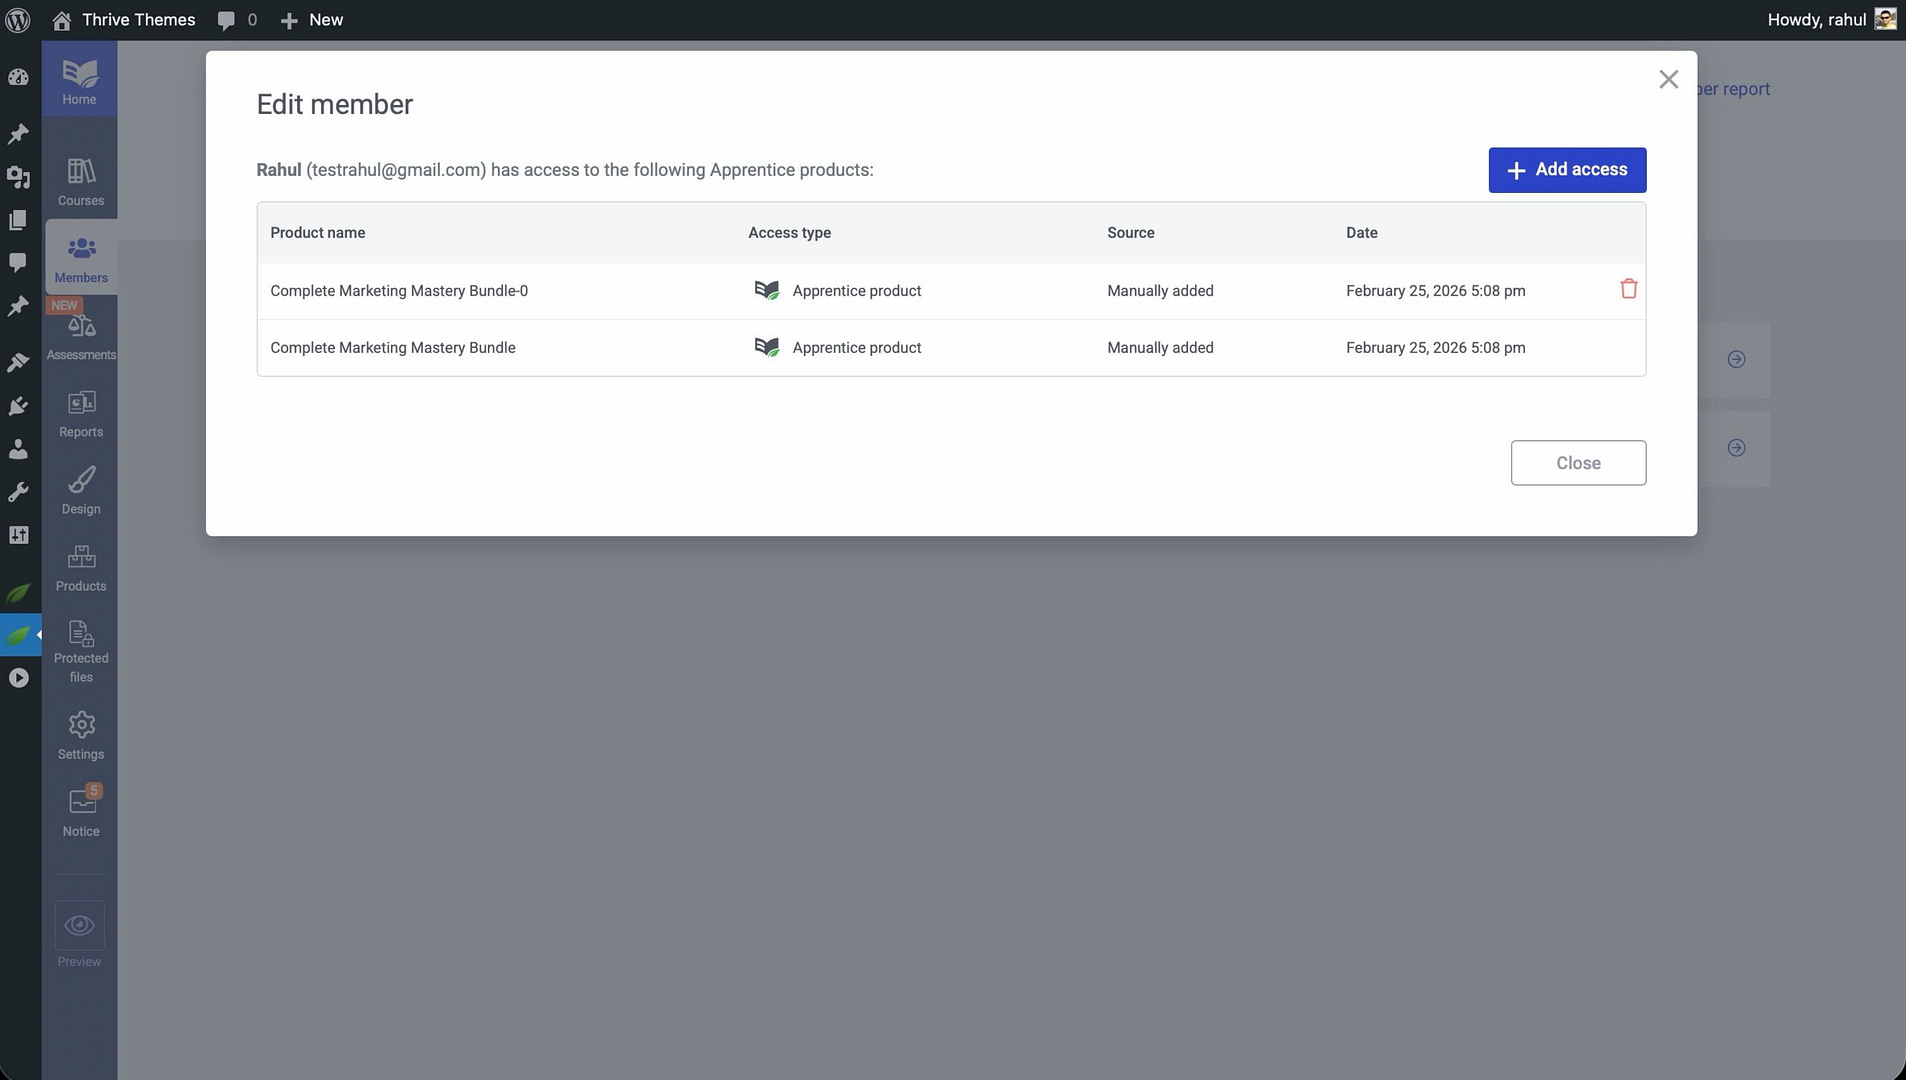
- Save the changes. The user now has access to all courses within those products.
Conclusion
That’s it! You’ve set up a login and registration page and configured access restriction rules for your Thrive Apprentice courses. With these settings in place, you control exactly what visitors see when they encounter restricted content—whether that’s a custom-designed page, a redirect to your login form, or a redirect to a sales page.
Related Resources
- Settings overview — How to Navigate and Configure Thrive Apprentice Settings
- Member management — How to Manage Members in Thrive Apprentice
- Course management — How to Manage Course Status and Bulk Actions