In this article, you’ll learn how to implement advanced drip scheduling scenarios in Thrive Apprentice—including cohort-based classes, weekday-only dripping, first-Monday-of-the-month starts, decoupled drip schedules, excluding lessons from drip, hiding locked lessons, and unlocking content at varying time intervals.
Creating Cohort-Based Classes
Cohort-based classes let groups of students progress through your course together on the same timeline, creating shared deadlines and a sense of community. You can run multiple cohorts simultaneously—for example, one group starting in March and another in June—with each cohort following its own synchronized schedule.
- Navigate to Thrive Dashboard > Thrive Apprentice and open your course.
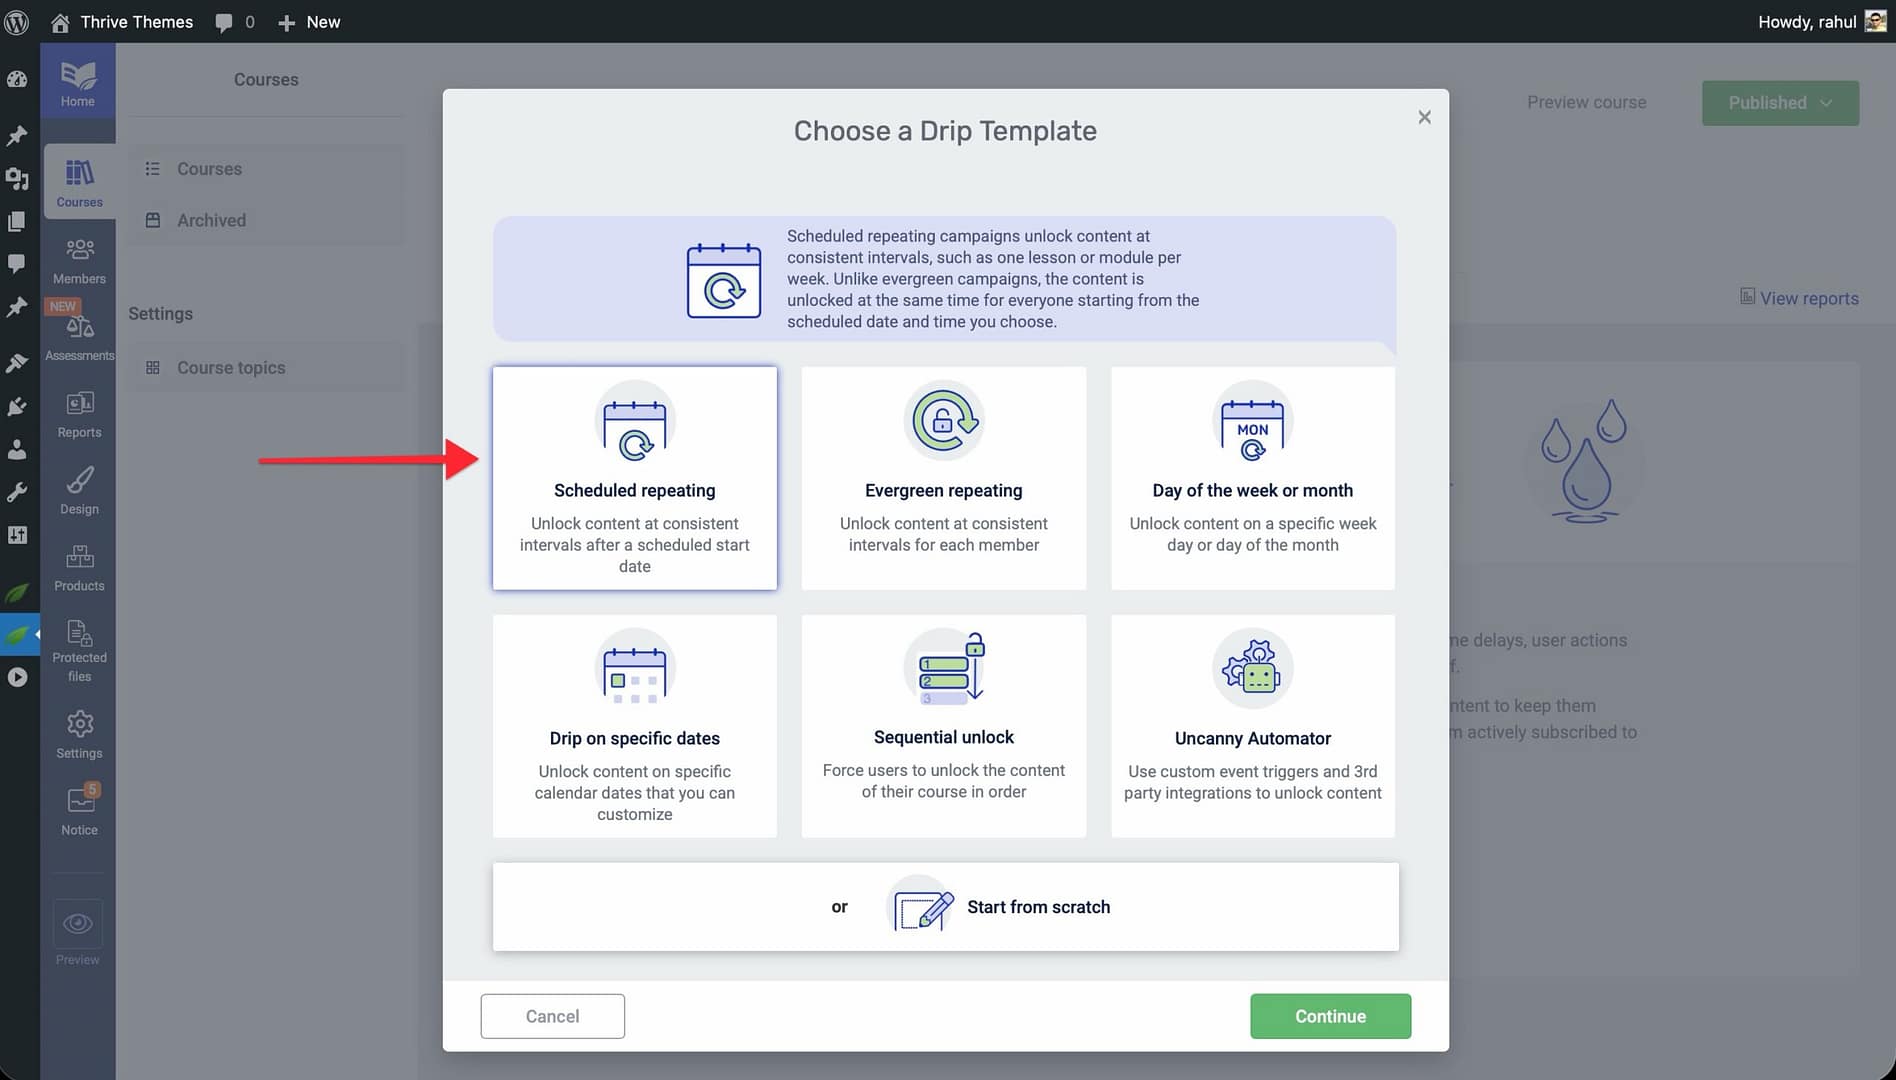
- Click the Drip tab and create a new drip campaign using the Scheduled Repeating template (or another calendar-based template).
- Set the Start Date to the date your first cohort begins.
- Configure the Repeat Interval to match your desired pacing (e.g., one module per week).
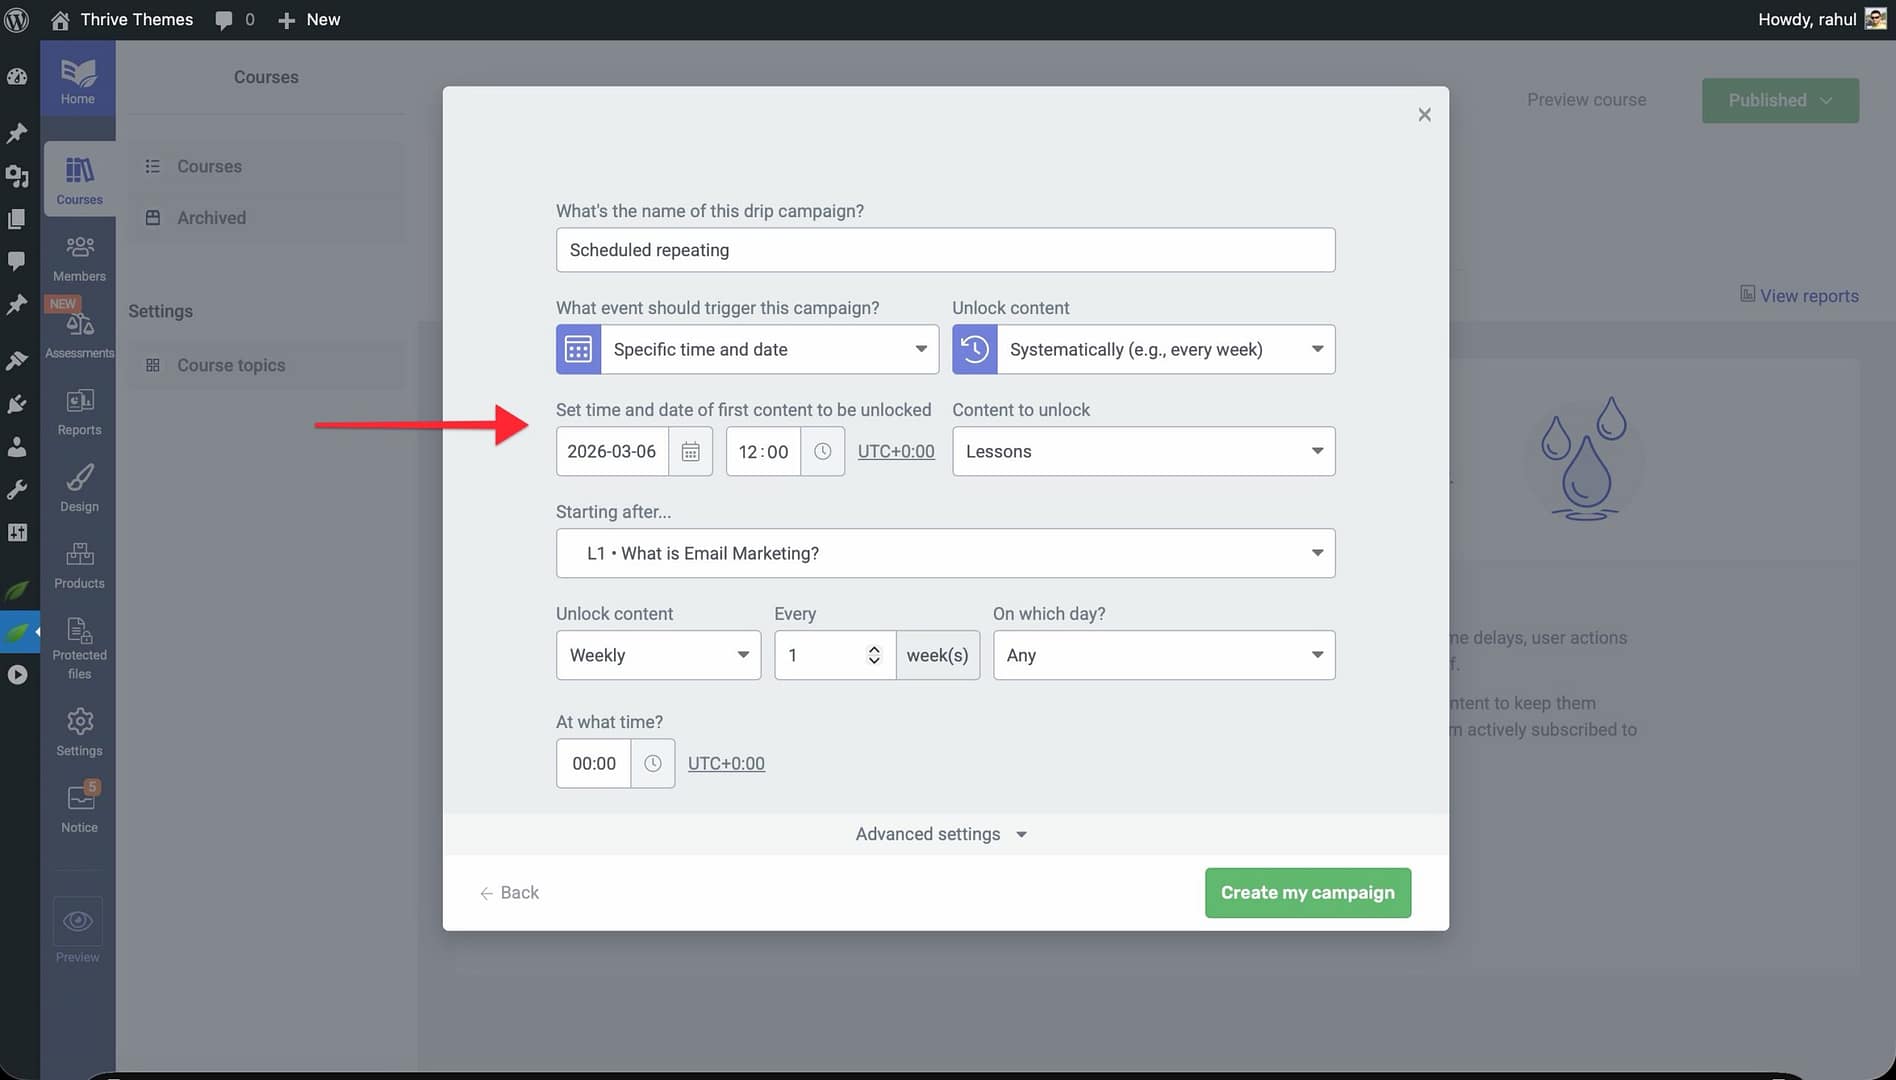
- Click Save to apply the campaign.
- To run a second cohort, create a separate Product for that cohort and assign a new drip campaign with a different start date.
- Use Decoupled Drip Schedules (explained below) to link each product to its own drip timeline while keeping a single course.
Dripping Course Content Only on Weekdays
If you want to release lessons only on weekdays—skipping Saturdays and Sundays—you can configure your drip campaign to match a Monday-through-Friday schedule.
- Open your course and click the Drip tab.
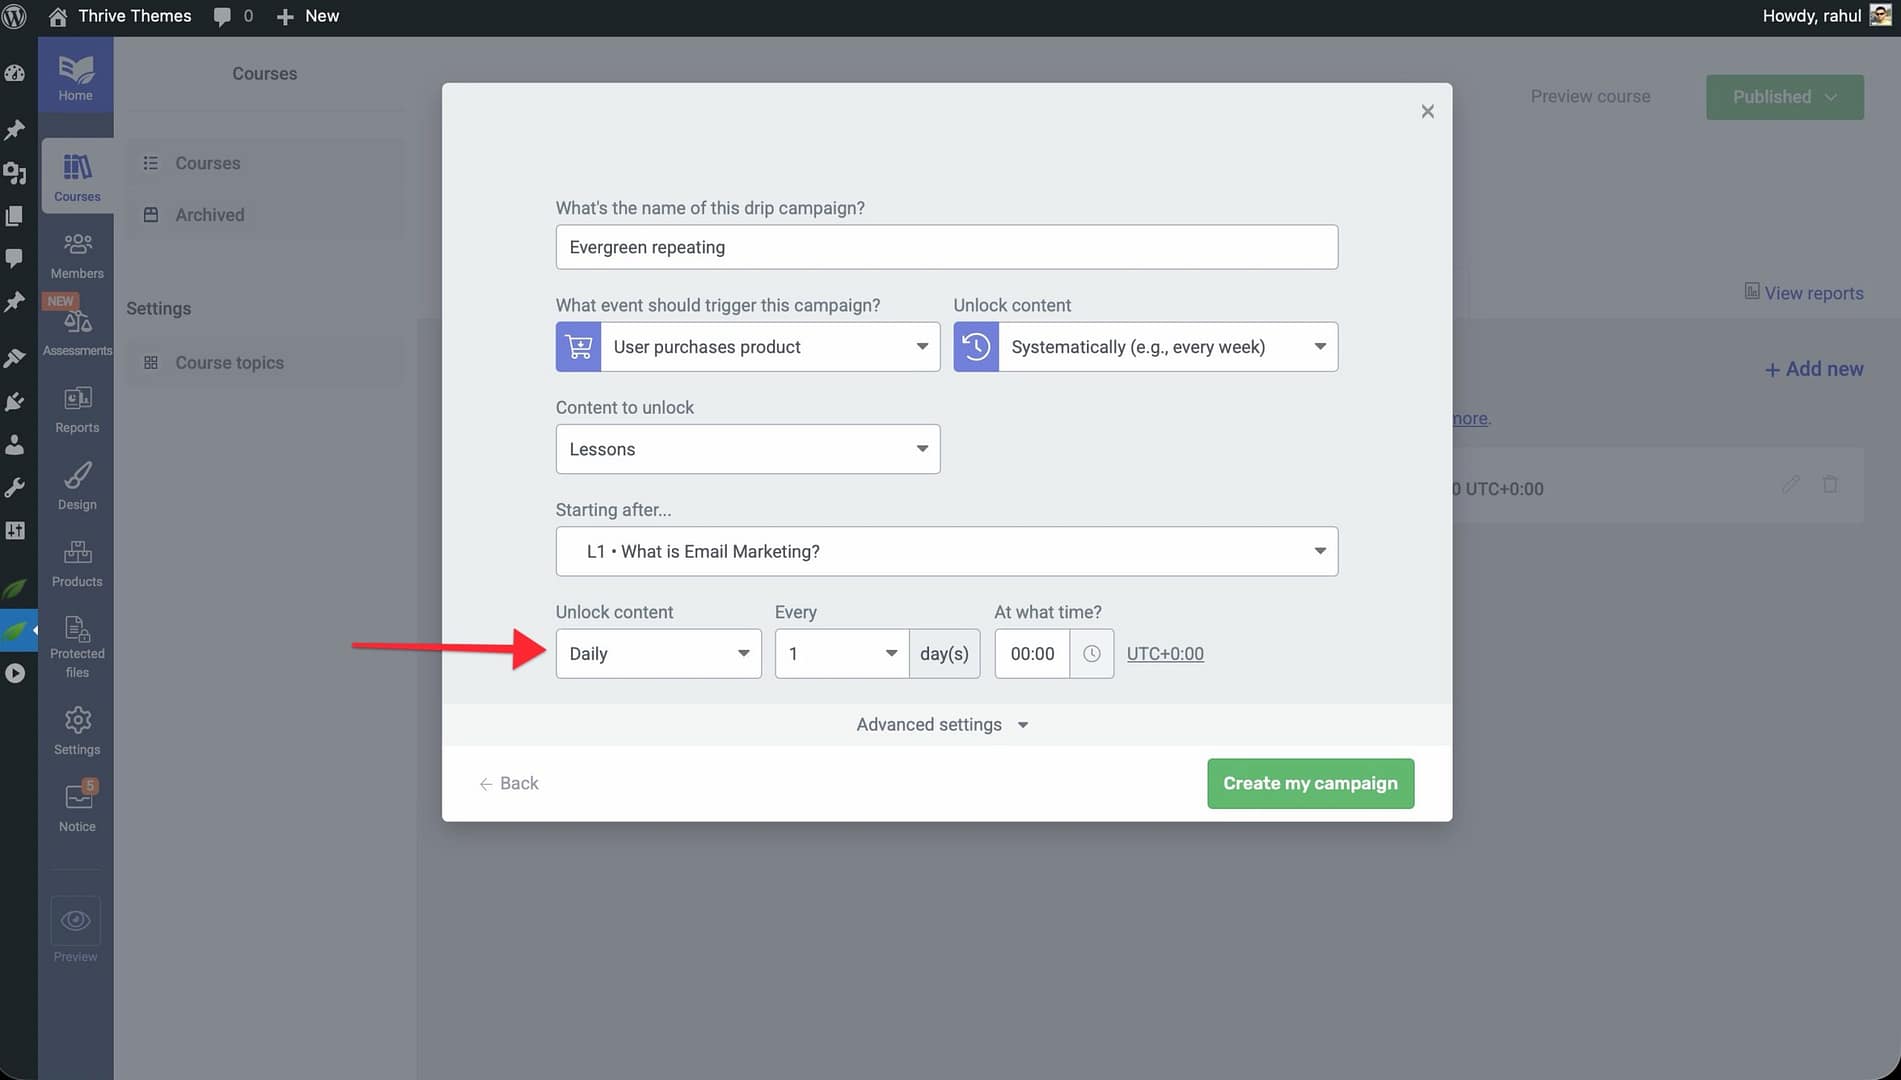
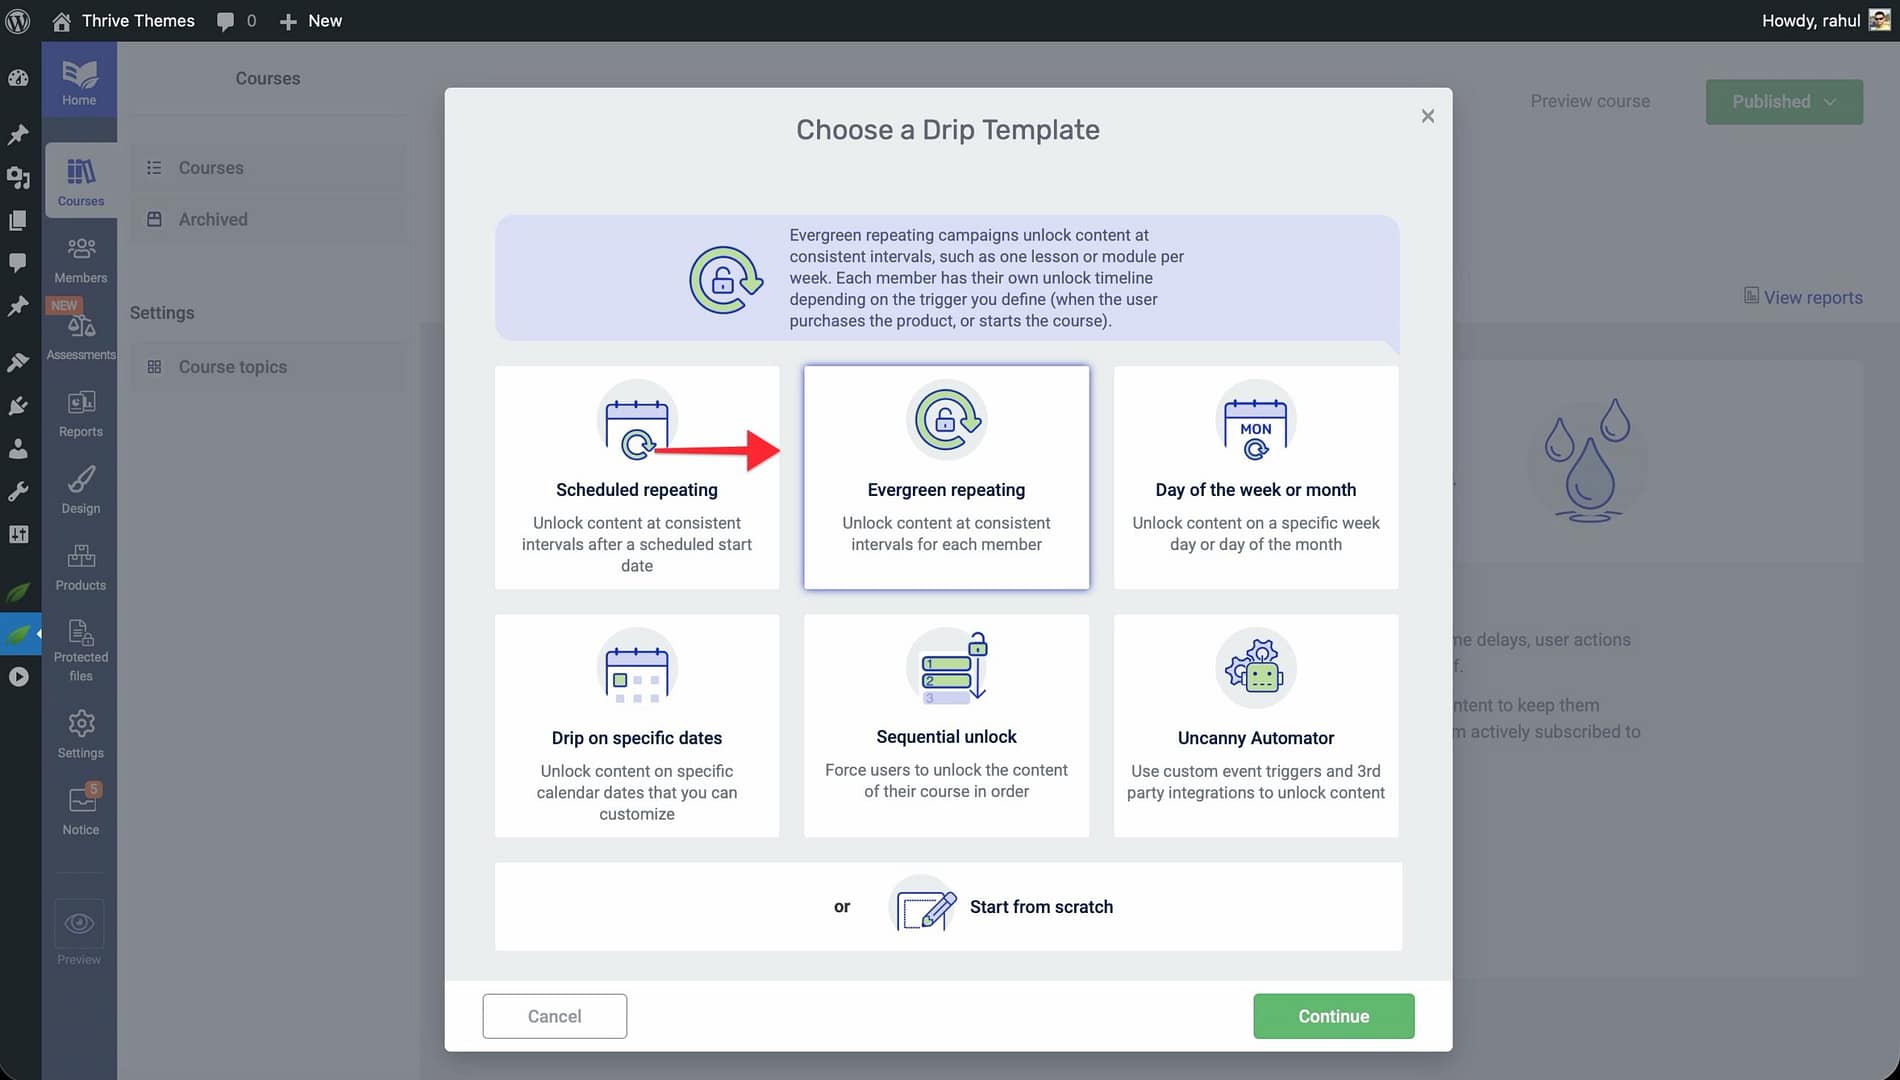
- Create a new drip campaign using the Evergreen Repeating template.

- Enter a Campaign Name and click Continue.
- Set the Start Event to your preferred trigger (e.g., product purchase or enrollment).
- Configure the unlock schedule so that content unlocks every 1 day, but only on weekdays. You can achieve this by setting up multiple campaigns on the same course—one campaign for each weekday—or by using the Day of the Week or Month template and selecting Monday through Friday as your unlock days.
- Click Save to apply the campaign.
Starting a Course on the First Monday of the Month
For courses that should begin on the first Monday of each month—ensuring a clean, predictable start date for new students—use the Day of the Week or Month template.
- Open your course and click the Drip tab.
- Click Create first Drip Campaign and select the Day of the Week or Month template.
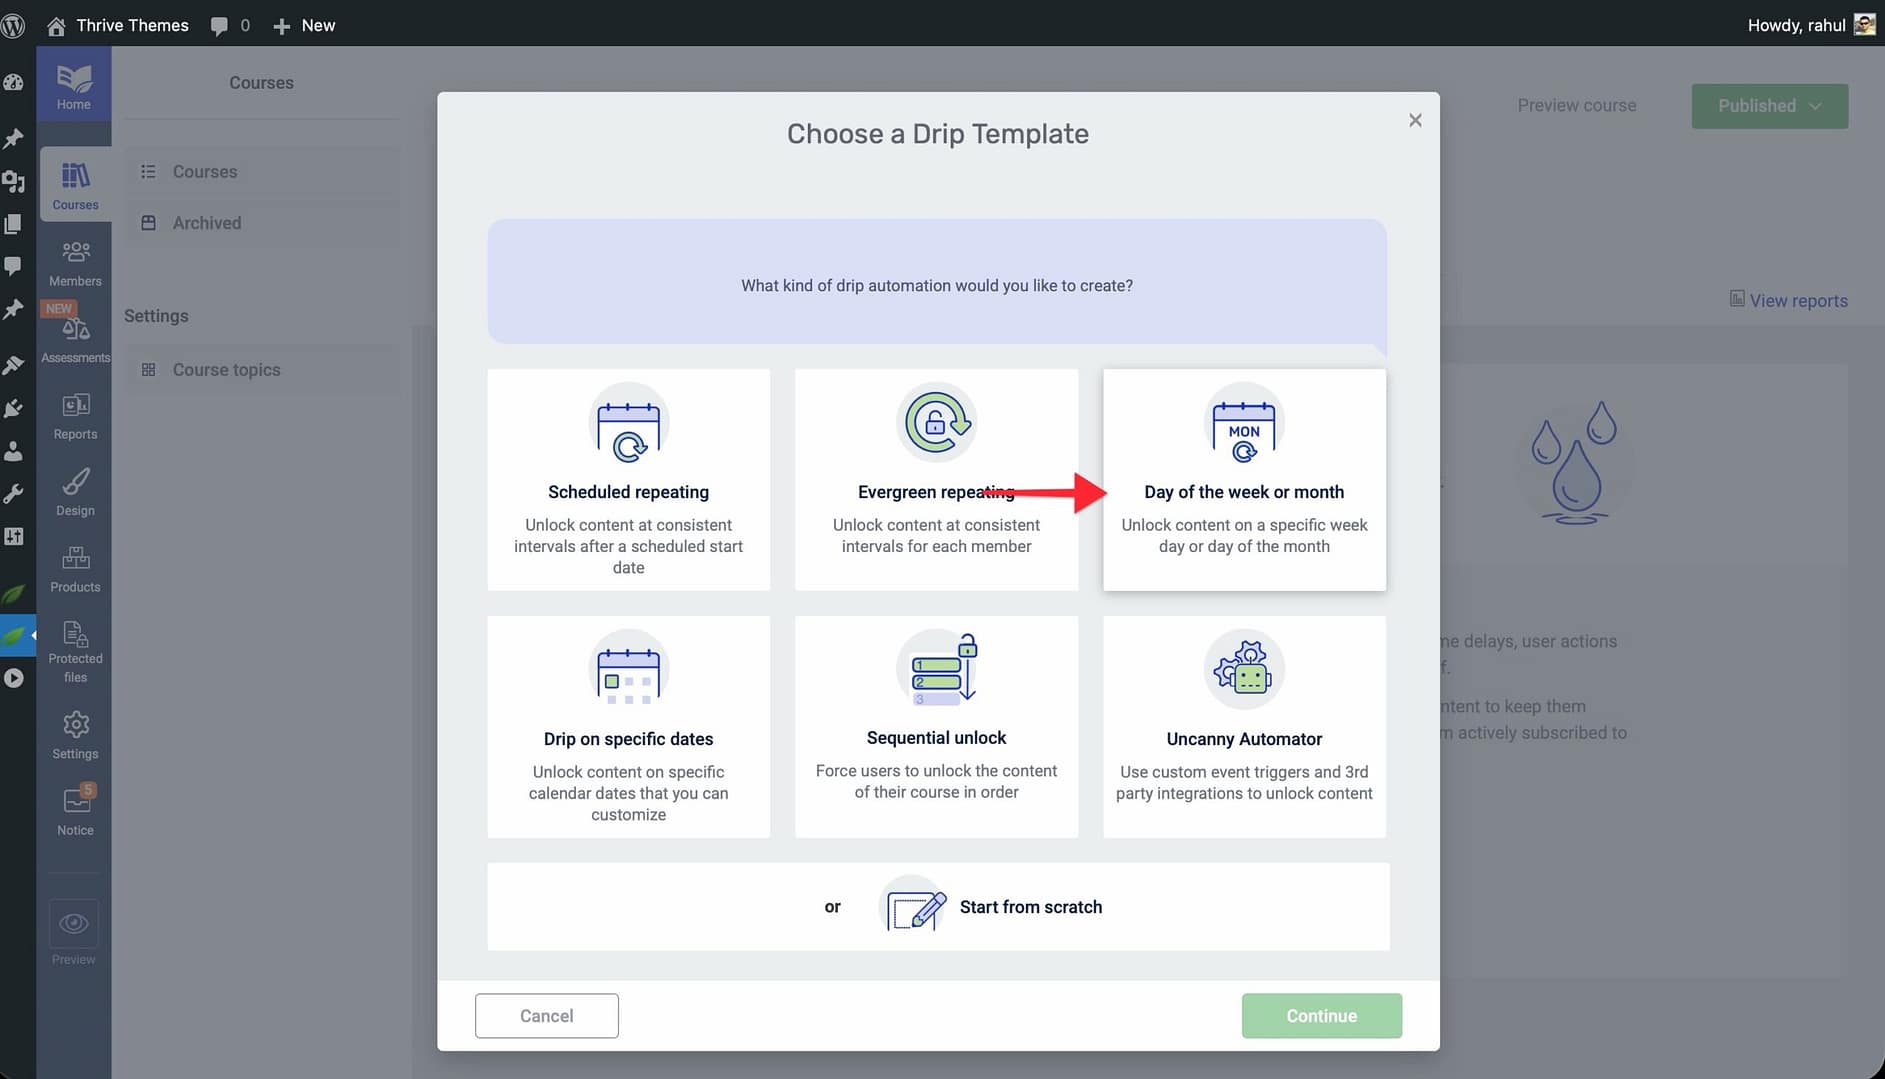
- Click Continue and enter a Campaign Name.
- Under the scheduling options, select First Monday as the recurring day pattern. This tells Thrive Apprentice to unlock the first lesson on the first Monday of the month.
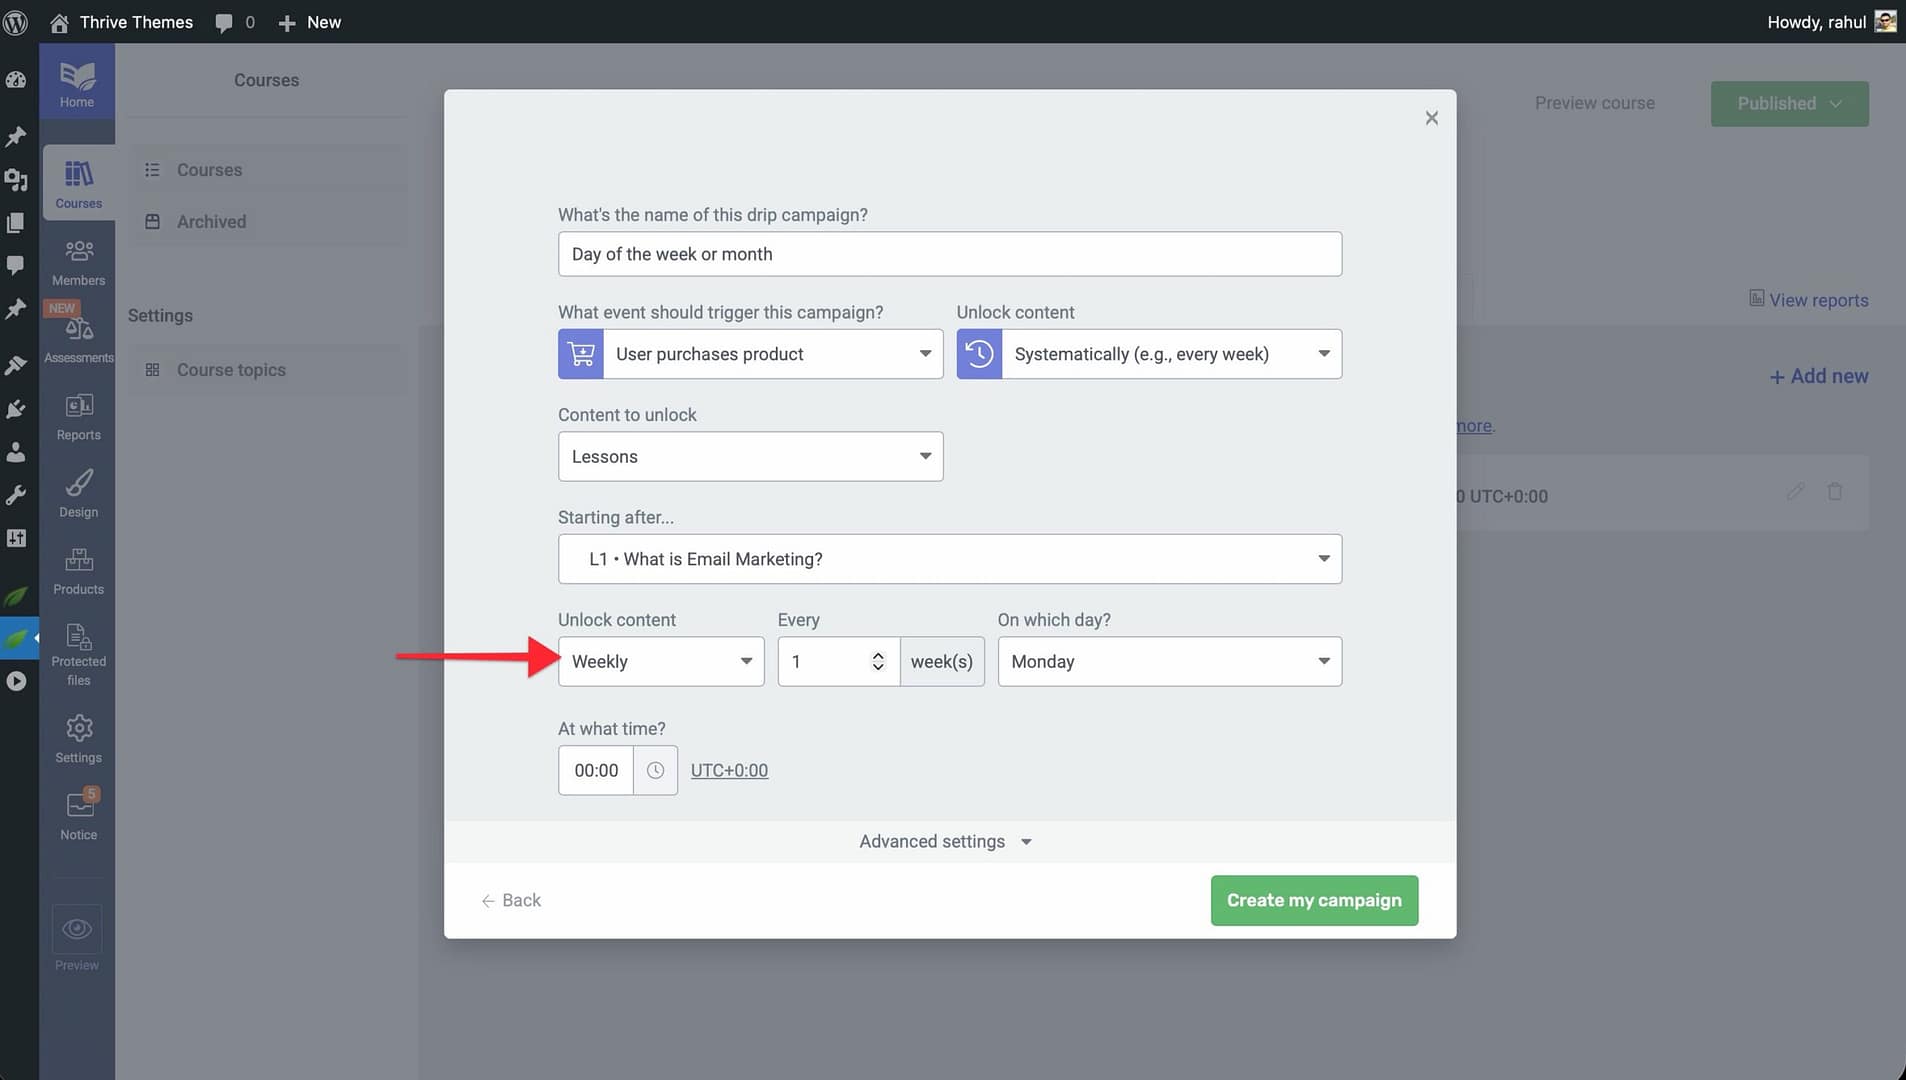
- Configure subsequent lessons to unlock on following Mondays (e.g., second Monday, third Monday) or at your preferred interval.
- Click Save to apply the campaign.
Tip: Combine this approach with a cohort model so that all students who enroll during a given month start together on the first Monday.
Using Decoupled Drip Schedules
Decoupled drip schedules let you create multiple drip timelines for the same course and sell each timeline through a different product. This means you maintain a single course but offer different pacing options—without duplicating your course content.
For example, you could offer:
- A standard track that releases one module per month.
- An accelerated track that releases one module per week.
- A cohort track tied to a specific calendar start date.
- Navigate to Thrive Dashboard > Thrive Apprentice and open your course.
- Click the Drip tab and create your first drip campaign (e.g., an Evergreen Repeating campaign with a monthly interval).
- Click Add Campaign to create a second drip campaign for the same course (e.g., an Evergreen Repeating campaign with a weekly interval).
- Go to the Products section in the left sidebar.
- Create a separate product for each pacing option (e.g., “Standard Access” and “Accelerated Access”).
- When configuring each product’s access settings, assign the appropriate drip campaign to each product.
- Click Save on each product.
Excluding Lessons from a Drip Campaign
You may want some lessons to be immediately accessible—such as a welcome video or introductory material—while the rest of the course follows a drip schedule. Thrive Apprentice offers two ways to exclude lessons from drip.
Method 1: Exclude initial lessons from any template
- Open your drip campaign from the Drip tab.
- Look for the option to exclude the first set of lessons from the drip schedule.
- Specify how many initial lessons should be immediately accessible (e.g., the first 2 lessons).
- Click Save. Those lessons will be available as soon as a student enrolls, while the remaining lessons follow the drip timeline.
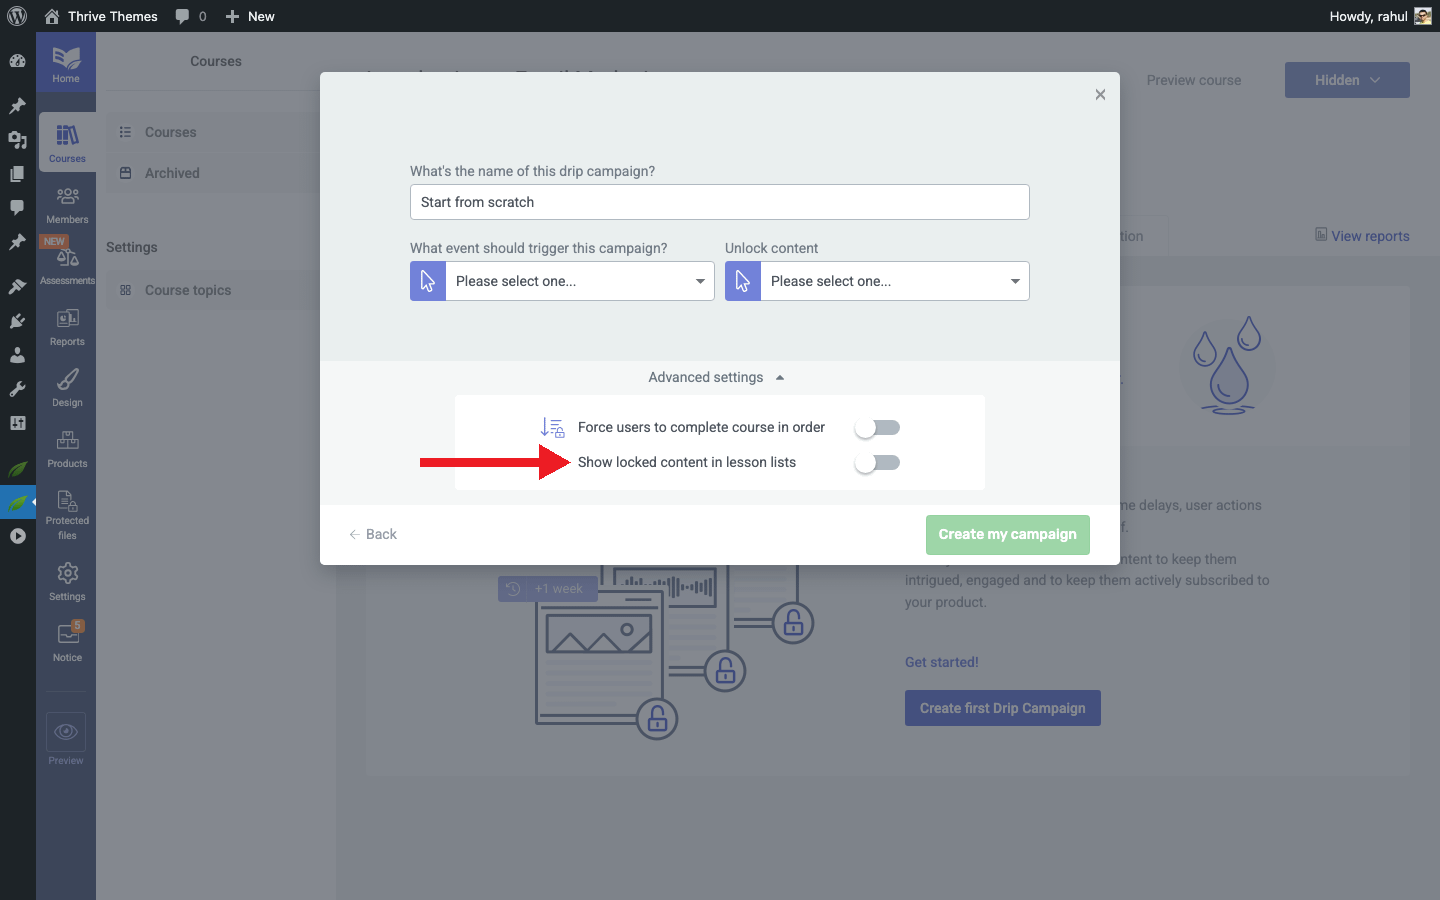
Method 2: Exclude specific lessons with Start From Scratch
- Create a drip campaign using the Start From Scratch template.
- Select the Unlock content at custom intervals option.
- For each lesson you want to make immediately available, set the unlock delay to 0 days or remove the unlock condition entirely.
- Configure drip intervals for the remaining lessons as needed.
- Click Save to apply the campaign.
Tip: Use Method 2 when you need to exclude lessons that are not at the beginning of the course—such as a mid-course bonus lesson or an appendix.
Hiding Locked Lessons from the Lesson List
By default, locked lessons remain visible in the Lesson List element on your course page—students can see the lesson titles but cannot access the content. If you prefer to hide locked lessons entirely so that students only discover new lessons as they unlock, you can change this behavior.
- Navigate to Thrive Dashboard > Thrive Apprentice.
- Open the course where you want to hide locked lessons.
- Go to the course’s design settings or the Lesson List element configuration.
- Locate the option to control locked lesson visibility.
- Enable the setting to hide locked lessons from the lesson list.
- Click Save to apply the change.
After enabling this setting, students will only see lessons that are currently available to them. As new lessons unlock according to your drip schedule, they will appear automatically in the lesson list.
Note: Hiding locked lessons creates a progressive discovery experience. Students will not know how many total lessons remain, which can build anticipation but may also reduce transparency about the full course scope.
Unlocking Content at Different Time Intervals
Sometimes you need different lessons to unlock at different pacing—for example, standard lessons every week but review or assessment lessons every two weeks. Custom unlock conditions let you set unique timing for each content item.
- Open your course and click the Drip tab.
- Create a drip campaign using any template (the Start From Scratch template gives you the most flexibility).
- Once the campaign is created, click on an individual lesson in the drip timeline to open its Unlock Conditions.
- Set a custom time delay for that lesson (e.g., unlock 2 weeks after the previous lesson is completed instead of the default 1 week).
- Repeat for each lesson that needs a unique interval.
- Click Save to apply the changes.
For example, in a two-module course where standard lessons unlock weekly, you could set revision tests to unlock 2 weeks after the previous lesson—giving students extra time to study before an assessment.
Tip: Mixing intervals works best when you clearly communicate the schedule to students, so they know when to expect new content and when they have extra time for review.
That’s it! You’ve successfully explored seven advanced drip techniques in Thrive Apprentice—from cohort-based delivery and weekday-only schedules to decoupled timelines, lesson exclusions, hidden locked lessons, and custom intervals.
Related Resources
- Getting Started with Drip: Learn drip fundamentals in How to Get Started with Drip Content.
- Drip Schedule Templates Reference: Review all seven templates in the Drip Schedule Templates Reference.
- Access Restrictions and Rules: Control course access with the Access Restrictions and Rules guide.
- Creating Your First Course: New to Thrive Apprentice? Start with How to Create Your First Course.
- Thrive Apprentice Knowledge Base: Browse the full Thrive Apprentice Knowledge Base for more tutorials.