The Campaign Dashboard is your control center in Thrive Ultimatum. Here, you can manage your ongoing campaigns, view performance statistics, and fine-tune exactly when your scarcity designs appear using the Timeline.
Managing Campaigns
Each campaign is represented by a “Card” on the dashboard. Hovering over a card reveals a set of quick actions:

- Display Settings: Quickly access and edit where this campaign appears on your site.
- Duplicate: Create an exact copy of the campaign. This is useful for A/B testing variations manually or creating similar campaigns for different products.
- Delete: Permanently remove the campaign (use Archive if you might need it later).
- Drag & Drop: Click and hold to move cards up or down. Priority Matters: If a visitor qualifies for multiple campaigns, they will see the one higher up in this list.
- Archive: Hide the campaign from the active view but save its data and settings for future reference.
- Start/Pause: Instantly toggle the campaign status.
- Rename: Change the internal name of the campaign.
Understanding Statistics
On the campaign card, you will see two key metrics:

- Impressions: How many times the countdown/form has been displayed.
- Conversion Rate: The percentage of visitors who completed the campaign’s goal (if a conversion event is set).
The Timeline
The Timeline acts as the scheduler for your campaign. It determines what design is shown and when it appears during the campaign’s duration.

For a simple fixed-date campaign, the timeline might just show a “Start” and “End”. But for more advanced scarcity, you can add “Events” to change the design as the deadline approaches.
Adding Timeline Events
You can create a “dynamic” experience where the design changes (e.g., from a subtle bar to a large popup) when time is running out.
- Open your Campaign and locate the Timeline section.
- Click the Plus (+) button on the timeline to add a new event.

- Configure the Event:
- When: Set how much time is left (e.g., “1 Day before end”).
- What: Choose which Design to display.
- State: Select a specific “State” of that design (e.g., a “Closing Soon” state with red colors).
Using Design States
Designs in Thrive Ultimatum can have multiple “States”. A state is simply a variation of the design.
- Default State: The standard look.
- Closing Soon State: A more urgent look (e.g., different text, different colors).
To use states:

- Edit your Design in Thrive Architect.
- Click the Plus (+) button in the bottom right to Add New State.
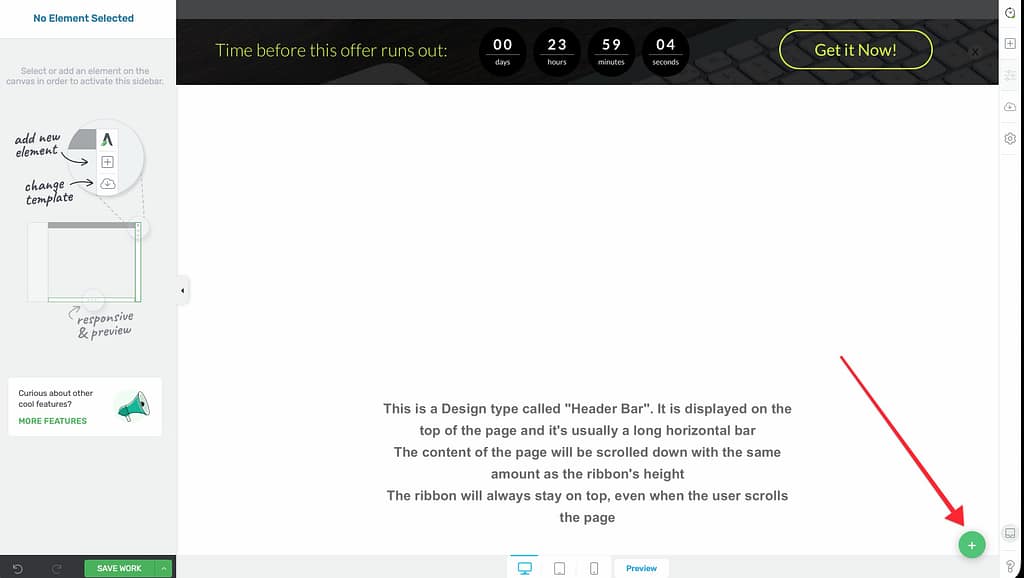
- Customize this new state.
- Back in the Timeline, map a specific event to this new state.
This feature allows you to automatically ramp up the urgency without manually changing the campaign every day.
Related Resources
- Design: How to Edit Designs in Thrive Architect
- Testing: How to Test Your Thrive Ultimatum Campaigns
- Thrive Ultimatum Documentation: Explore the full Thrive Ultimatum knowledge base.