In this article, you’ll learn how to use the User Profile element in Thrive Architect. The User Profile element lets you display logged-in user data — such as name, email, avatar, bio, and custom fields — directly on your pages. This is ideal for building member dashboards, student profile pages, account settings areas, and personalized user experiences on your WordPress site.
Combined with Conditional Display, the User Profile element can show different content to logged-in versus logged-out visitors, creating a seamless experience for membership sites, online courses, and community platforms.
What Is the User Profile Element?
The User Profile element is a Thrive Architect building block that automatically pulls and displays data from the currently logged-in WordPress user’s profile. Instead of manually entering user information, the element dynamically renders the visitor’s own data, making it perfect for personalized pages.
The element can display:
- Display Name — The user’s chosen display name from their WordPress profile
- First Name and Last Name — Individual name fields
- Email Address — The user’s registered email
- Avatar / Profile Picture — The user’s Gravatar or custom avatar image
- Biographical Info — The bio text from the user’s WordPress profile
- Website URL — The website field from the user’s profile
- Custom Fields — Any additional user meta fields added by plugins or custom code
Adding the User Profile Element to a Page
Follow these steps to add a User Profile element to your page:
- Open your page or post in the Thrive Architect editor.
- Click the green plus (+) icon in the right sidebar to open the element panel.
- Type User Profile in the search field at the top of the panel.
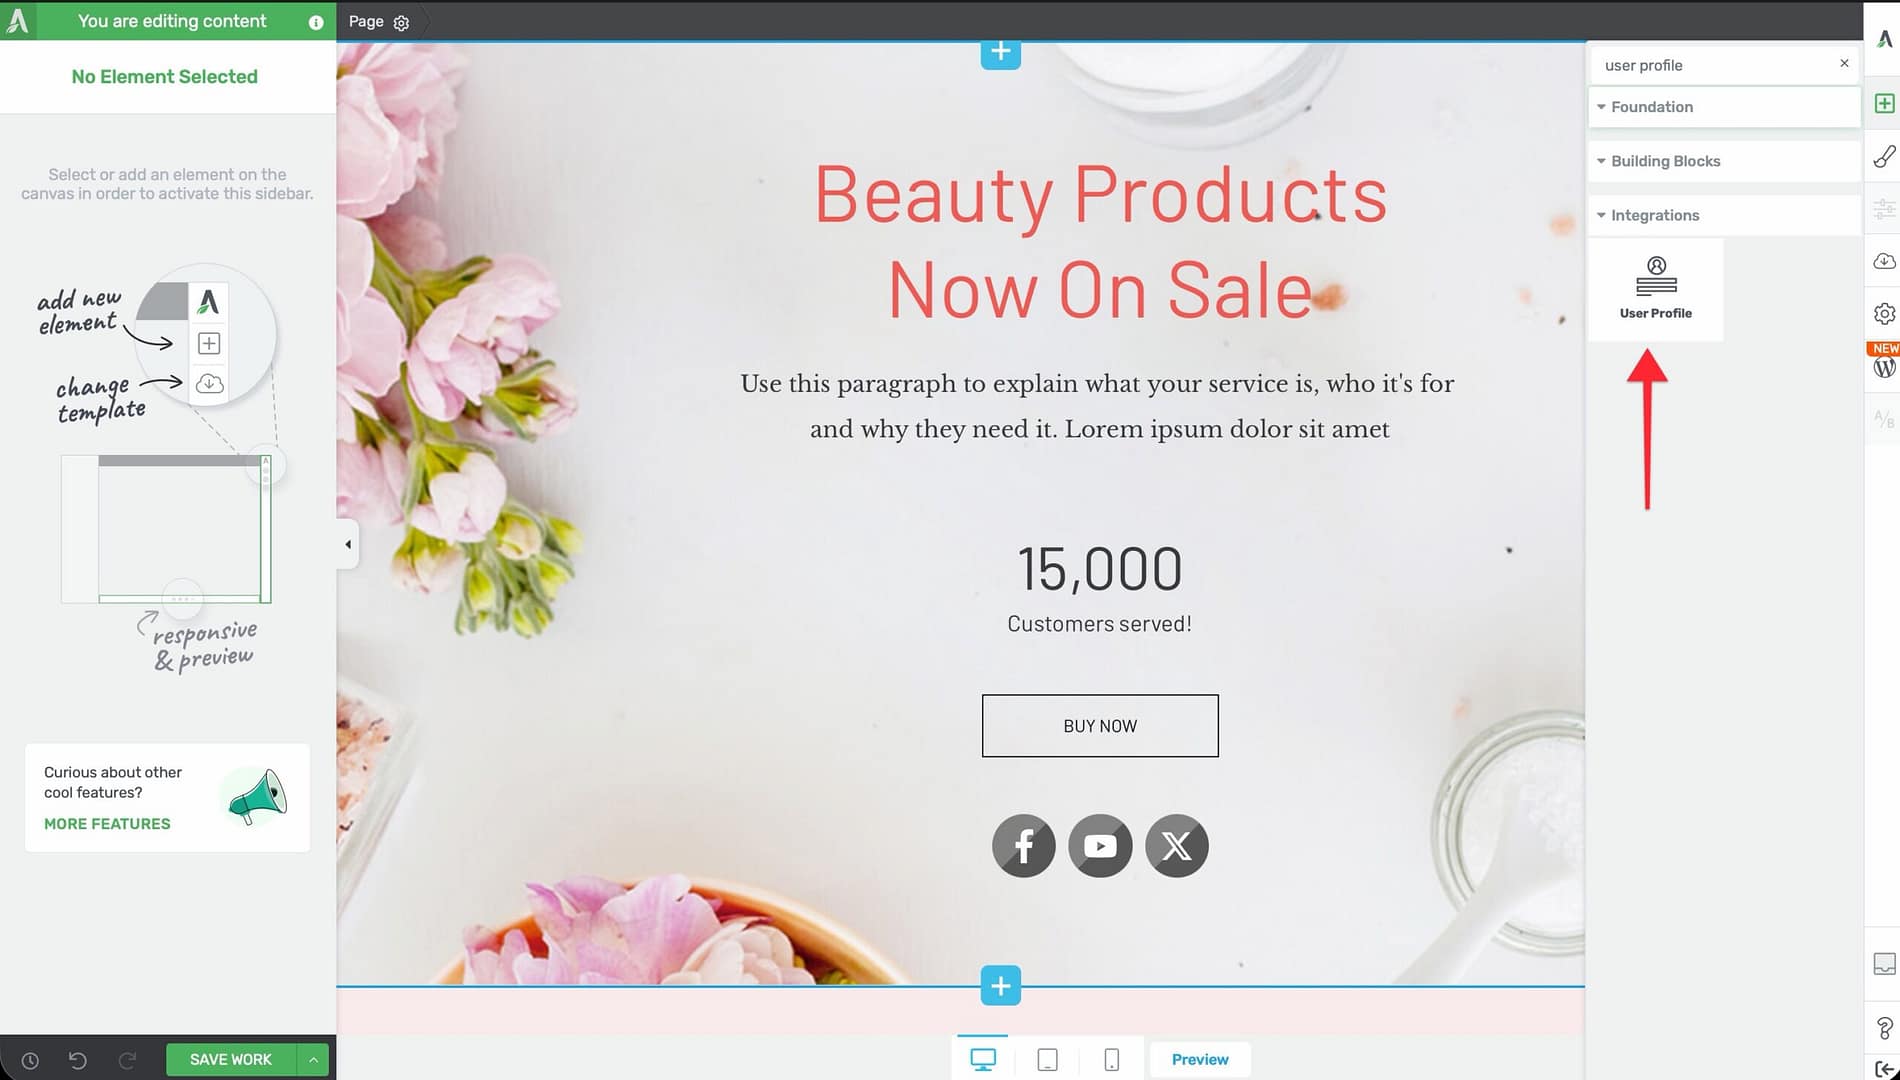
- Alternatively, scroll through the element list to find the User Profile element.
- Drag the element from the panel and drop it onto your page canvas.
A default profile layout will appear on the canvas, showing placeholder data that represents the logged-in user’s information.
Configuring Which Fields to Display
After adding the User Profile element, you can configure which user data fields are shown and how they are arranged.
Selecting Fields
- Select the User Profile element on the canvas.
- In the left sidebar, you will see the element’s configuration options.
- Look for the Fields or Profile Fields section, which lists all available user data fields.
- Toggle individual fields on or off to control which information is displayed:
- Avatar — Shows the user’s profile image
- Display Name — Shows the user’s chosen display name
- First Name — Shows the first name field
- Last Name — Shows the last name field
- Email — Shows the user’s email address
- Bio — Shows the biographical information from the user’s profile
- Website — Shows the website URL from the user’s profile
- The canvas preview updates immediately as you enable or disable fields.
Reordering Fields
If the element supports field reordering:
- In the Fields section of the sidebar, drag individual field items up or down to change their display order.
- The canvas layout updates to reflect the new order.
Adding Custom User Meta Fields
If you have custom user meta fields (added by plugins such as ACF, BuddyPress, or custom code):
- Look for an Add Field or Custom Field option in the sidebar configuration.
- Enter the meta key (the database field name) for the custom user meta field you want to display.
- The element will pull the value of that meta key from the logged-in user’s profile and display it.
Tip: Common custom user meta fields include phone numbers, job titles, company names, social media URLs, and membership levels added by membership or LMS plugins.
Styling the User Profile Element
The User Profile element can be styled using the same design controls available on other Thrive Architect elements.
Avatar Styling
When the avatar is enabled, you can customize its appearance:
- Size — Adjust the width and height of the avatar image
- Shape — Set the avatar to display as a circle (using border-radius) or keep it as a square
- Border — Add a border around the avatar with custom color, width, and style
- Shadow — Add a box shadow for depth
- Alignment — Position the avatar to the left, center, or right of the profile content
Text Styling
Each text field (name, email, bio, etc.) can be styled individually:
- Typography — Set the font family, size, weight, line height, and letter spacing
- Color — Choose text colors for each field
- Spacing — Adjust margins and padding between fields
Layout Options
Configure the overall layout of the profile element:
- Orientation — Display the avatar and text side by side (horizontal) or stacked (vertical)
- Alignment — Set the overall alignment of the profile content
- Background — Add a background color, gradient, or image to the profile container
- Borders and Shadows — Apply borders and shadows to the entire profile element
- Padding and Margins — Control the spacing inside and around the profile element
Integration with Thrive Apprentice for Student Profiles
If you use Thrive Apprentice (the online course plugin in the Thrive Suite), the User Profile element becomes especially powerful for building student-facing pages.
Displaying Student Course Data
When Thrive Apprentice is active, the User Profile element can access additional student-related data:
- Enrolled courses — Show which courses the student is enrolled in
- Course progress — Display completion percentages or progress indicators
- Certificates earned — Show links to earned certificates
Building a Student Dashboard
To create a student dashboard page that combines the User Profile element with course data:
- Create a new page in WordPress and open it in Thrive Architect.
- Add a User Profile element at the top of the page to display the student’s name, avatar, and bio.
- Below the profile, add Thrive Apprentice course elements (such as course lists filtered to the current user’s enrollments) to show the student’s learning progress.
- Use Content Box or Background Section elements to organize the layout into clear sections (e.g., “My Profile,” “My Courses,” “My Certificates”).
- Save the page and set it as the student profile or dashboard page in your site navigation.
Creating an Edit Profile Page
You can also build a page where students can view and update their profile information:
- Create a new page for profile editing.
- Add form elements that allow users to update their name, email, bio, and avatar.
- Use Thrive Architect’s Login and Registration Form element or a custom form solution to handle profile updates.
- Link the read-only profile page to the edit profile page so students can navigate between viewing and editing their information.
Login and Logout Conditional Display
The User Profile element only displays meaningful content when a user is logged in. For logged-out visitors, you should show alternative content — such as a login prompt or a call to action to create an account.
Setting Up Conditional Display for User Profile Pages
- Wrap your User Profile element inside a Content Box, Block, or Background Section element.
- Open the Conditional Display section in the left sidebar for the wrapper element.
- The Default Display will contain the User Profile element (designed for logged-in users).
- Create a new display variant by clicking Add Display or duplicating the default.
- Name the new variant (e.g., “Logged Out” or “Not Logged In”).
- In the new variant, replace the User Profile element with alternative content:
- A login form (using the Login and Registration Form element)
- A message prompting visitors to log in or register
- A button linking to the login or registration page
- Click the filter icon on the “Logged Out” variant and set the condition to: User > Is not logged in.
- Click Save conditions.
Now, logged-in users see their profile information, while logged-out visitors see a login prompt or registration CTA.
Showing Different Content by User Role
You can extend Conditional Display to show different profile layouts based on user roles:
- Administrators — Show a full profile with site management links
- Subscribers — Show a basic profile with an upgrade CTA
- Students (Thrive Apprentice) — Show course progress and certificates
- Customers (WooCommerce) — Show order history and account details
For each role, create a display variant with appropriate content and set the condition to User > Role > is > the target role.
Common Use Cases
Here is a summary of popular User Profile element applications:
- Member dashboards — Display a personalized welcome area with the user’s name, avatar, and account links
- Student profile pages — Show student information, course enrollments, and completion progress for online learning sites
- Community directories — Display user profiles on member listing pages
- Account settings pages — Show current profile data with links to edit profile information
- Author bio sections — Display the post author’s profile information on blog posts
- Personalized welcome headers — Show a “Welcome back, [Name]” message in page headers for logged-in users
Frequently Asked Questions
Does the User Profile Element Work for Logged-Out Visitors?
The User Profile element displays data for the currently logged-in user. If no user is logged in, the element will show empty or placeholder content. Use Conditional Display to show alternative content (such as a login form) to logged-out visitors.
Can I Display Custom User Fields from Other Plugins?
Yes. If other plugins (such as ACF, BuddyPress, or membership plugins) add custom user meta fields, you can display those fields by referencing their meta key in the User Profile element’s custom field option.
How Does the Avatar Image Work?
The User Profile element displays the user’s Gravatar by default (the profile image associated with their email address at gravatar.com). If you use a plugin that allows custom avatar uploads (such as Simple Local Avatars or WP User Avatar), the element will display the custom avatar instead.
Can I Use the User Profile Element in Thrive Theme Builder Templates?
Yes. Adding the User Profile element to a Thrive Theme Builder template (such as a header or a custom page template) allows you to display user data consistently across your entire site.
Is User Data Secure When Displayed on the Page?
The User Profile element only displays data for the currently logged-in user on the front end. Other visitors cannot see a different user’s profile data unless you have specifically built a public profile system. Sensitive fields like email addresses should be displayed thoughtfully — consider whether public-facing pages should include them.
Related Resources
- Conditional Display: How to Use Conditional Display — Showing different content to logged-in vs. logged-out visitors
- Login and Registration Form: How to Use the Login and Registration Form Element — Adding authentication forms to your pages
- ACF Integration: How to Integrate ACF with Thrive Architect — Displaying custom user fields from ACF
- Getting Started: Getting Started with Thrive Architect — Overview of the editor and element panel
That’s it! You’ve successfully learned how to use the User Profile feature in Thrive Architect. By adding the User Profile element to your pages, configuring which fields to display, styling the layout, integrating with Thrive Apprentice for student profiles, and using Conditional Display for login-aware content, you can create personalized, dynamic user experiences on your WordPress site.