In this article, you’ll learn how to add video descriptions to your courses and lessons, move video descriptions from their default placement on a template, require students to watch a video before marking a lesson complete, and track video events for analytics.
Video is one of the most powerful tools for delivering course content. Thrive Apprentice gives you fine-grained control over how videos appear on your pages, how they interact with lesson progress, and how you can monitor student engagement with video content.
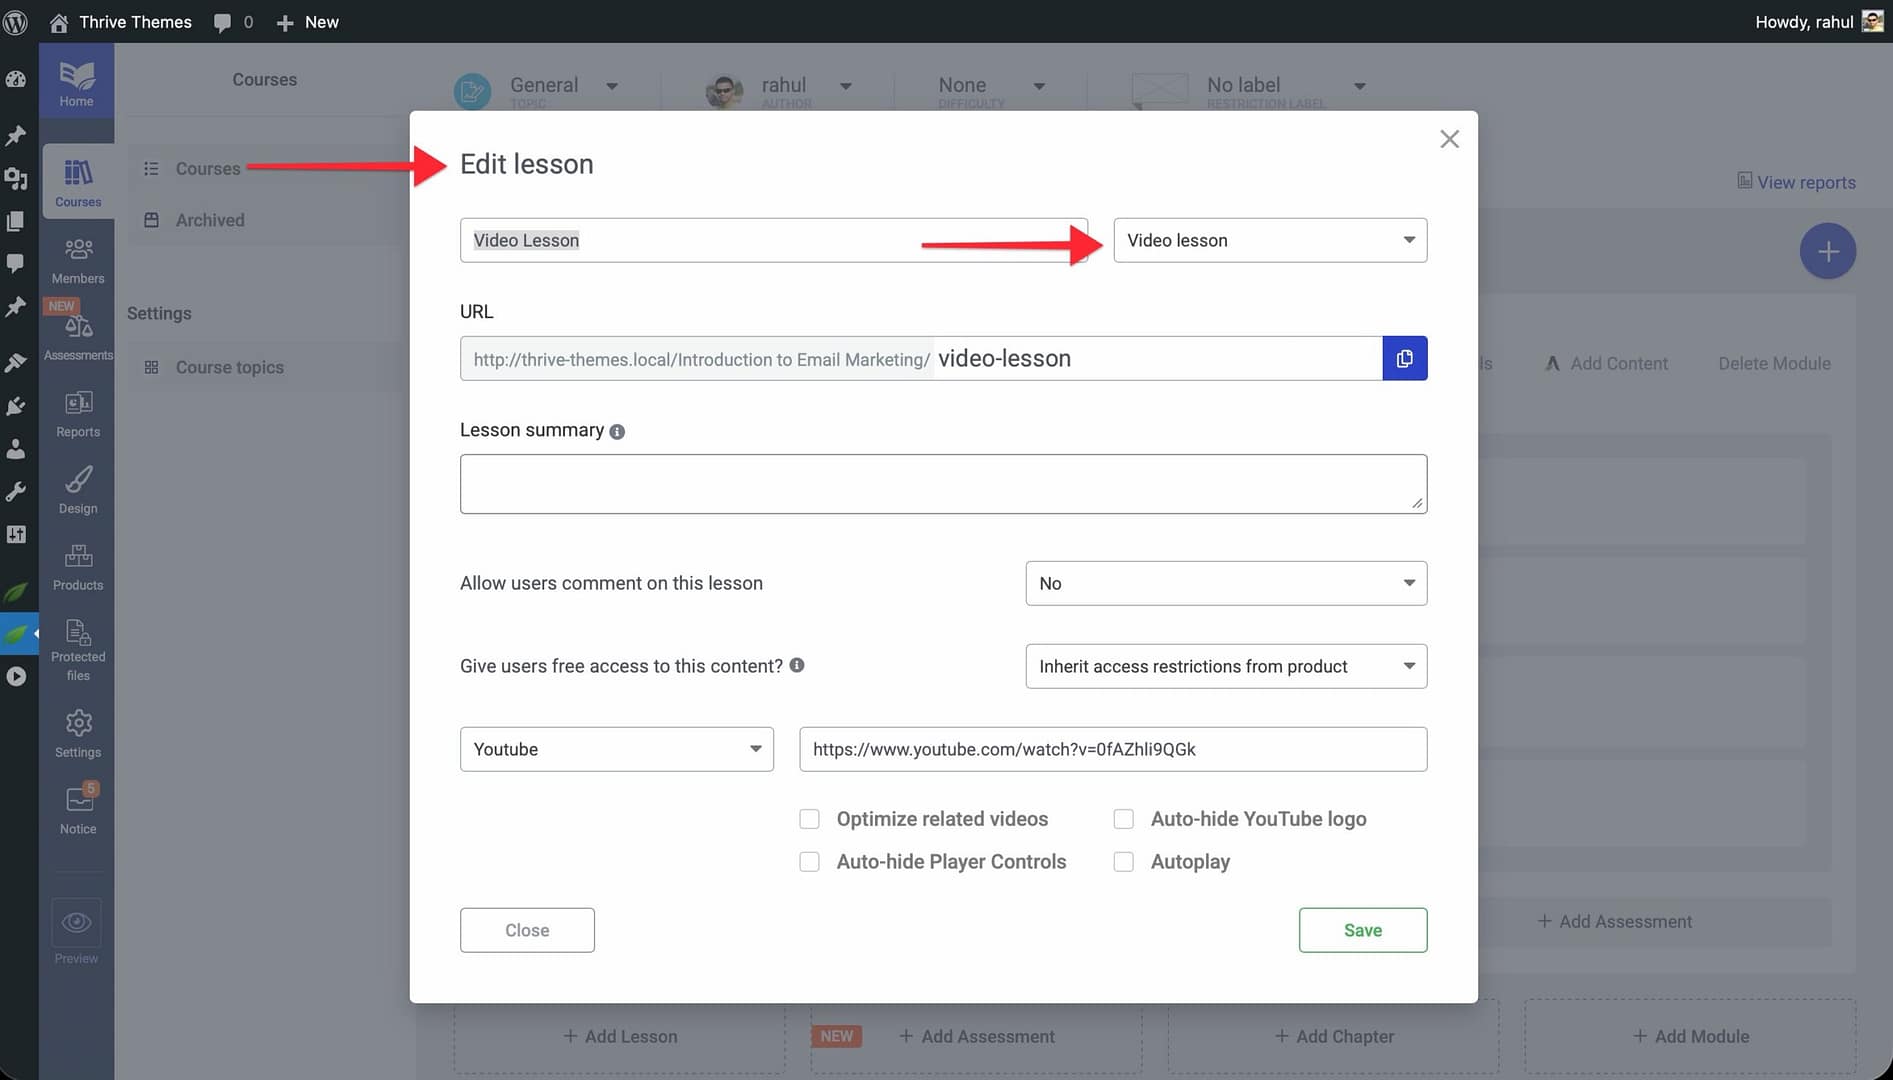
Adding a Video Description to a Course
A video description allows you to display a video on your Course Overview page—directly below the course title—giving prospective students an immediate visual introduction to your course.
- Go to Thrive Dashboard > Thrive Apprentice.
- Open the course you want to edit.
- Click on the Course Details tab.
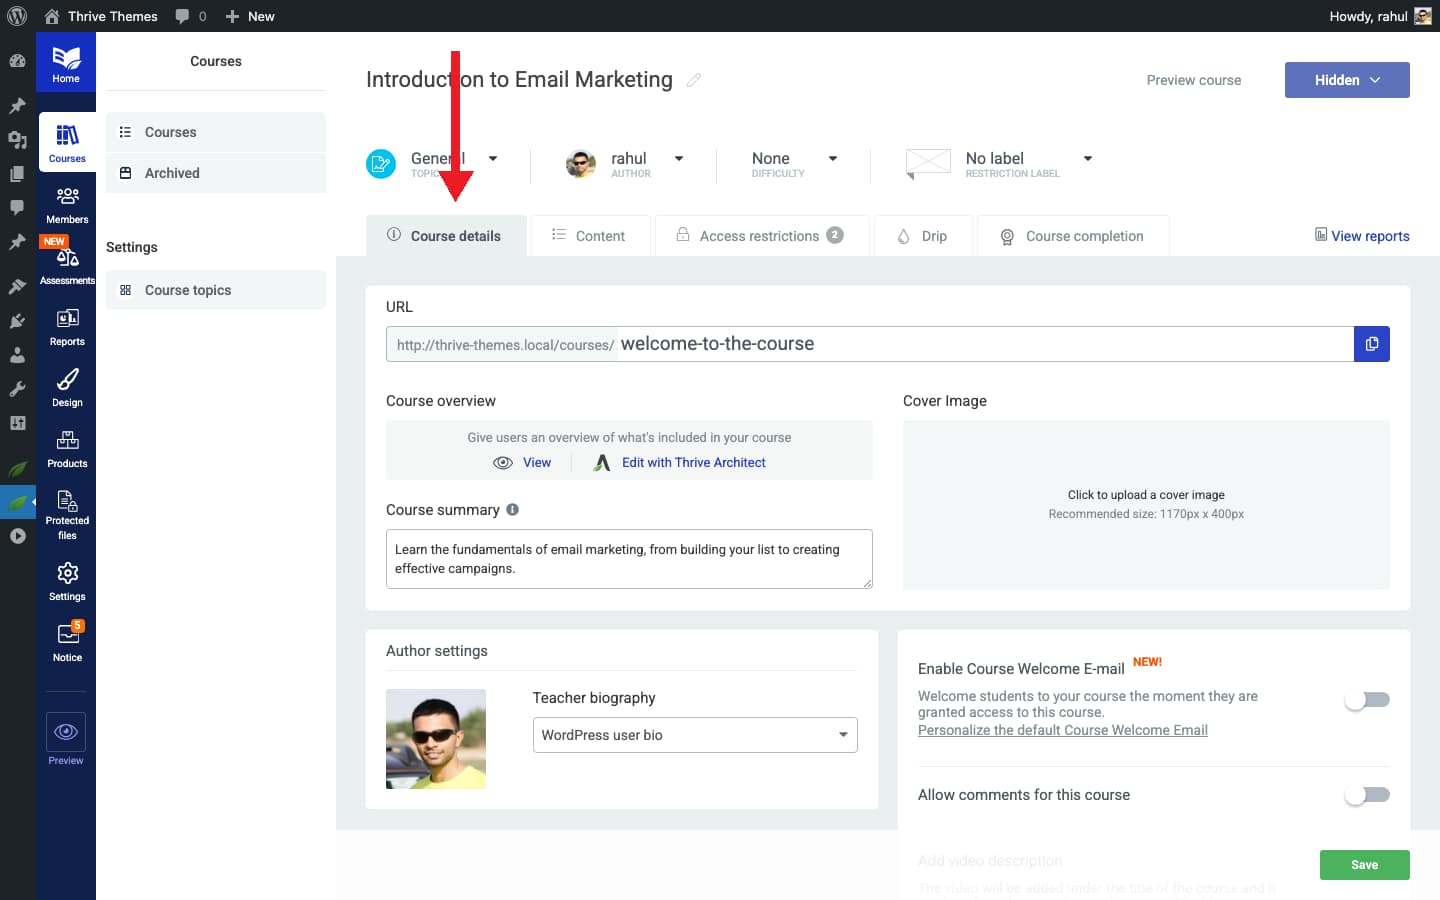
- Scroll to the bottom of the page and locate the Video Description option.
- Enable the video description toggle.
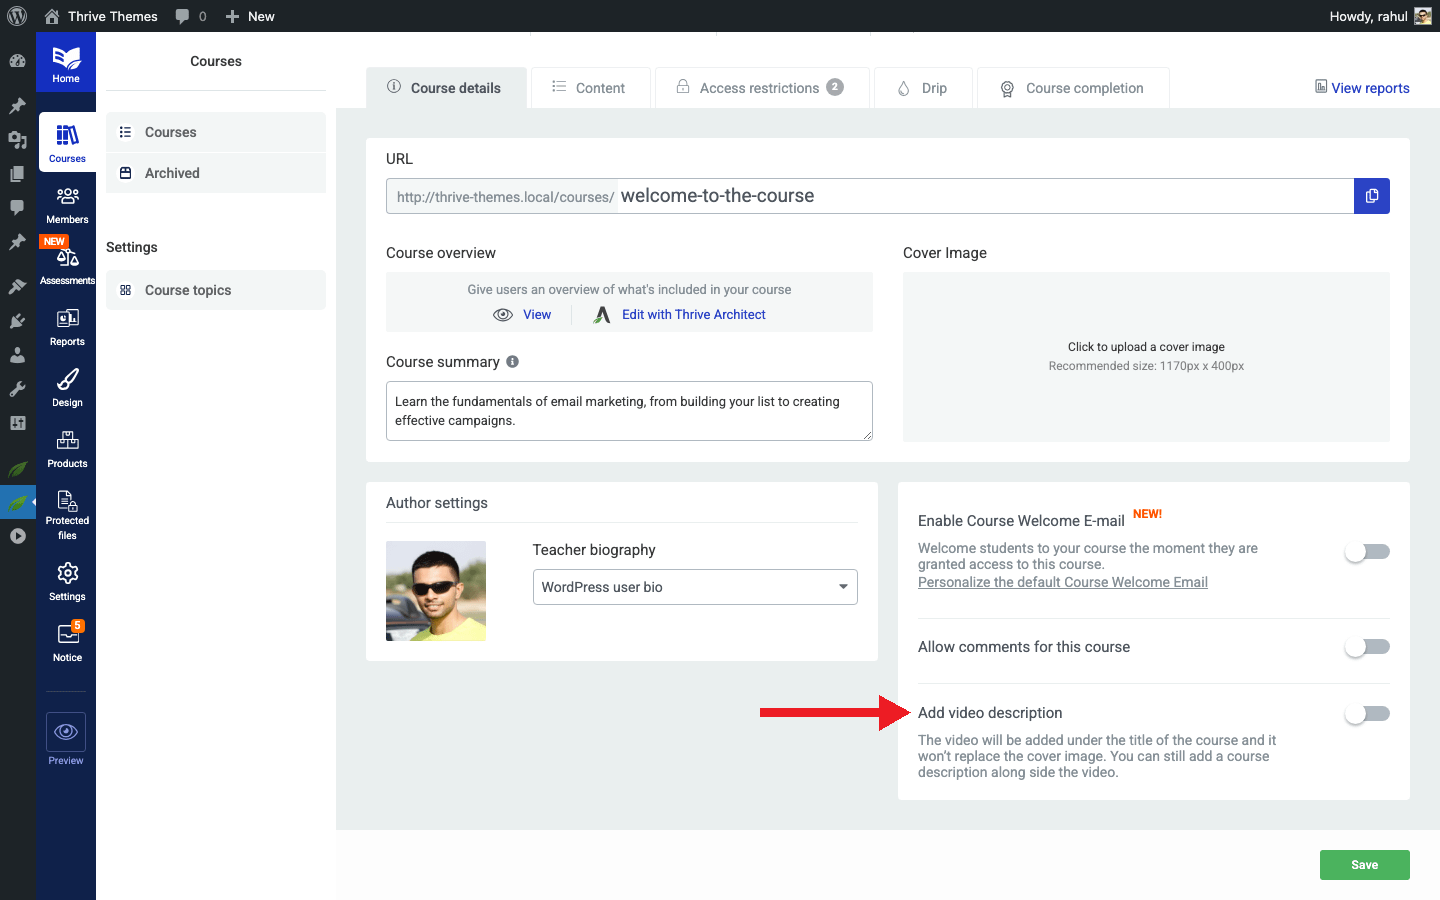
- Select or paste the video URL you want to display.
- Save your changes.
Once enabled, the video will appear on your Course Overview template, positioned below the course title. You can include both a video description and a regular text description simultaneously—they complement each other on the page.
Moving the Video Description Placement
By default, the video description appears below the course title on the Course Overview template. If you want to reposition it—for example, placing it in a sidebar or further down the page—you can do so through the template editor.
- Navigate to your course and preview it on the front end.
- You will see two editing options: – Edit with Thrive Apprentice Editor — Modifies the template for all courses using this design. – Edit with Thrive Architect — Modifies the layout for this specific course only.
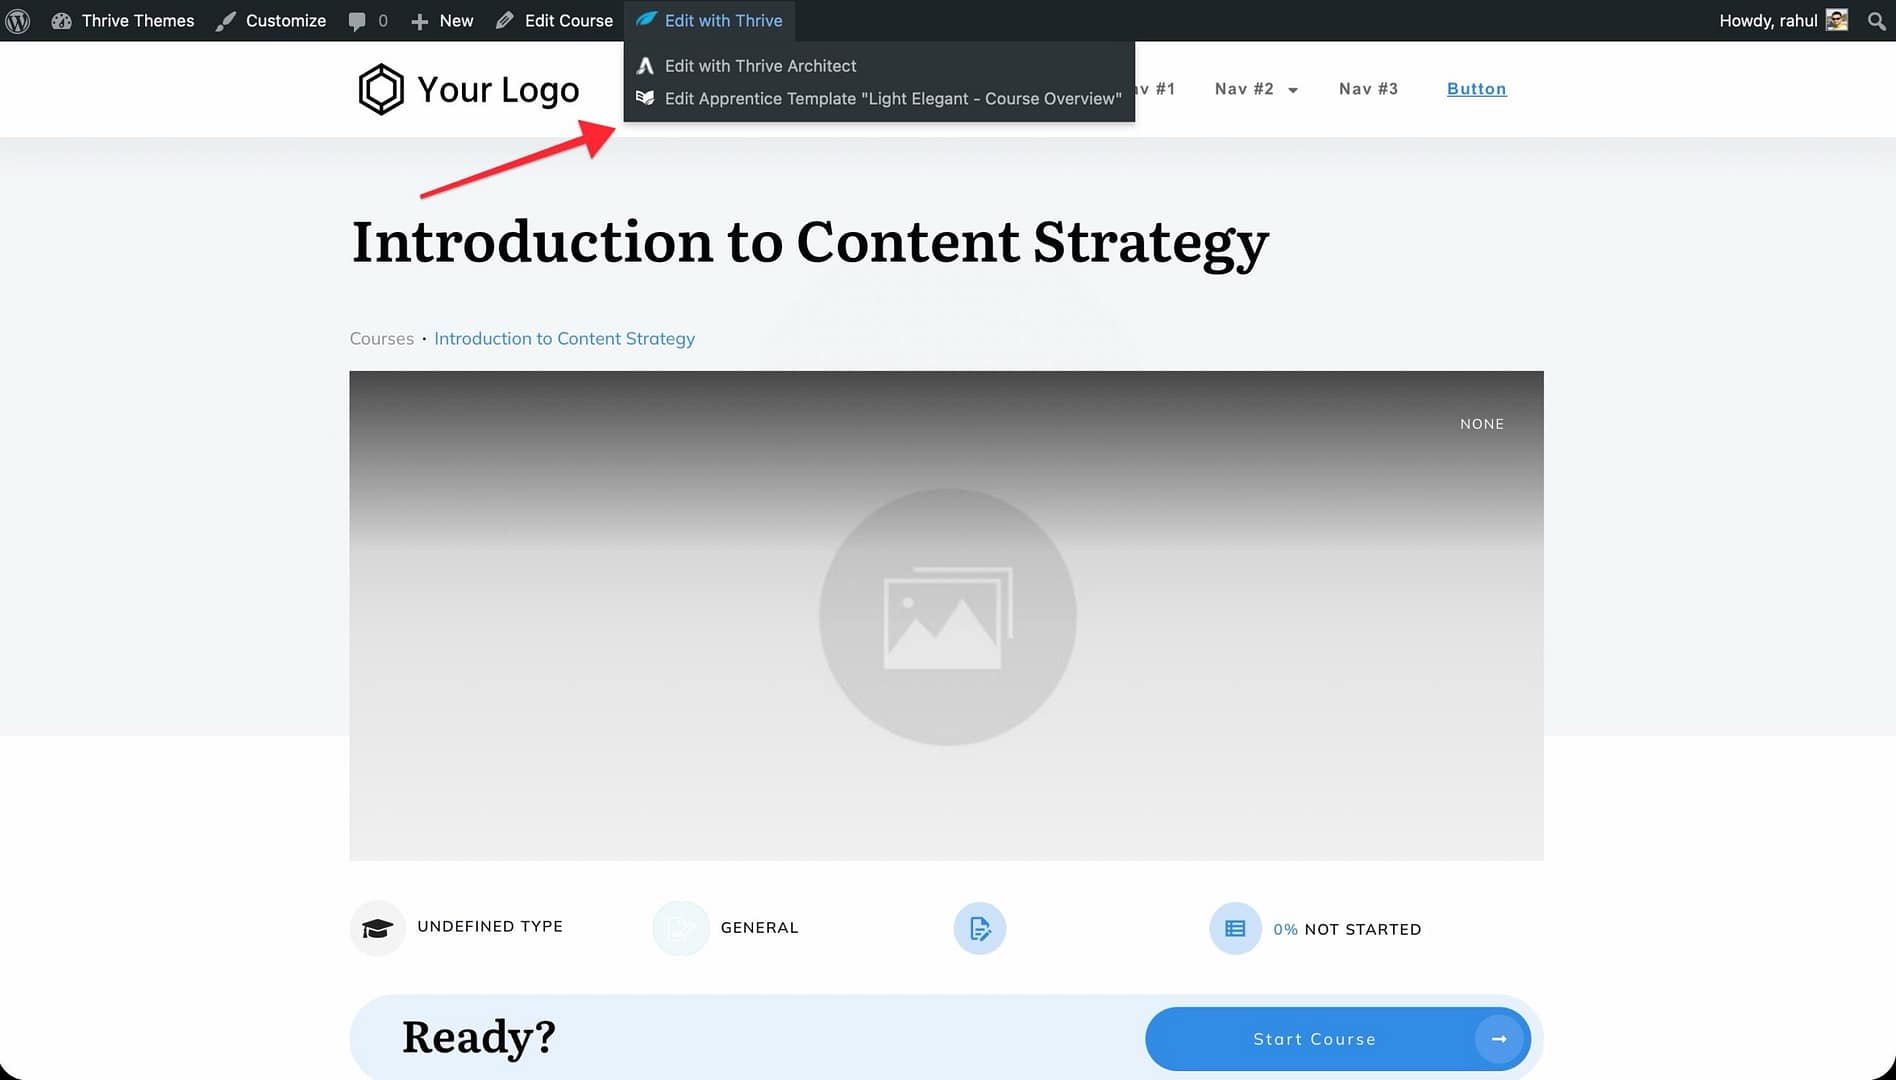
- Choose the appropriate editor based on whether you want to make a global change or a per-course adjustment.
- Locate the video description element on the template.
- Drag it to your desired position on the page.
- Save your changes.
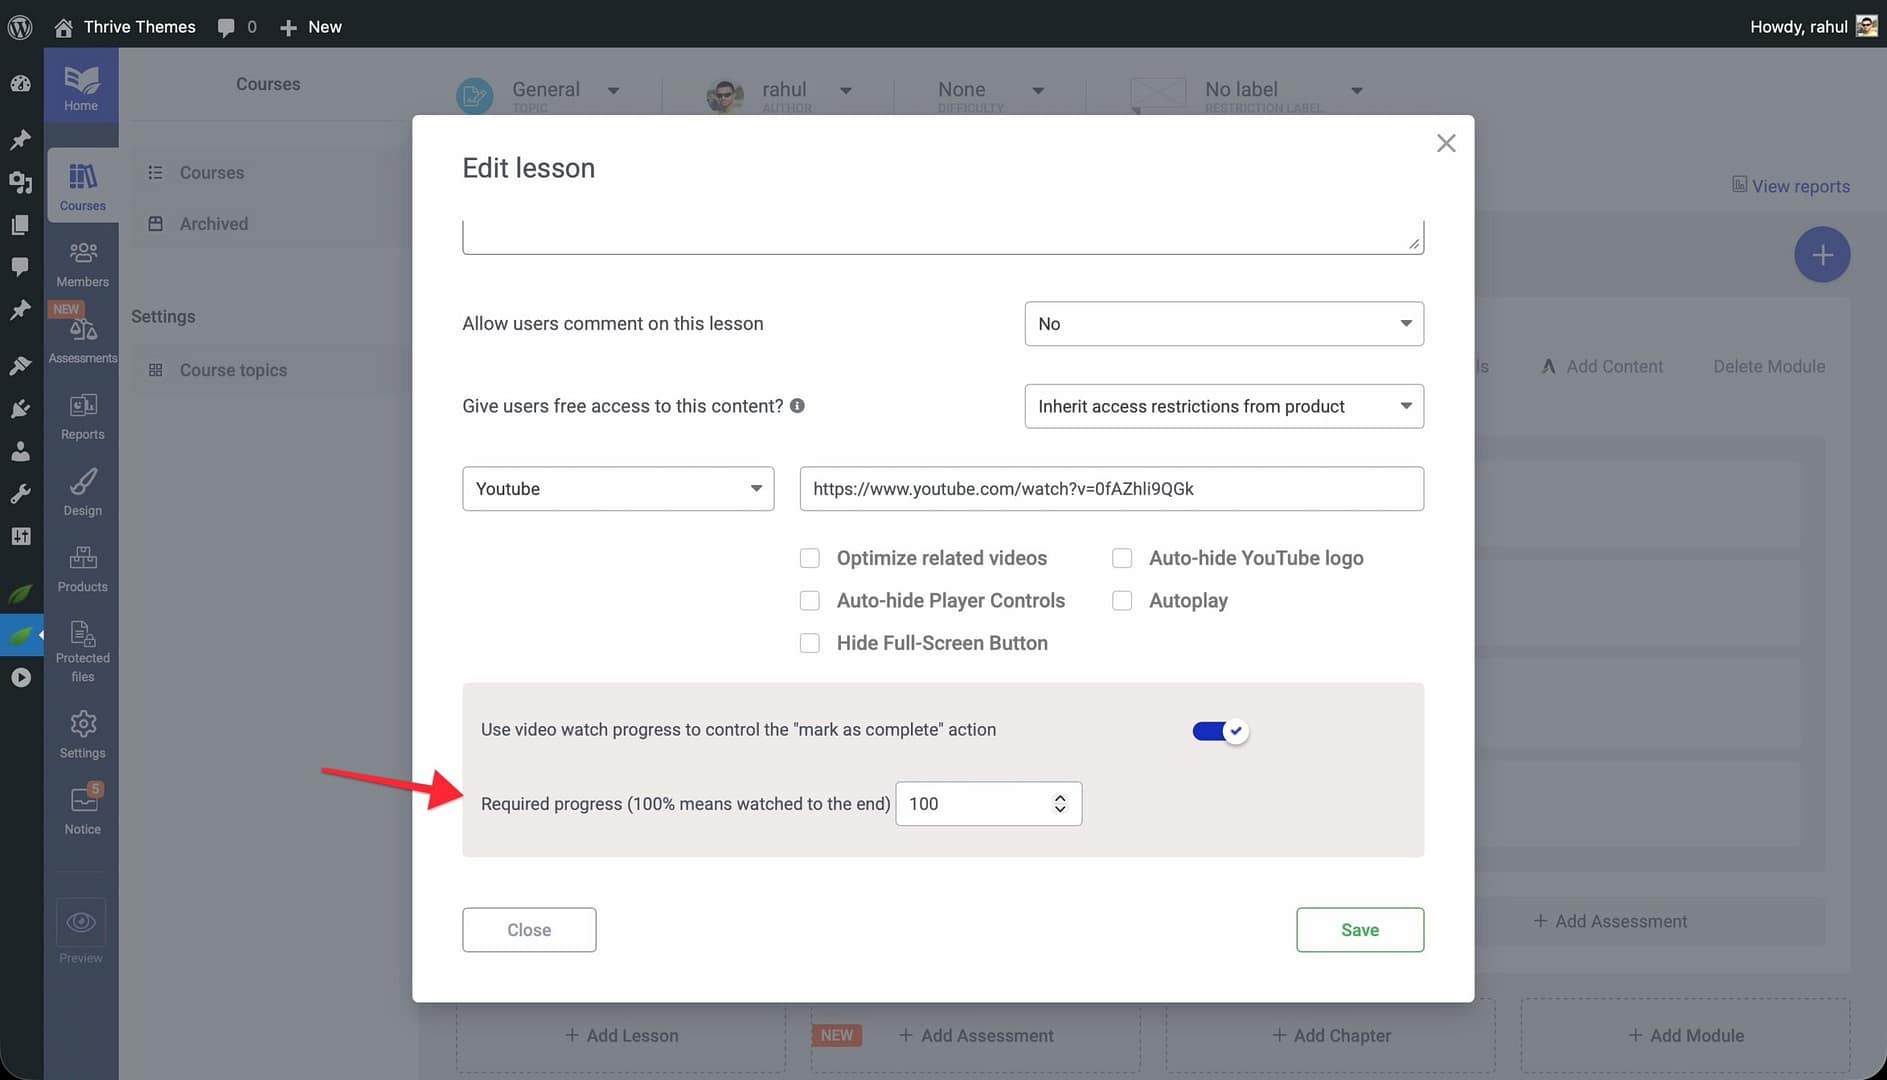
Requiring Students to Watch a Video Before Completing a Lesson
The Video Watch Progress feature lets you prevent students from marking a lesson as complete until they have watched a specified percentage of the lesson video. This ensures genuine engagement with your content.
Enabling Video Watch Progress for a New Lesson
- Go to Thrive Dashboard > Thrive Apprentice.
- Open the course and create a new lesson.
- Add a video to the lesson.
- In the lesson settings, locate the Video Watch Progress option.
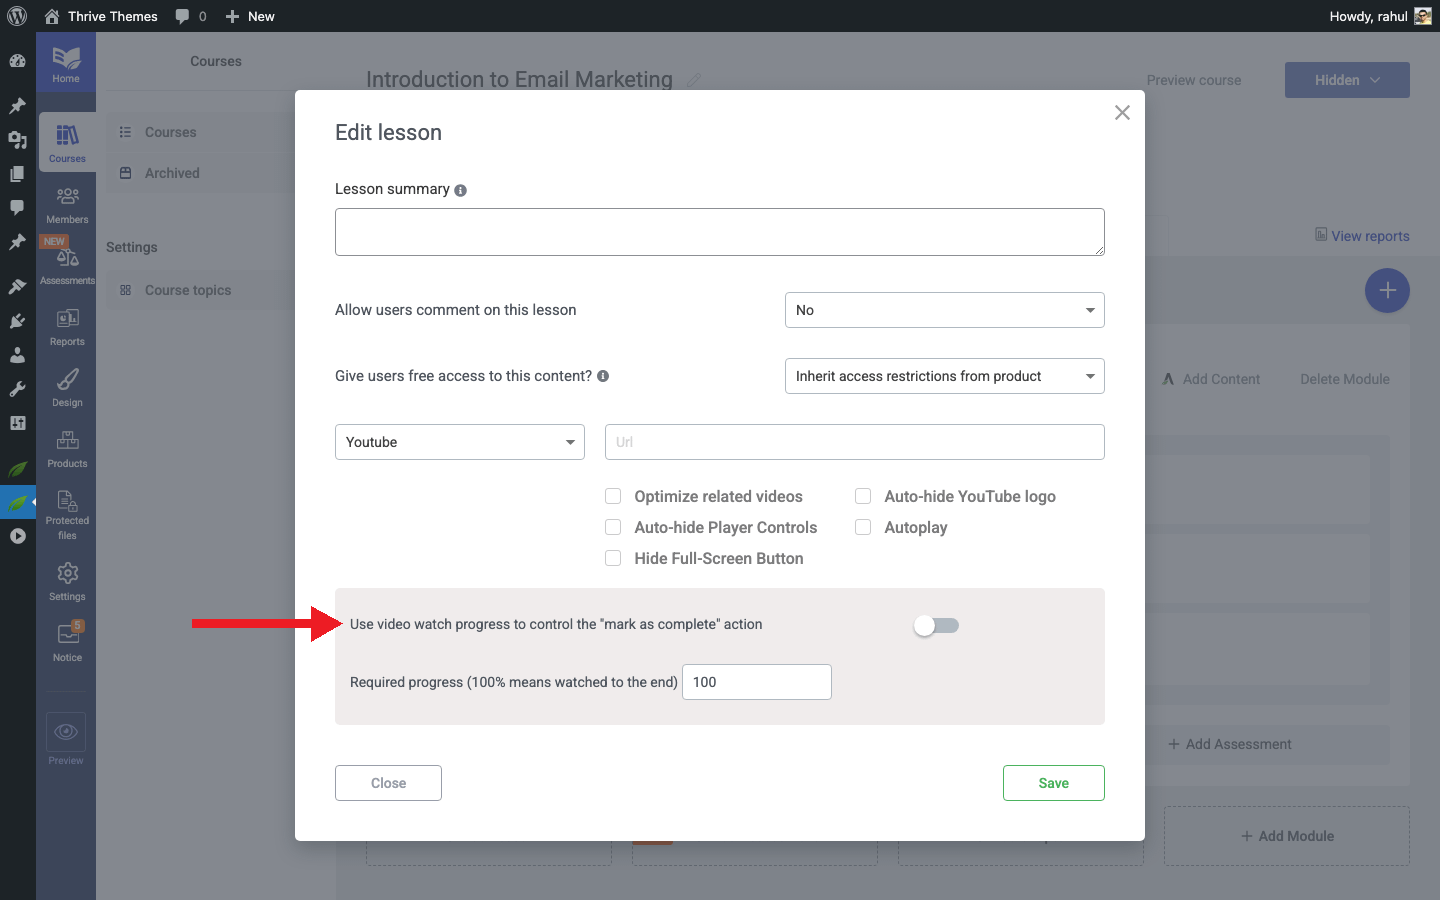
- Enable it and set the required watch percentage (e.g., 90%).
- Save the lesson.
Enabling Video Watch Progress for an Existing Lesson
- Open the existing lesson you want to update.
- Navigate to the lesson settings.
- Locate the Video Watch Progress option.
- Enable it and configure the required watch percentage.
- Save your changes.
Once enabled, students will not be able to click the Mark as Complete button until they have watched the required amount of the video. This helps maintain the integrity of your course completion metrics.
Recording Video Events for Analytics
The Record Video Events feature allows you to track how students interact with videos in your lessons. This data is valuable for understanding engagement patterns, identifying drop-off points, and improving your content.
- Go to Thrive Dashboard > Thrive Apprentice.
- Open the lesson where you want to track video events.
- In the lesson settings, locate the Record Video Events option.
- Enable it.
- Save your changes.
Once activated, Thrive Apprentice will begin recording video interactions—such as plays, pauses, and completion events—for that lesson. You can view this data in the Reporting section of your Thrive Apprentice dashboard to track student progress and engagement.
Conclusion
That’s it! You’ve successfully learned how to add video descriptions, reposition them on your templates, enforce video completion requirements, and track video events. These features give you full control over the video experience in your online school and help ensure that students truly engage with your content.
Related Resources
- Template Types Reference — Learn about all seven template types, including the Course Overview template where video descriptions appear.
- Displaying Lesson Resources by Progress — Show or hide lesson resources based on student completion status.
- Creating and Managing Templates — Build and customize the templates that house your video content.