Thrive Automator is a powerful tool designed to help you create automated workflows between your website’s plugins and third-party tools. This guide covers how to set up, manage, and troubleshoot your automations effectively.
1. Getting Started: Installation
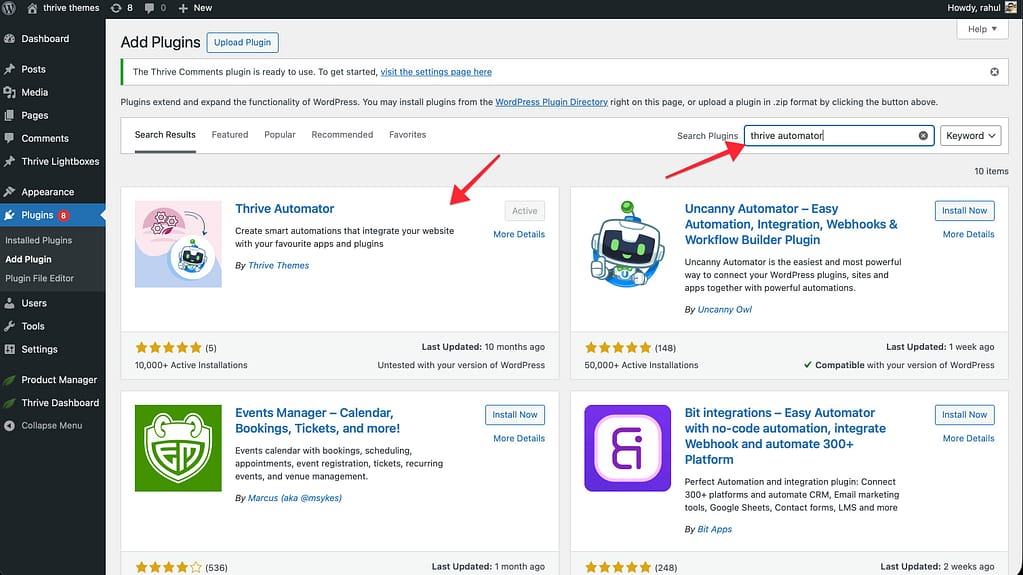
Thrive Automator is a free plugin available to everyone. You can install it in two ways:
From the WordPress Plugin Directory
- Navigate to Plugins > Add New in your WordPress dashboard.
- Search for “Thrive Automator“.
- Click Install Now and then Activate.
Unlocking More Features (Thrive Product Manager)
While the base plugin is free, connecting it to a free Thrive Themes account via the Thrive Product Manager unlocks advanced triggers and actions for email autoresponders, WooCommerce, and more.
- Install the Thrive Product Manager.
- Connect your account to access the full suite of free Automator integrations.
2. Navigating the Automations Dashboard
Once installed, access the dashboard via Thrive Dashboard > Thrive Automator.

Key Actions
- Add New: Start creating a new workflow by clicking the “Create your first automation” button.
- Filtering: Select multiple automations to Publish, Unpublish, or Delete them in bulk using the checkboxes at the left.
- Renaming: Hover over an automation’s name and click the Pencil icon to rename it.
- Duplicating: Hover over an automation and click Duplicate.
Note: Duplicated webhooks will have a unique URL. You must update your third-party service to point to the new URL.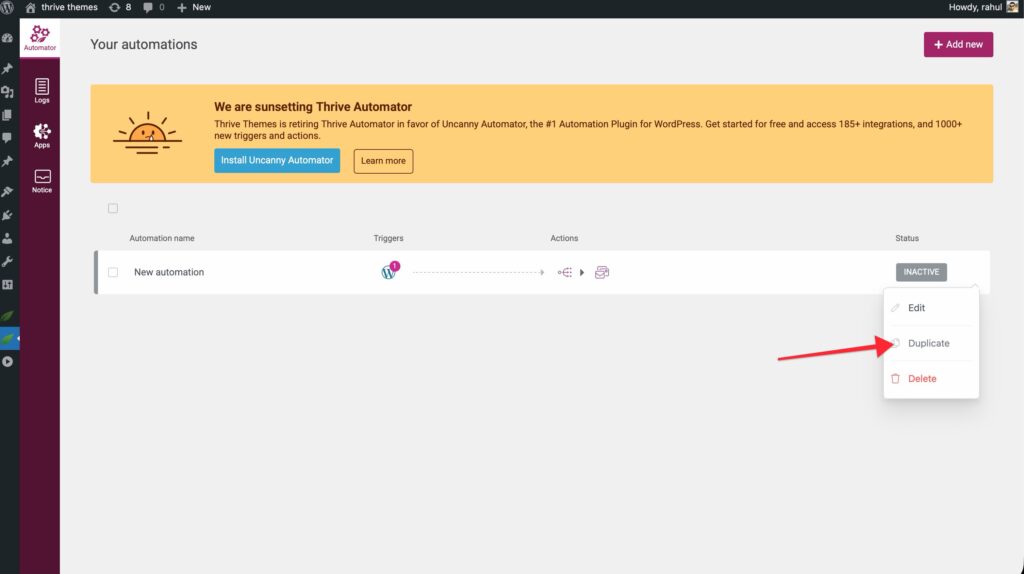
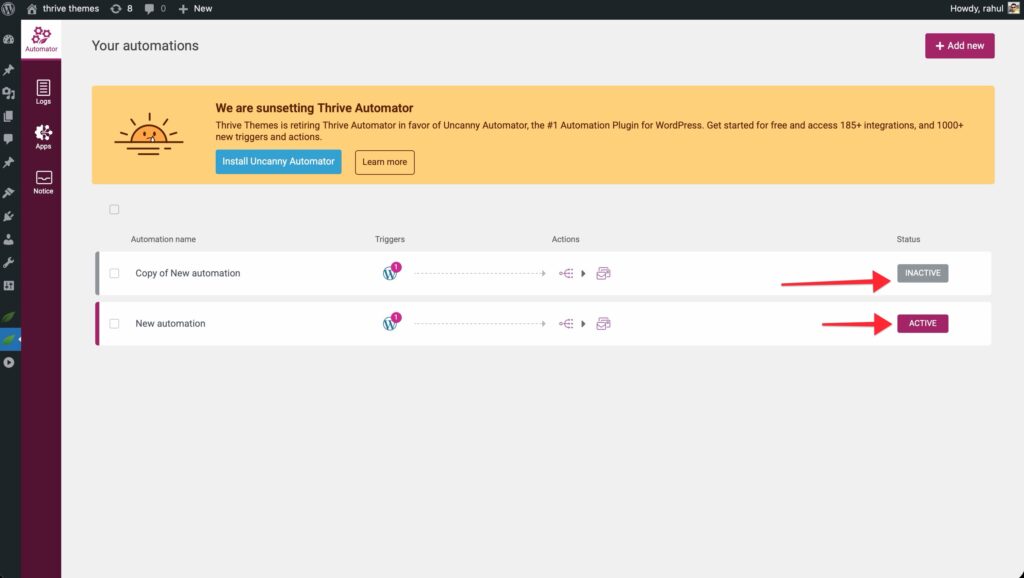
3. Understanding Automation Status
It is important to know if your automation is live and running.
- Active (Maroon Button): The automation is running. It will fire every time the trigger event occurs.
- Inactive (Grey Button): The automation is saved but not running.
- Draft/Saved: Progress is saved, but no actions will be taken until toggled to “Active”.
4. Troubleshooting with the Logs Section
The Logs tab is your first stop if an automation isn’t behaving as expected. It provides a detailed history of every time an automation was triggered.
How to use Logs:
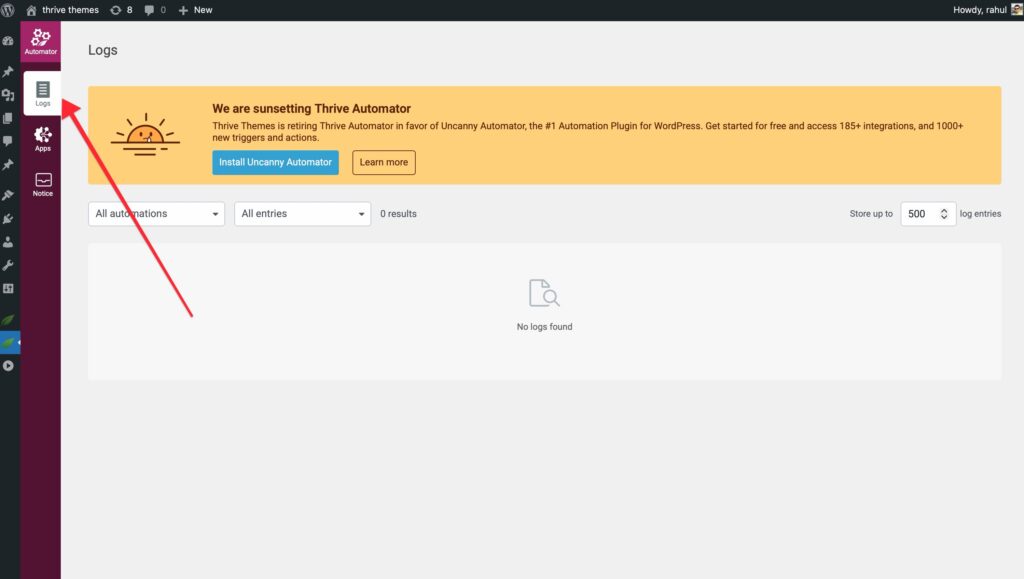
- Select the Logs tab in the Thrive Automator sidebar.
- Filter by Automation: Use the “All automations” dropdown to find a specific workflow.
- Filter by Date: Narrow down the history to a specific timeframe.
- Check Status:
- Success: The automation completed all steps as intended.
- Error: Something went wrong. You will see an error message explaining why (e.g., missing API connection or failed filter).
Viewing Raw Data
If an error occurs, click “See raw data” under the Actions column. This opens a pop-up with the exact technical error code, which is invaluable if you need to contact support or debug a webhook payload.
Log Management
You can control how much history is stored using the “Logs to keep” setting at the top right of the dashboard. This helps keep your database clean by deleting older log entries automatically.
5. FAQ & Quick Fixes
- Why didn’t my automation fire? Check if the status is set to “Active” and verify the “Logs” to see if a filter prevented the execution.
- My webhook isn’t working? Ensure the external service is sending data to the exact URL provided in the trigger setup.
- How do I delete an automation? Hover over the automation on the dashboard and click the trash icon. Note that this will stop all further executions immediately.