Do you want to make your online courses more structured and easier for students to navigate? Organizing lessons and chapters into modules with Thrive Apprentice helps break down your content into manageable sections, allowing learners to follow your courses step by step with greater clarity.
In this article, we’ll show you how to organize your course lessons and chapters inside modules on your website.
- Adding Modules to a Course on Your Website
- Adding New Lessons or Chapters to a Module
- Rearranging Modules in a Course
- Editing the Module Details
- Editing a Module Content
- Deleting a Module
Adding Modules to a Course on Your Website
To create modules in Thrive Apprentice, please ensure you’ve created a course using Thrive Apprentice.
To open a course in Thrive Apprentice, first open your WordPress admin area, navigate to Thrive Dashboard >> Thrive Apprentice, and in the left panel click on Courses.
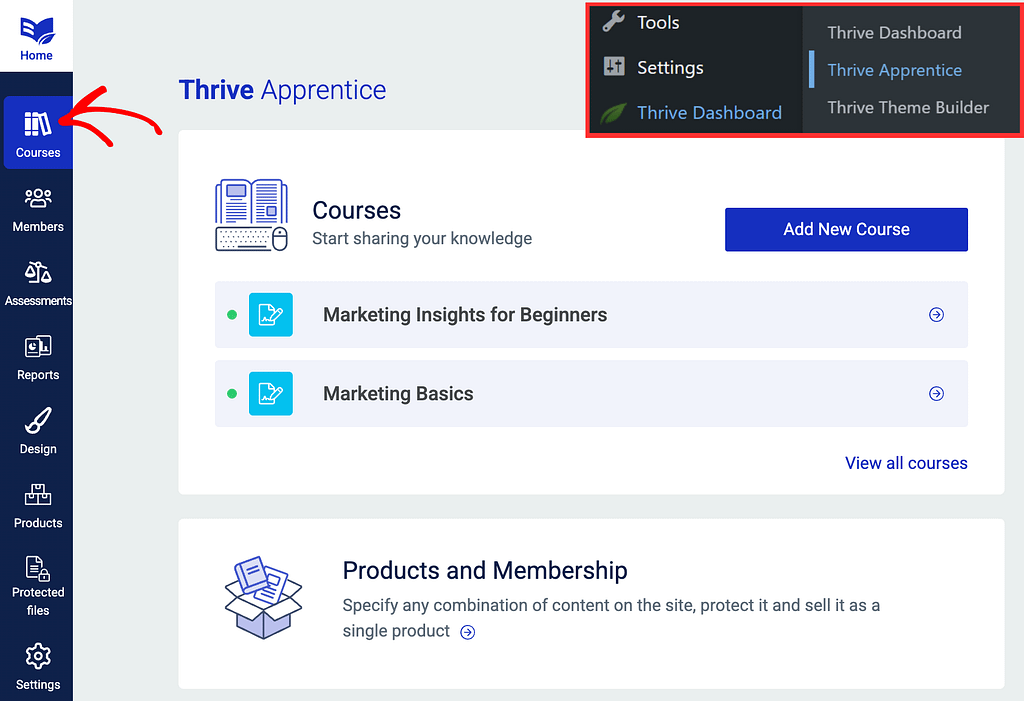
On the Courses page, click on the Course you want to add the module to.
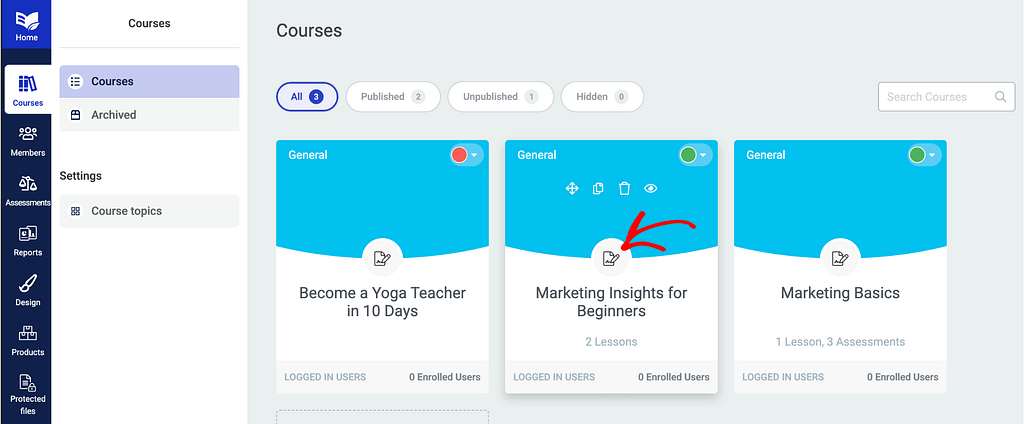
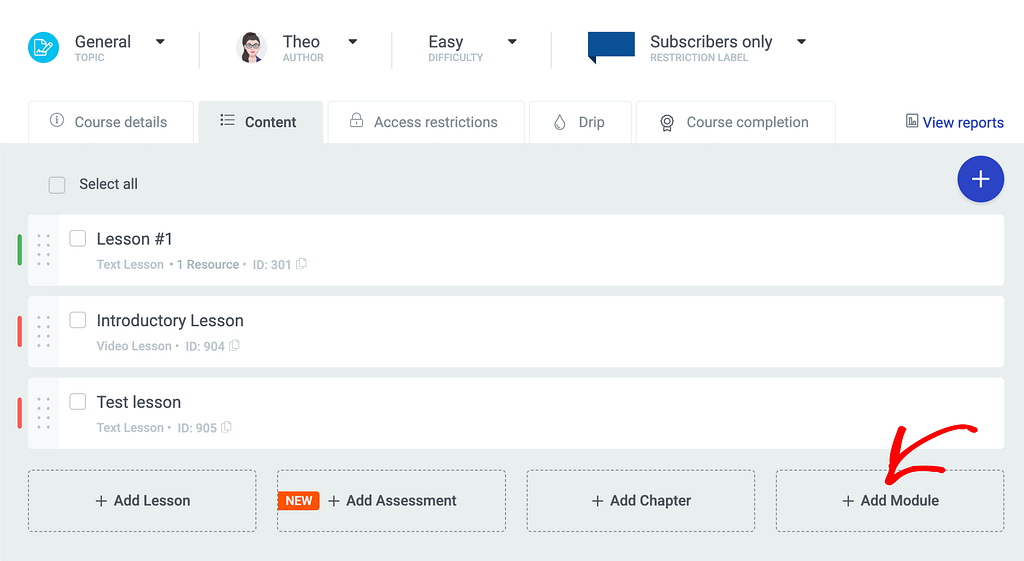
On the individual course page, click to open the Content tab.

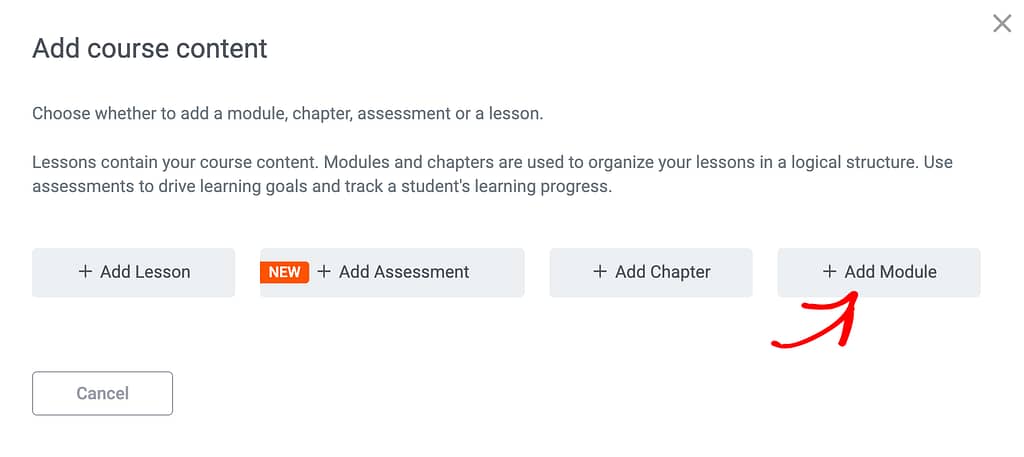
Under the Content tab, click on +Add Module to add a new module.
The other way you can do this is, click on the + icon on the right.
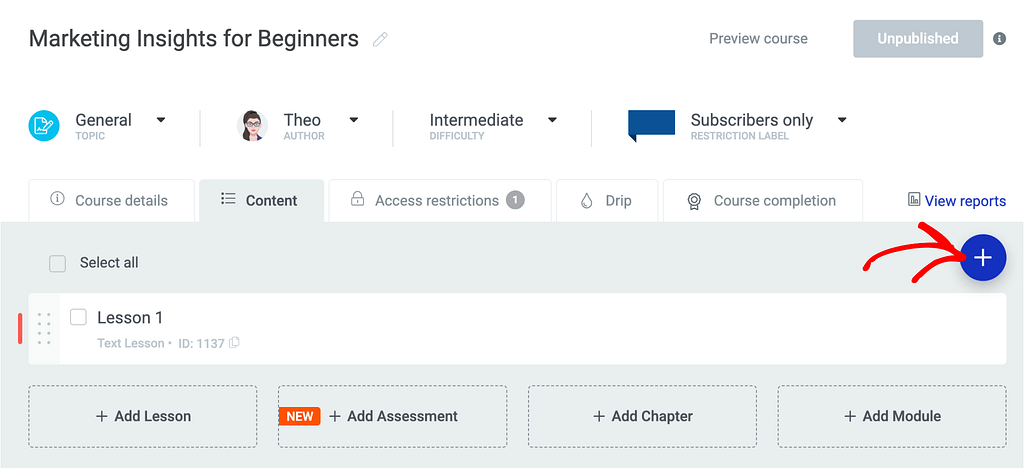
Clicking the plus icon, you’ll see a popup where you select the content type. On this popup, click Add Module.
After you click to add a module you’ll see a notice mentioning that the present lessons and chapters inside the course will be added to the module.
Note: This notice is only seen when you already have a lesson/lessons, chapter/chapters in the course.
To proceed, click the Continue button.

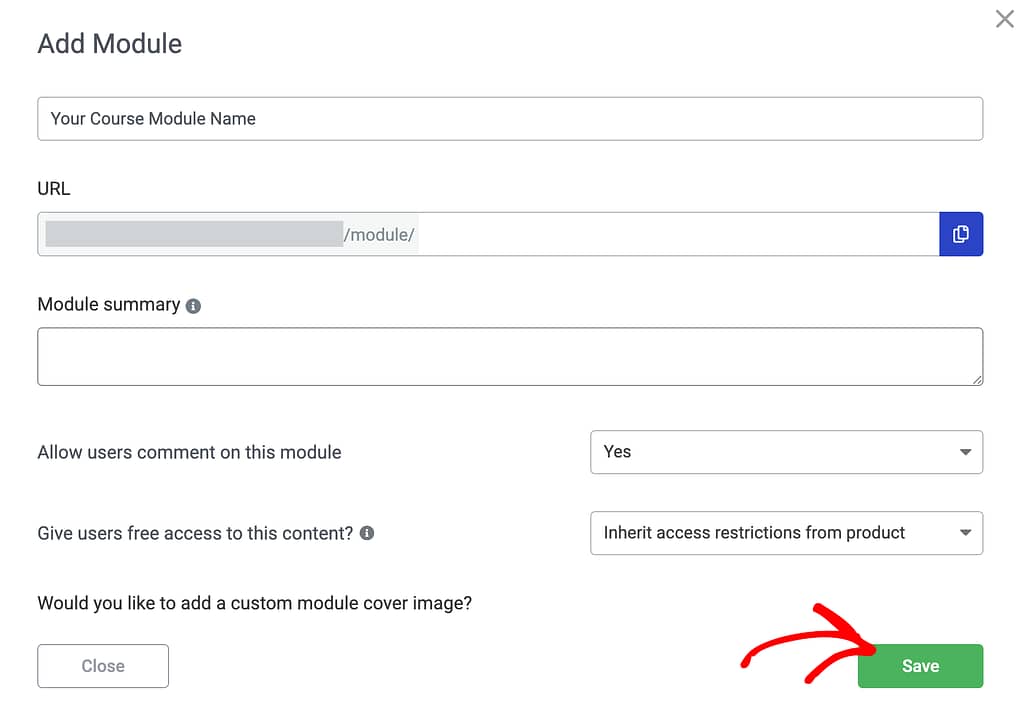
When you agree to add the lesson/lessons to the chapter, in the next step, enter the Module name and click the Save button.
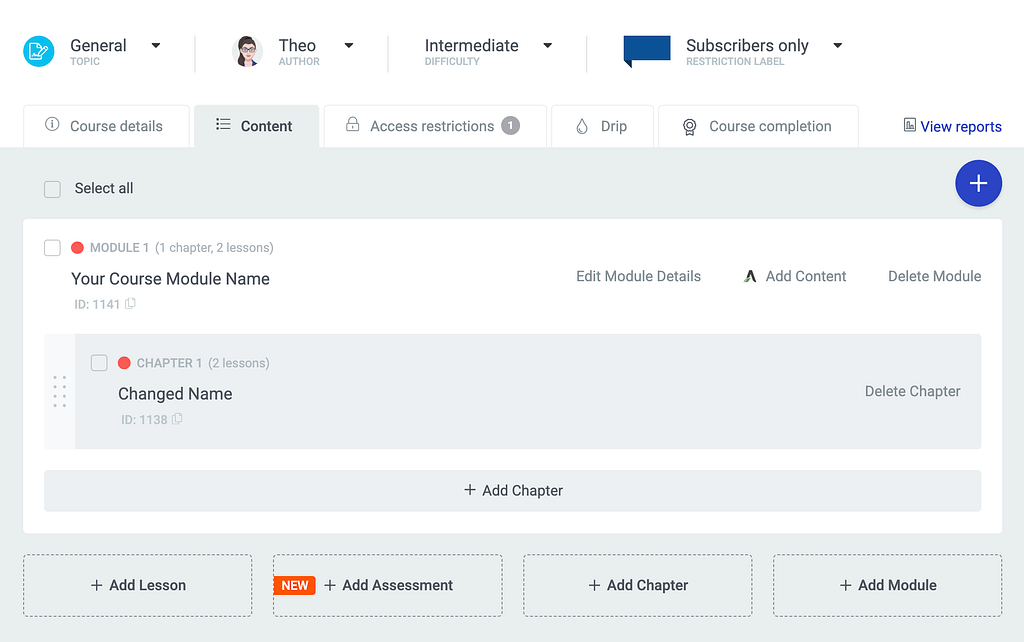
Clicking the button will close the popup and you’ll see the module added in the course with the lesson or the chapter moved inside it.
Adding New Lessons or Chapters to a Module
You can see an option to add a lesson or chapter to a module depending on the content present inside the module.
For example, when the module contains a chapter with a lesson within, you’ll see an option to add a new chapter inside which you can add a lesson.
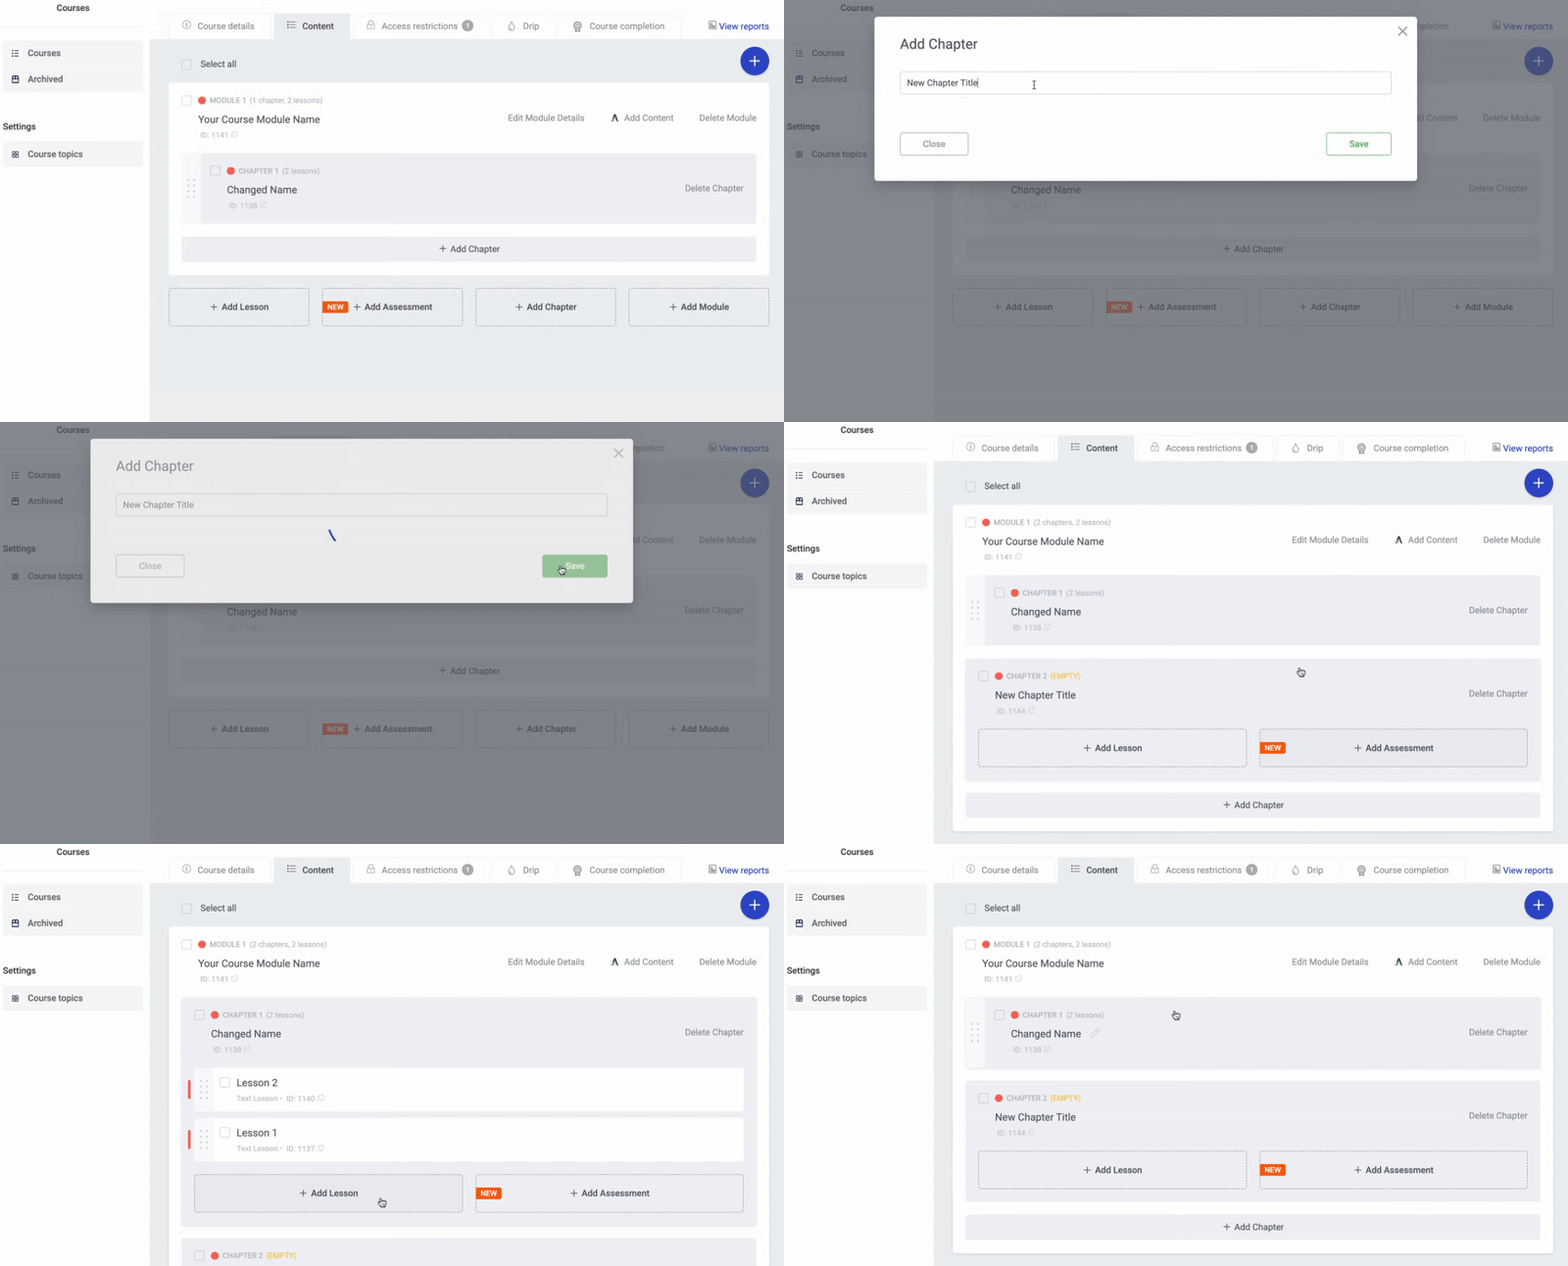
Also, if the module has only lessons that are not included inside chapters, you’ll see options to add a lesson, chapter or assessment directly inside the module.
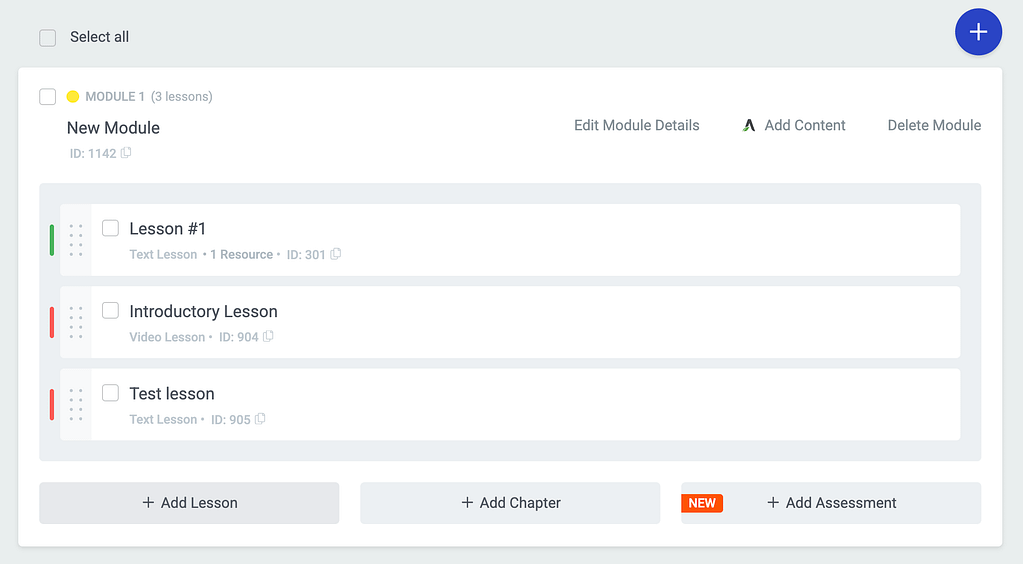
Clicking on Add Lesson will open a popup where you have to enter the Lesson name, type and more as listed in this section here.
Similarly, this document here will help you create a chapter in Thrive Apprentice.
Rearranging Modules in a Course
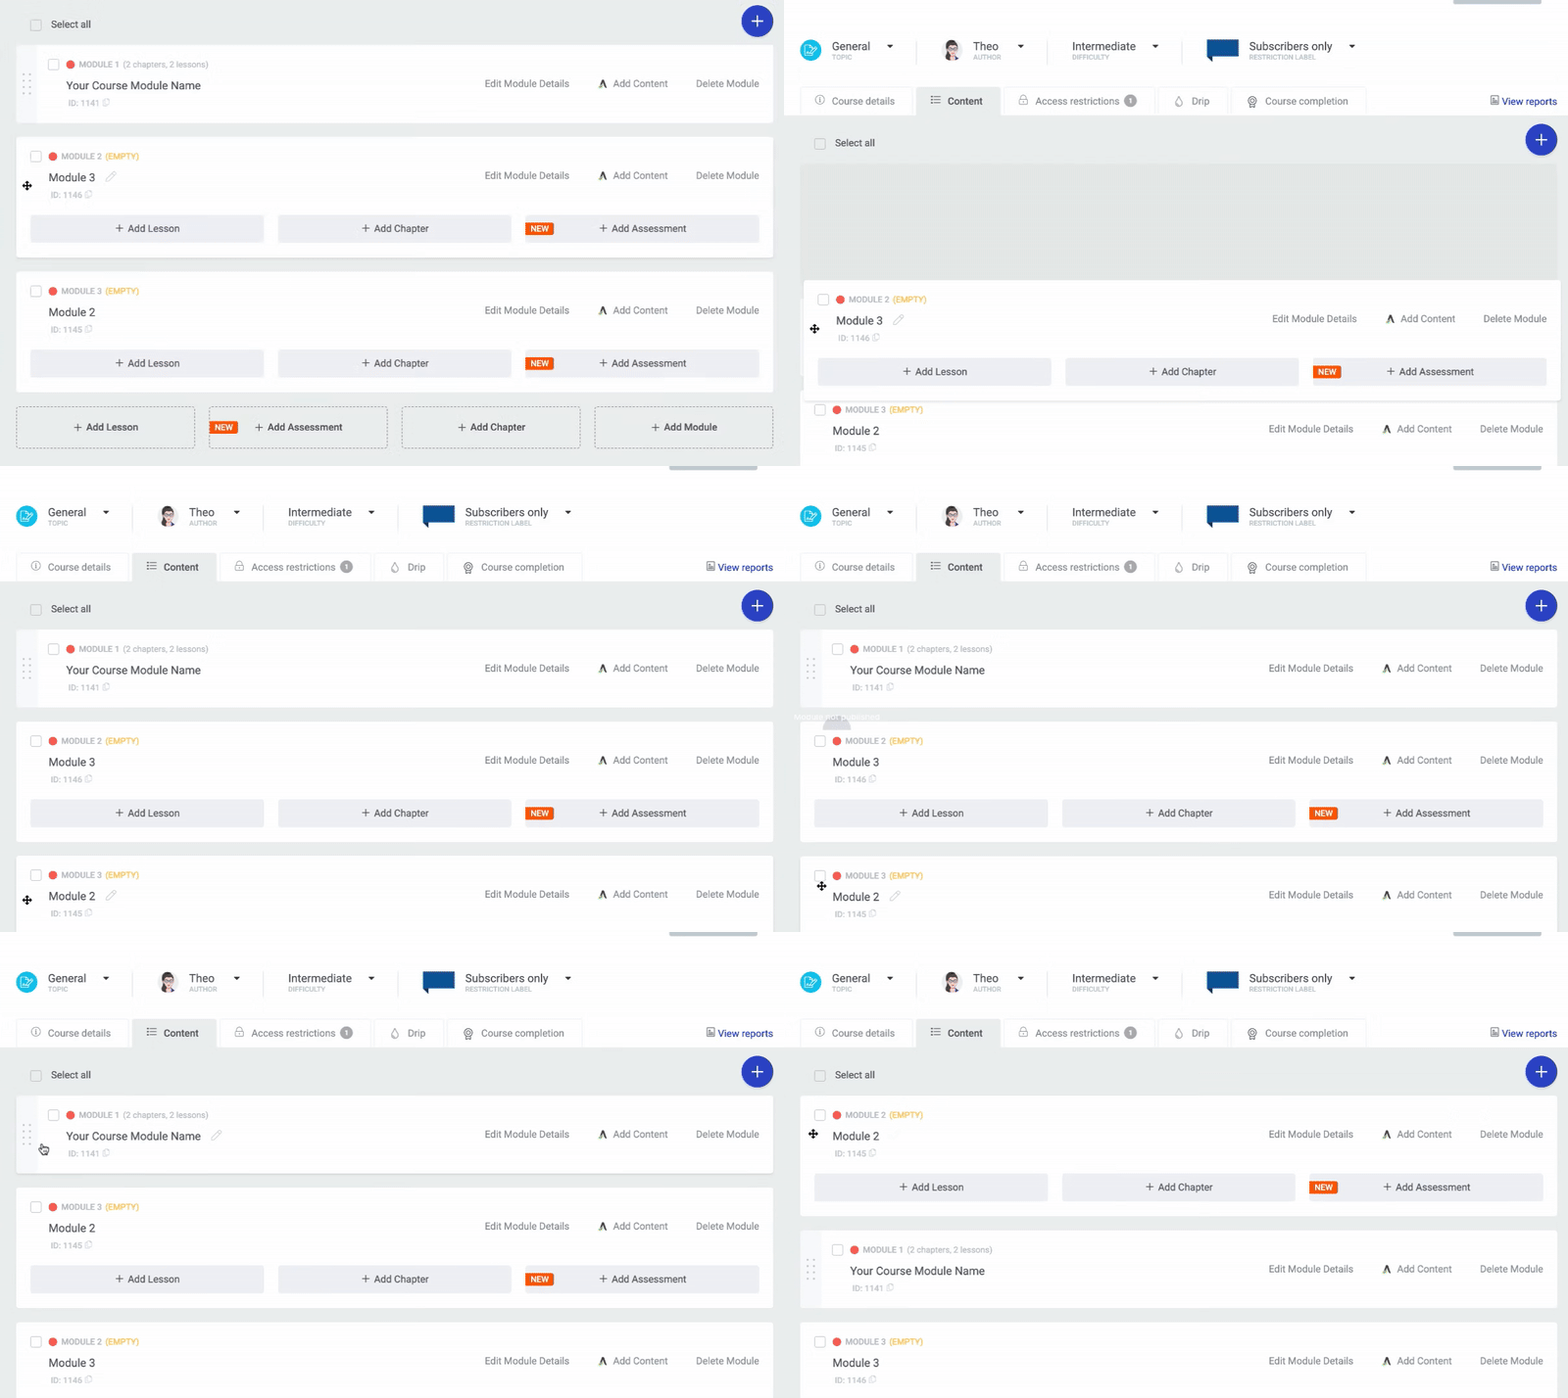
When you have multiple modules under one course, you can choose to reorder them as you want.
To reorder modules inside a course, simply, click on them and drag and drop them in the order you want.
Editing the Module Details
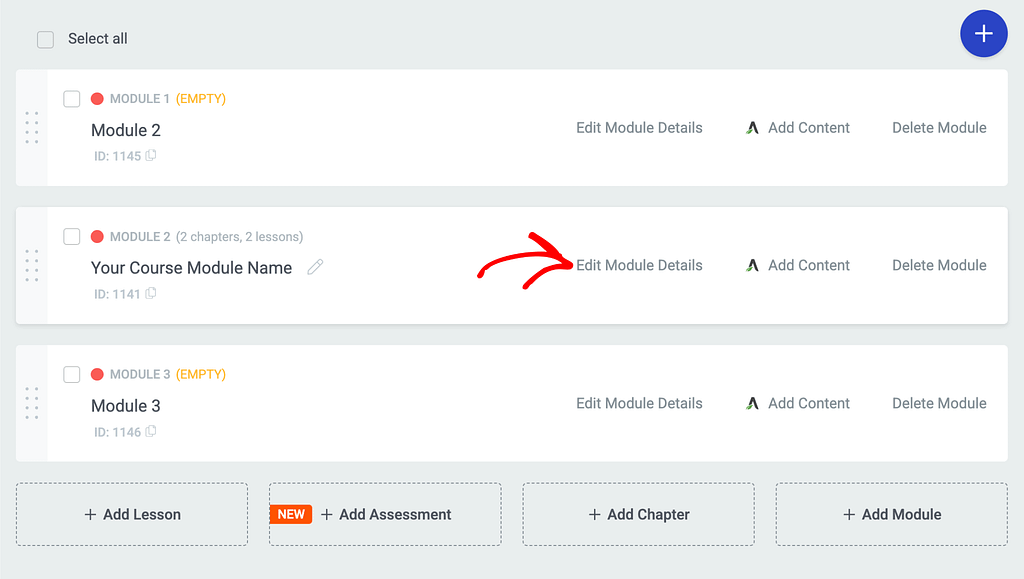
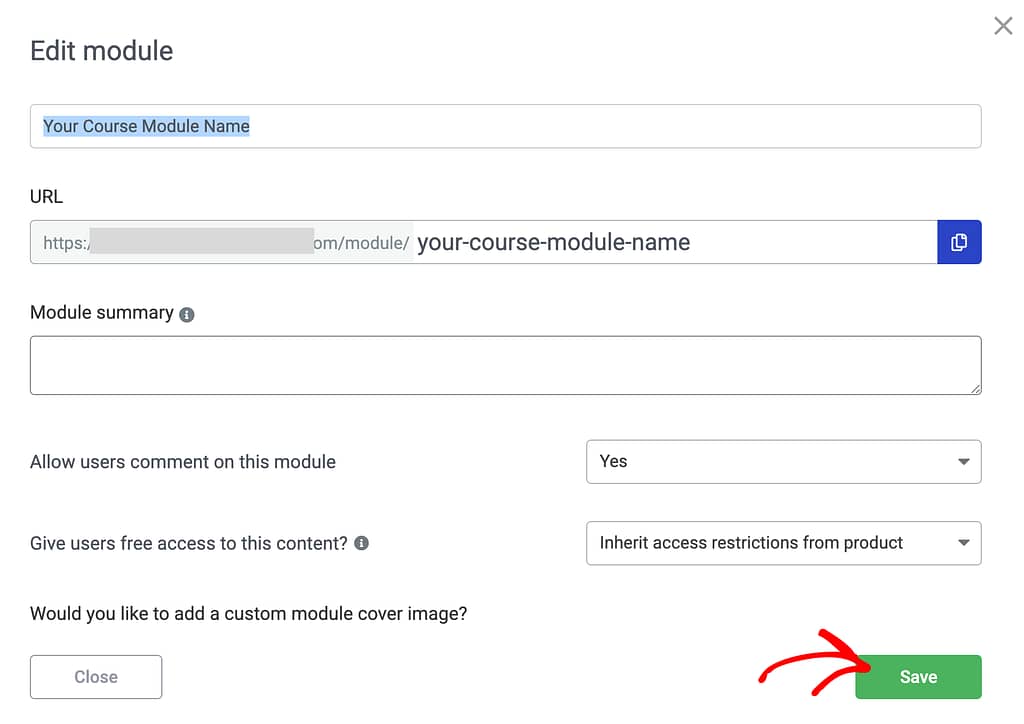
To edit the details of a module like the name, slug, summary and other settings, click on Edit Module Details on a module.
Clicking to edit module details will open the settings in a popup where you can edit the details and click the Save button on it.
Editing a Module Content
The content inside a module can be edited using the Thrive Architect editor. To edit a module content, click on the Add content link.
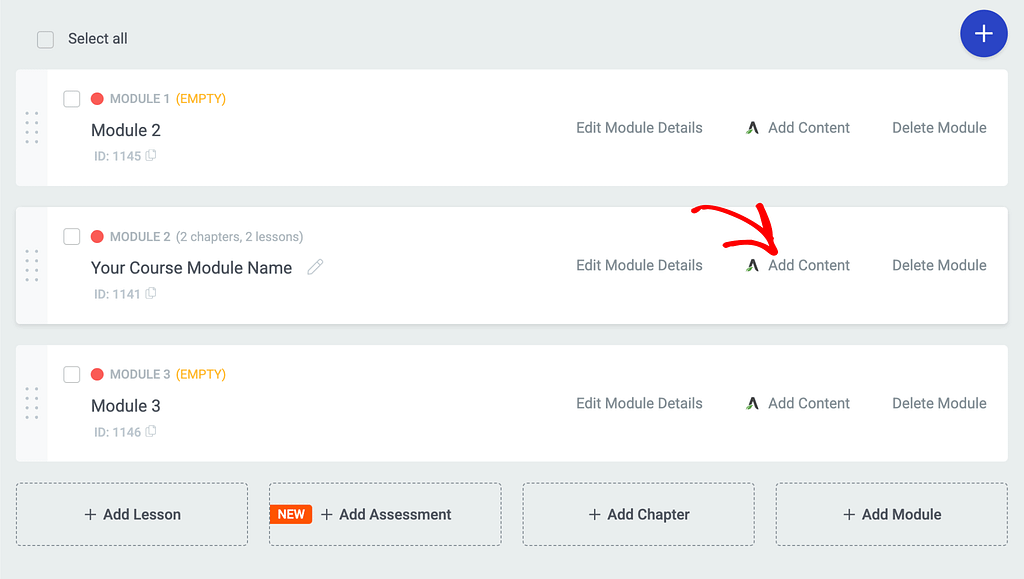
Clicking on this option will take you to the Thrive Architect editor, from where you can use the left sidebar options of each element, to customize it as you want.
Moreover, you can add new elements, using the plus sign from the right sidebar, and simply using the drag and drop method to place the elements.
Deleting a Module
When you no longer need a module inside a course, you can delete it.
Note: Deleting a module will also delete the content inside it.
To delete a module, click on Delete Module.
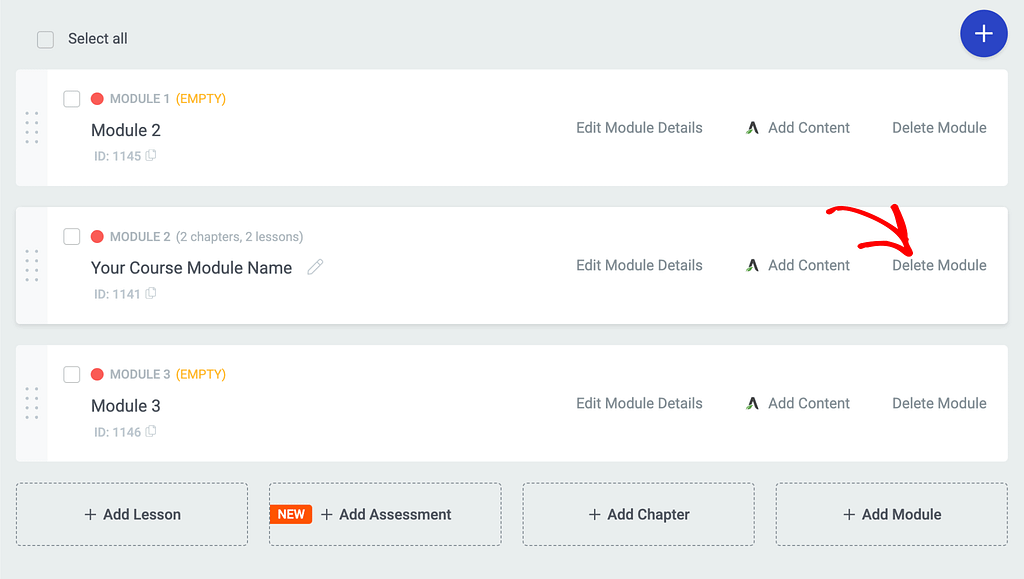
Clicking to delete a module will show a popup asking you to confirm whether you really want to delete the module.
On this popup, click Yes.

We’ve just seen how you can add a new module in a Thrive Apprentice course and organize lessons and chapters inside it.
Next, if you want to learn more about how to organize lessons inside chapters, read our document here.