In this tutorial, we will have a look at how you can offer a trial version of a Thrive Apprentice premium course to your users, then automatically remove them from the course once the trial period is over.
|
Let’s say you are promoting your latest course on your website. You are offering a free trial period, in which the users can see what the course is about. When the trial expires, the users will not have access to the course anymore and will have to buy it in order to complete it. In addition to this, they will also be added to your mailing list, and receive a discount code via email, that they can use when purchasing the course. |
You can do all this in Thrive Automator, and thus, create a workflow that will run independently and automatically every time the trigger is set off.
When the users land on the promotion page, they will automatically trigger the Thrive Ultimatum campaign, and also, the automation itself.
In the following steps I’m gonna show you exactly how you can do that:
1. Create the Thrive Apprentice Course
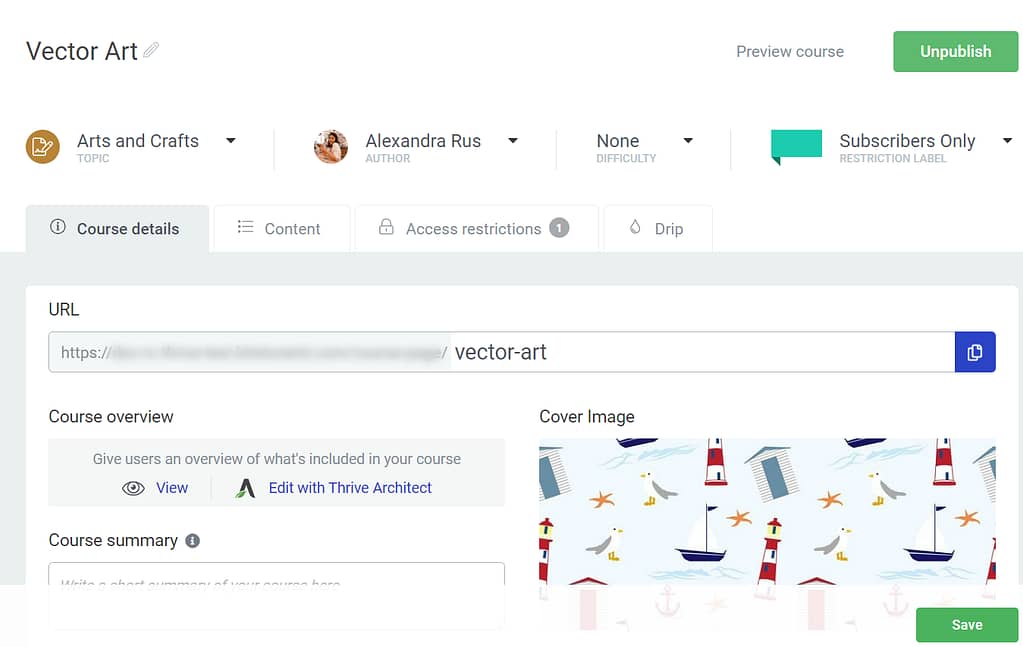
First, access Thrive Apprentice and access or create the course for which you want to offer a free trial to your users:
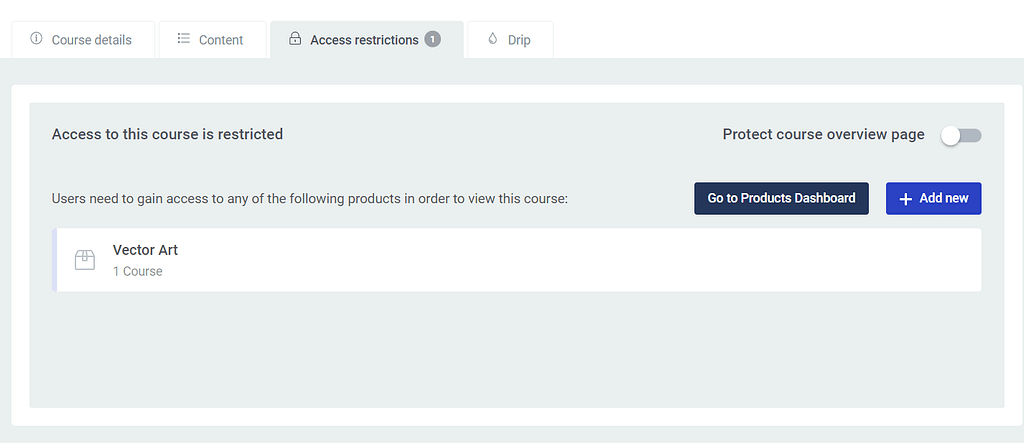
Then, make sure you add your course to a product:
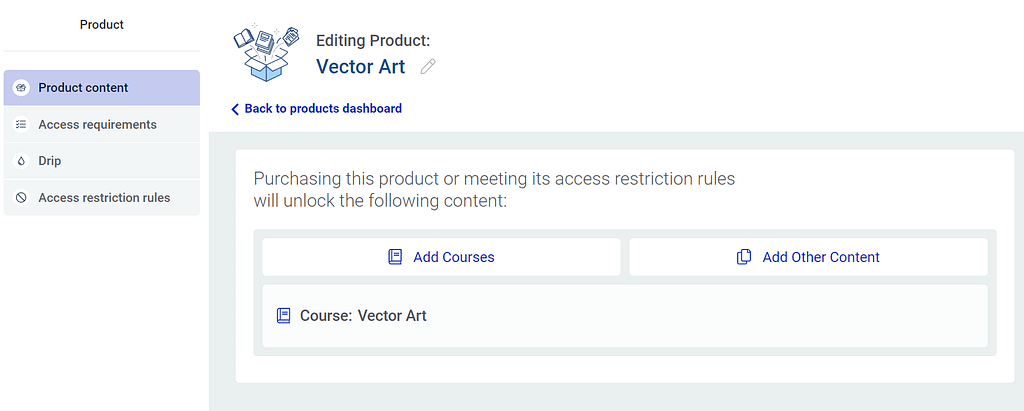
After you do that, you will be taken to the product level settings, where you can start configuring the access requirement and access restriction rules:
Set up Access Requirements
In order to sell your product through a checkout tool or membership plugin, you need to make sure you have the right integration with the chosen service:
Feel free to read the article linked above, if you want to decide what service to use. You will also find there links to other ‘how to’ articles, if you want to learn how to integrate with those services.
In this example, as mentioned, I will be using SendOwl, which is already set up on my website. In order to make sure my product is protected by this tool, I need to make sure that I set up the restriction rules:
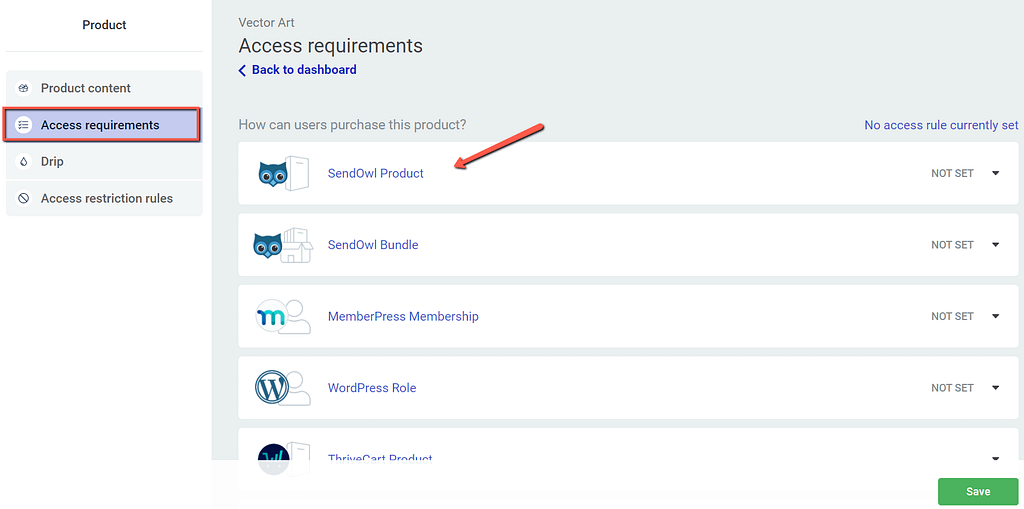
Since, in this case, the user will have to purchase the product through SendOwl, you need to make sure this rule is set for the course:
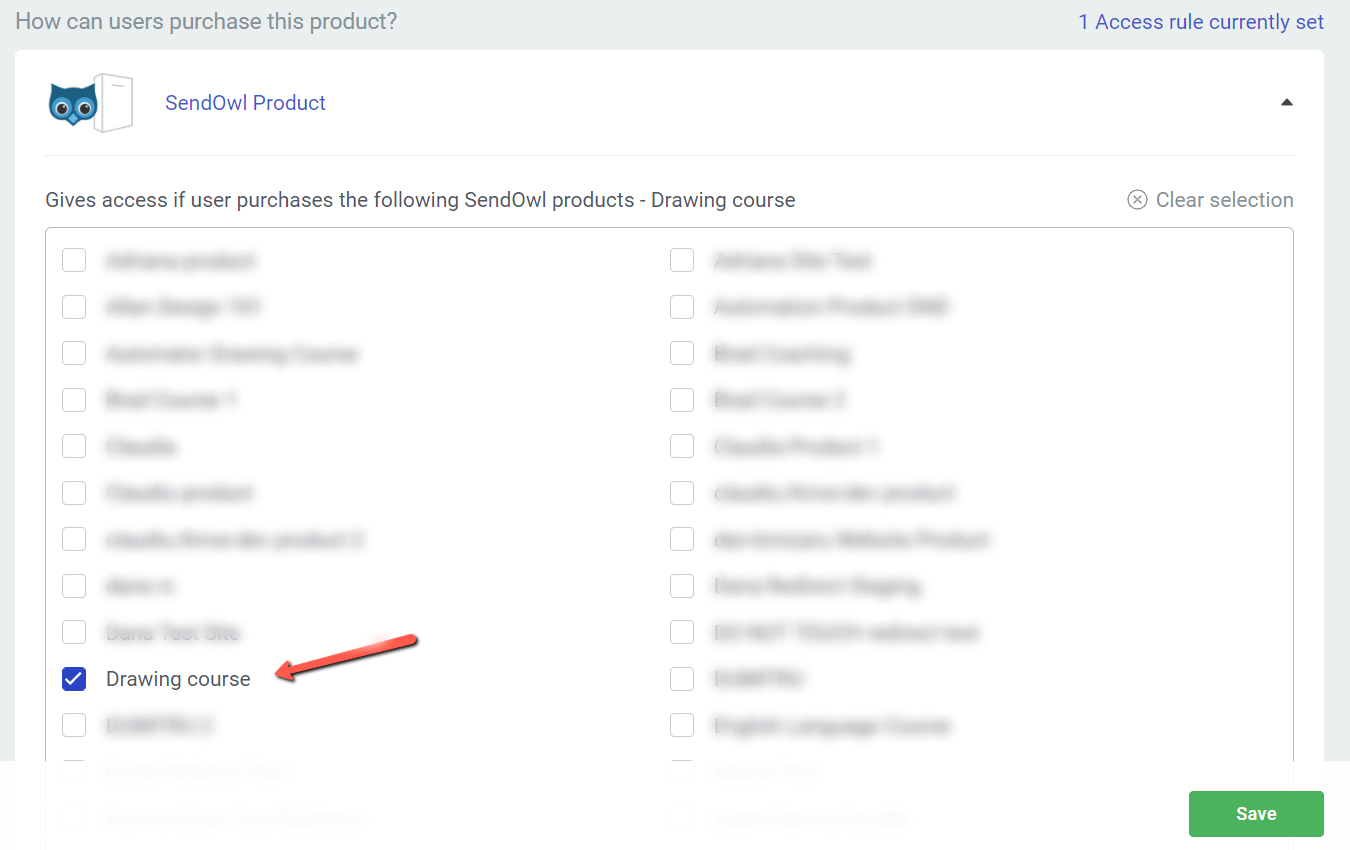
If you want to learn more about access restrictions and selling your courses through SendOwl, make sure to also check out these articles from our knowledge base:
Configure the Access restriction rules
The next step in the process is setting up the page and content that will be displayed to the users who are trying to access the course.
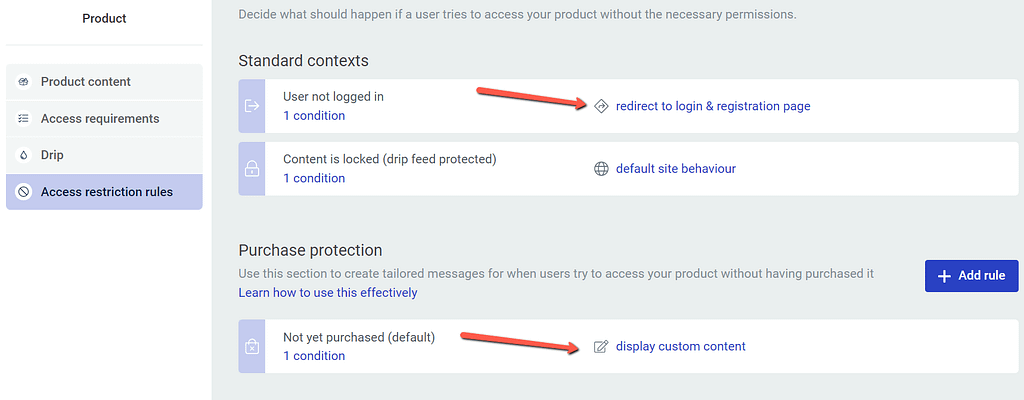
For the guests who are trying to access the course, I’ve simply selected the “Redirect to login & registration page”, where they will have to proceed first with creating an account.
For the users who are already registered, but trying to access the course, make sure the “Display custom content” option is selected here:
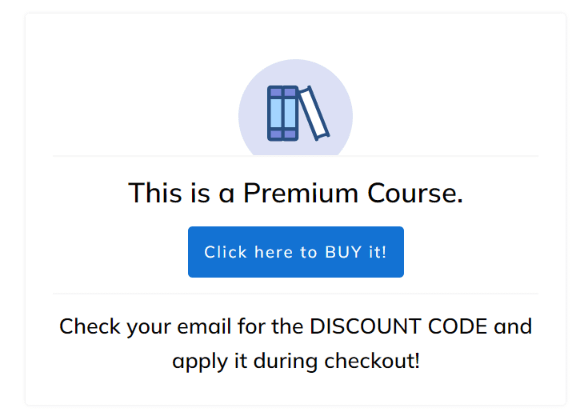
This is the page that the users will see when they stop having access to the course.
The template already comes a predefined template. Customize it as you best see fit, and make sure you use the purchase link here, which redirects the customers to the next step in the checkout process:
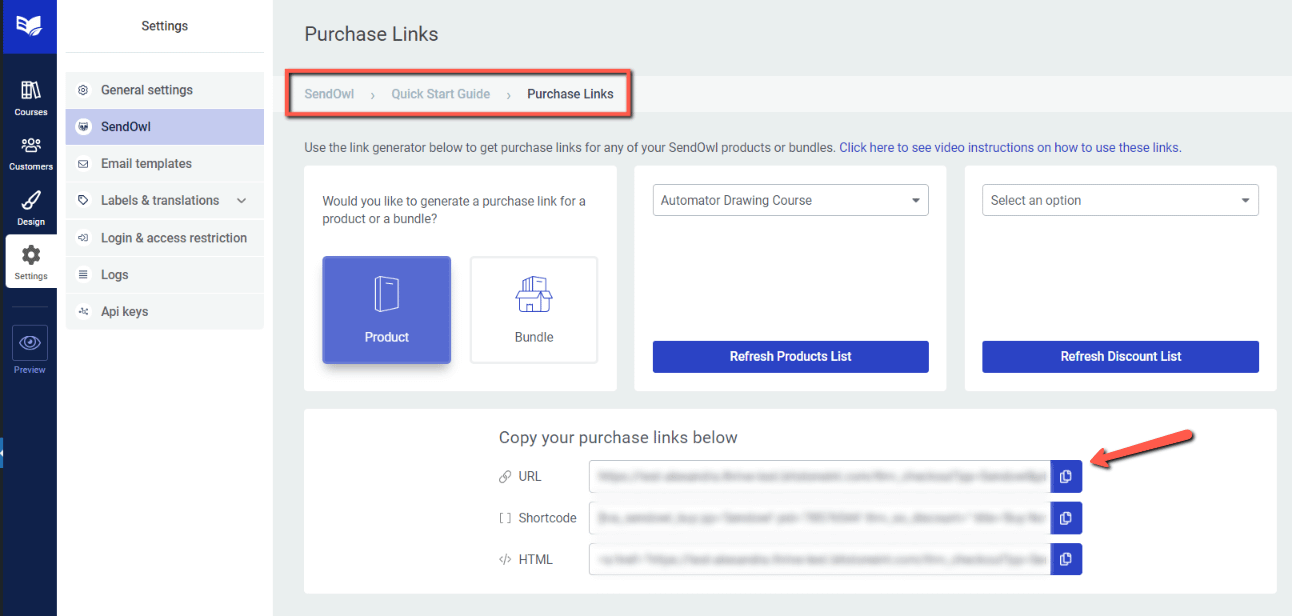
The purchase link can be generated and copied from the SendOwl “Quick Start Guide”:
Here’s a step-by-step tutorial that you might find useful if you want to learn all about the process of selling your courses with SendOwl:
2. Set up Your ‘Free Trial’ Page
You’ll next have to create a page on your website, where the user will be able to view the offer. This is also the page where the Thrive Ultimatum campaign will run.
Here as well you can choose from a set of predefined templates, or you create the page from scratch.
Any visit to this page will trigger the Thrive Ultimatum campaign, which, in return, will trigger the automation.
3. Configure the Thrive Ultimatum Campaign
When creating your Thrive Ultimatum campaign, you need to make sure that you are, first of all, setting up an evergreen campaign:
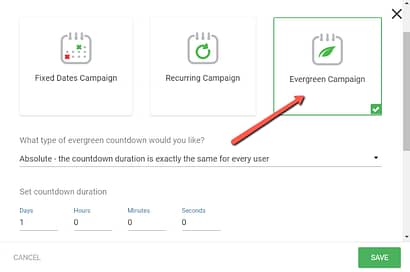
This is due to the fact that the evergreen campaigns are triggered by users’ actions, and not by dates. So it will only run based on the settings you configure for it, and only for specific users from your website.
While you are configuring it, set the trigger to be a “Visit to a specific page”, and then select the previously created promotion page:
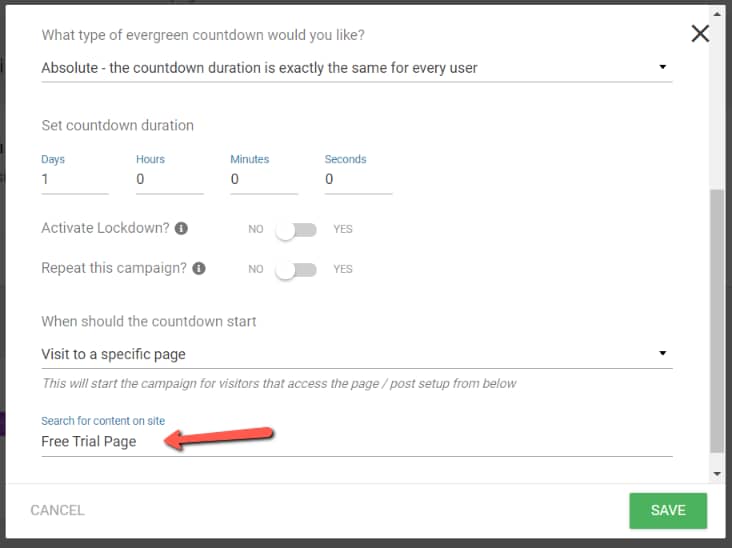
Lastly, make sure that you set the same page in the “Display” settings, and set your campaign to “Running”:
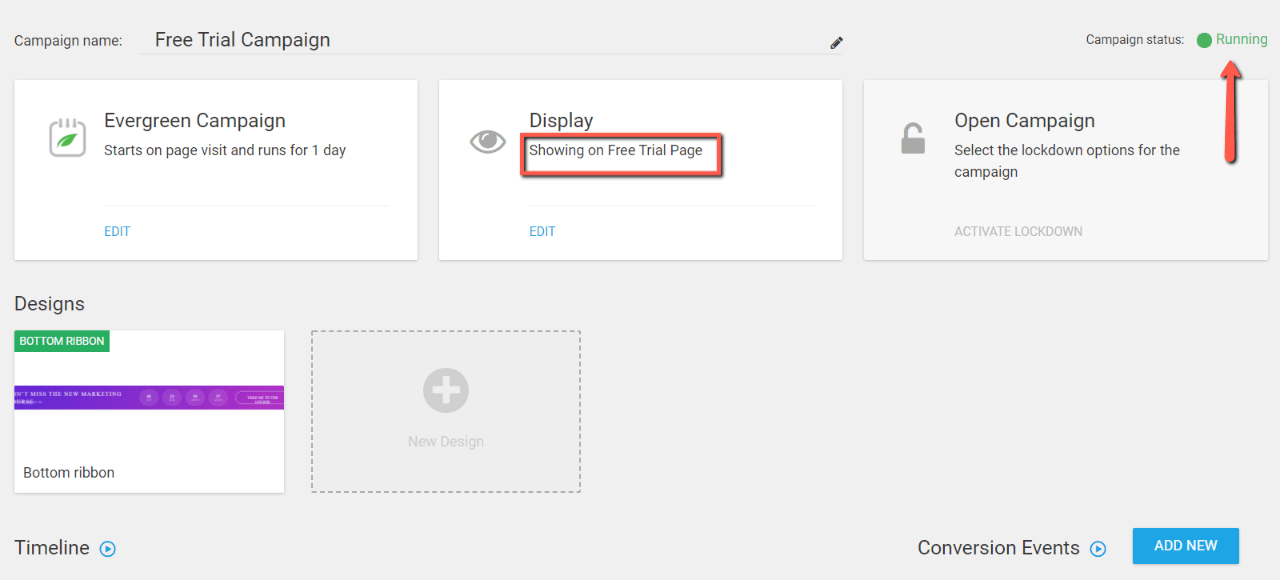
As always, I recommend accessing our knowledge base for more in detail information about how to set this up on your website:
Now that you’ve set everything up, you can go on to the next and final step, which is creating the workflow in Thrive Automator.
4. Set up Your Automation
In order to create your automation, head over to your Thrive Dashboard and select Thrive Automator:
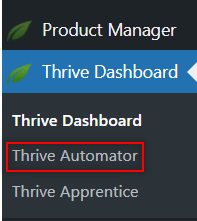
Create a new automation from the “+Add New” button:

Next, you can rename it, to make sure you quickly identify if you are running multiple automations on your website, and then you can proceed with selecting the trigger:
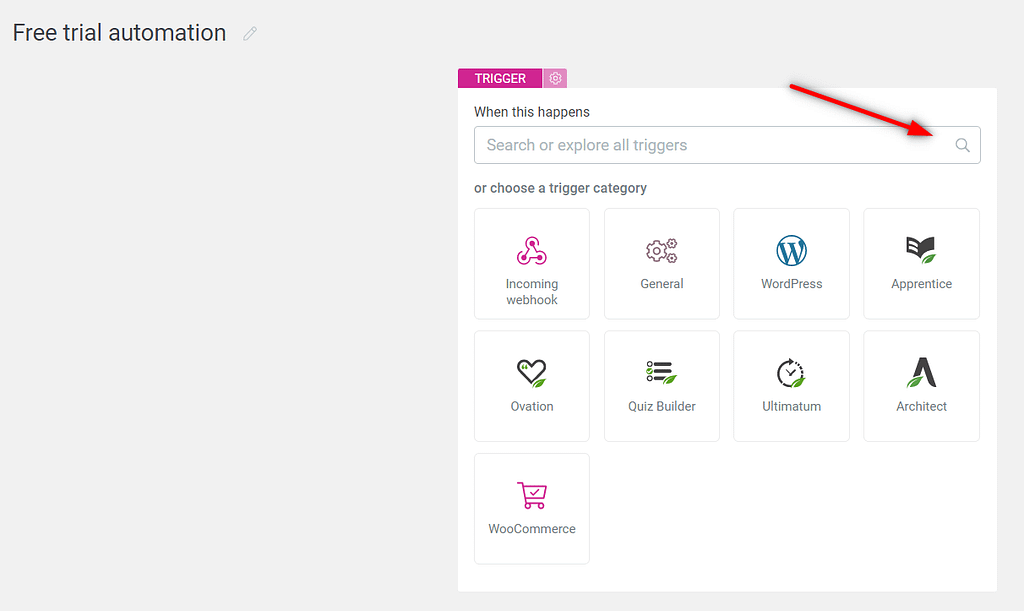
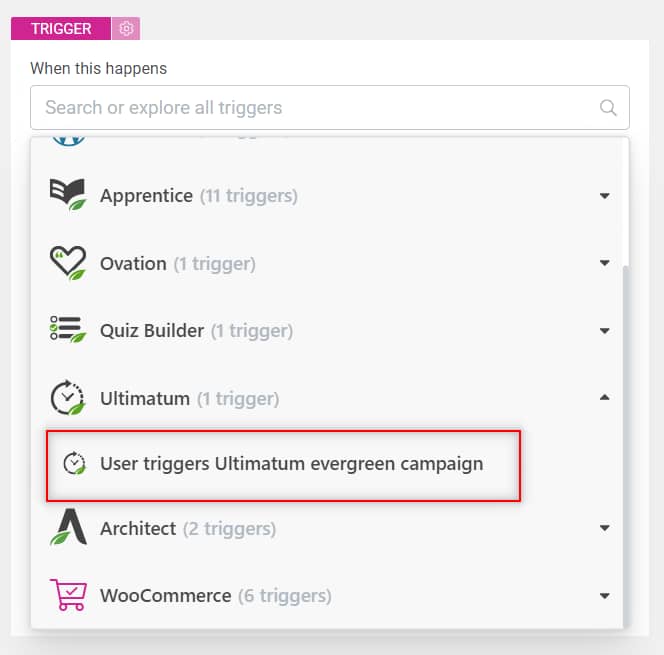
Open the drop-down list, and for this example, you will have to use the “User triggers Ultimatum lockdown campaign” trigger:
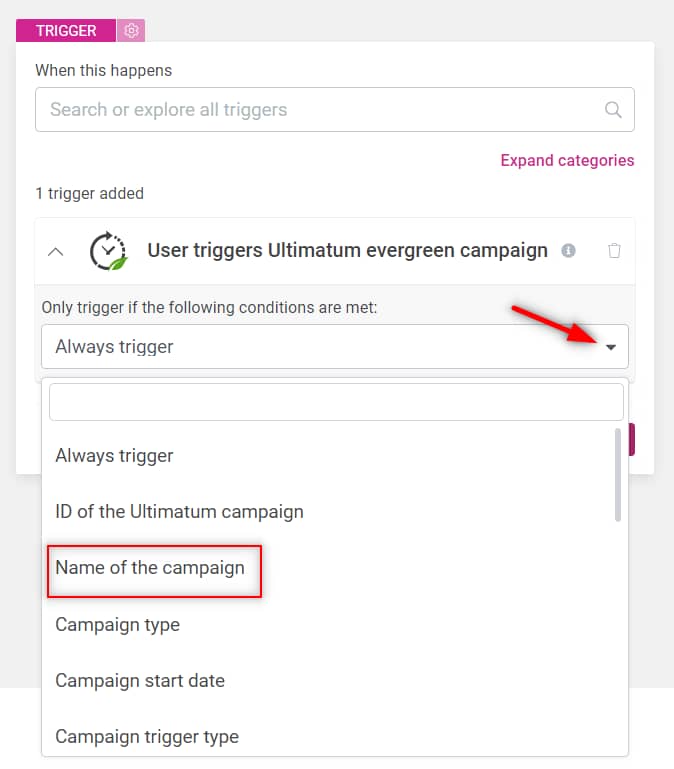
You can next add a condition that needs to be met, before the trigger starts. For this example, I’ll choose the “Name of campaign”, which means that the user needs to trigger the exact campaign that I select here:
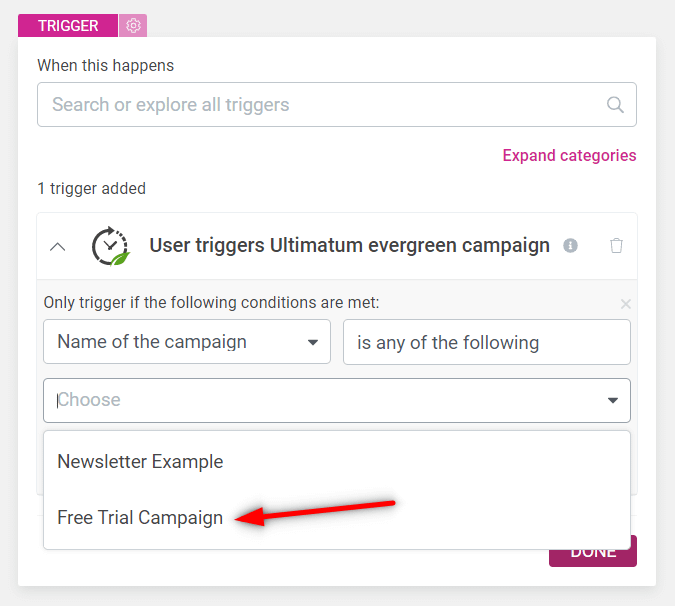
Lastly, select it from the list of running campaigns:
Then proceed to the next step:
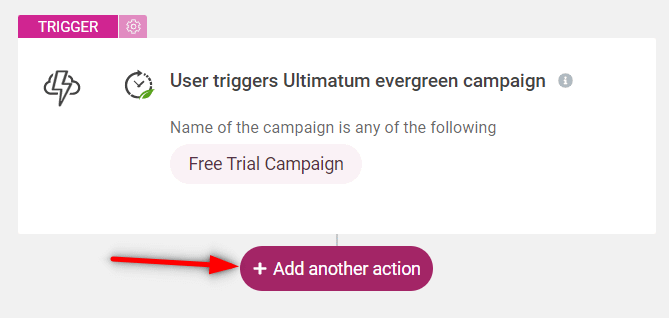
Here, select the “Grant access to product” action:
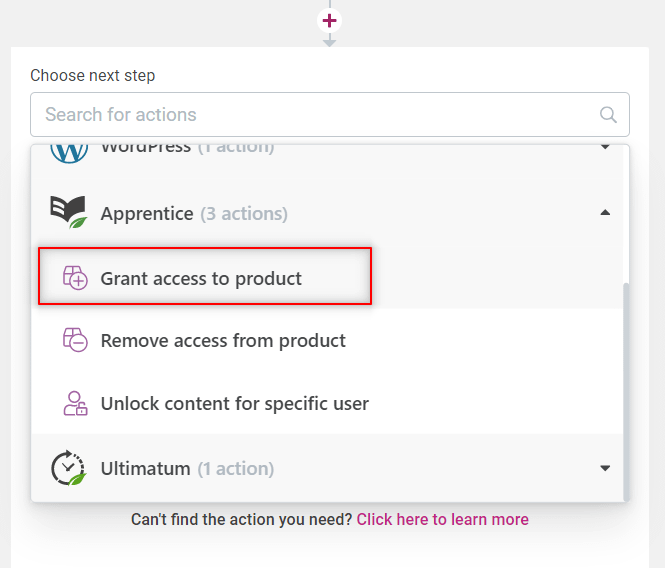
And proceed with selecting the course to which you want to offer the free trial:

Once you select it, click on “Done”:

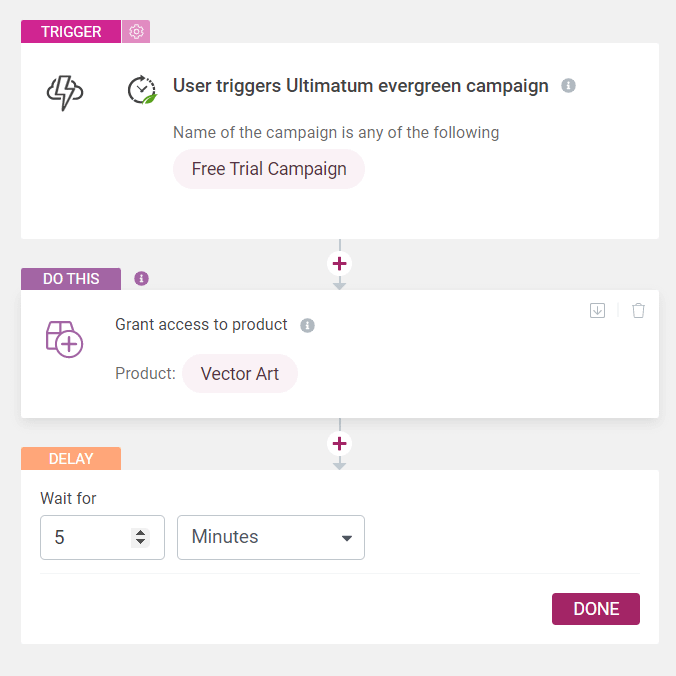
Next, add a delay to your automation:
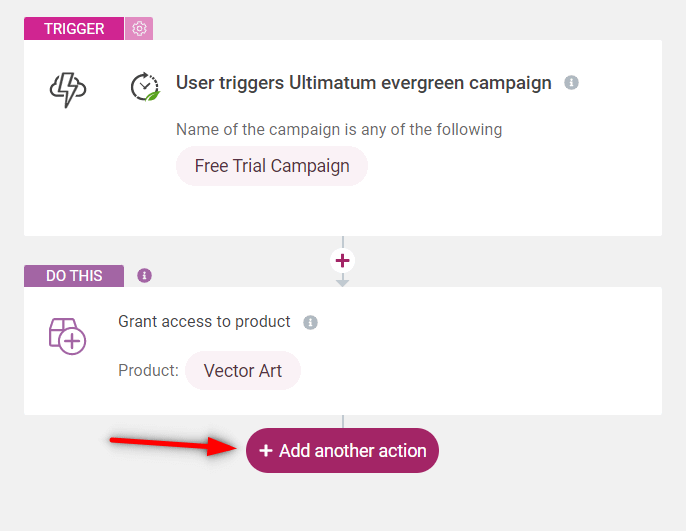
What this means is that after the user will trigger the campaign and access the course, he will have a “free trial” period in which he can browse the course and see what it is about. The time, however, will not be enough to actually complete the course.
This is one example of how you can make use of the delays available in Thrive Automator.
Click on the “Delay” icon to set the time:
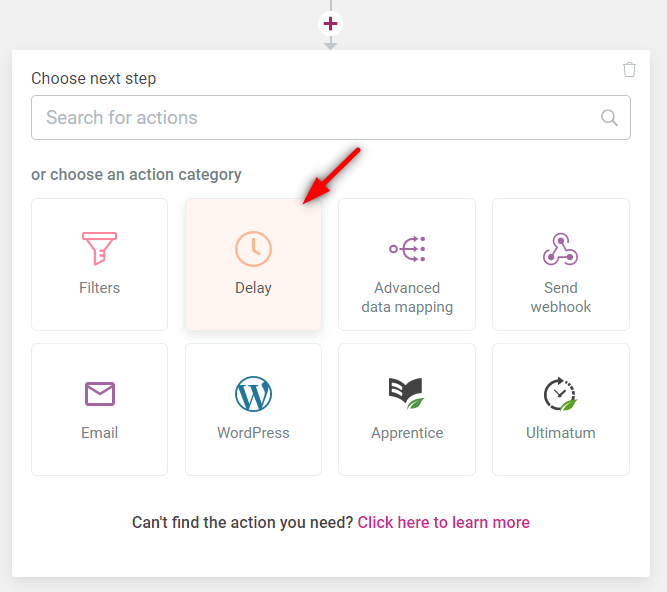
In the fields that appear, set the amount of time for the “free trial”. After this time passes, the user will be automatically removed from the course and will have to purchase it in order to be able to complete it:
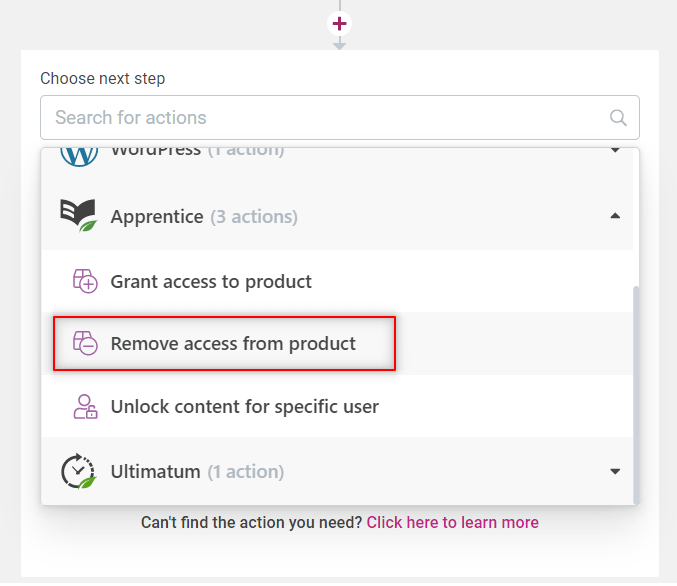
Therefore, the next step in the workflow is adding the “Remove user from course” action:
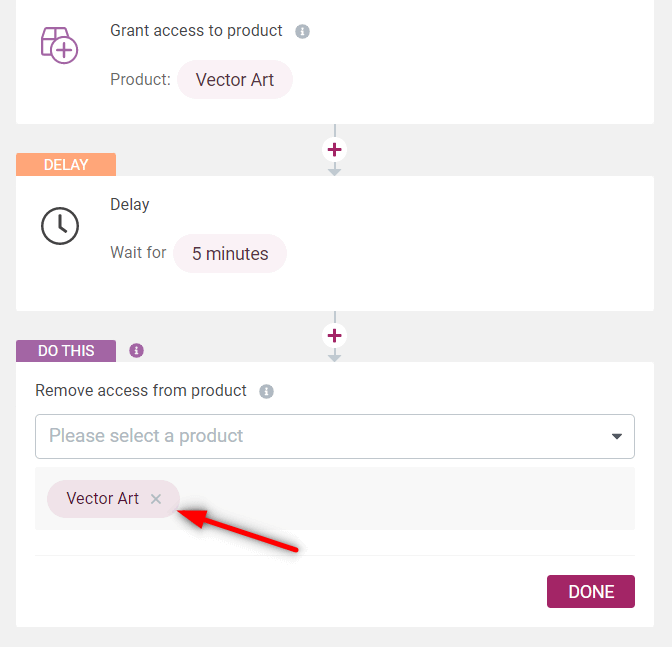
Next, select once more your course from the list:
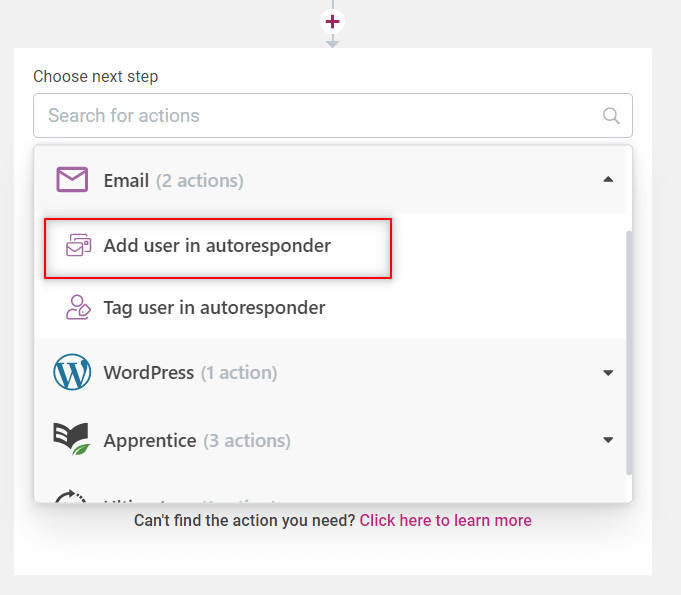
Lastly, add one more action to this automation, in the form of adding the users to your autoresponder:
After you select it, proceed with choosing the mailing service of your choice (in this case, Mailchimp):

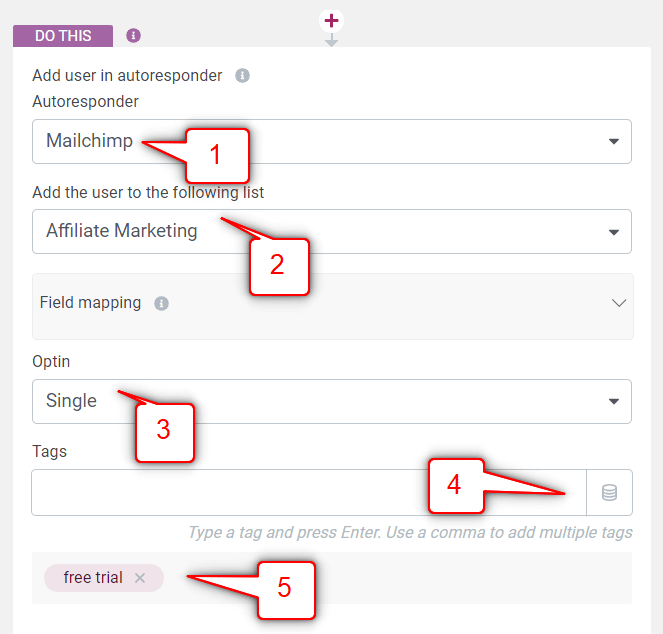
After selecting the service (1) you will also have to select the mailing list (2) to which the users will be added, the opt-in type (3) (depending on the provider you are using), and assign a tag (5).
When sending tags to the autoresponder, you’re also able to send dynamic information (4). For example, you can also send the username/email etc. of the person that has filled in the form, and the information will be received as a tag in the autoresponder.
Prior to making these configurations here, you will also need to make sure that the e-mail/campaign is set up in the autoresponder of choice.
Important!
For this example, I’ve created an automation in Mailchimp, which sends an e-mail to all my newly added subscribers. The mail contains the discount code for my Thrive Apprentice course.
You might have to set this up differently depending on the autoresponder you are using, so feel free to try out the version that best suits your needs.
Once everything is done, don’t forget to save and run your automation using the “Active/Inactive” buttons.
This is how the automation would work from start to finish: the users land on your promotion page, where you are advertising your Thrive Apprentice course:

The visit to this page will automatically trigger the Thrive Ultimatum campaign (which, in return, will trigger the Thrive Automator workflow):

When the users click on the button from the Thrive Ultimatum banner, they will be redirected to the course:
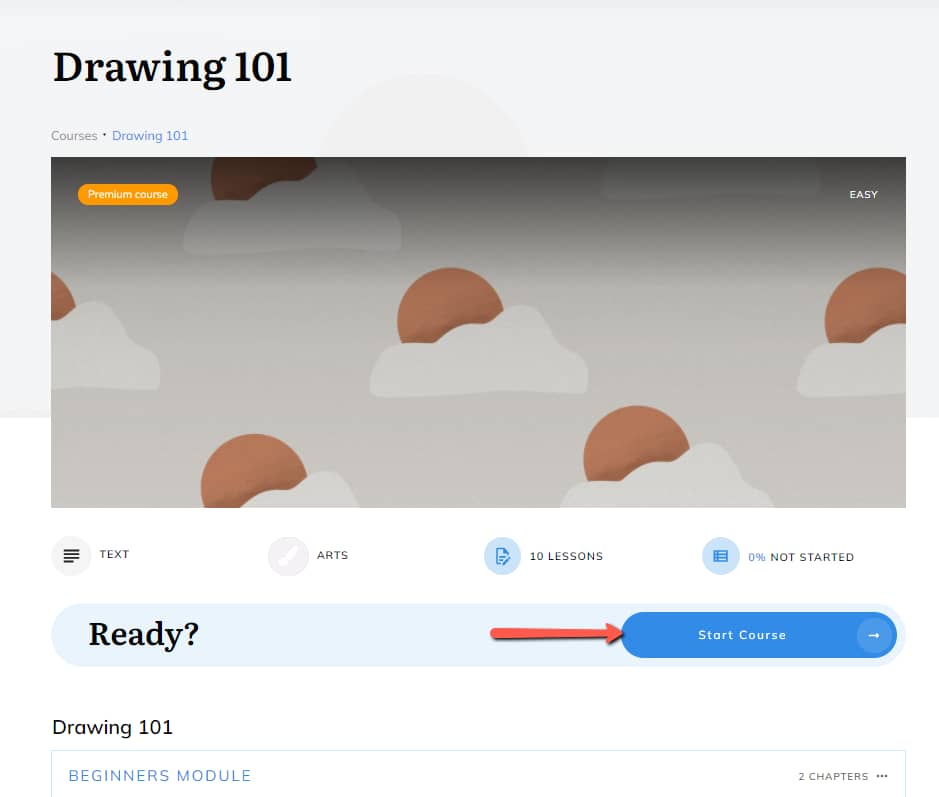
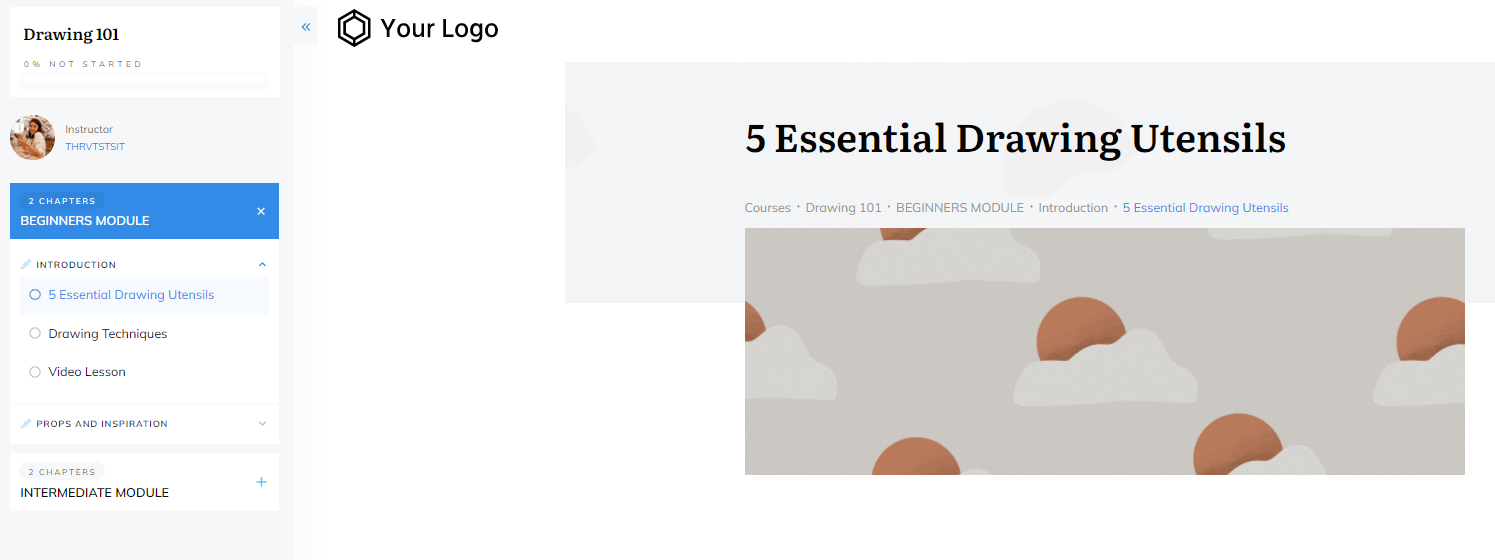
Here, the users will have some time to explore the course before the trial version expires. This depends on the delay that you’ve configured while setting up the automation:
Once the free trial period is over, the users will see this message:
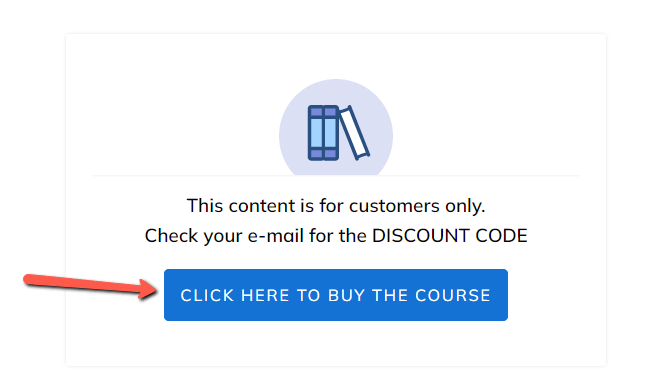
In the backend, they have been removed from the course, but have been added to your mailing list instead, so your autoresponder service should automatically send them the welcome e-mail (along with a discount code, if you’ve set that up as well).
From here onwards, the users can proceed with the SendOwl purchasing process.
And that’s pretty much it! All this will happen automatically each time a visitor from your website will fill in the form and trigger the campaign in Thrive Ultimatum and, subsequently, the workflow in Thrive Automator.
I really hope this tutorial was useful to you. If you want to read other tutorials of this type, make sure to check these out as well: