What to do if you want to have courses that you want to sell (premium courses) and subscribers-only courses (lead magnet courses) at the same time?
If you have set up the connection between Thrive Apprentice and SendOwl, you have the possibility to set up both types of courses. The difference will be in the “Access Restrictions” of the courses:
- If you want to set up a premium course for sale, you will have to add a “SendOwl” access rule for it. This means that you will select the SendOwl product/bundle you want to protect the course while setting up the “Access Requirements” of the Thrive Apprentice product. Then, you will also have to include a link to buying the course, in the message for users who will not have access.
- If you want to have subscribers-only courses, you will have to use the “WordPress Role” option when you set up the “Access Requirements” of the Thrive Apprentice product. This way, the users will need to subscribe in order to get full access to the course, but the course itself will be free.
If you need full instructions on how to do this, then please access the separate articles linked above that we have for both of these cases.
Here are the most important steps you need to have both type of courses on your website:
1. Premium courses for sale
After you have created the course with Thrive Apprentice, created a product for it in SendOwl, and set up the SendOwl Settings, you can go on with adding the “Access Requirements” for the course.
Note: This article details what you need to do to set up premium courses that you want to sell with Thrive Apprentice & SendOwl. Please check it out, if you haven’t created this kind of course yet.
Setting up the Access Restrictions
First, you’ll have to create a product in Thrive Apprentice, in which you can add your course (either just the one, or multiple courses and/or other types of content). For that, go to your Thrive Apprentice dashboard and access the “Products” section:
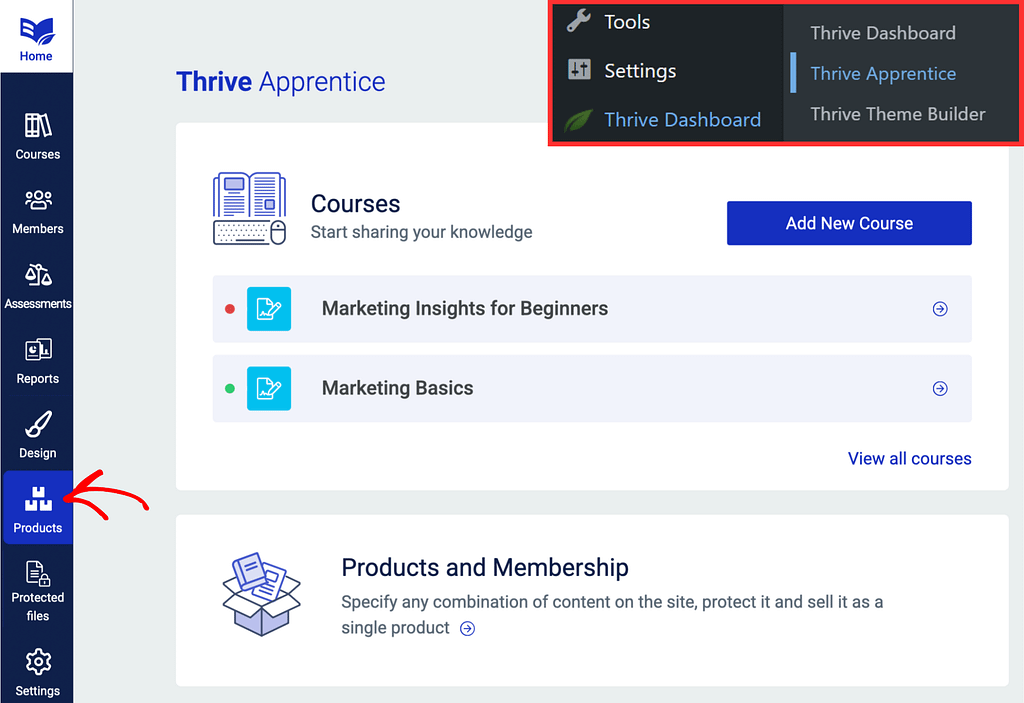
Then, create your product and add the course inside it. This article has the entire section detailed, and you can check it out in case you need guidance when creating a new product.
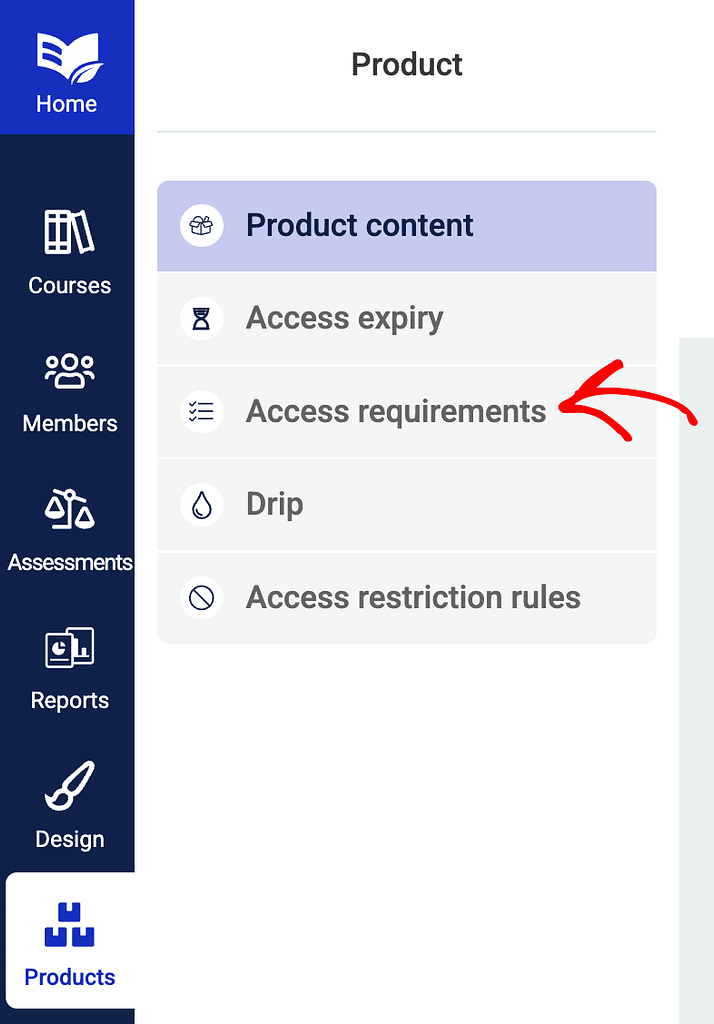
Once you’ve created it, go to the “Access Requirements” section:
Access Rule
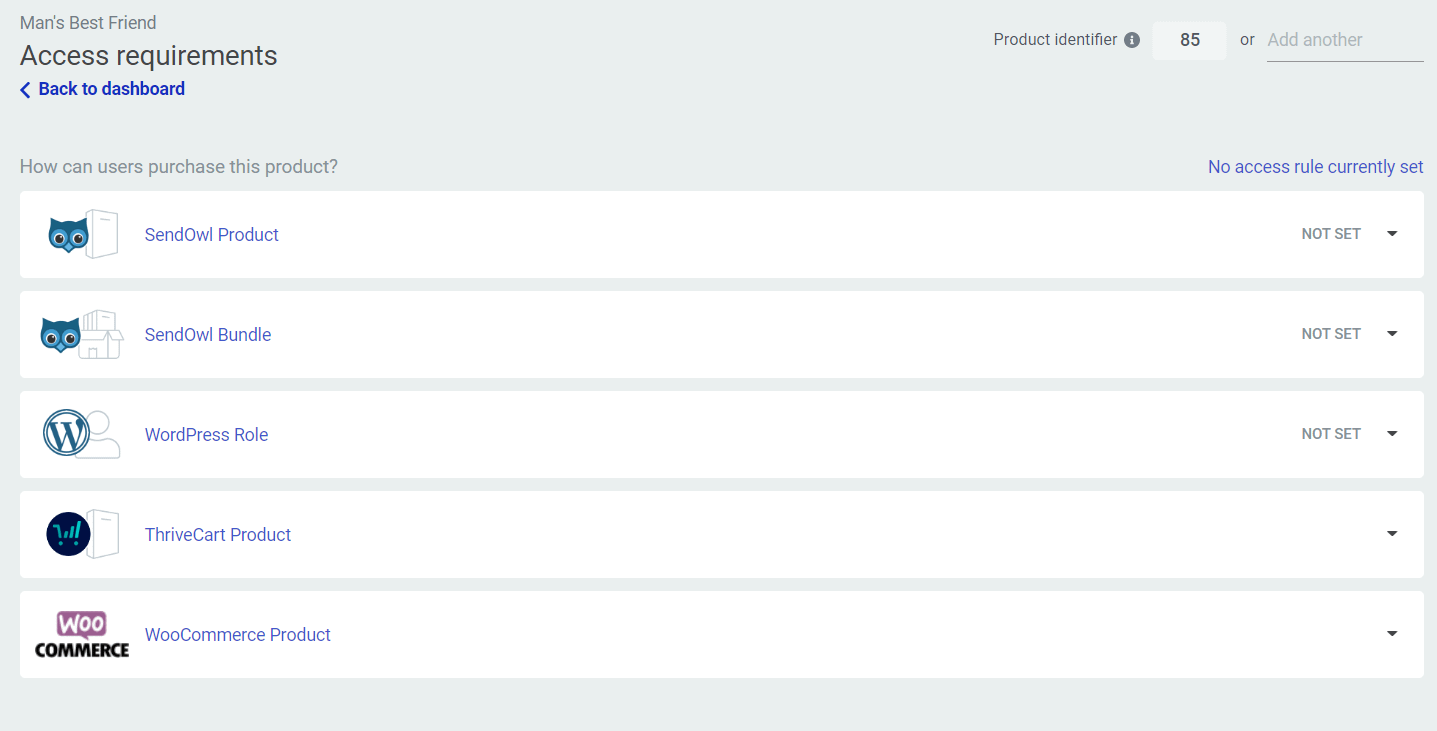
Then, you will need to look for the service that you want to use in order to set the restriction. You will see a list with all of the plugins/services that are available after you’ve set them up on your site. Here is an example of what this might look like:
In the case of courses that you want to sell, you will have to select either the “SendOwl Product” here or the “SendOwl Bundle”, depending on what you want to protect the course with:
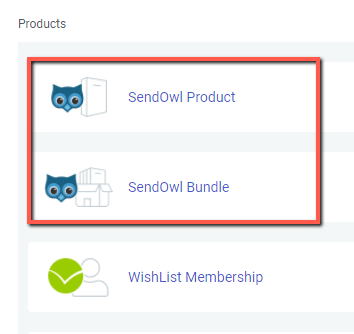
Click on either of these sections, to expand them, and the product/bundle list will appear.
Now, you will have to select the respective product/bundle you want to protect the course with. This means that the visitors of your website/users will have to have the product/bundle that you select here, in order to get full access to the course.
To select the product/bundle all you have to do is check the checkbox next to its name:

This way, if users have previously bought the product you selected here, they will simply need to log in to access the course. However, if they have not purchased the product yet, then they will need to buy it to get access to the course.
After you have selected the product/bundle, click on the “Save” button:

Note: You will be able to tell which access rules are set for each course, as you will notice a text next to each plugin, with the structure “Give access if ..”.

You can also set up the other aspects of the restriction, such as the “Restriction Label” and the exclusions (as detailed in this article).
When you are done, click on the “Save” button from the bottom right corner of the page, to save the restrictions for the course you want to sell.
2. Subscribers-only courses
After you have created the course you want to make a subscribers-only course, you can go on with adding the “Access Requirements” for it as well. Since you will offer this course for free, you do not need to set up anything in SendOwl for this one.
What you will need to do, is to add a “WordPress Role” access rule to it.
Setting up the Access Requirements for the product
The first steps are exactly the same as in the case of the premium courses above.
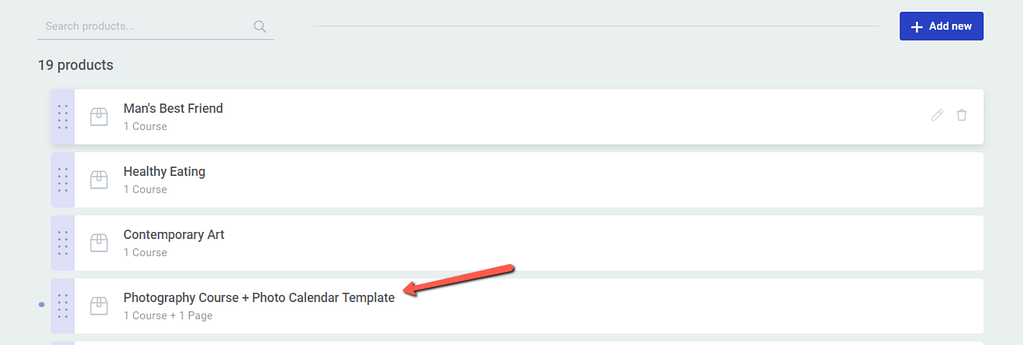
Go to your Thrive Apprentice dashboard and open up the “Products” section:

Find the product which contains your course (or create a new product and add your course inside it, if you haven’t done that) and open it:
Then, click on the “Access Requirements” tab from the left side:

Access requirements
This is where the difference between the two setups comes in. Since in this case, you want to offer a course for free, but at the same time you want the users to subscribe to your website before accessing it; you will have to use the “WordPress Role” option from this list:
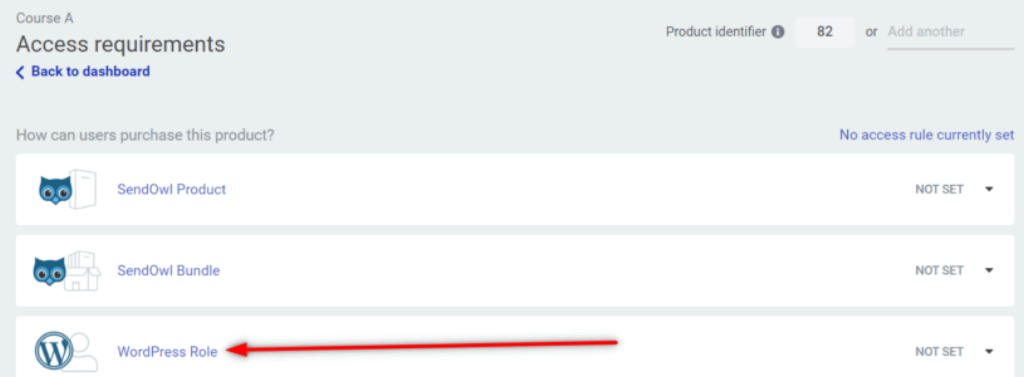
This will open the list of available roles. You will see every WordPress role that you have set up for your website.
Select the role(s) you want the users to have in order to be able to access the course. You can do this by checking the checkbox next to the respective role. For instance, if you want to grant access to the subscribers, then that is the role you should check.
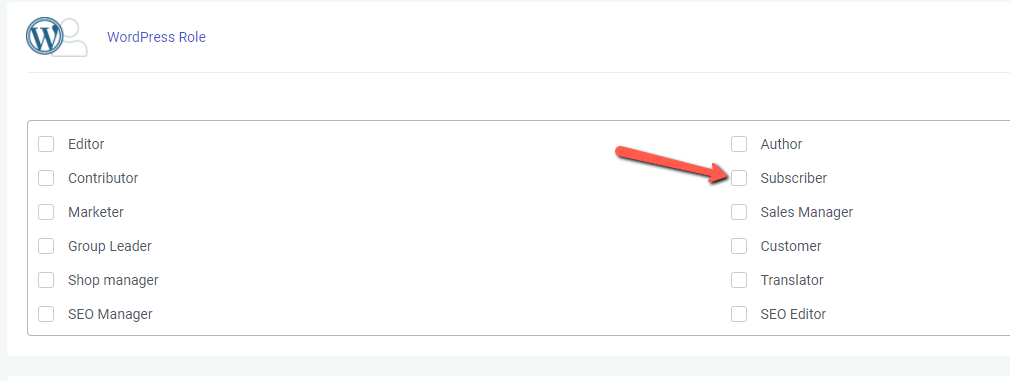
Once you have done that, you will see that the rule has been set:

After setting up the “WordPress Role” restriction rule, you can go on and set the other aspects of the restriction for the course. You can find detailed info on how to do that in this article.
After you have set up everything related to the “Access Restrictions”, click on the “Save” button from the bottom right part of the page to save what you have done.

Preview
In both cases, you can preview the course to see how the restrictions work.
In order to do that, you will have to use the “Preview Course” option from the upper right part of the page (use this either in an incognito window or in another browser where you are not logged in):

- In the case of the premium course for sale:
When you will try to access a restricted part of the course, you will be redirected to the message with the purchase link you have set up for this course, along with a login form.If people have already bought the product needed, they will just have to log in and they will be able to see the course. If they have not yet purchased it, then they will need to click on the call to action and complete the purchasing process to get access.
- In the case of the subscribers-only course:
When you will try to access a restricted part of the course, you will be redirected to the login form and the message you set up for this course.If people are already subscribers, then they will only have to log in and they will see the course.If not, then they will have to register first, using the “Register a new account here” option from below the form, or if you have added a link to a different registration page in the message, then using that one.
So this is how you can have both subscribers-only courses for free and premium courses for sale with Thrive Apprentice and SendOwl. If you need even more details on this subject, please check out this blog post.
Important!
You should not use the “SendOwl” and the “WordPress Role” access rules at the same time for one course. These are meant to be used separately, for separate courses.
If you would add both of these rules to the same course, then that course would be for sale and for free at the same time, which would not make sense. People would be able to buy the course, but also access it without buying it, by simply registering/subscribing.
So please keep in mind, that these two “Access Rules” are meant to be used for different courses, just as they are showcased in this article.