While Lead Groups automate form placement, sometimes you need manual control. That’s where ThriveBoxes and Lead Shortcodes come in.
ThriveBoxes (2-Step Opt-ins)
A ThriveBox is a popup (lightbox) that is hidden by default and only appears when a user clicks a specific link, button, or image. This “2-step” process often leads to higher conversion rates because the user has shown intent.
Creating a ThriveBox
- Go to Thrive Dashboard >> Thrive Leads.
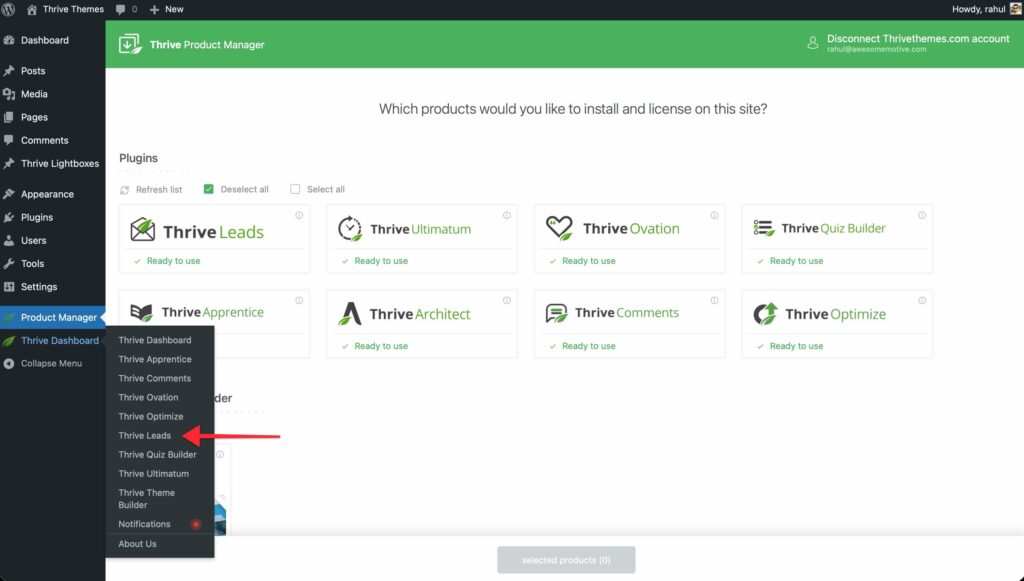
- Scroll down to ThriveBoxes.

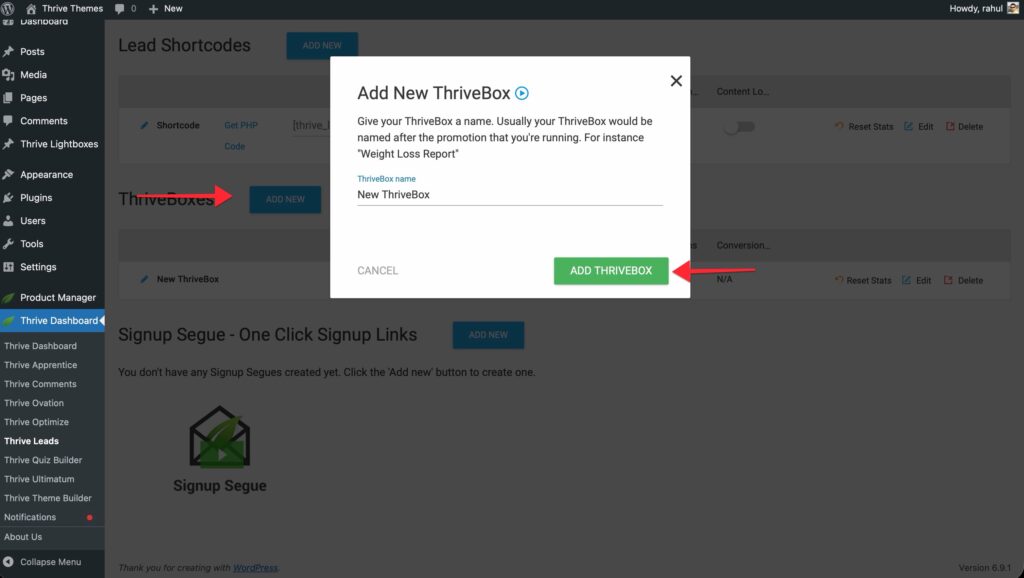
- Click Add New.
- Name it and click Add ThriveBox.
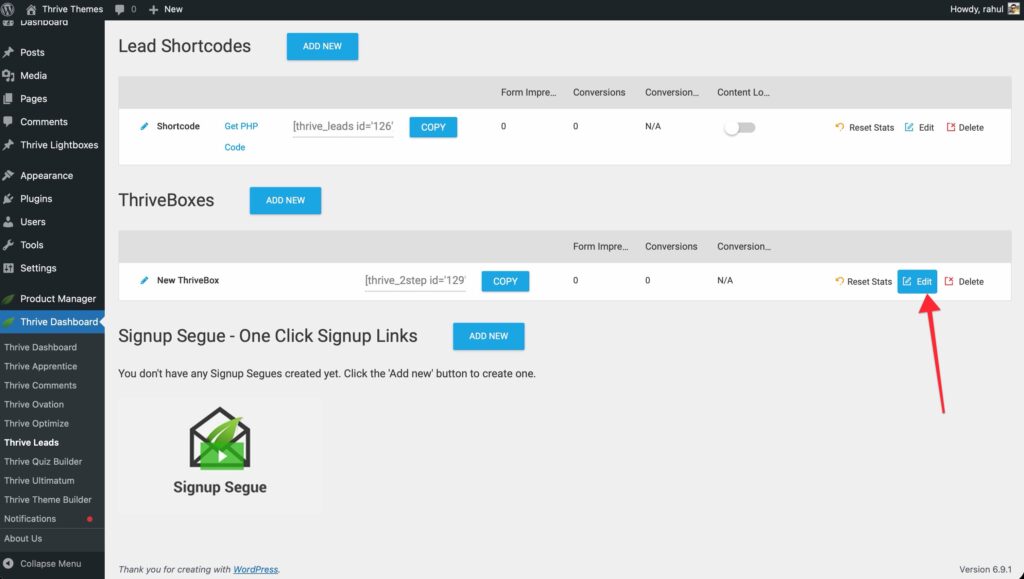
- Click Edit (pencil icon) to design the form in Thrive Architect.
Triggering a ThriveBox
Triggering via Shortcode
- Copy the shortcode provided next to the ThriveBox name (e.g.,
Triggering via Thrive Architect
- In Thrive Architect, select any Button, Text, or Image.
- Go to Animation & Action.
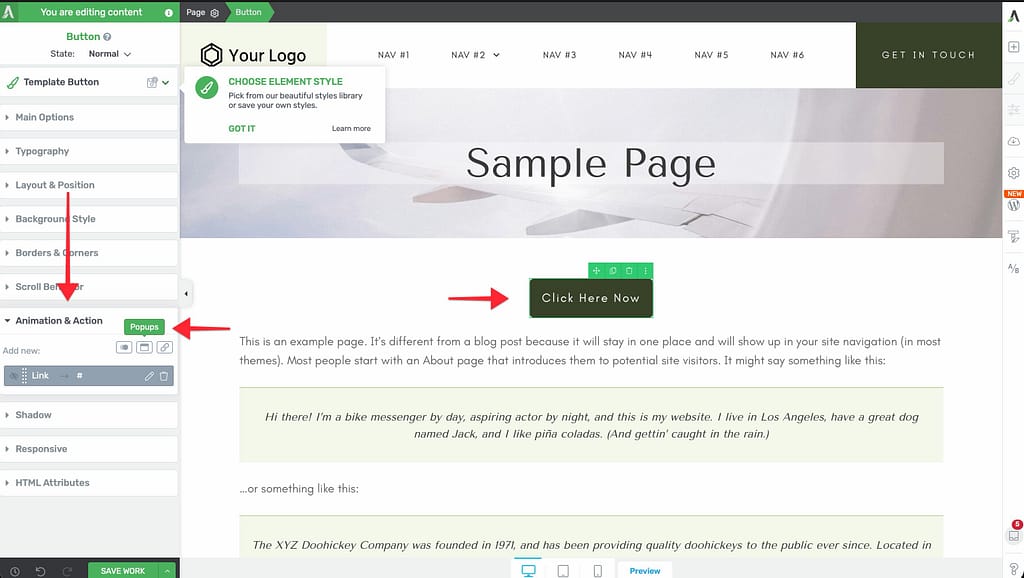
- Select Popups > Open Thrive Leads ThriveBox.
- Search for and select your ThriveBox.
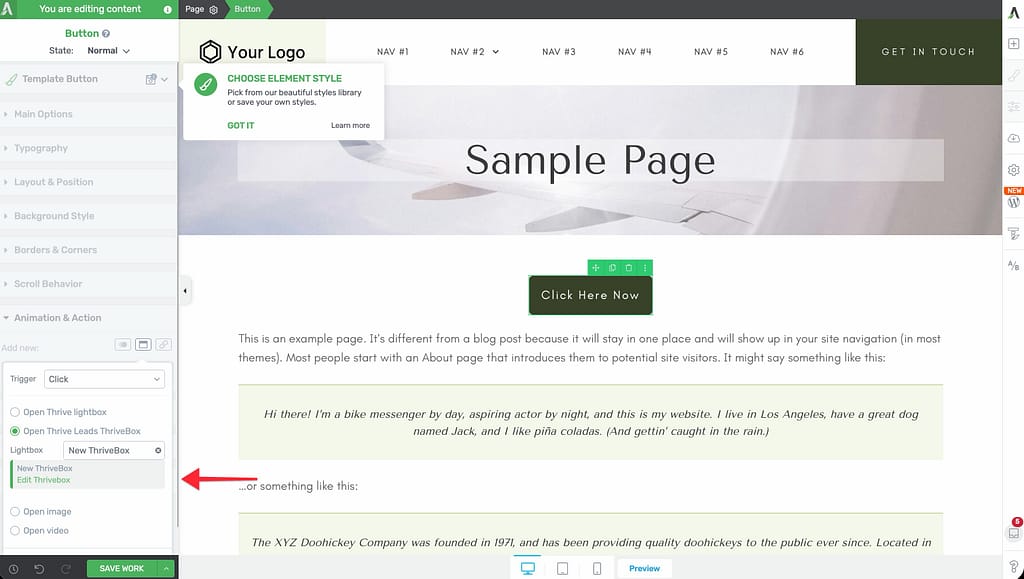
- Click Apply.
Lead Shortcodes
Lead Shortcodes are inline forms that you manually place inside your content. They are perfect for in-depth guides where you want a specific offer mid-content.
Creating a Shortcode Form
- Go to the Lead Shortcodes section in the Thrive Leads dashboard.
- Click Add New.
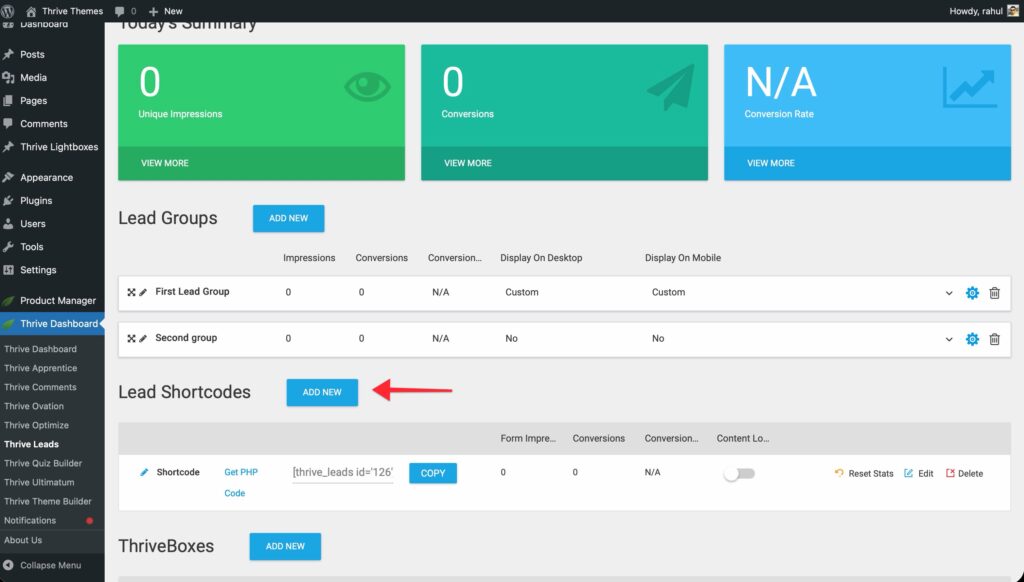
- Name it and click Add Lead Shortcode.
- Click Edit to design the form (Shortcode forms typically use the "Post Footer" or "In-Content" templates).
Content Locking
A specialized feature of Lead Shortcodes is Content Locking, where you hide part of your post content until the user subscribes.
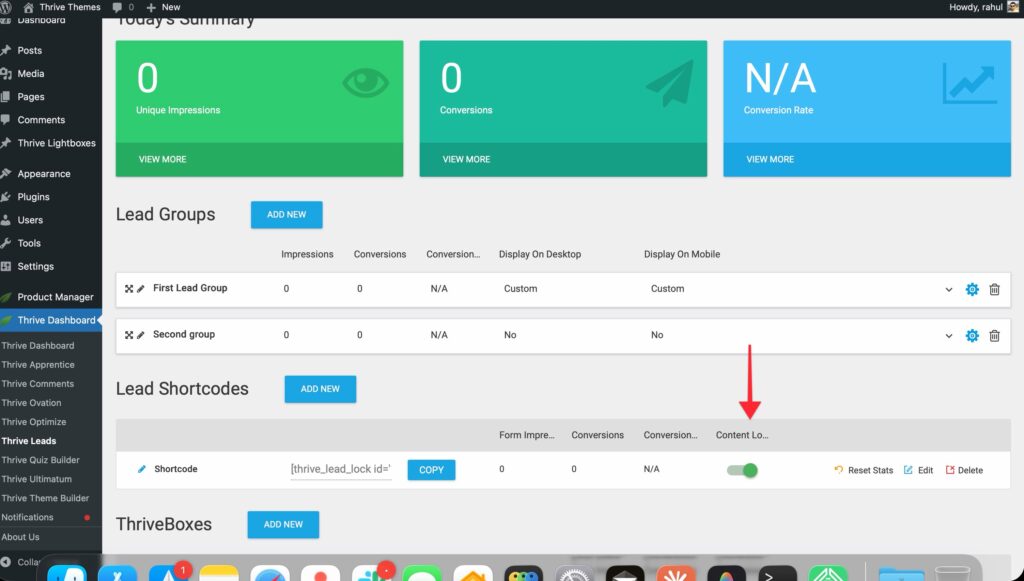
- Create a new Lead Shortcode.
- Toggle Content Locking to ON.
- Design the form (this is the "gate" that users will see).
- In the dashboard, choose a Lock Mode:
- Hide: Content is invisible.
- Blur: Content is blurred (great for teaser effect).
- Copy the shortcode. It will look like this:
[tve_leads_shortcode_123] Hidden Content Goes Here [/tve_leads_shortcode_123] - Paste it into your post, wrapping the text you want to lock.
Duplicating ThriveBoxes and Lead Shortcodes
You can duplicate any ThriveBox or Lead Shortcode in one click.

- Find the item you want to copy in the ThriveBoxes or Lead Shortcodes section of the dashboard.
- Click the Duplicate icon next to its name.
- A new item appears immediately, named (COPY) Original Name.
What’s copied:
- All design settings and form fields
- Trigger and display settings
- Animation settings
- Connected integrations
What’s reset:
- Impressions, conversions, and conversion rate all start at zero.
Initial state: The duplicate starts disabled. Turn it on manually when you’re ready.
Important: The duplicate gets its own new shortcode — it will be different from the original. Update any pages or posts where you want to use the new copy.