Many of our members have asked us: does Thrive Leads support ActiveCampaign?
With the API connection feature, the answer is: yes, it does! Here’s a video that shows you how to create the connection and add leads who sign up through Thrive Leads forms to your ActiveCampaign lists:
Get the ActiveCampaign API key
To connect ActiveCampaign you first need to log in to your ActiveCampaign Dashboard and get the API key and URL of your account.
You can do this by clicking on the “Settings” section from the left sidebar:

Look for the “Developer” section in order to view your API details:

You will need both the URL and API Key from here for setting up the API Connection.
Add the keys to your Thrive Dashboard
The next step is logging into your WordPress administration panel.
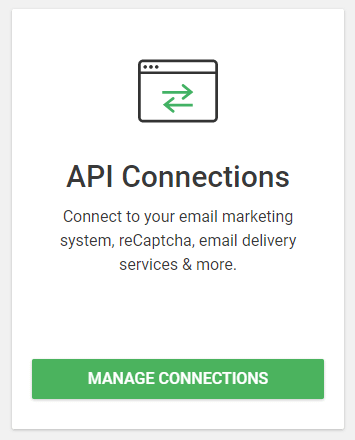
Click on Thrive Dashboard, and press the “Manage Connections” button of the API connections card:
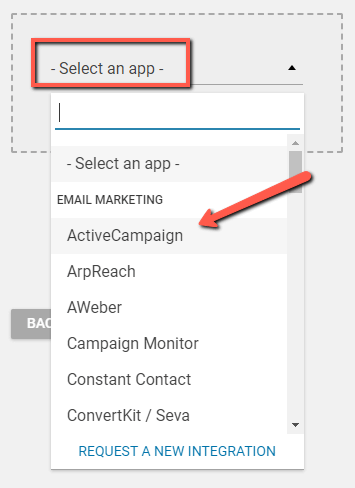
Then, add a new connection, select ActiveCampaign from the “Select an app” drop-down:
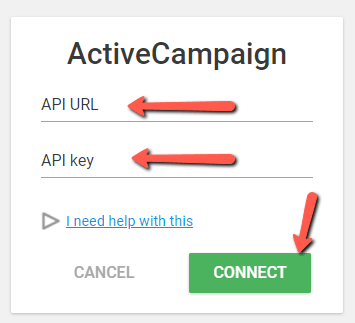
After that, you need to paste your API URL and API key and click on “Connect”.
You will get a success message if everything went ok. You can edit or remove this connection on the “API Manager” page.
Connecting ActiveCampaign to a “Lead Generation” element
After you have created your API Connection with ActiveCampaign, you are ready to connect it to a “Lead Generation” element as well.
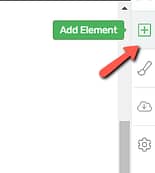
For doing that, you’ll first have to open a Thrive Architect page and, from the right sidebar, drag and drop the “Lead Generation” element to the page:
Once added to the page, its options will appear in the left sidebar, like so:
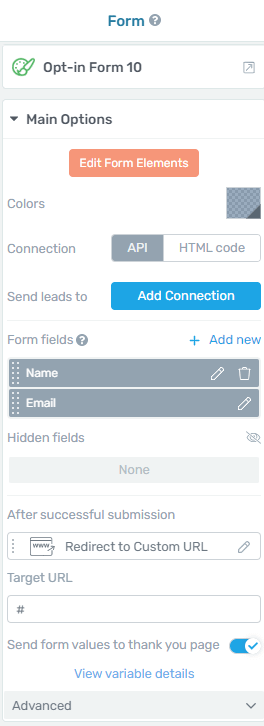
You can use the options to customize the element. If you want to learn more about what each option does, make sure to read this article.
1. Add Connection
When setting up the connection, make sure “API” is selected in the “Connection” section of your left sidebar, and then click on “Add Connection”:
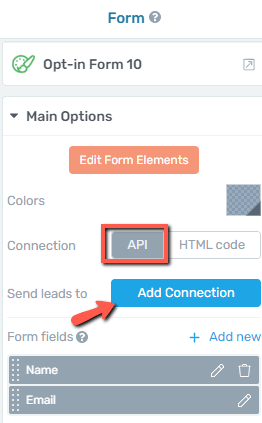
Connection
After you click on “Add Connection”, a pop-up will show up on the screen with all the available integrations:
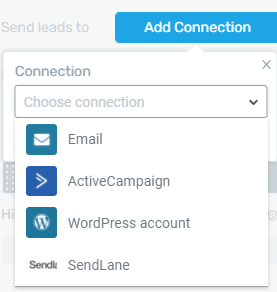
Look for the “ActiveCampaign” connection and select it:
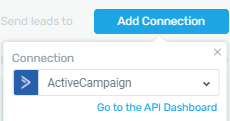
Mailing List
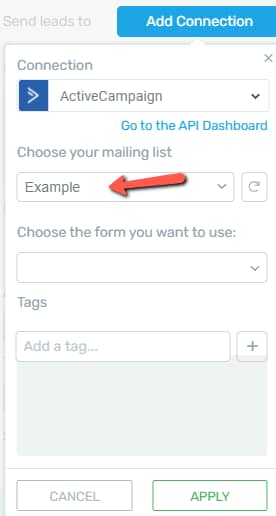
The next step is setting up the mailing list, from the same left sidebar options. Click on the drop-down and select the mailing list which you’ve previously set up in your ActiveCampaign account:
Forms
In the next drop-down there’s no need to pick a form, as you are already using the template from your “Lead Generation” element:

However, if you want to read more about this topic, make sure to check out the dedicated resources from the Active Campaign Help Center.
Tags
And lastly, if you want to create a targeted campaign you can do so, by adding tags in the corresponding field. Type in the tag that you want to assign to this form, and then click on the plus button:
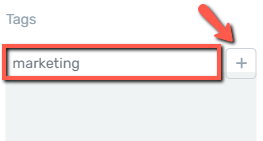
Adding tags will allow you to have a tagging structure for all the visitors who sign up through this form. You can send them targeted campaigns based on the tags that were assigned to them.
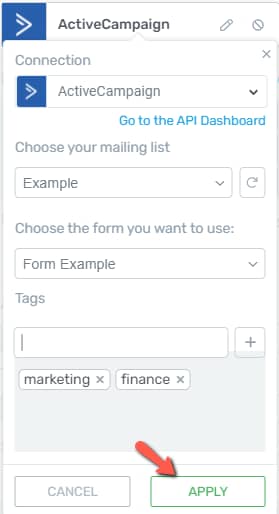
Add in as many tags as you need, and once everything is ready, click on “Apply” to make sure all your settings are saved:
2. Set up the form fields
Once you have created the connection, you can start setting up the form fields.
More information about how to do that can be found in the dedicated section of the “Lead Generation” article, linked here.
Now your connection is ready to be used, so make sure to save all the changes by clicking on the green “Save Work” button from the bottom left side of the screen:

Connect ActiveCampaign to Thrive Leads
If you want, you can also connect your ActiveCampaign account to Thrive Leads.
For that, access the Thrive Leads dashboard, and find the Lead Group that contains the form you want to connect to ActiveCampaign:
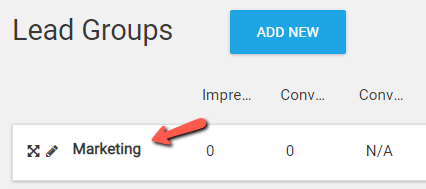
Click on it, to expand it. You might have multiple forms of the same type. Look for the one that you want to connect to ActiveCampaign, and click on the pencil icon to edit it:

The form will open in the Thrive Architect editor. You will then be able to select the “Lead Generation” element and connect it to your Active Campaign account.
Click on the element, in the editor, to open its options in the left sidebar:
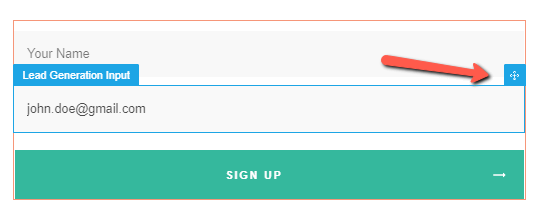
The steps are almost identical to the ones already described above for connecting your ActiveCampaing to a “Lead Generation” element.
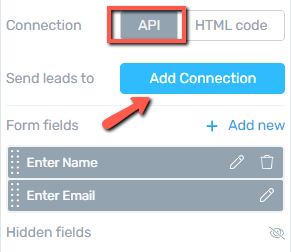
Check if the “Connection” is set to “API” and click on “Add Connection”:
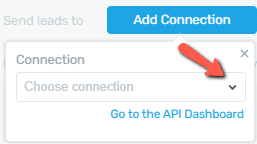
A pop-up will open, and you have to click on the down arrow to open the list of available connections:
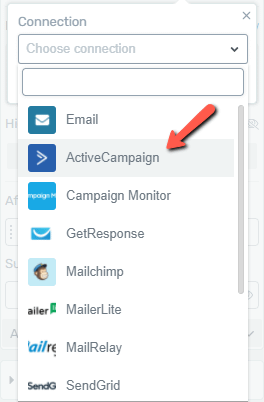
Naturally, click on ActiveCampaign:
The pop-up will expand, and the next thing that you have to do is choose your mailing list:
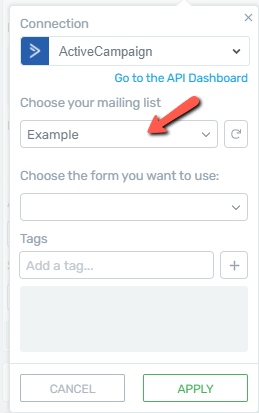
In the next section, you will have to choose the ActiveCampaign form that you want to use:
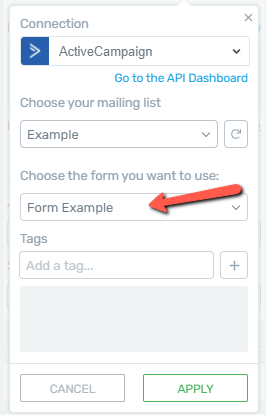
Lastly, you can also add tags, if you want. For that, you first need to type in the tag that you want in the corresponding field and click on the “plus” button:
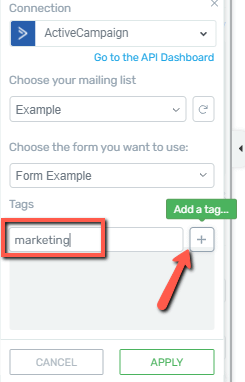
This will automatically add the tag to your list.
Once everything is set up, click on “Apply” to make sure all your changes are saved:
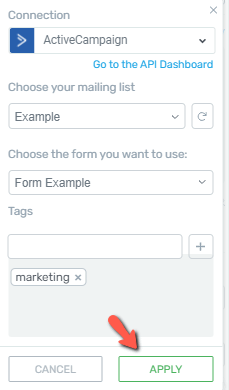
The connection is all set now. You can then add and customize form fields, and decide what happens after people submit the form. These options have been described in more detail in this article.
This is how you can set up and use an API connection with ActiveCampaign.
Don’t hesitate to check out our knowledge base if you want to read more about API Connections and how Thrive Leads works.
Hopefully, this article was useful to you.