Do you want to allow your website visitors to login using their Google account while commenting? This is possible when you establish an API connection between Google and the Thrive Dashboard on your website.
In this document, we’ll show you how you can establish an API connection between Google and Thrive Dashboard.
- Obtaining the Google Client ID and Secret Key
- Obtaining the Google Account API Key
- Building an API Connection Between Thrive Dashboard and Google
Obtaining a Google Client ID and Secret Key
A Google client ID and secret key is the medium through which you can build a secure API connection between your Google account and the Thrive Dashboard on your website.
There are a few steps you’ll need to follow to obtain the client ID and secret key.
Enabling the Google API
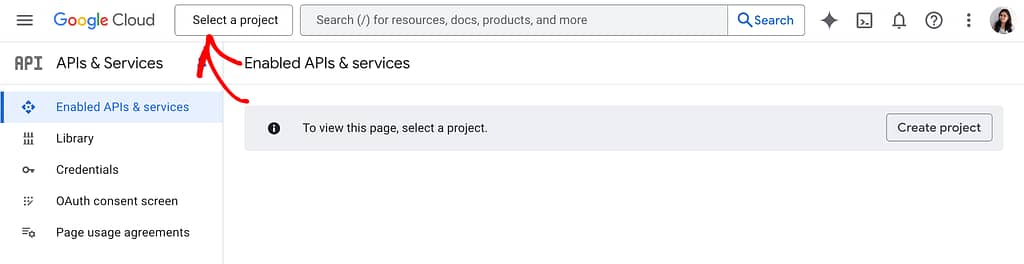
To begin enabling the Google API, login to your Google account and open the Google APIs Console.
Clicking on this link will open the APIs and Services page. On this page, you can either choose to select a project you’ve created or opt to create a new one.
If you already have a project that you want to use, you can ignore the project creation steps and click Select a Project.
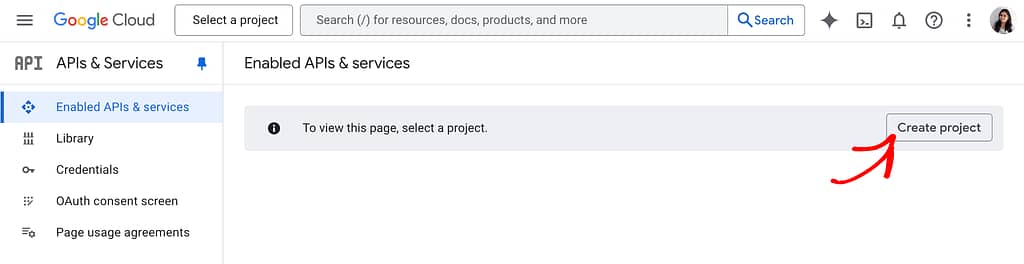
After you click Select a Project, you’ll see a popup where you can click the project name you want to open.
To create a new project, click the Create Project button on the top right.
When you click Create Project, you’ll be taken to a page where you’ll be asked to enter the Project name, Organization, and Location. To proceed, enter this information and click Create.
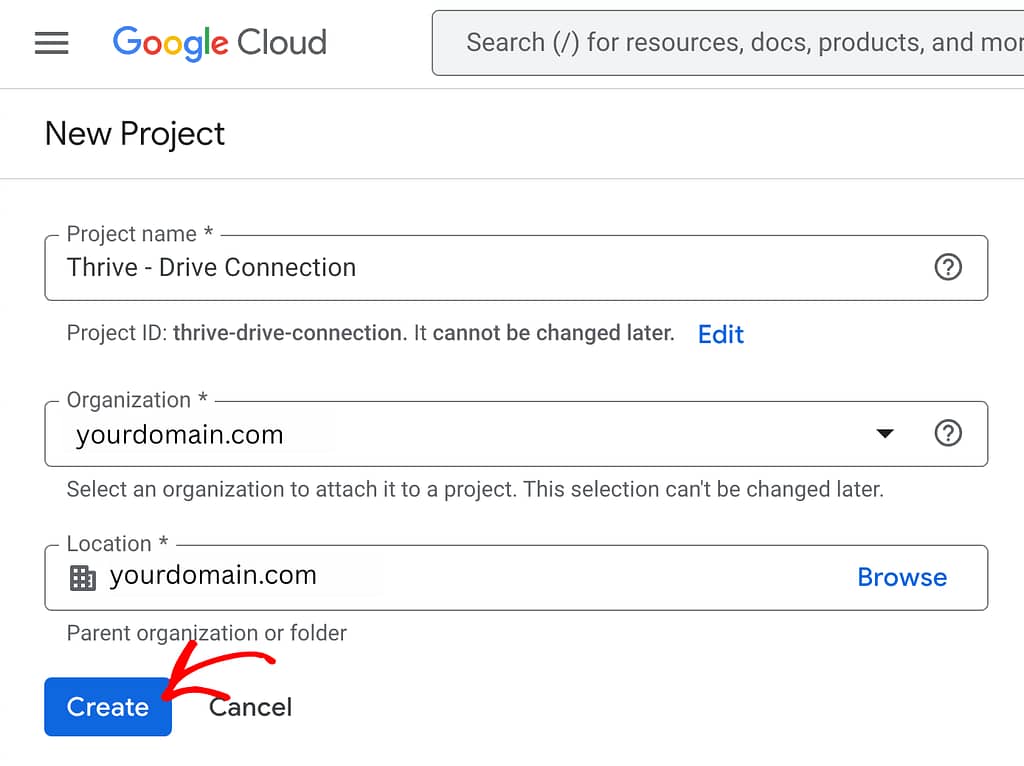
This will create the project you want to use for this connection.
Configuring the OAuth Consent Screen
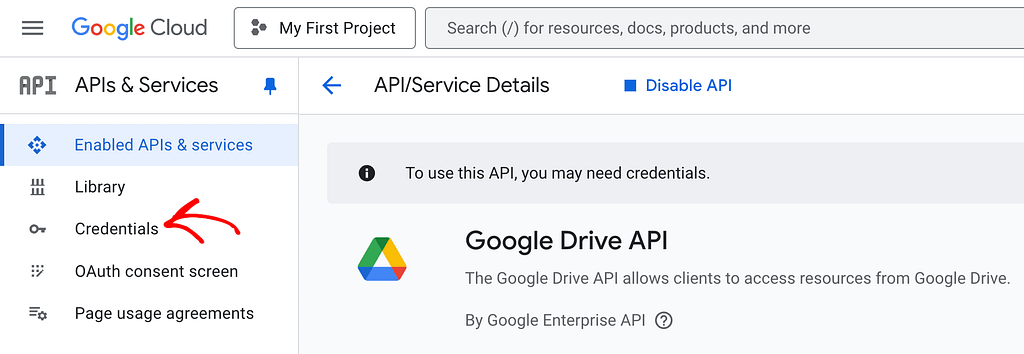
Once you create a project or select one, it’s time to generate Google account credentials. To do so, you’ll need to create the OAuth Consent Screen.
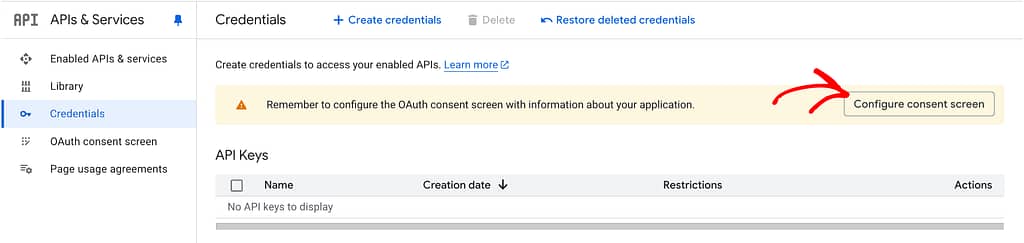
To create the OAuth Consent Screen, open the APIs and Services page and click on Credentials.
Before you are able to create the Google API credentials, you’ll need to Configure the OAuth Consent Screen.
If you haven’t done so yet, you’ll see a notice on the Credentials page asking you to Configure the OAuth Consent Screen by clicking the button.
To proceed, click Configure Consent Screen.
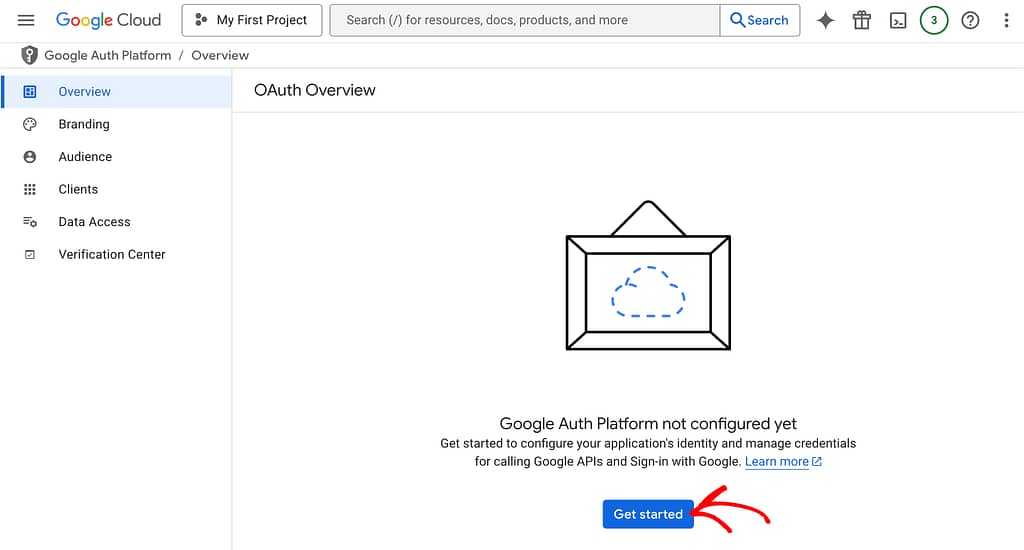
Clicking the Configure consent screen button will take you to a page where you’ll be informed that the Google Auth Platform is not configured yet. To do this, click Get Started.
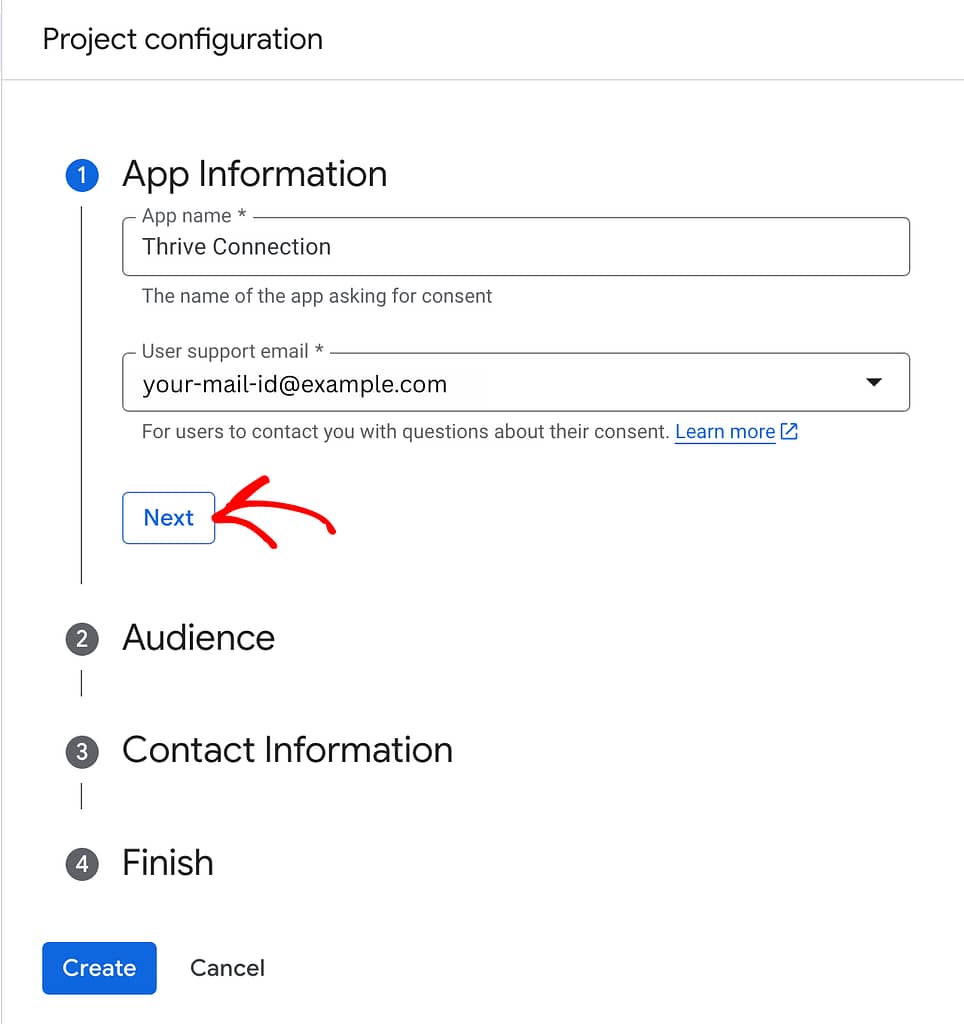
When you click Get Started, you’ll be taken to the Project Configuration page where you begin by entering the requested App Information, such as the Application name and your email address.
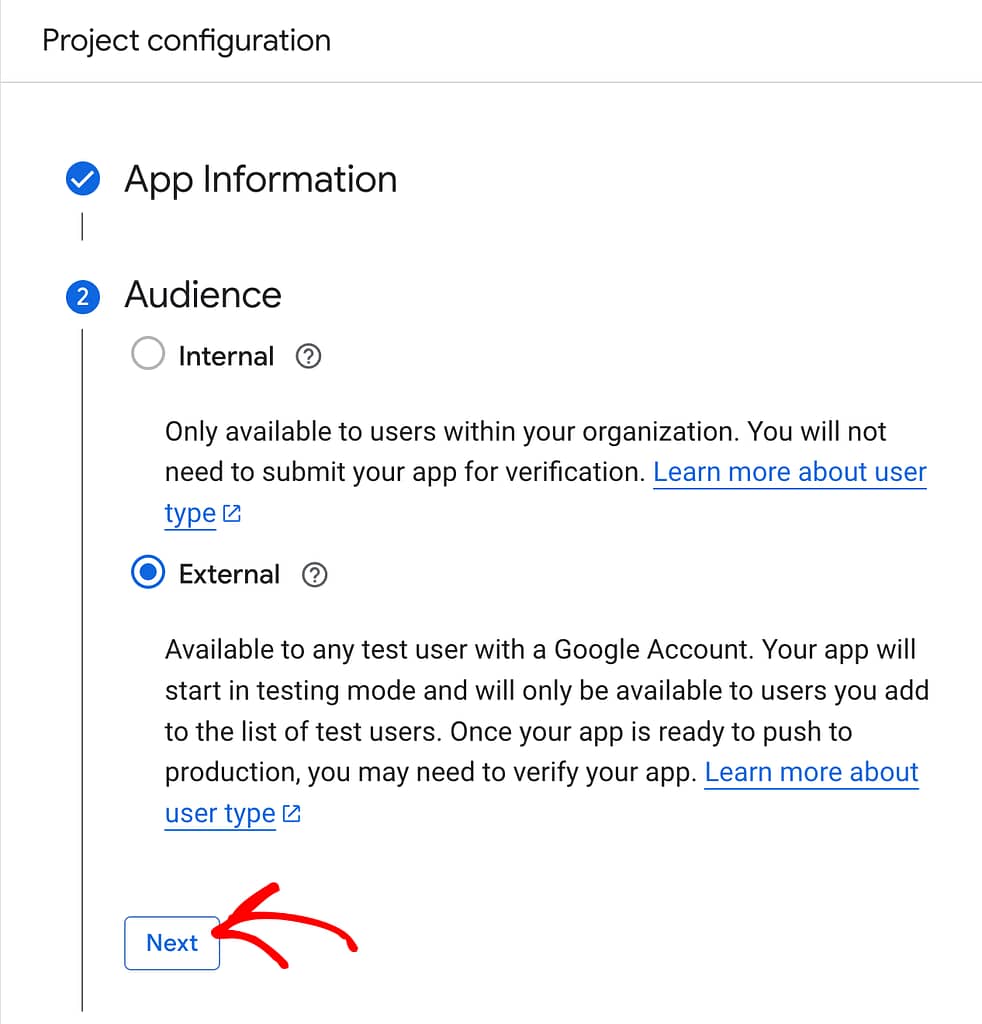
After the application information, select the audience you want this application to be accessible to. Here, select External and click Next.
Once you select your audience, you’ll have to enter your contact information. These is/are the email IDs you’d want to receive important notifications in case there are any changes in your application.
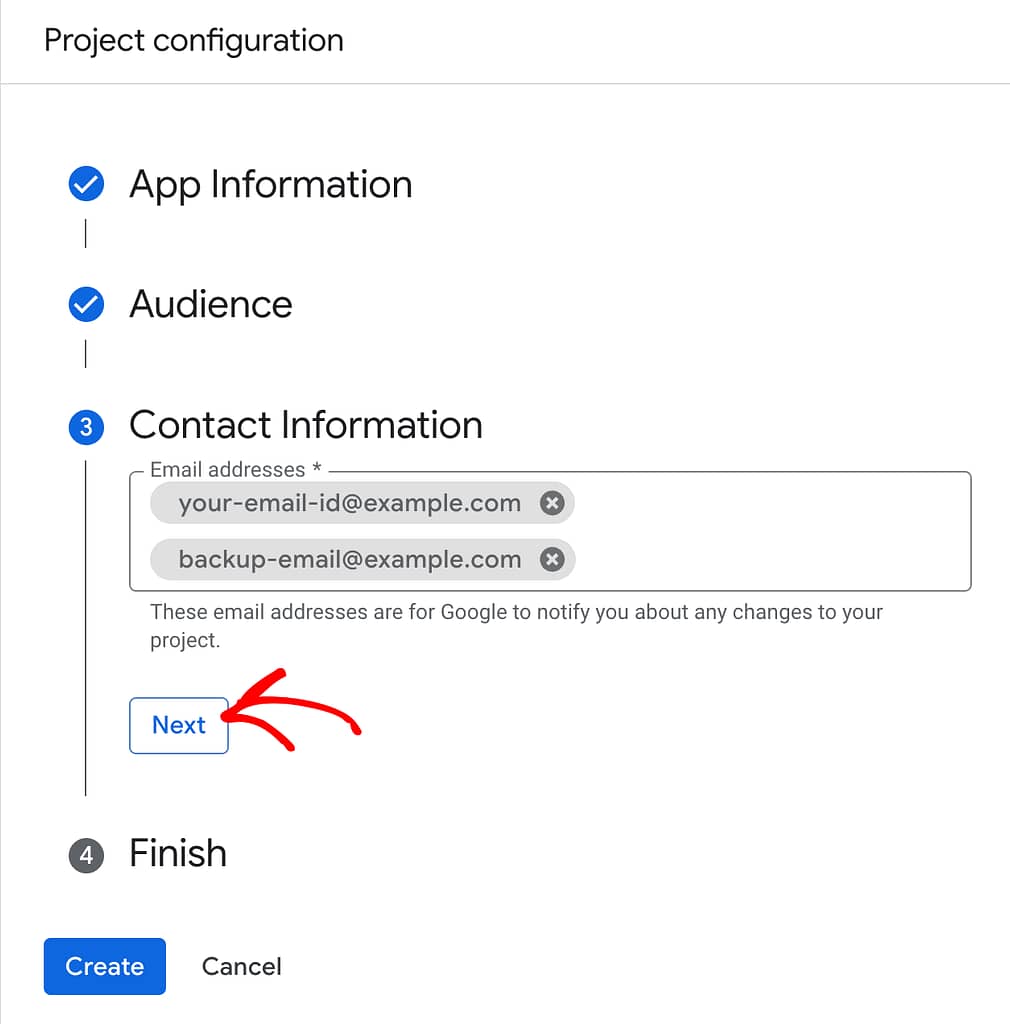
After you enter your contact information, you must click the checkbox to agree to Google API and services data policies, and click Continue.
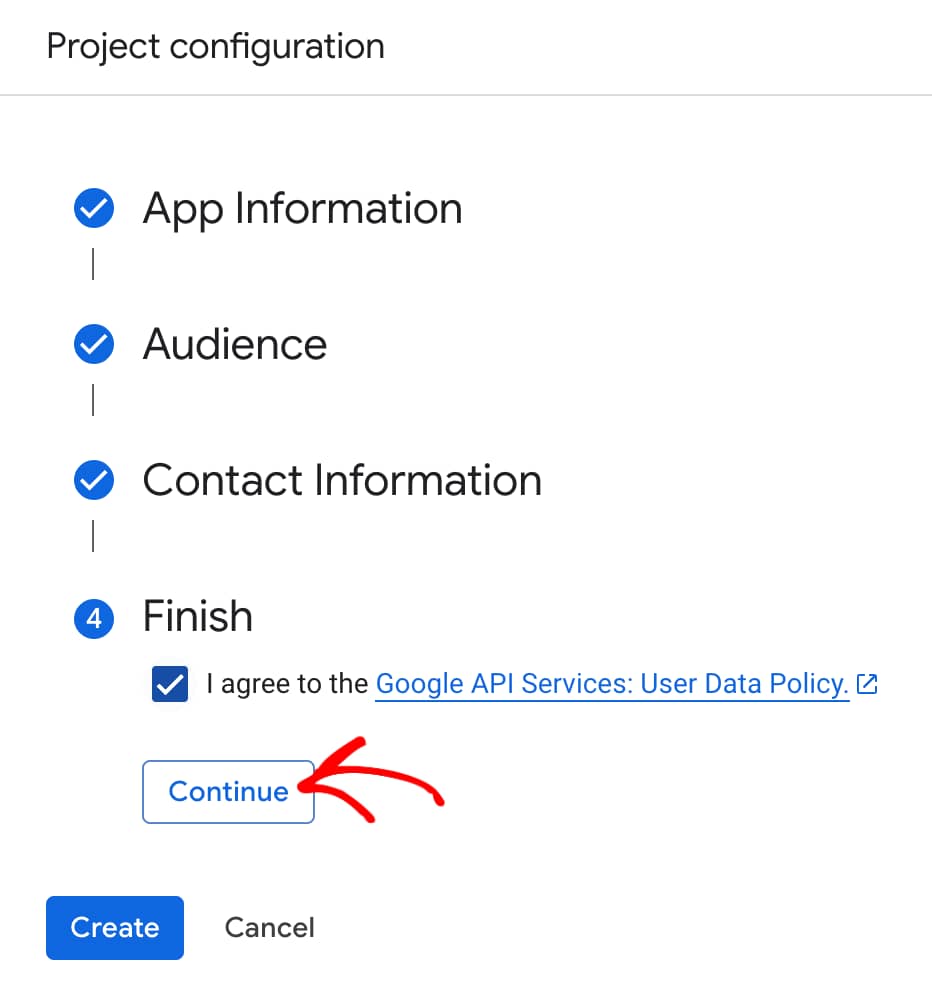
Once you click Continue, you are done with all the information required here. To proceed, click Create.

Now that you have configured the OAuth Consent screen, the next step is to generate the OAuth Credentials.
Generating the OAuth Credentials
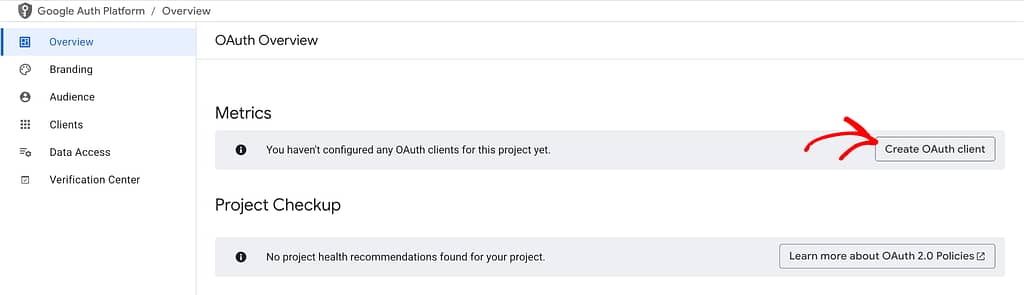
When you configure the OAuth consent screen, you’ll be taken to the OAuth Overview page where you see an option to create an OAuth client. To do so, click the Create OAuth Client button.
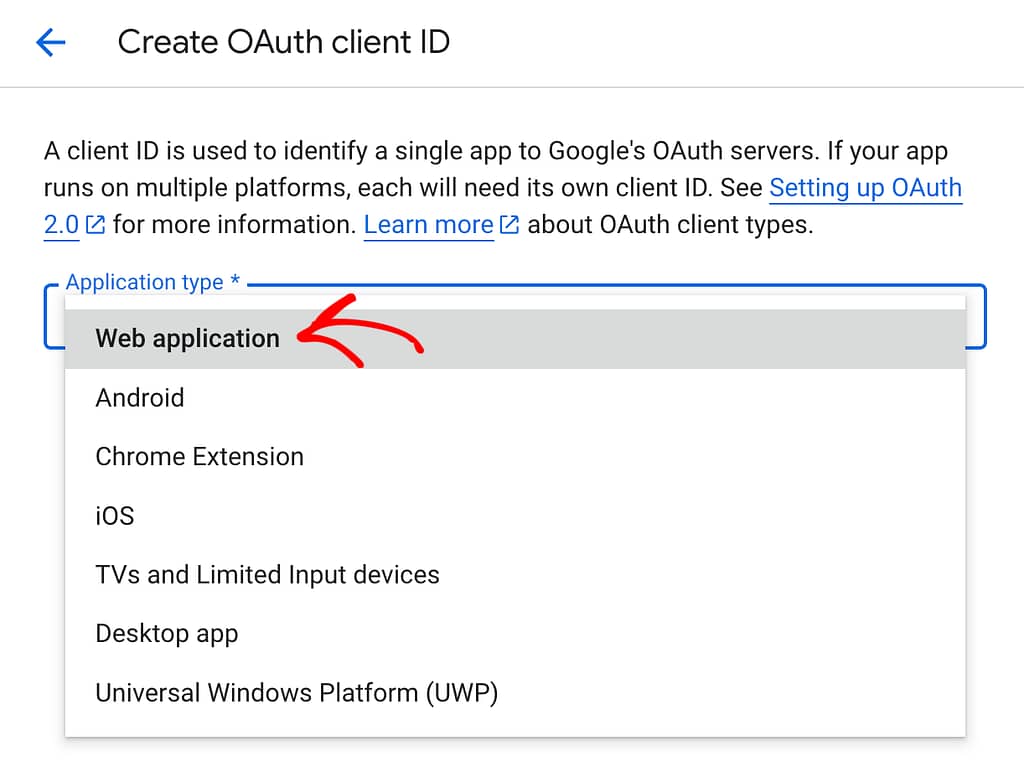
Clicking the button will take you to a page to create the OAuth Client ID. Here, begin by entering the Application type. To set an application type, select Web application in the dropdown field.
After selecting the application type, you can change the default name used for this client ID.
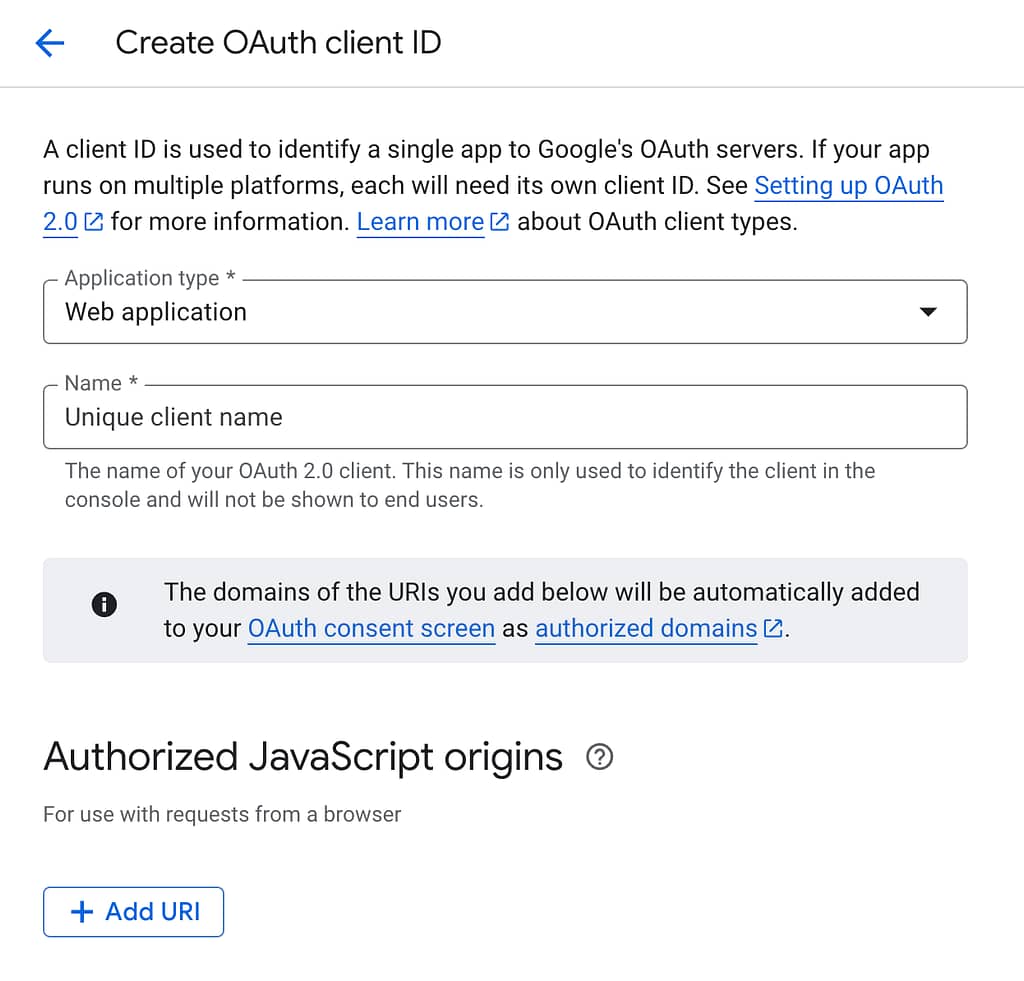
Once you are done with these basic settings, what’s important is to set the redirect URLs.
To set the redirect URLs for this application scroll down to the Authorized Redirect URL section and click the + Add URL button.
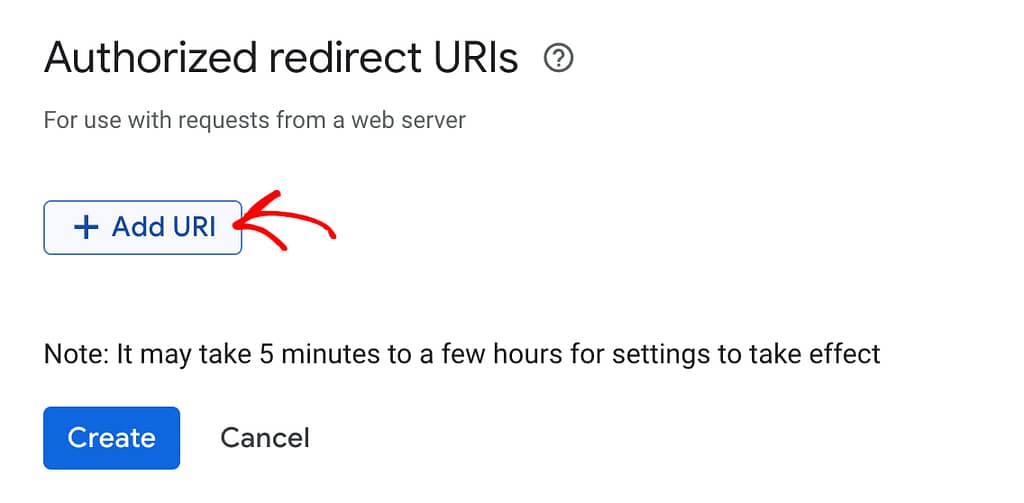
When you click the Add URL button, you’ll see an input field to enter the URL.
In this field enter the following URL by replacing “YOUR-SITE” with your domain name, and click Create.
https://[YOUR-SITE]/wp-admin/admin.php?page=tve_dash_api_connect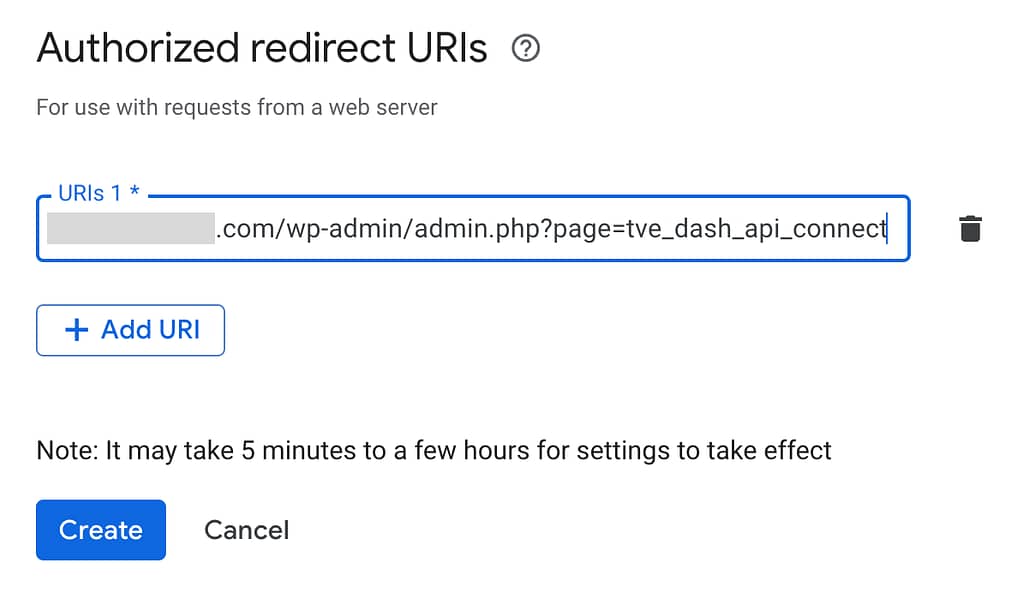
Clicking create will create the OAuth client and display the Client ID and Secret Key in a popup.
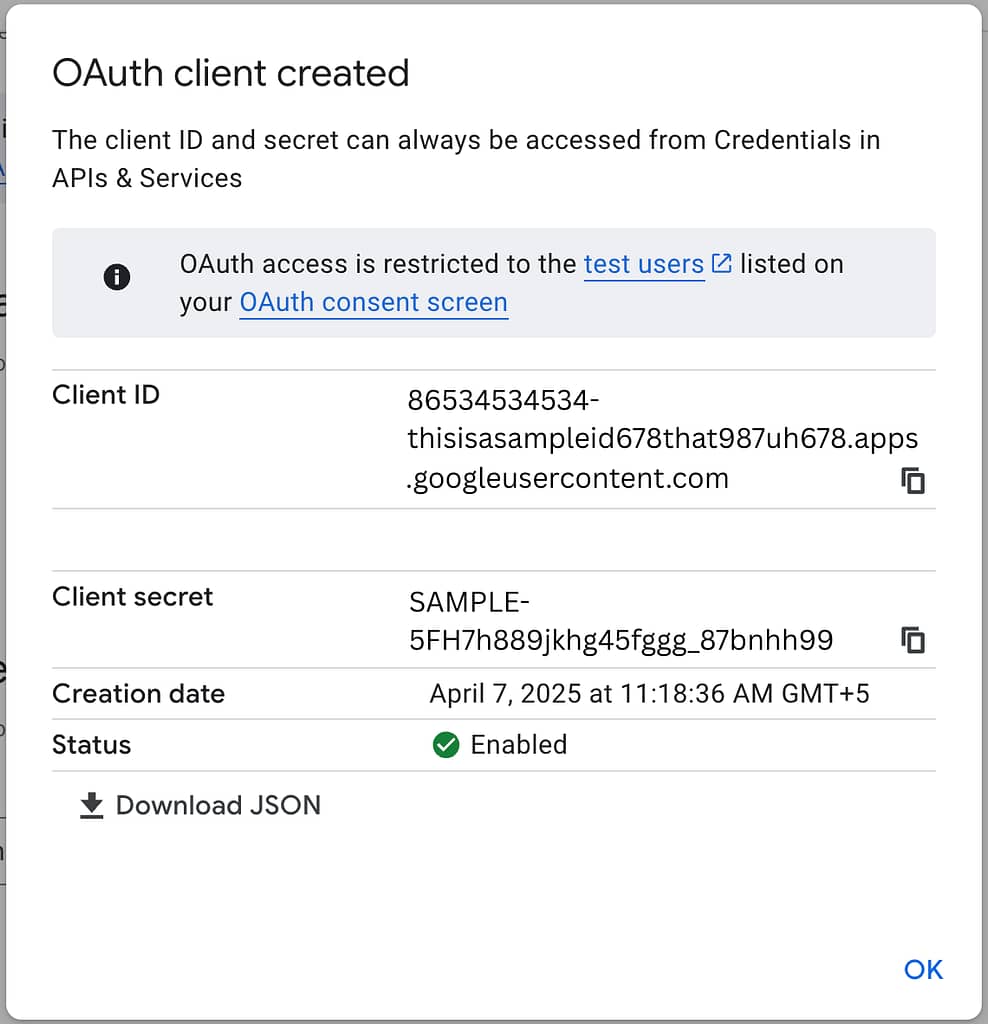
The Client ID and the Secret Key that you get here will be needed when you are connecting your Thrive Dashboard to Google Drive. Therefore, copy and save this for further use.
Obtaining the Google Account API Key
For a successful integration between Thrive Dashboard and Google, you will also need an API Key alongside the Client ID and Secret key obtained above.
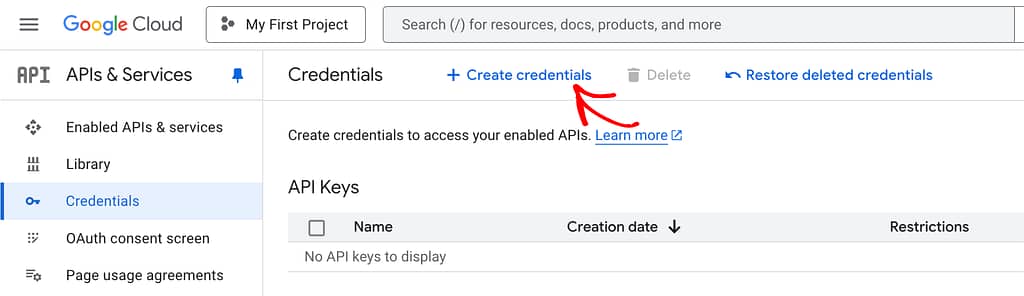
To find your Google account API key, open the APIs and Services page in Google Console and click on Credentials in the left column.
On the Credentials page, click the + Create credentials link in the top bar.
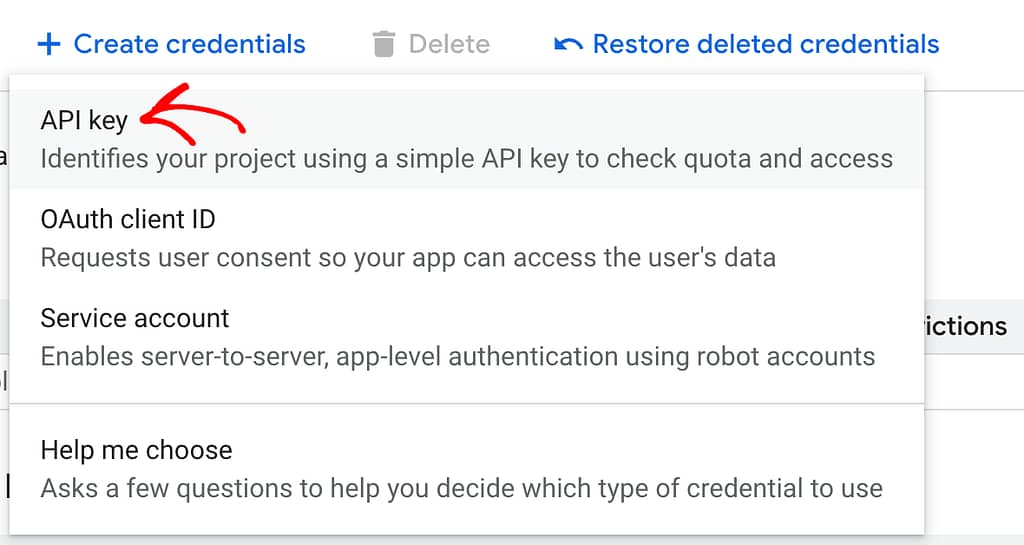
After you click to create credentials, click on API Key.
When you select the API key, you’ll see a popup with the generated API key on display. To copy this key, click the copy icon beside it.
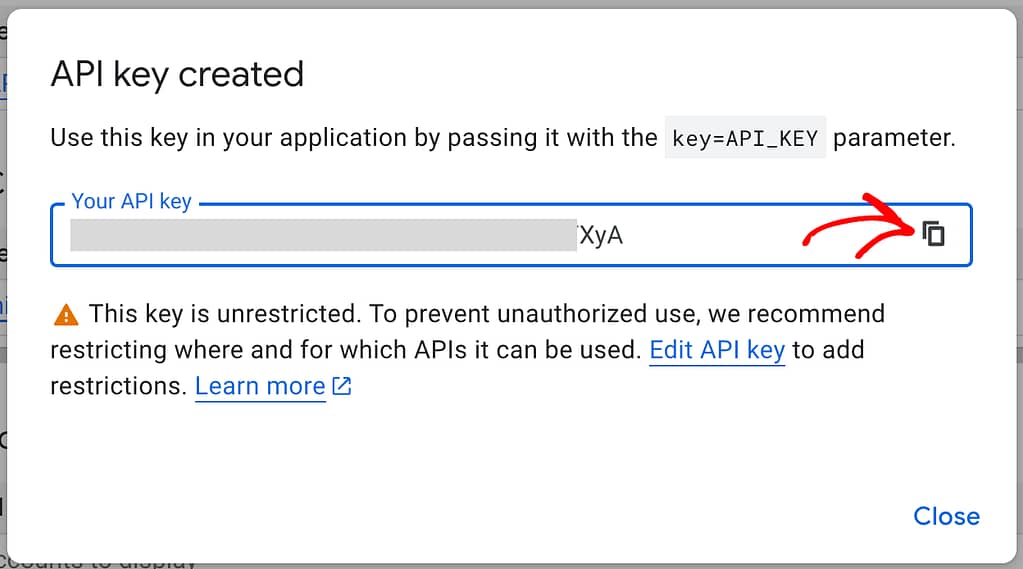
This API key will be used alongside the Client ID and Secret key to establish a connection between Google and Thrive Dashboard.
Building an API Connection Between Thrive Dashboard and Google
After you’ve configured the OAuth Client and Credentials in Google API and services, you can move forward to integrate your Thrive Dashboard with Google.
To begin, open your WordPress admin area, navigate to Thrive Dashboard >> Thrive Dashboard, scroll down to API Connections and click the Manage Connections button.

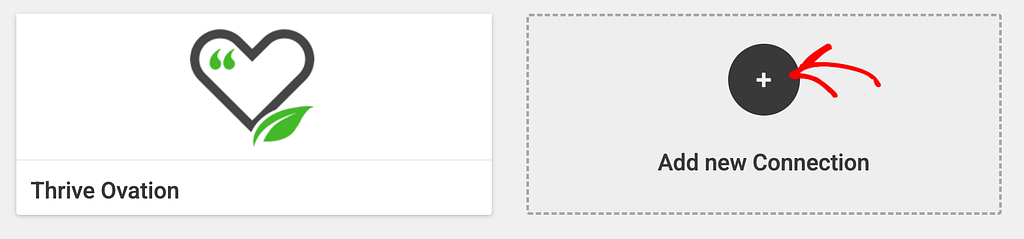
On the API Connections page, click Add Connection.
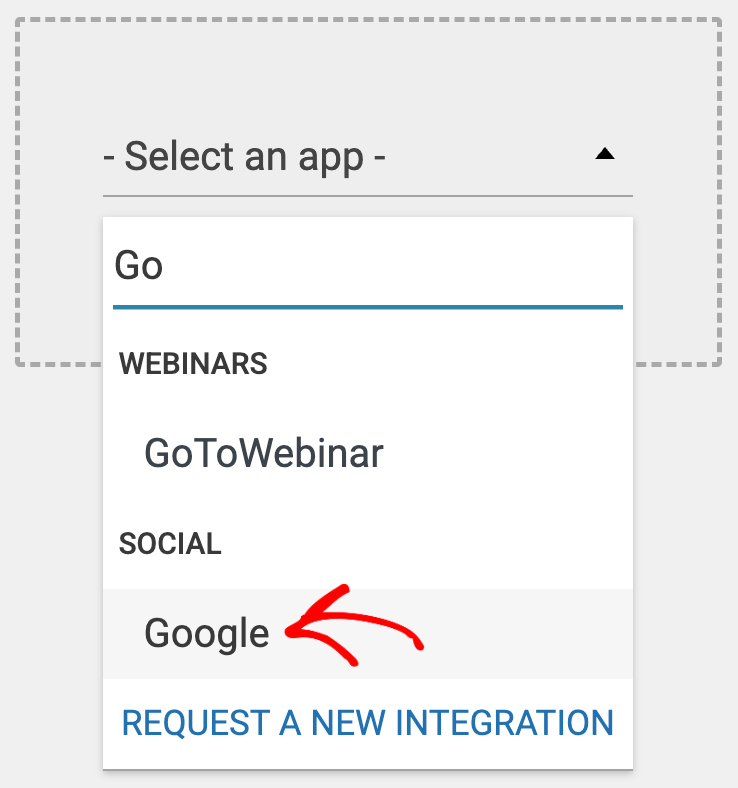
When it asks you to select the application you want to connect, select Google in the dropdown.
After selecting Google to proceed with the integration, enter the Client ID, Client Secret key and API key in the available fields. Once you enter all these fields, click Connect.
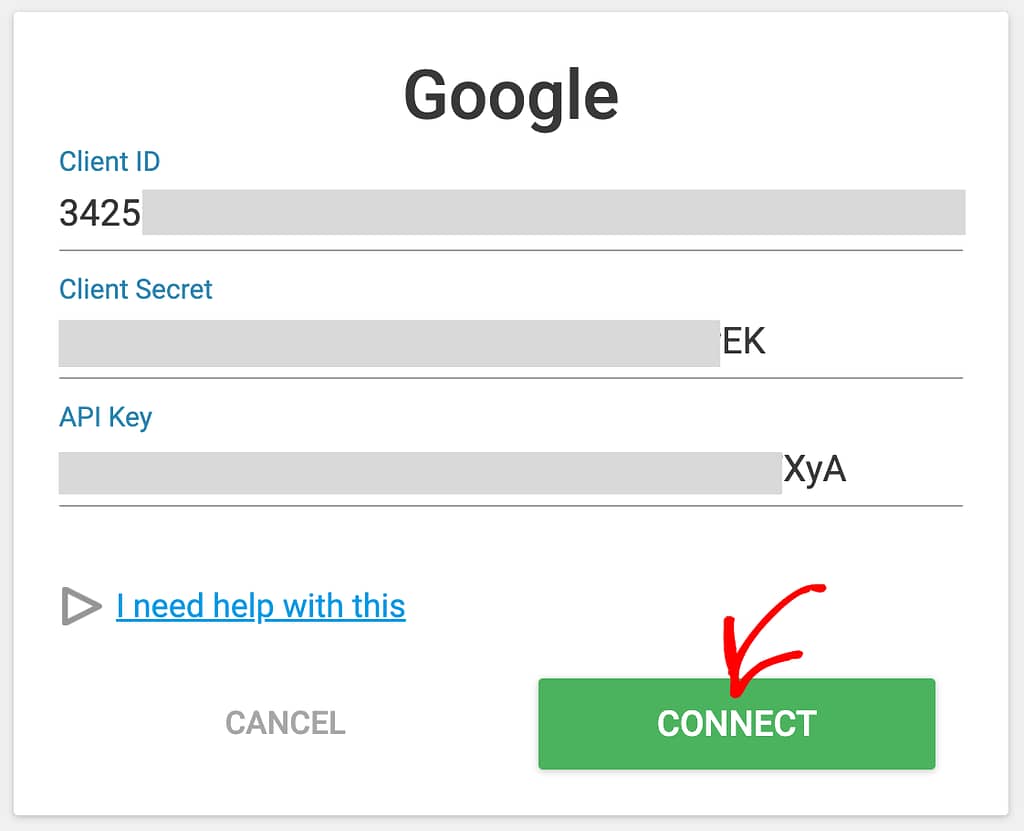
Clicking connect will establish a connection between Google and Thrive Dashboard.

We’ve just seen how you can build an API connection between the Thrive Dashboard and Google.
Next, do you want to allow users to sign in to their Google accounts while posting a comment? Here’s a document that will help you with that.
Similarly, if you are using the Thrive Quiz Builder to publish quizzes on your website, refer to our document that will help you add social share badges to your quiz results page.