Do you want to store and manage leads captured using the Lead Generation element or a Thrive Leads form? You can connect them with HubSpot, a customer relationship management tool.
In this article, we’ll show you how to connect Thrive Themes with HubSpot, so you can pair it up with the Lead Generation element or Thrive Leads to capture, store, and manage leads.
- Finding the HubSpot Access Token
- Adding the HubSpot Access Token to the Thrive Dashboard
- Connecting HubSpot to a Lead Generation Element
- Connecting HubSpot to a Thrive Leads Form
Finding the HubSpot Access Token
The HubSpot access token is an authentication code used to identify and verify an account or a user when you want to connect it with another tool.
Therefore, the first thing you’ll need to connect your Hubspot account to the Thrive Dashboard is the HubSpot access token.
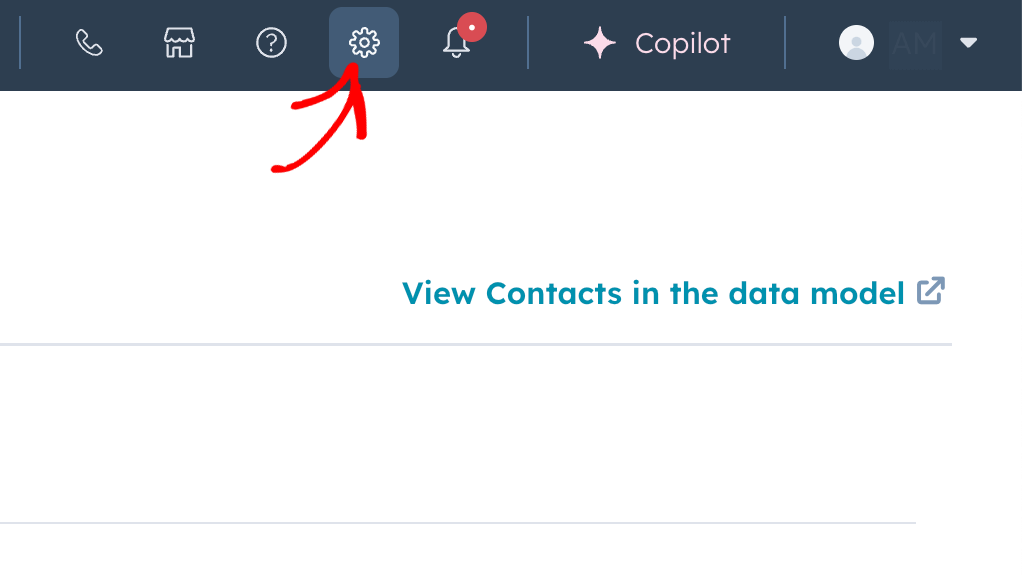
To find the access token, log into your HubSpot account, click on the gear icon in the top bar.
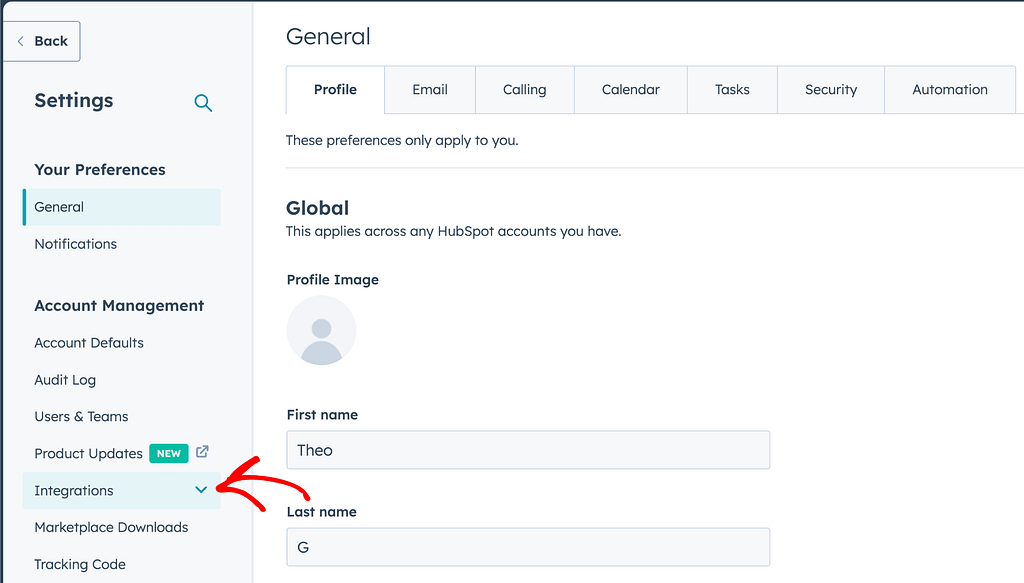
On the Settings page, click on Integrations in the left column.
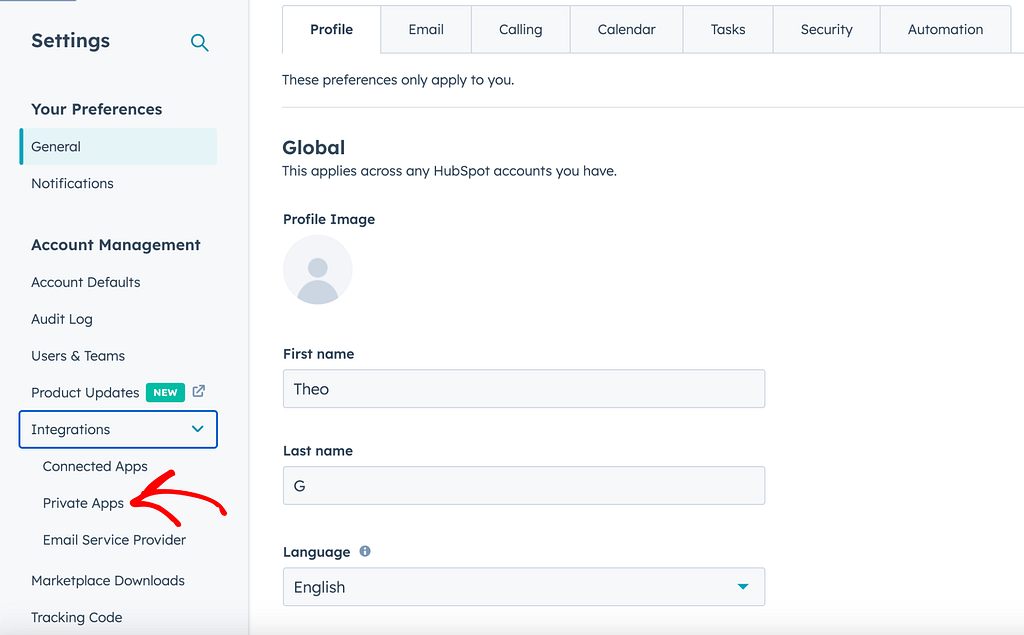
Under HubSpot Integrations, click Private Apps.
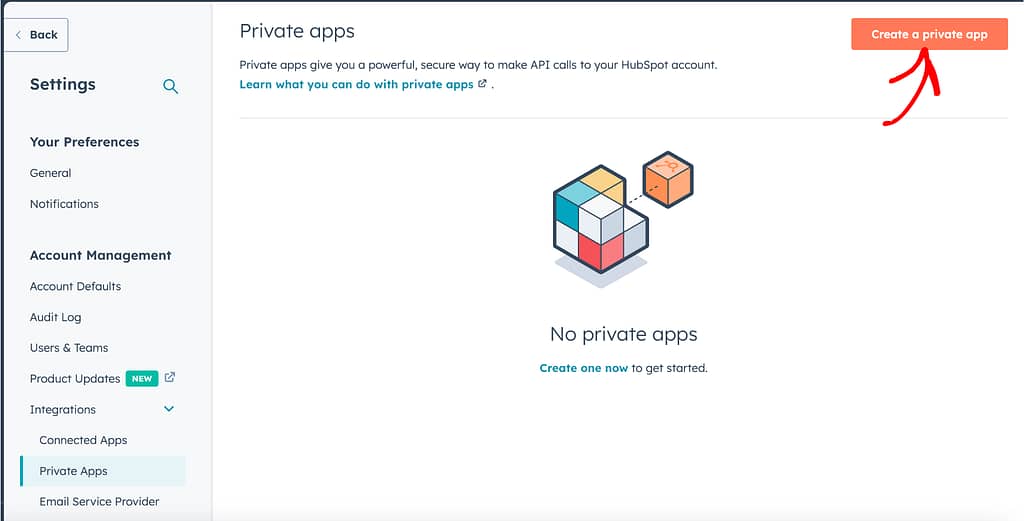
On the Private Apps page, create a new private application by clicking the Create Private App button on the top right.
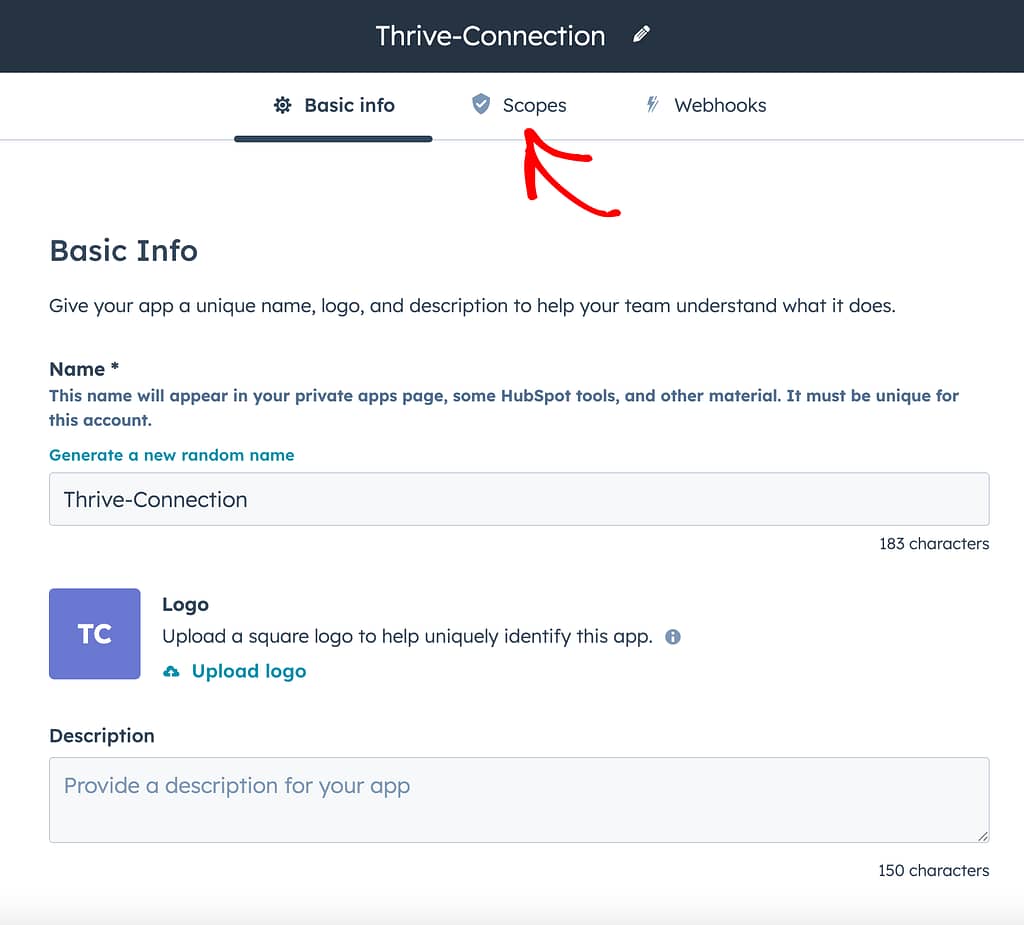
Clicking the button will take you to a page asking for basic information about the application you want to create.
Under Basic Info, enter the Application name, a logo you want to use and a description that tells you what this application is all about.
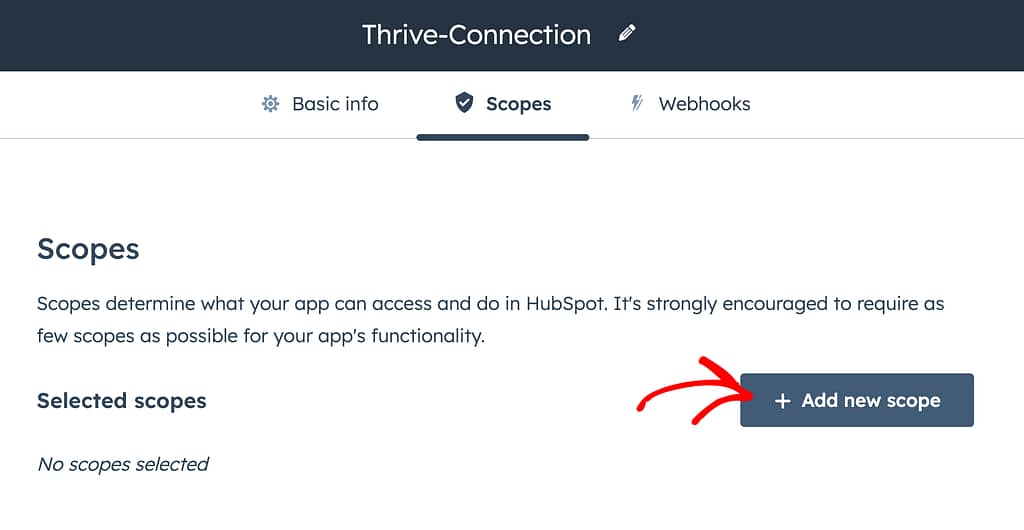
After you enter the basic information, click the Scope tab to set the scope of the application.
Under the Scope tab, proceed to create a new scope by clicking the + Add new scope button.
When you choose to add a new scope, you’ll see a slide in where you have to select the scope/scopes you want to add for this application.
The scopes you select here will determine what exactly your app can do in HubSpot. Please ensure you select only the necessary scopes here.
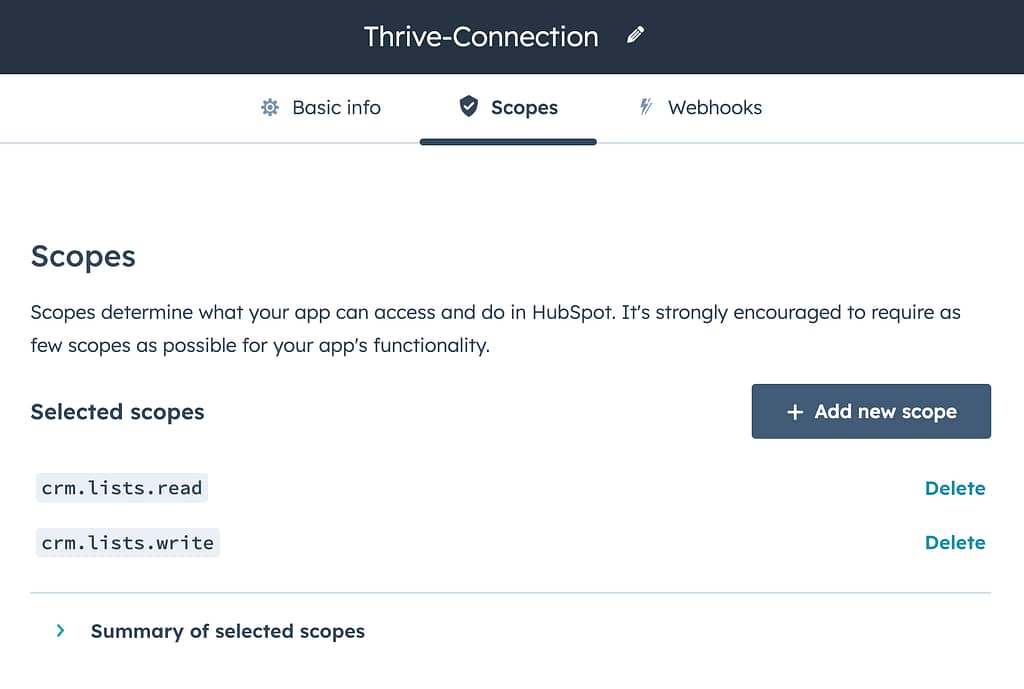
Since we are integrating HubSpot with Thrive products so we can manage leads and use it as a CRM, ensure that you enable the read and write permissions for crm.lists.
After you enable crm.lists.read, crm.lists.write, crm.objects.contacts.read, crm.objects.contacts.sensitive.read, crm.objects.contacts.write, and any other scope you want to add, click the Update button.

When you click Update, you’ll see the scopes added under the Scope tab.
After you’ve selected the scopes, click the Create App button on the top right.
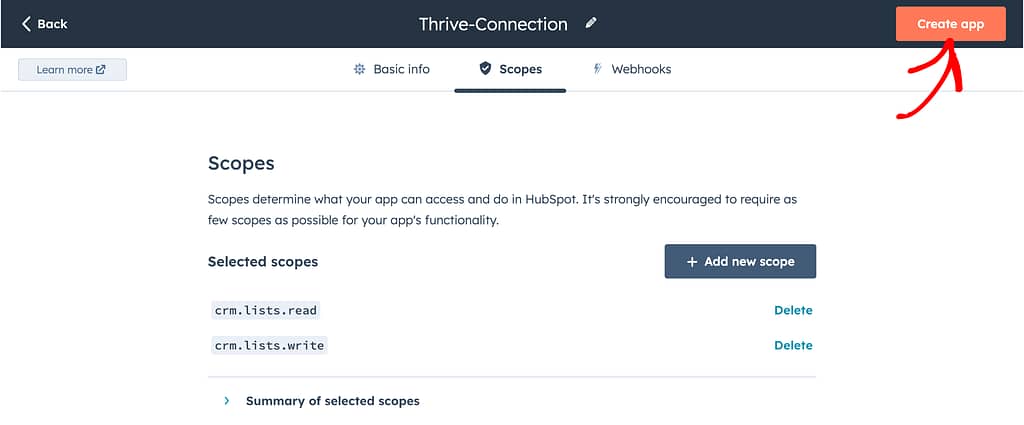
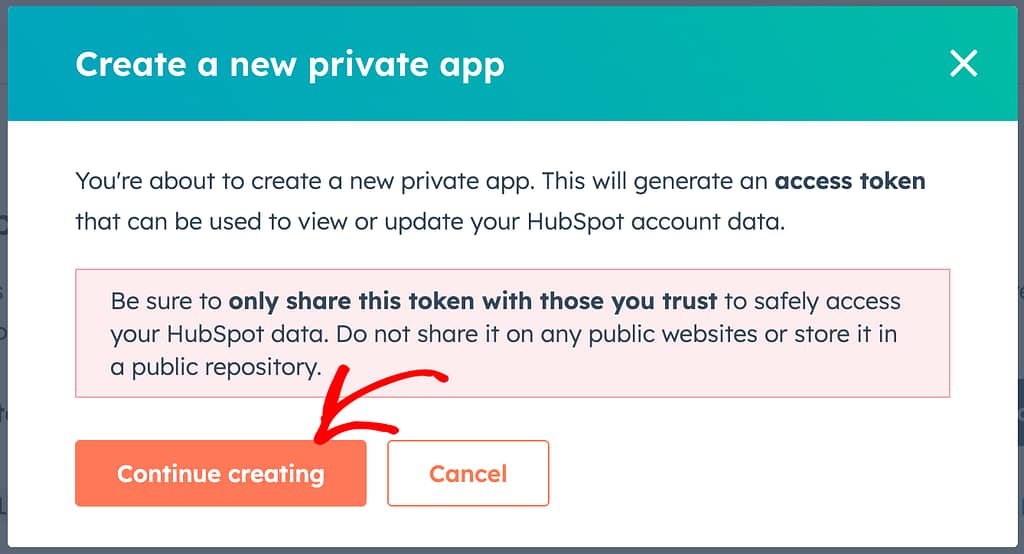
Clicking the Create App button will display a popup informing you about an access token that will be generated and displayed in the next popup. It also recommends you not to share this access token with anyone.
To proceed and view the access token, click Continue creating.
After completing this final step, you’ll see a popup with the access token on it. On this popup, click Show token to view the token and then Copy to copy it.
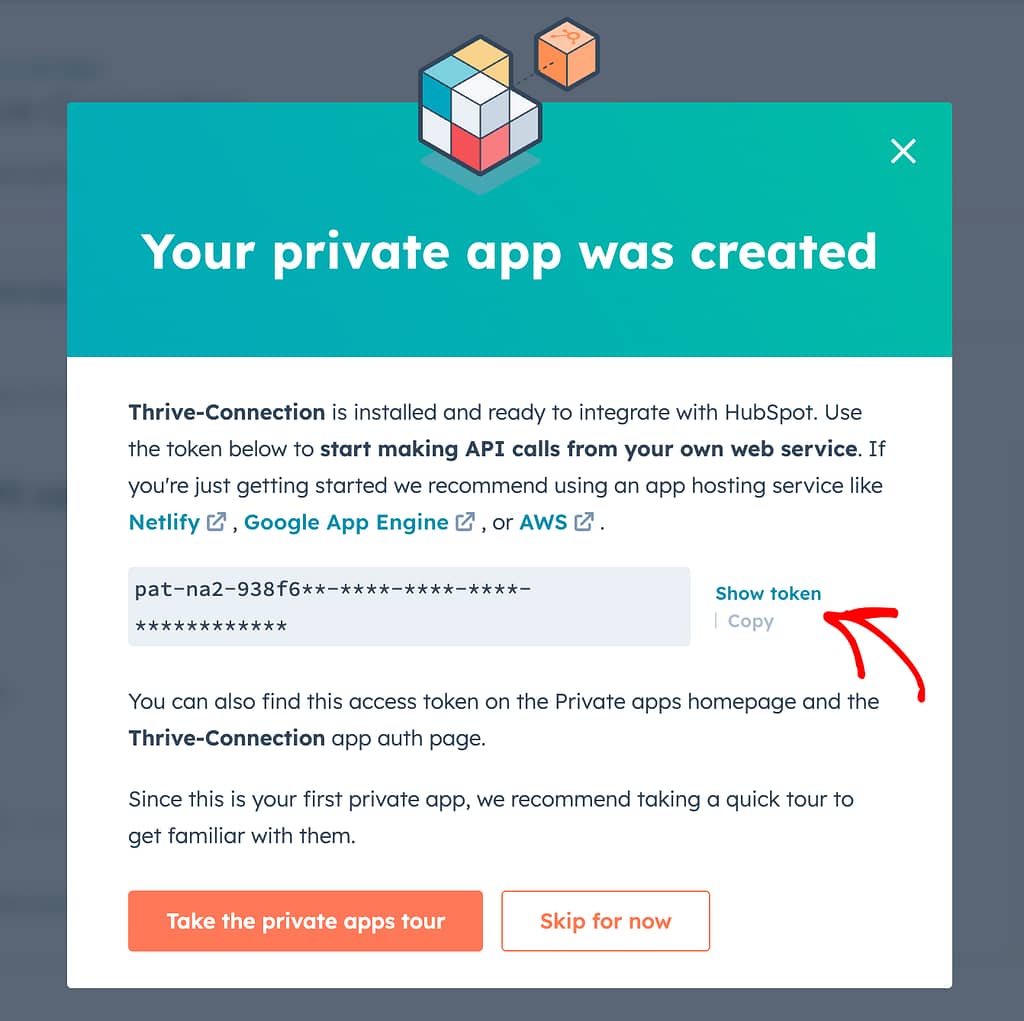
Now, this is the access token you’ll need when you connect Thrive Dashboard to HubSpot.
Adding the HubSpot Access Token to the Thrive Dashboard
To proceed with the API connection between HubSpot and the Thrive Dashboard, it is important to enter the HubSpot access token.
To begin, open your WordPress admin area, navigate to Thrive Dashboard >> Thrive Dashboard, scroll down to API Connections, and click on Manage Connections.

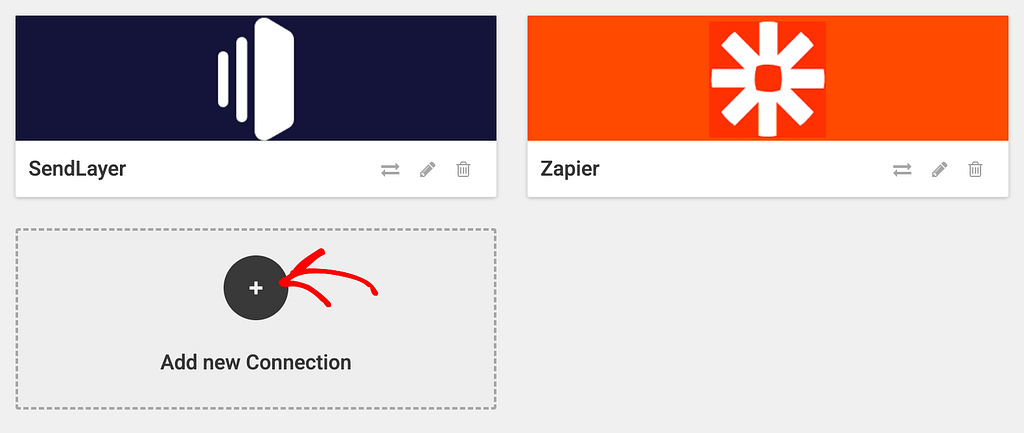
Clicking on Manage Connections will take you to the Active Connections page. On this page, scroll to the Add New Connection block and click on it.
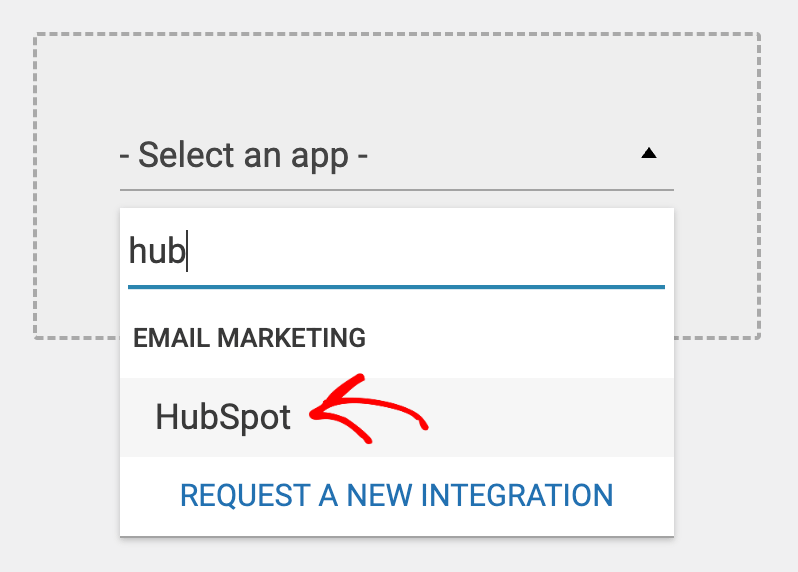
When you click to add a new connection, you’ll see a dropdown where you can select the app, HubSpot, that you want to connect to.
Selecting HubSpot will let you select the version of HubSpot you want to continue with. Here, select Version 2 since Version 1 is deprecated.
To proceed with Version 2, enter the HubSpot access token obtained from the steps above.
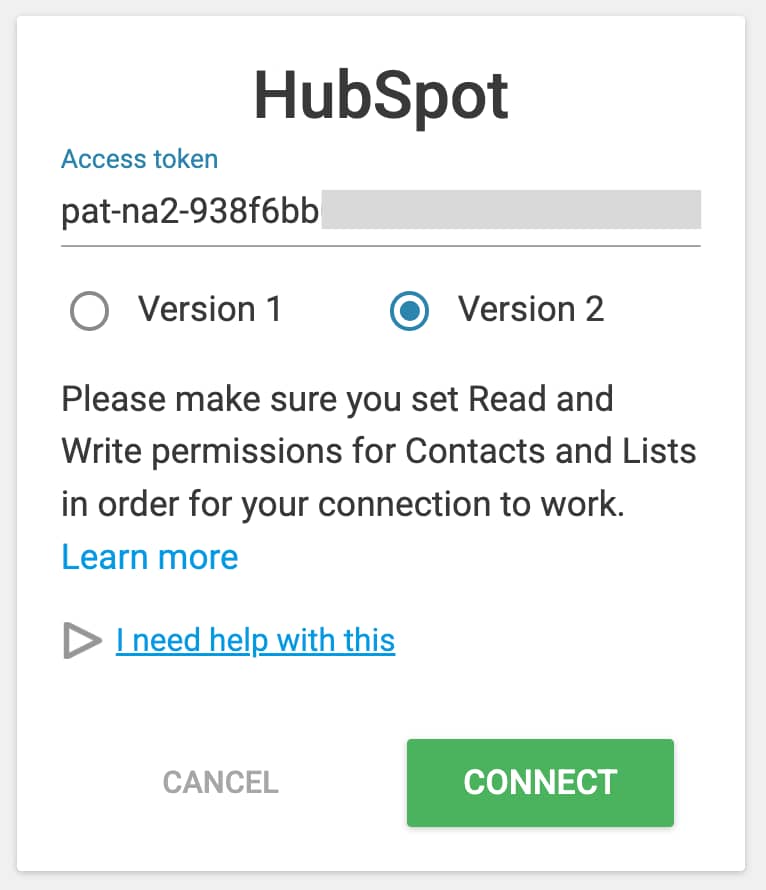
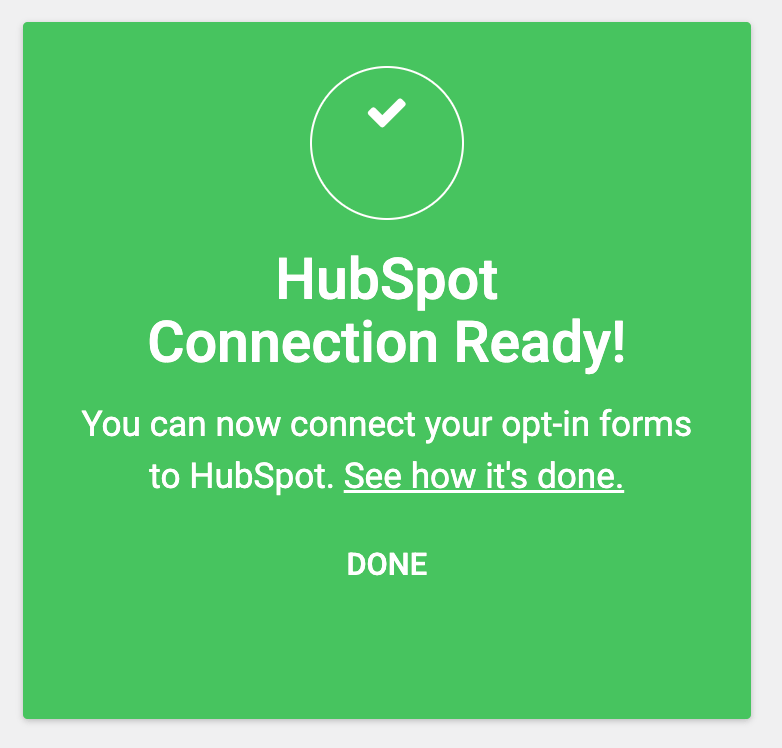
When you enter the HubSpot access token, click the Connect button. This will display a message of a successful connection.
Connecting HubSpot to a Lead Generation Element
After you’ve established a connection between HubSpot and the Thrive Dashboard, you can proceed to add the connection to a Lead Generation element you’ve used or plan to use.
Before we build a connection, please make sure you’ve added the Lead Generation element on a page or post using Thrive Architect. You can read our document to know more about the Lead Generation element.
Once you are ready with a post or page with the Lead Generation element on it, click on the element to see its options open in the left sidebar.
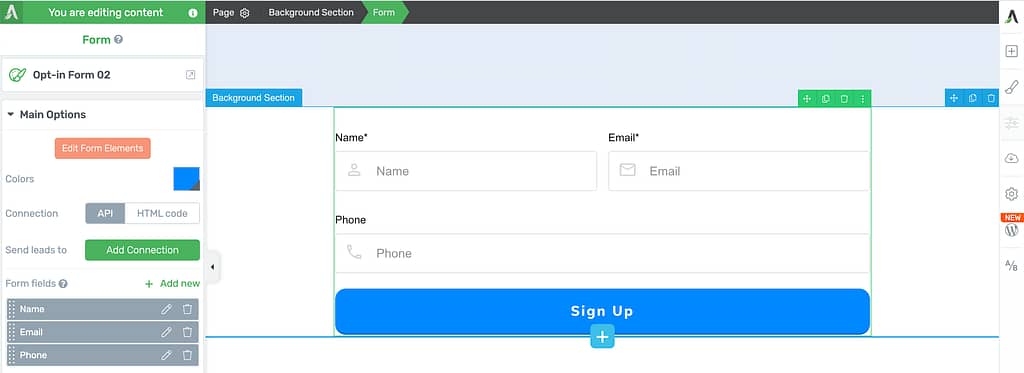
In the Lead Generation options seen in the left sidebar, open Main Options and click on the Add Connection button. This will help you determine the application to which you’d like to send the leads.
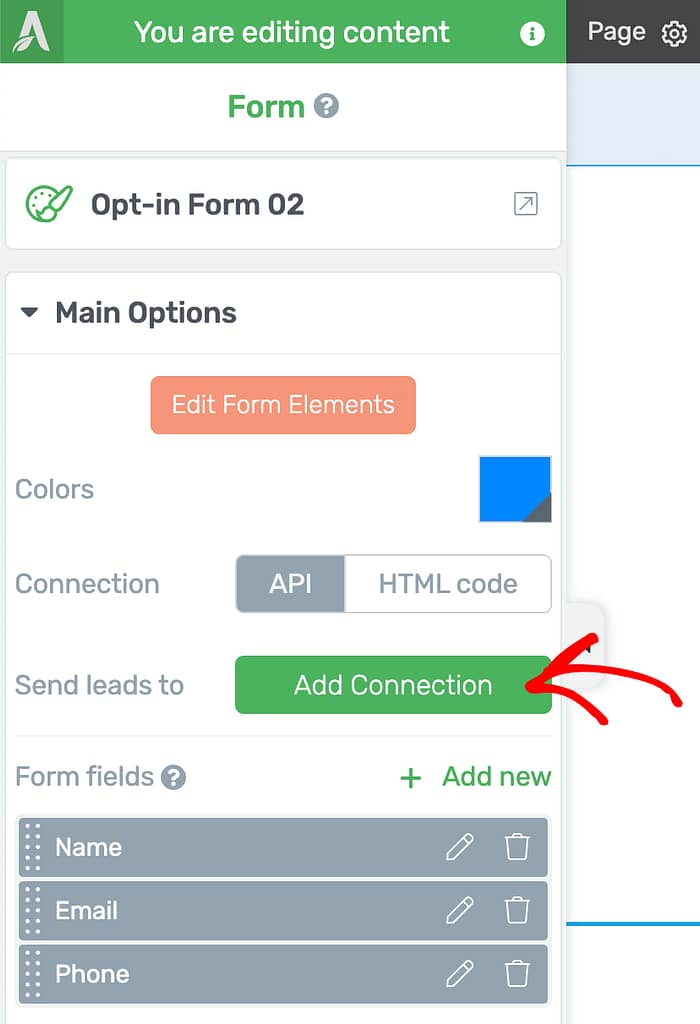
After clicking on Add Connection, you’ll see a dropdown where you select the connection you want to add. In this dropdown, select HubSpot.
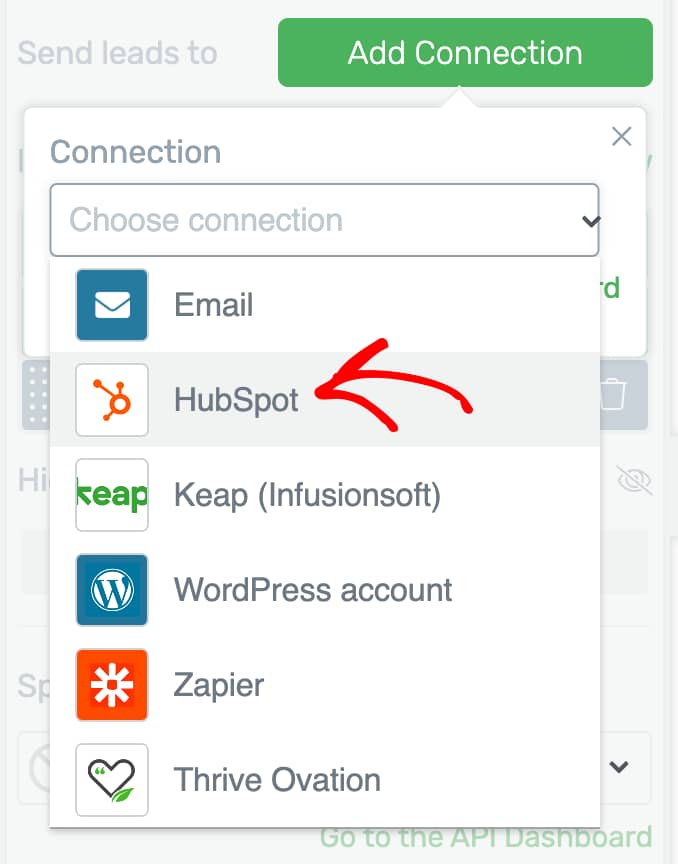
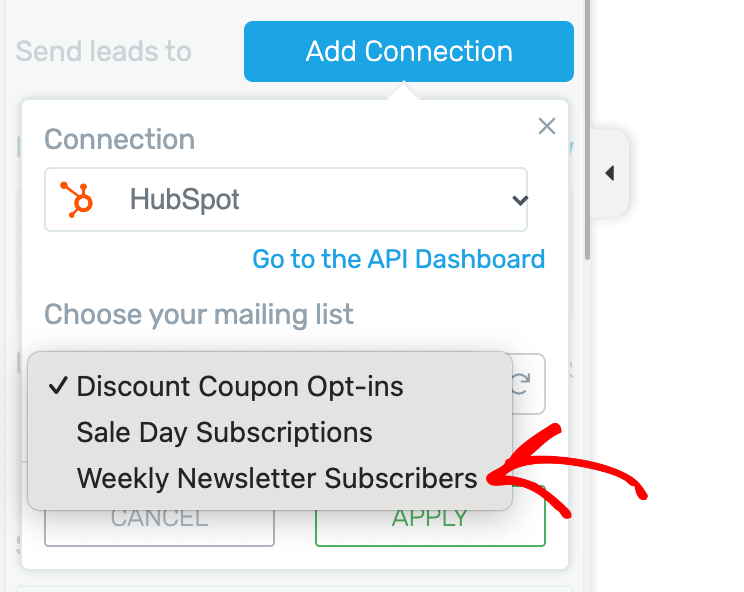
When you select HubSpot, you’ll see another field down that asks you to select the list you want to use here.
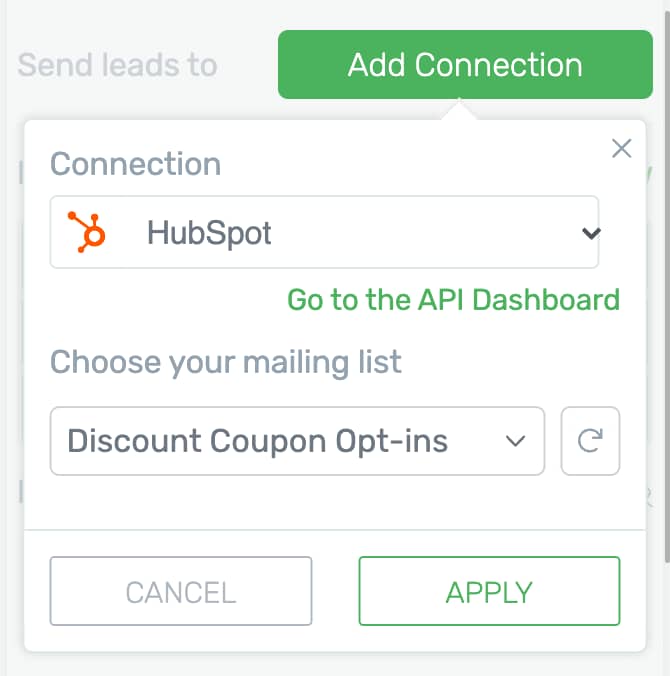
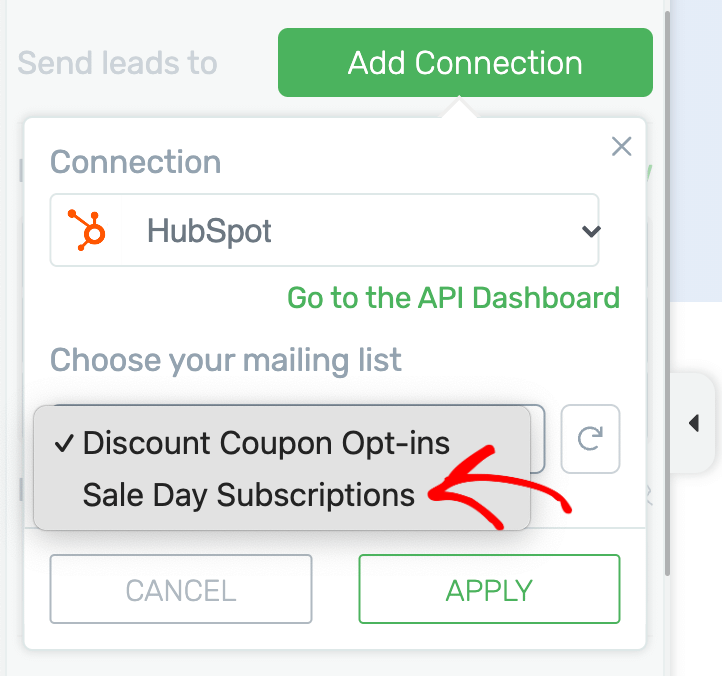
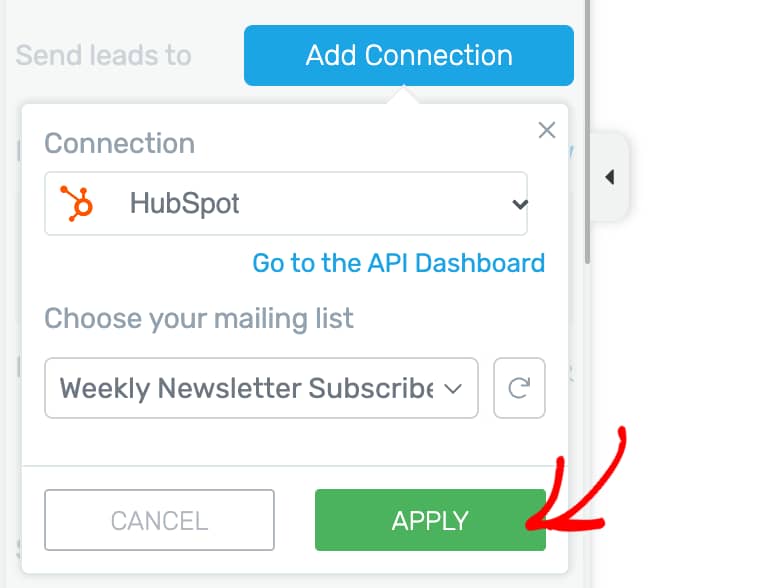
To select a HubSpot list, click the dropdown to choose a mailing list and select the list you want to use here.
Once you select HubSpot and the list you want to connect to, you can add tags for the contacts being added to this list. To do so, type the tag in the given field and click the + button or the Enter key.
After you’ve done that, click the Apply button to add the connection.
Once you’ve added the connection, you can manage the fields and add custom fields if required.
To add a custom field, first under the Form fields section click + Add new.

In this select field type dropdown select the type you want to add. We are selecting a Text for this example.

Once you select the field type, enter the field name and click on the dropdown to select the respective field in HubSpot that you want to map this field with.
In this example, we’ve selected Job Title. So, the information going through the text field will be sent to the Job Title field in FluentCRM.

After adding the field and mapping it with the one in HubSpot, click the Apply button to add this custom field.
Connecting HubSpot to a Thrive Leads Form
To be able to connect HubSpot with Thrive Leads, you need to make sure you have a form created using Thrive Leads.
You can refer to our detailed documentation on how to create a form using Thrive Leads.
To be able to connect HubSpot with a Thrive Leads form, begin by opening your WordPress admin area, navigating to Thrive Dashboard >> Thrive Leads, and click on a Lead Group that contains the form you want to edit.
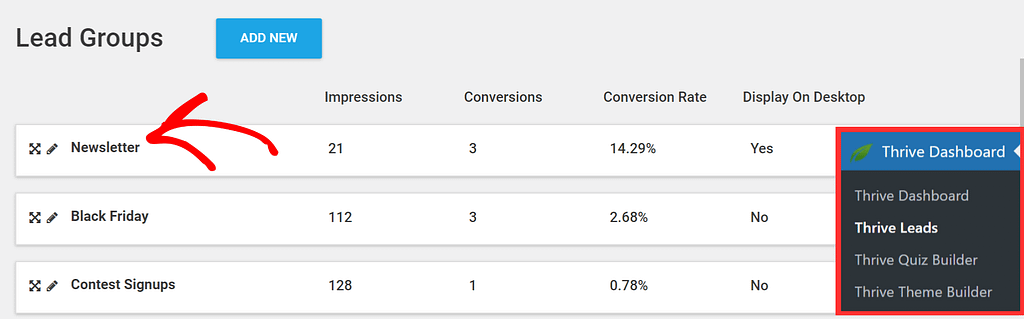
When you click on a Lead Group, it’ll display the form types created under it. To connect a specific form type, click on the “Pen” or Edit icon seen on the right side of the form name.
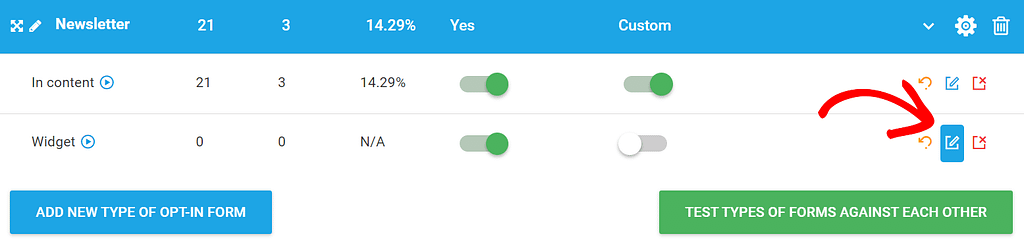
When you choose to edit the form type, it’ll take you to a page where you’ll see the form/forms created under this form type.
On this page, click on the pen or edit icon seen on the right side of the form name.

When you click to edit the form, it’ll take you to the editor where you can modify the form elements.
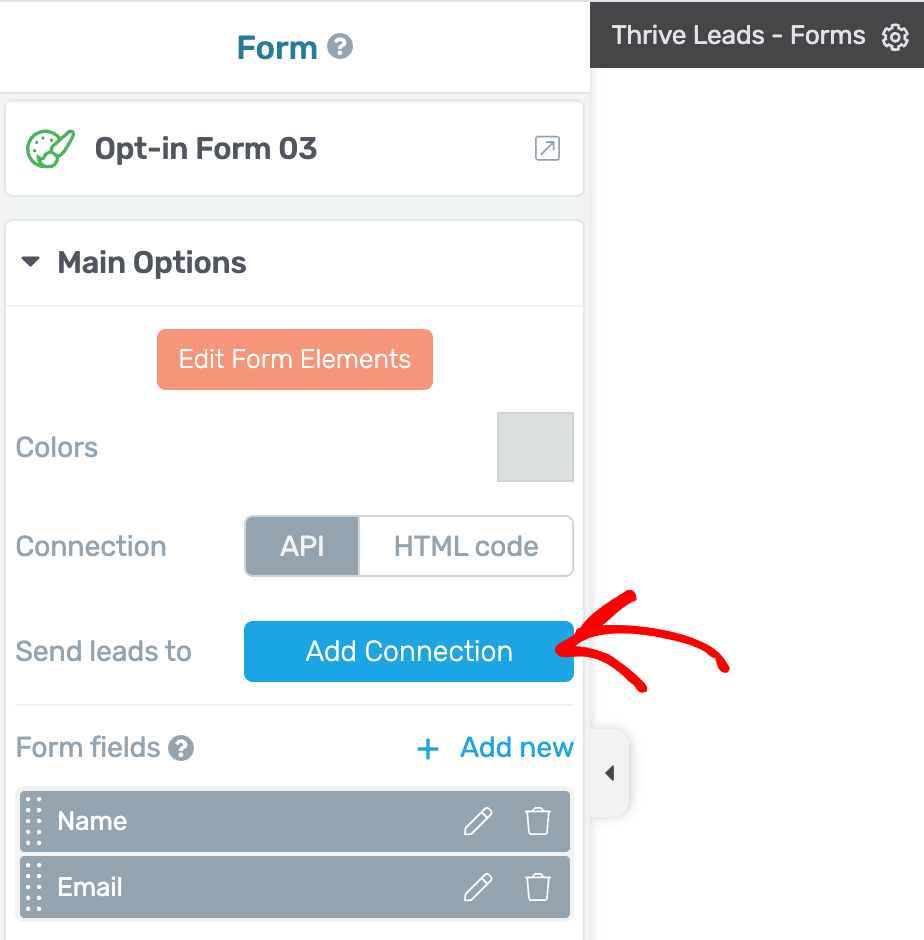
In the editor, click on the form and see its options in the left sidebar.
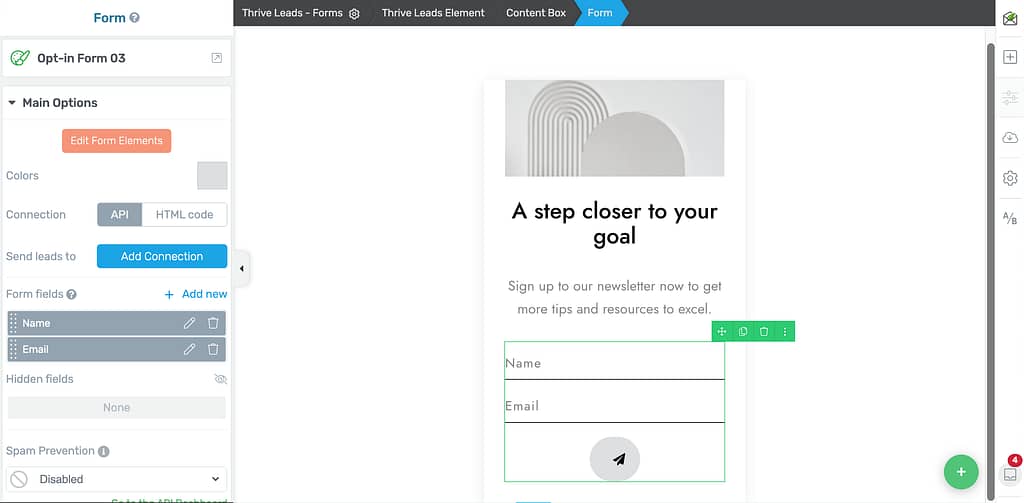
In the left sidebar, open Main Options, and click on the Add Connection button so you can send your leads to a list you select.
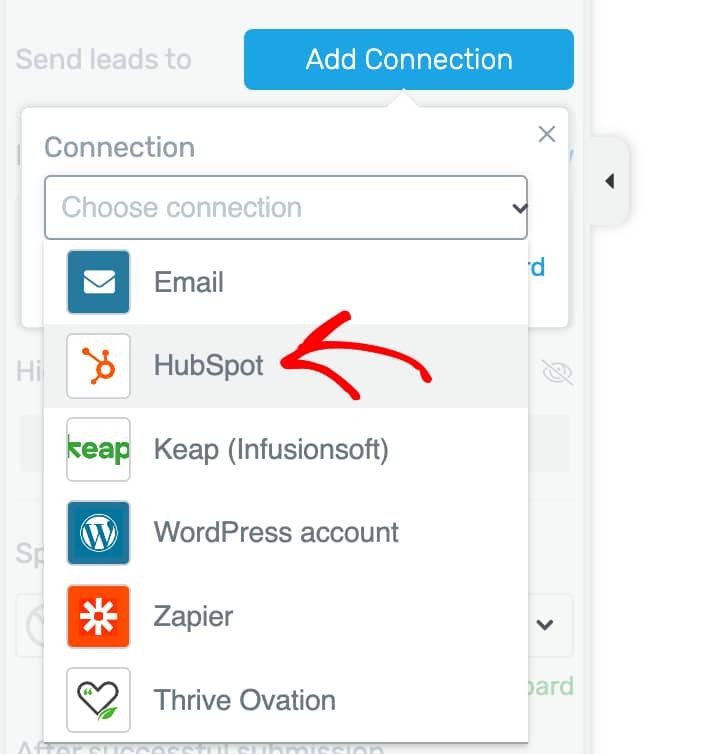
Clicking on Add Connection will show a dropdown. Click on this dropdown and select HubSpot to establish the connection.
When you select HubSpot, you’ll see another field down that asks you to select the list you want to use here.

To select a HubSpot list, click the dropdown to choose a mailing list and select the list you want to use here.
Once you select HubSpot and the list you want to connect to, click Apply.
We’ve just seen how you can establish an API connection between Thrive Dashboard and HubSpot and use it in a lead generation element and a Thrive Leads form on your website.
Next, if you want to trigger Thrive Lead forms based on where a user comes from, read more about SmartLinks in Thrive Leads.