Do you want to store and manage leads captured using the Lead Generation element or a Thrive Leads form? You can connect them with Infusionsoft by Keap, a customer relationship management tool.
In this article, we’ll show you how to connect Thrive Themes with Infusionsoft so you can pair it up with the Lead Generation element or Thrive Leads to capture, store, and manage leads.
- Finding the Infusionsoft API Key
- Adding the Infusionsoft API Key to the Thrive Dashboard
- Connecting Infusionsoft to a Lead Generation Element
Finding the Infusionsoft API Key
API, i.e., Application Programming Interface Key, is an authentication code used to identify and verify an account or a user when connecting it with another tool.
Therefore, the first thing you’ll need to do to connect your Infusionsoft account to the Thrive Dashboard is to use an API Key.
Thrive Themes lets you use two types of API keys from Infusionsoft. They are:
- Service Account Key (SAK)
- The Legacy Key (that’ll remain valid until February 2025. Know why here.)
Finding the Service Account Key (SAK) in Your Keap Account
The Service Account Key is Keap’s recent recommendation after they announced the deprecation of their Legacy key from February 2025 onward.
To obtain the Keap Service Account Key (SAK), log into your Keap account, click on your profile picture, and then click Settings.
On the Settings page, scroll down and click to open the API section.
On the Keap API page, click the Service Account Keys tab.
Under the Service Account Keys tab, generate a new key by clicking the New Key button.
After clicking the New Key button, a popup will appear where you enter the key’s name and click the Create button.
Immediately after clicking create, you’ll see the API key in the popup. To copy this API key, click the Copy button.
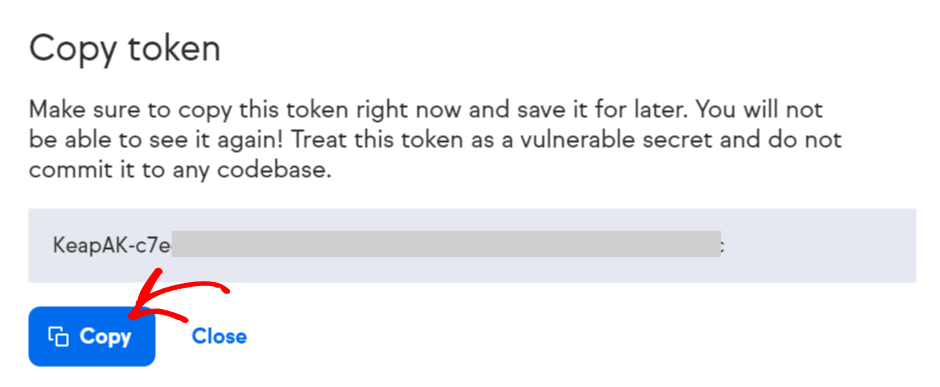
If you want to use Keap’s Service Account Key (SAK), insert this key alongside the client ID in your Thrive Dashboard.
Finding the Legacy Key in Your Keap Account
The Legacy key is the first API key introduced by Infusionsoft by Keap to help you integrate it with any other tool.
For the reasons mentioned here, Keap has announced that the Legacy key will be depreciated starting in February 2025.
However, if you still want to integrate Thrive Themes with Keap using the Legacy Key, let’s learn how to find the key in your Keap account.
To obtain the Keap Legacy Key, log into your Keap account, click on your profile picture, and then click Settings.
On the Settings page, scroll down and click to open the API section.
On the Keap API page, click the Legacy Keys tab.
Under the Legacy Key tab, you will find the Current Legacy Key in the field. If not, click the Regenerate Key button to generate a new key.
After you click the Regenerate Key button, you’ll see a popup with a warning that says, “Generating a new Legacy key will disable all the existing integrations, and this cannot be undone.” If you agree with the above, click Generate.
After you click Generate, you’ll see the key added under the Current Legacy Key field, from which you can copy and use it.
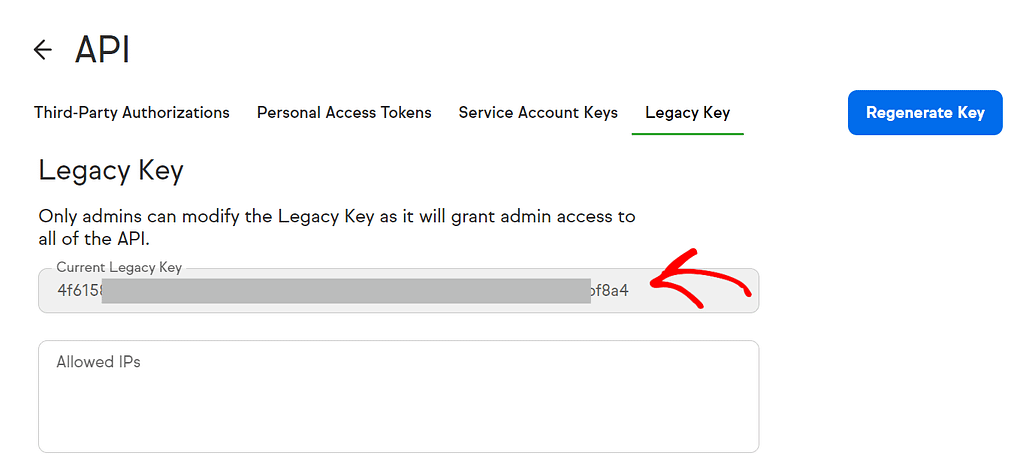
If you want to use Keap’s Legacy Key, insert this key alongside the client ID in your Thrive Dashboard.
Adding the Infusionsoft/Keap API Key to the Thrive Dashboard
Adding the API key to the Thrive Dashboard is important so you can easily use it with the Thrive tools.
To begin with the API Connection, open your WordPress admin area, navigate to Thrive Dashboard >> Thrive Dashboard, and click Manage Connections in the API Connections block.
Clicking on Manage Connections will take you to the Active Connections page. On this page, scroll to the Add New Connection block and click on it.
When you click to add a new connection, you’ll see a dropdown menu where you can select the app Keap (Infusionsoft) to which you want to connect.
When you select Keap (Infusionsoft) in the dropdown, you’ll see the fields asking you to enter a Client ID and the API Key.
You can add a text or alphanumeric value as the client ID and the key of your choice—a Service Account Key (SAK) or Legacy Key generated using the above-mentioned methods.
After entering the client ID and the API key, click Connect to establish the connection.
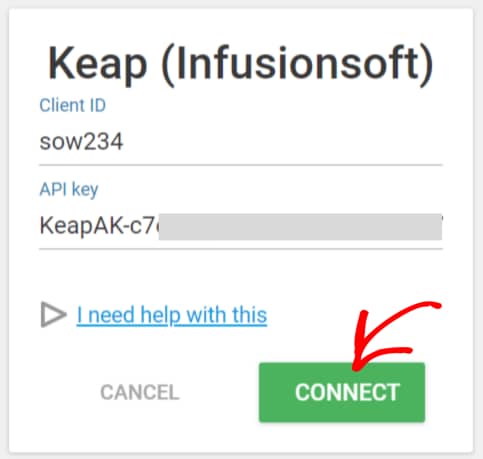
When you enter the right API key and click Connect, you’ll see a box confirming that the connection is established.
Connecting Infusionsoft to a Lead Generation Element
After establishing a connection between Keap (Infusionsoft) and the Thrive Dashboard, you can add the connection to a Lead Generation element you’ve used or plan to use.
Before we build a connection, please ensure you’ve added the Lead Generation element to a page or post using Thrive Architect. To learn more about the lead generation element, read our document.
Once you are ready with a post or page with the Lead Generation element, click on the element to see its options in the left sidebar.
In the Lead Generation options in the left sidebar, open Main Options and click the Add Connection button. This will help you determine the application you’d like to send the leads to.
After clicking on Add Connection, you’ll see a dropdown where you can choose the connection you want to add.
You click on the dropdown to see all the connections you’ve built in the Thrive Dashboard. To proceed, select Keap (Infusionsoft) from the list.
When you select Keap (Infusionsoft), you must select a Keap tag in the next field.
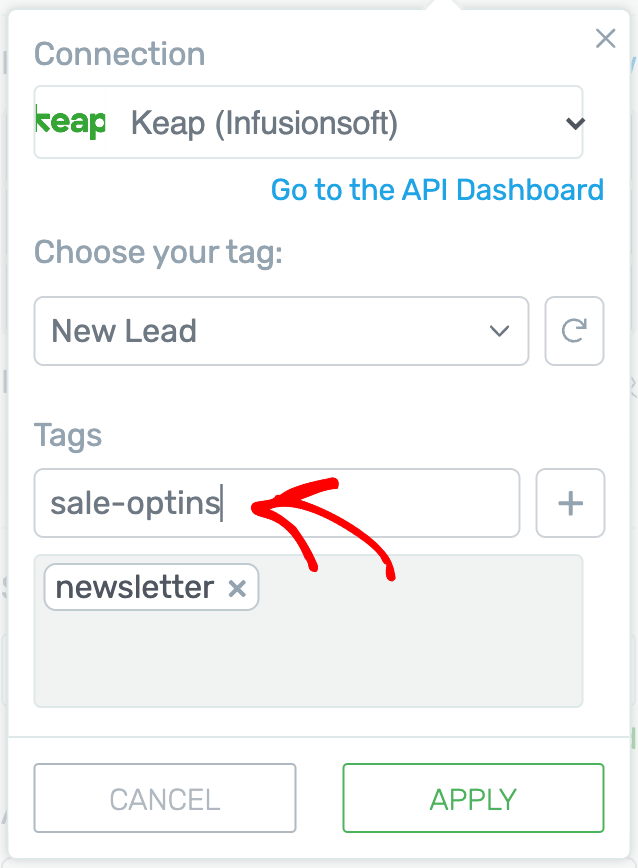
After you select the tag you want to add to leads, click Apply.
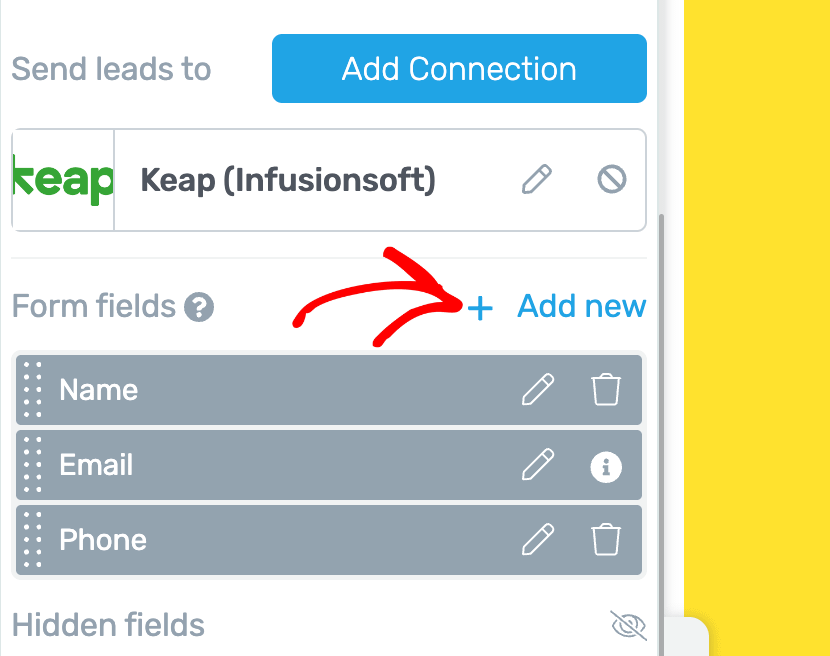
To add a custom field, first under the Form fields section click + Add new.
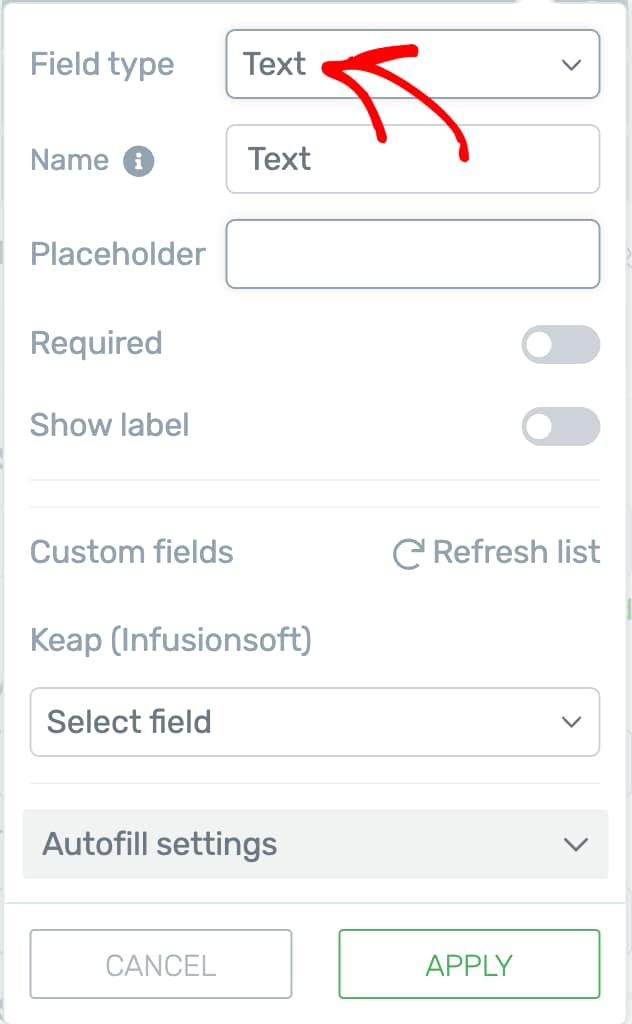
In this select field type dropdown select the type you want to add. We are selecting a Text for this example.
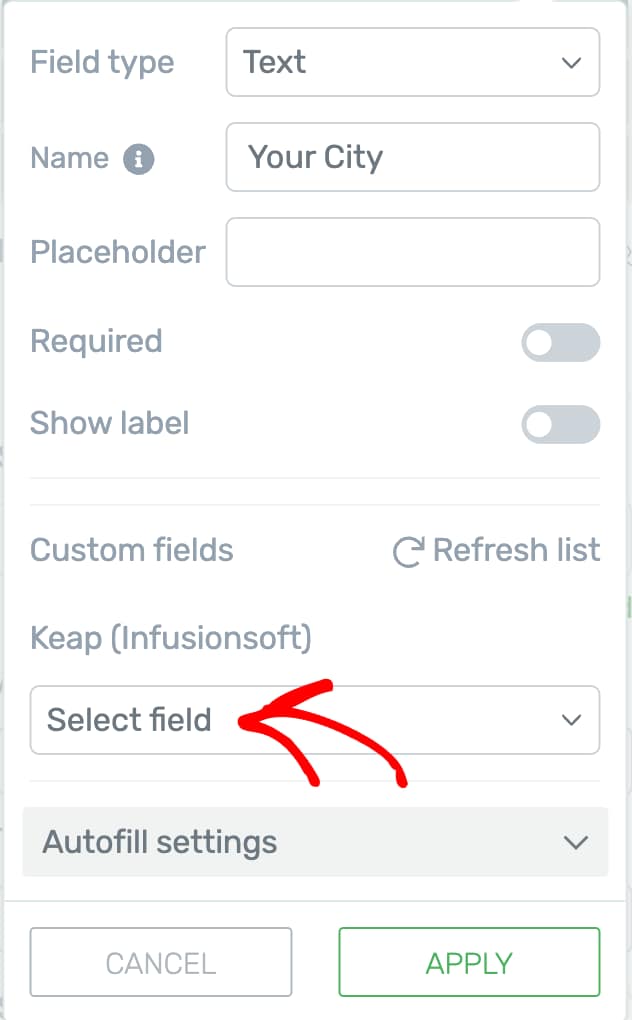
Once you select the field type, enter the field name and click on the dropdown to select the respective field in Keap that you want to map this field with.
In this example, we’ve selected City. So, the information going through the text field will be sent to the City field in Keap.
After adding the field and mapping it with the one in Keap, click the Apply button to add this custom field.
We’ve just seen how to set up a connection between Keap (Infusionsoft) and Thrive Themes and add it to a Lead Generation element.
Similarly, you can add this connection to a Thrive Leads form.
Next, you can trigger a Thrive Leads form based on the user’s source. Here’s a document where you can read more.