Do you want to use SendLayer to send email notifications when a user signs up through a lead generation form?
In this article, we’ll show you how to connect Thrive Themes with SendLayer so you can pair it up with the Lead Generation element or Thrive Leads to send out email notifications.
- Finding the SendLayer API Key
- Adding the SendLayer API Key to the Thrive Dashboard
- Connecting SendLayer to a Lead Generation Element
- Connecting SendLayer to Thrive Leads
Finding the SendLayer API Key
An API Key, i.e., Application Programming Interface Key, is an authentication code used to identify and verify an account or a user when connecting it with another tool.
Therefore, the first thing you’ll need to connect your SendLayer account to the Thrive Dashboard is an API Key.
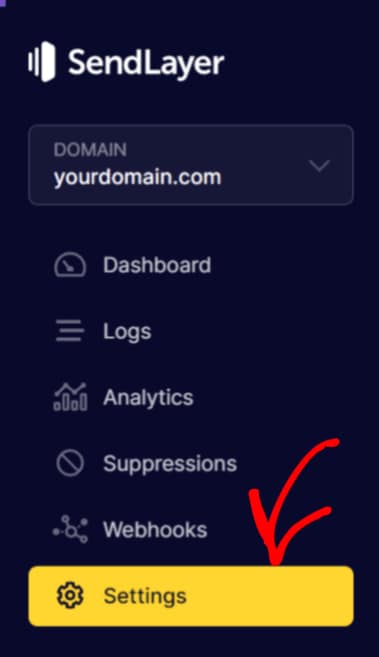
To find your API key, log into your SendLayer account and click on Settings in the left panel.
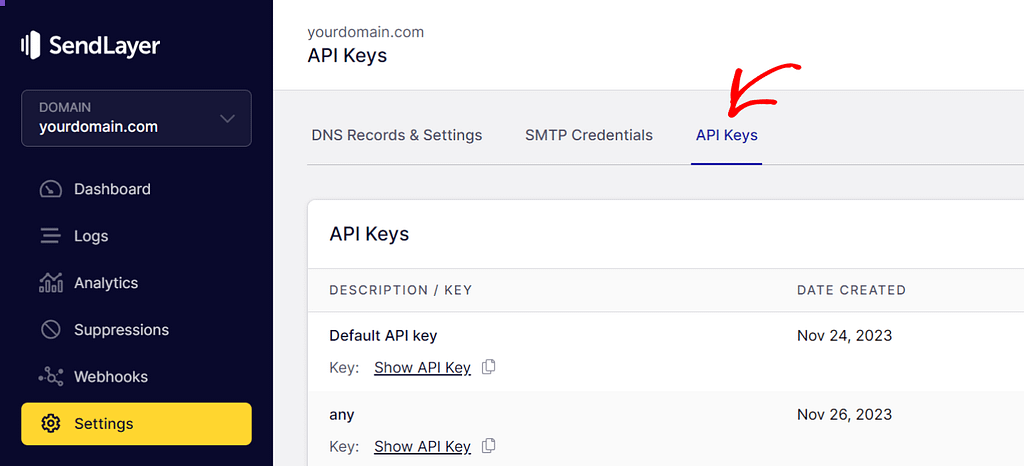
On the Settings page, click the API Keys tab.
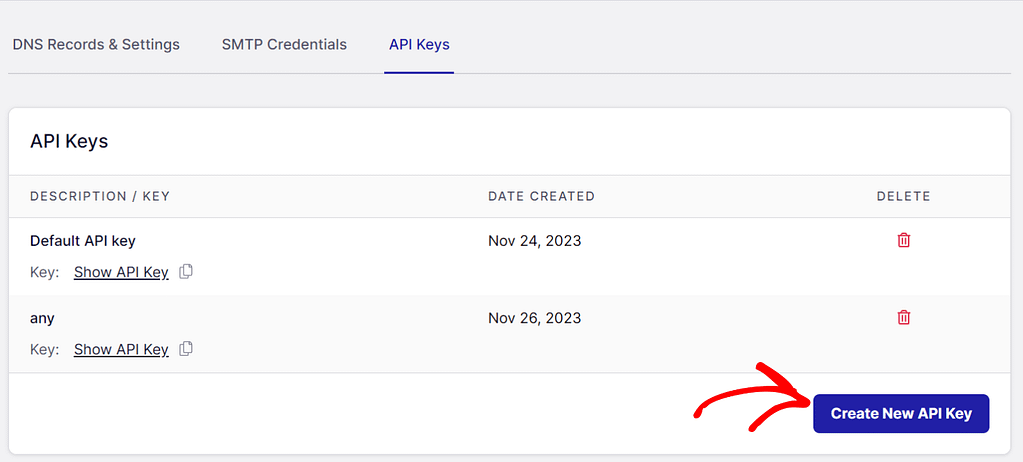
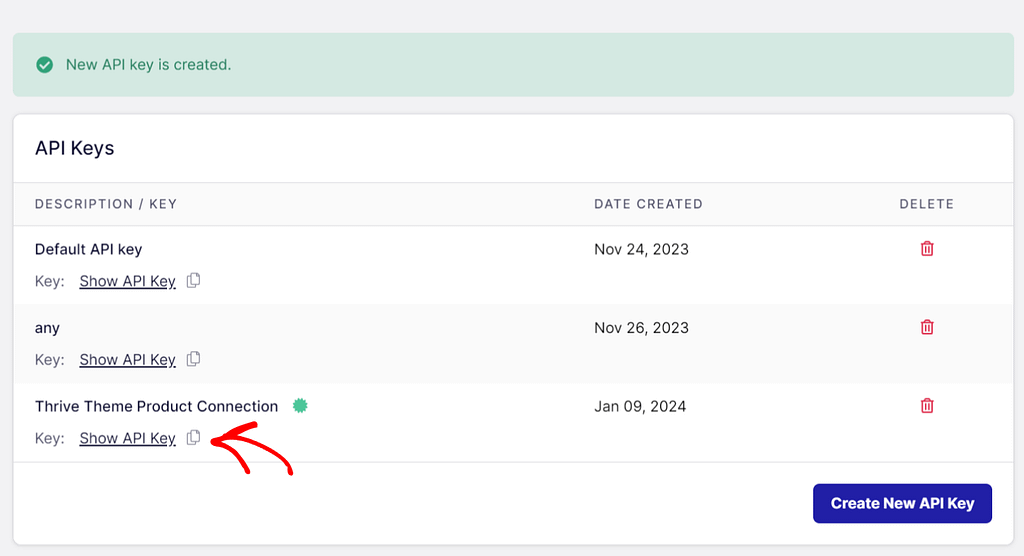
Under the API Keys tab, you can select an existing key or create a new one by clicking the Create New API Key button.
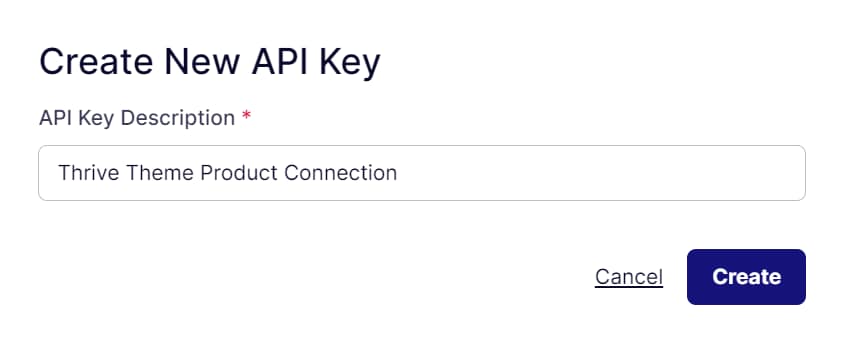
When you click the button, you’ll see a popup where you’ll need to add a description for the API Key and click the Create button.
When you click the Create button, you’ll see the newly created API key listed on the API Keys page. This is where you can see the API key by clicking the Show API Key link and copy it by clicking the copy icon under the API Key name.
Adding the SendLayer API Key to the Thrive Dashboard
To connect SendLayer with Thrive Products, you must establish an API connection using the API key.
Once you obtain an API key by following the above steps, open your WordPress admin area, navigate to Thrive Dashboard >> Thrive Dashboard, and click Manage Connections in the API Connections block.
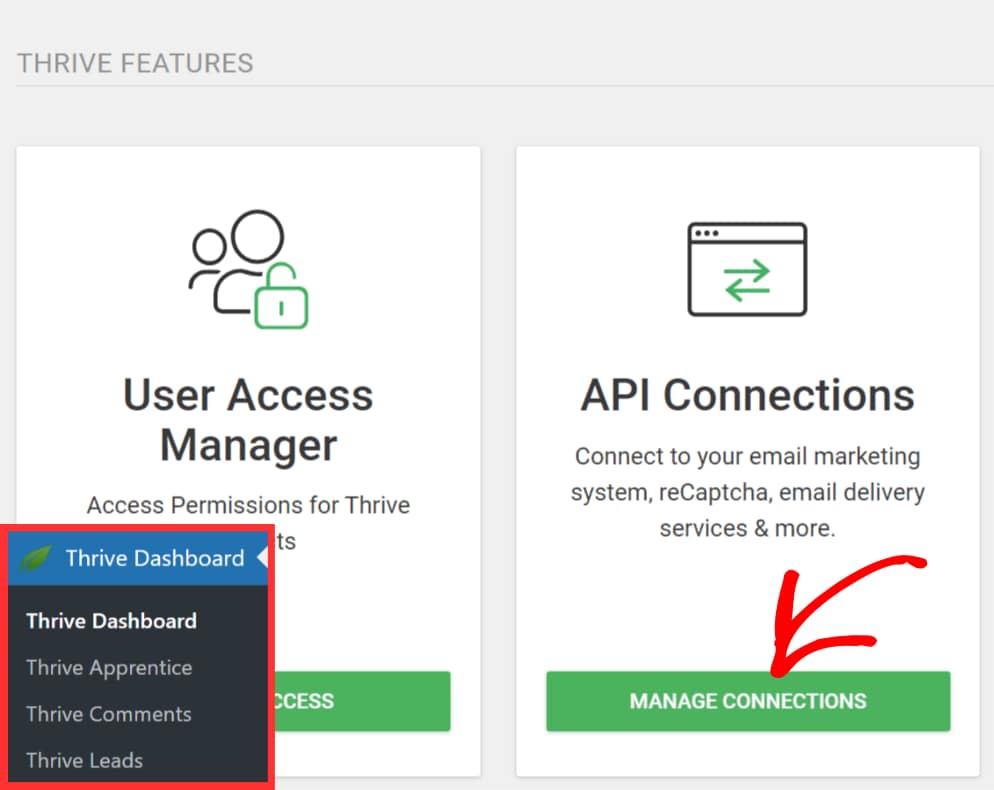
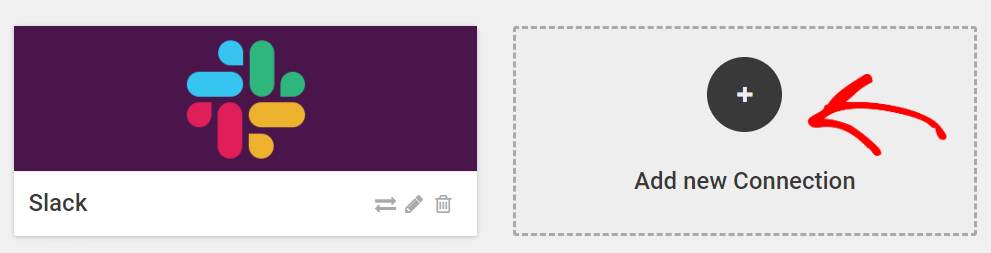
After clicking Manage Connections, you will be taken to the Active Connections page. On this page, scroll to the Add New Connection block and click on it.
When you click to add a new connection, you’ll see a dropdown where you can select the app SendLayer that you want to connect.
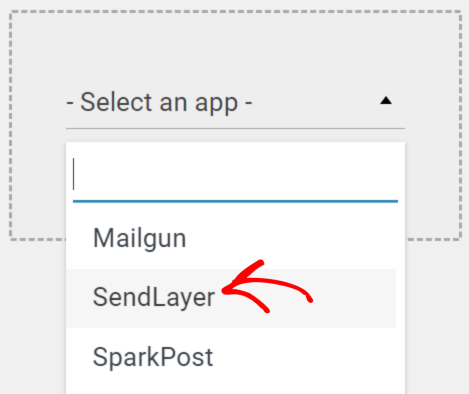
After selecting the app, you’ll be asked to enter the API Key you copied from your SendLayer account.
To establish the connection, enter the API key in the given field and click the Connect button.
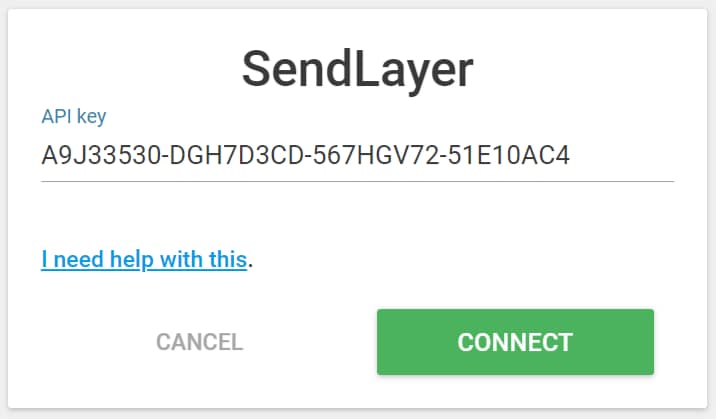
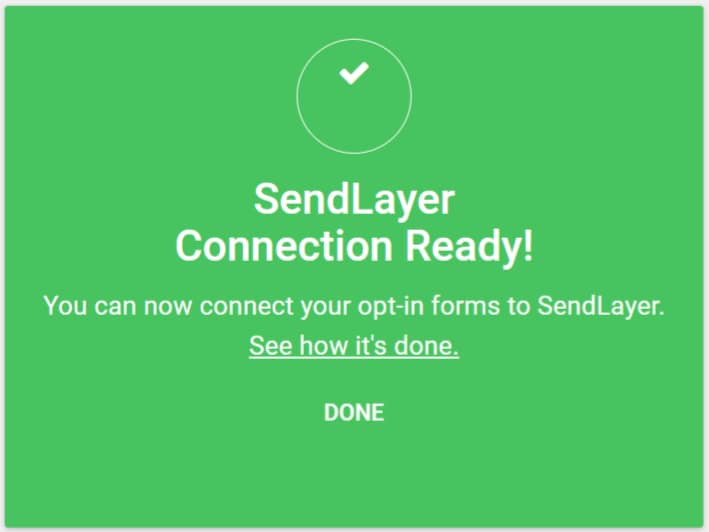
After you click the Connect button, you’ll see a box saying the connection is established.
Connecting SendLayer to a Lead Generation Element
After establishing a connection between SendLayer and the Thrive Dashboard, you can add the connection to a Lead Generation element you’ve used or plan to use.
Before we build a connection, please ensure you’ve added the Lead Generation element on a page or post using Thrive Architect. You can read our document to learn more about the Lead Generation element.
Once you are ready with a post or page with the Lead Generation element, click on it to see its options in the left sidebar.
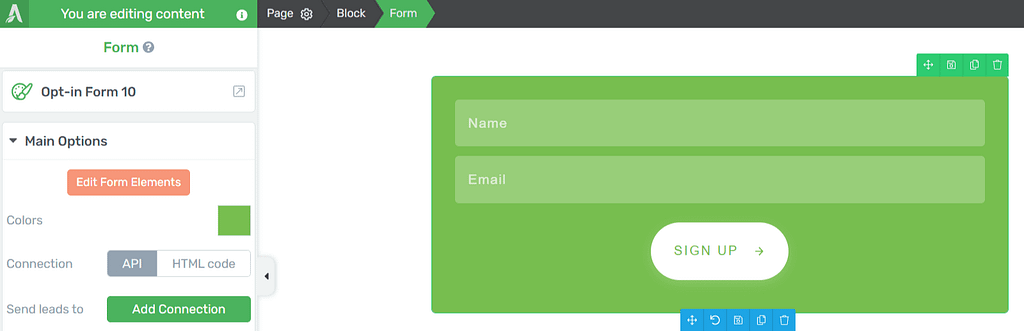
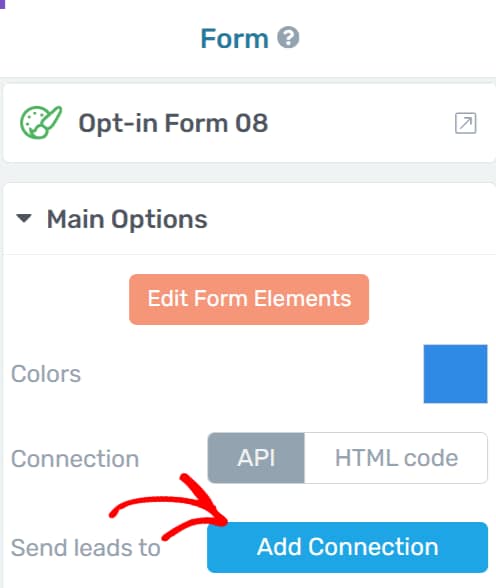
In the Lead Generation options in the left sidebar, open Main Options and click the Add Connection button.
After clicking on Add Connection, you’ll see a dropdown where you can choose the connection you want to add.
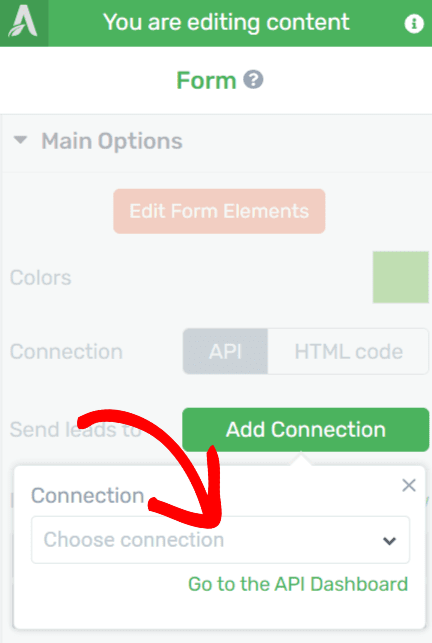
You’ll see all the connections you’ve built in the Thrive Dashboard when you click the dropdown. To proceed, select Email from the list.

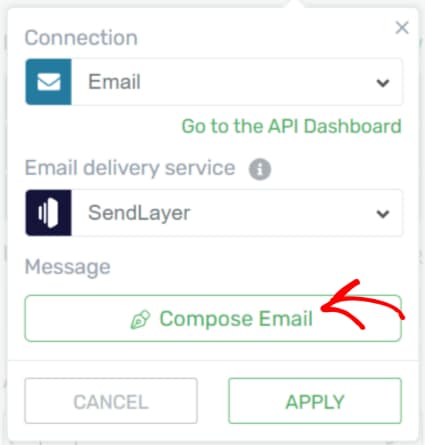
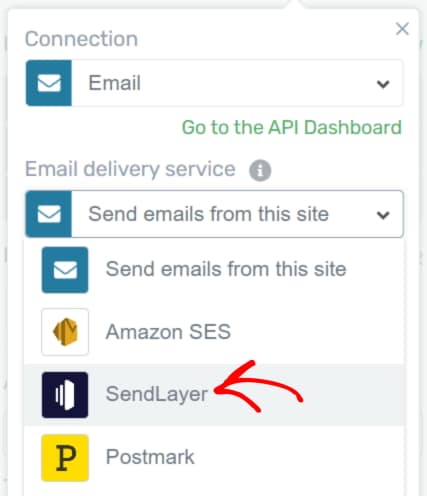
After you select Email, you’ll see another dropdown to select an email delivery service you want to use. This is where you can select SendLayer.

After you’ve selected SendLayer, you can then edit the message that’ll be sent through email by clicking the Compose Email button.
After choosing to compose the email, you’ll see a popup where you can select the email you want to receive the email from, the From Name, Email ID, Subject Line, and Message.

This popup also allows you to select the shortcodes you want to add to the email message and decide whether to send confirmation emails to users who submit the form.
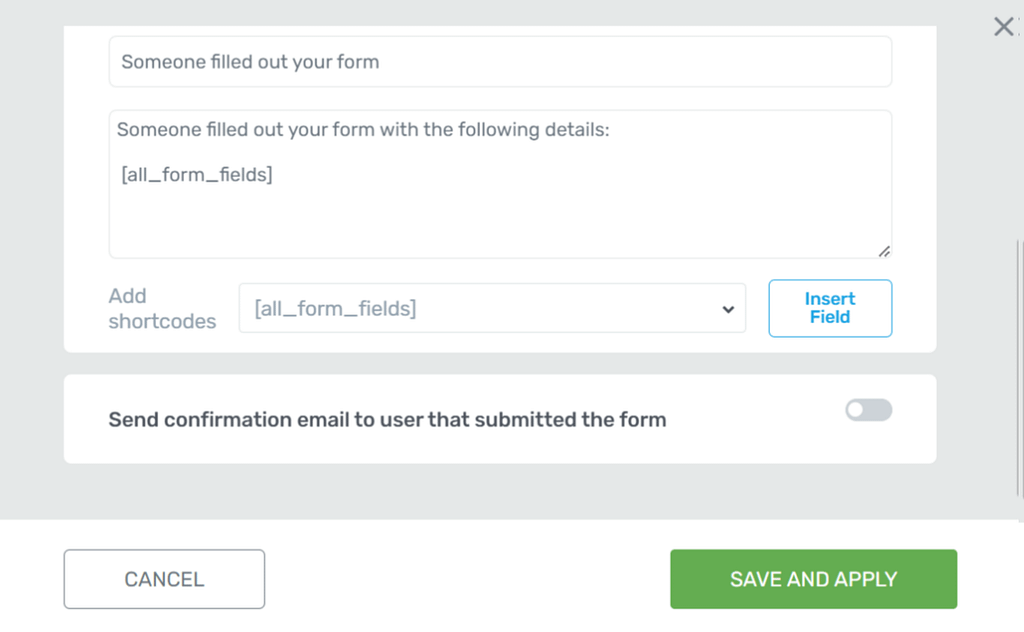
Once you are done composing the email, click the Save and Apply button.
Connecting SendLayer to Thrive Leads
To connect SendLayer to Thrive Leads, you must ensure you have a form created using Thrive Leads.
You can refer to our detailed documentation on creating a form using Thrive Leads.
To connect SendLayer to a Thrive Leads form, open your WordPress admin area, navigate to Thrive Dashboard >> Thrive Leads, and click on a Lead Group that contains the form you want to edit.
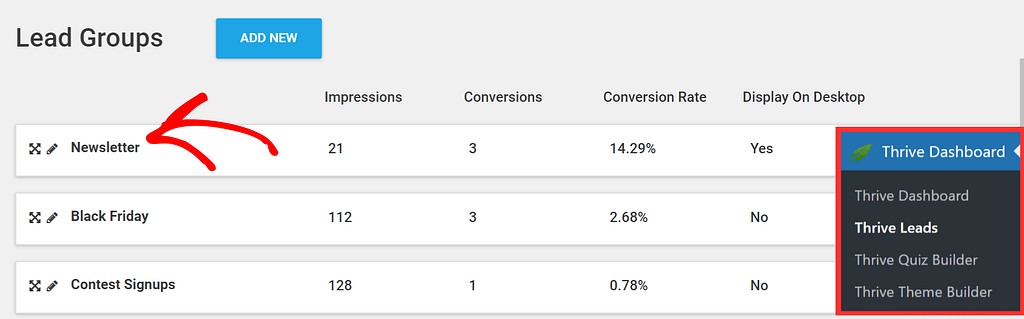
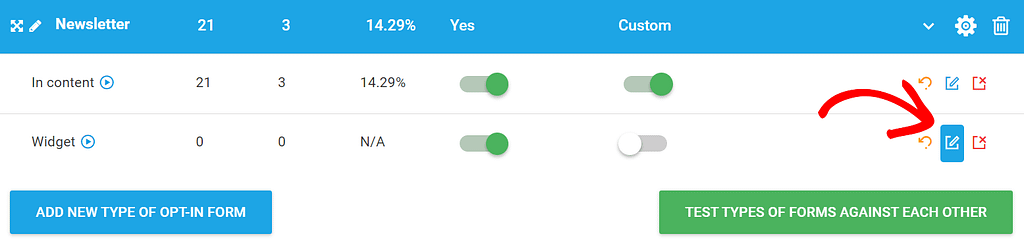
When you click on a Lead Group, it’ll display the form types created in it. To connect a specific form type, click on the “Pen” or Edit icon on the form name’s right side.
When you choose to edit the form type, it’ll take you to a page where you’ll see the form/forms created under this form type.

When you click to edit the form, it’ll take you to the editor, where you can modify the form elements.
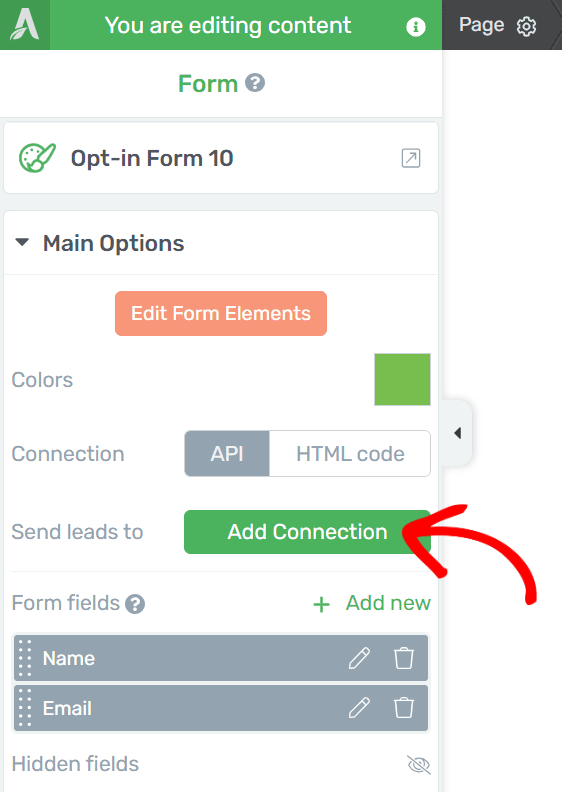
In the editor, click on the form and see its options in the left sidebar.
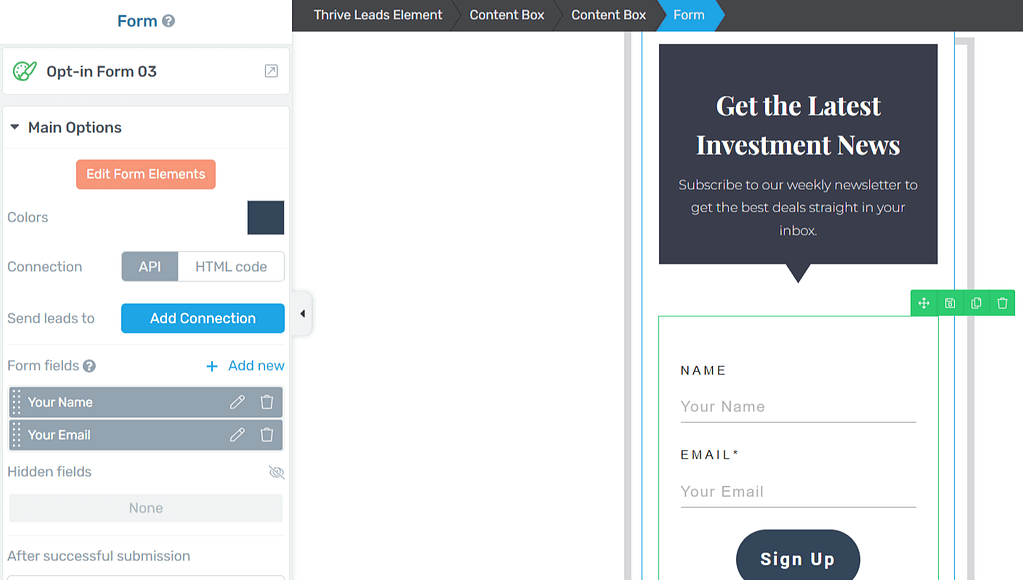
In the left sidebar, open Main Options and click the Add Connection button.
Clicking on Add Connection will show a dropdown where you select Email.
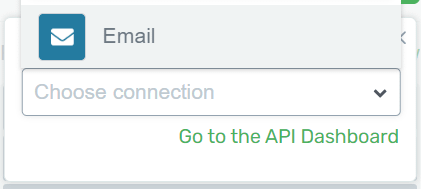
After you select Email, you’ll see another dropdown to select an email delivery service you want to use. This is where you can select SendLayer.
After you’ve selected SendLayer, you can then edit the message that’ll be sent through email by clicking the Compose Email button.

After choosing to compose the email, you’ll see a popup where you can select the email you want to receive the email from, the From Name, Email ID, Subject Line, and Message.

This popup also allows you to select the shortcodes you want to add to the email message and decide whether to send confirmation emails to users who submit the form.

Once you are done composing the email, click the Save and Apply button.
We’ve just seen how you can establish a connection between SendLayer and Thrive Themes to enable email notifications after form submission.
Next, you can also use SendLayer to send email notifications when a user completes a quiz on your website. Here is a document that will help you learn more.