Automated notifications keep you and your users informed the moment a quiz is completed. In this article, you’ll learn how to set up admin alerts using the Notification Manager and how to send personalized results to users via the Lead Generation element.
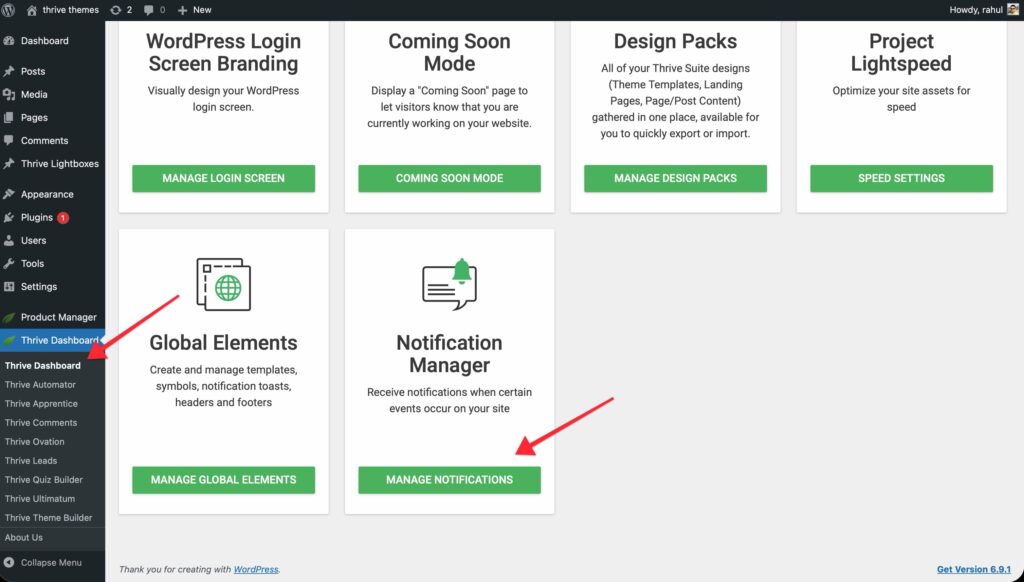
Method 1: Admin Notifications (Notification Manager)
Use the Notification Manager if you want to receive an email alert whenever someone completes a quiz on your site.
- Navigate to Thrive Dashboard > Notification Manager.
- Click the Add New Notification button.
- Set the Trigger to Quiz Completion.
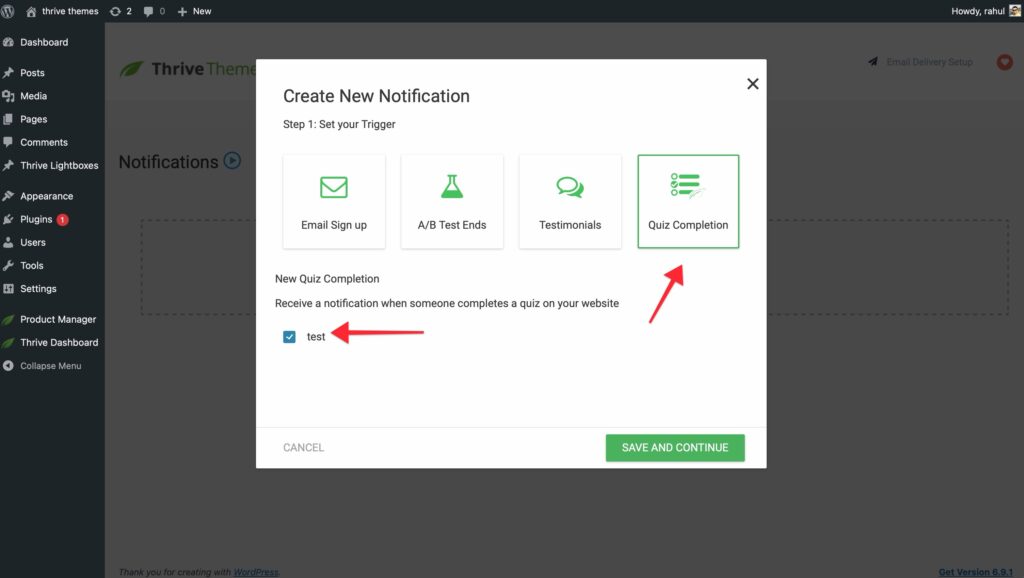
- Select the specific quiz you want to monitor from the dropdown.
- Click Add New Action and select Send Email Notification.
- Specify the Recipient’s Email (e.g., your admin email).
- Draft your message: Use the visual editor to write your subject line and body.
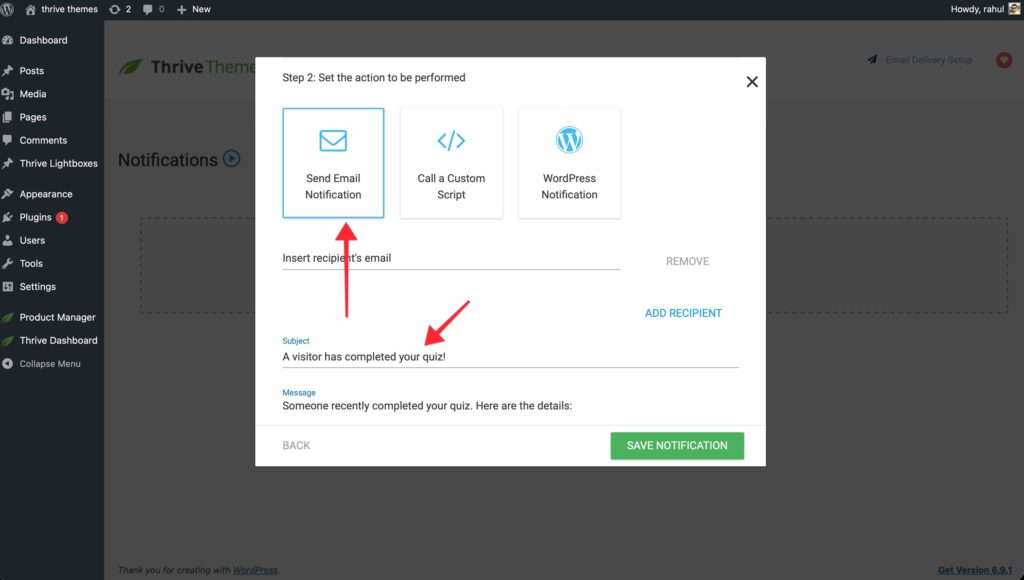
- Click Save.
Method 2: Participant Notifications (Lead Generation)
Use this method to send a personalized breakdown of results directly to the person who took the quiz.
- Open your Opt-in Gate or Results Page in the Thrive Architect editor.
- Select the Lead Generation element.
- In the sidebar, click Add Connection and choose the Email connection.
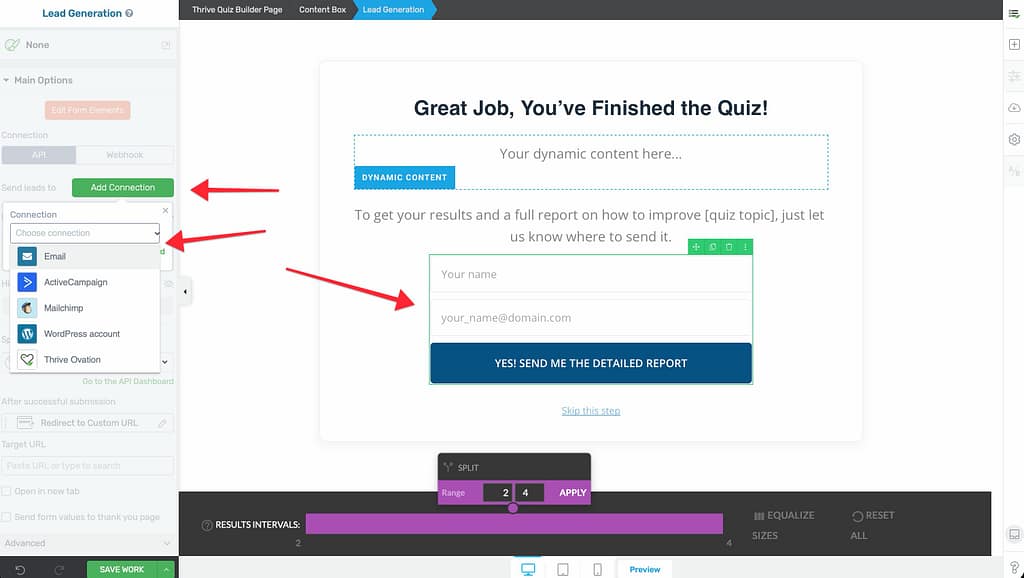
- Specify the email address the results should be sent from.
- Personalize the message: Use the following dynamic shortcodes to include specific quiz data:
[quiz_name]: The title of the quiz.[quiz_result]: The user’s final score or category.[quiz_answers]: A full list of every question and the user’s specific response.
- Click Save.
Troubleshooting Notifications
If emails are not being delivered:
- API Connection: Ensure you have a valid email delivery service (like SendGrid, Mailgun, or Postmark) connected in your Thrive Dashboard > API Connections.
- Spam Folders: Check your spam/junk folders.
- API Connection: Ensure you have a valid email delivery service (like SendGrid, Mailgun, or Postmark) connected in your Thrive Dashboard > API Connections.
- Spam Folders: Check your spam/junk folders.
- Notification Log: Check the logs in the Notification Manager to see if the trigger was fired correctly.
Related Resources
- Connecting Email Services: Connecting Quiz Data to Your Email Marketing Service
- Delivering Results: Delivering Results Directly to Users
- Opt-in Gates: Using the Opt-in Gate in Thrive Quiz Builder
- Thrive Quiz Builder Documentation: Explore the full Thrive Quiz Builder knowledge base