|
Note: Please note that the “Incoming Webhook” option has been renamed to “3rd Party Event”. Thus, the option from your Thrive Ultimatum Dashboard will differ from the one shown in the video tutorial. However, please keep in mind that its functionality remained the same. |
One of the ways in which you can trigger a Thrive Ultimatum Evergreen campaign is with the help of an incoming webhook from a third party platform.
If you want to learn how to set up an incoming webhook, as well as how does it work and which third-party platforms can be used with it, then this article from our knowledge base would be of use to you.
An incoming webhook will allow you to set the campaign to start at a certain date, chosen by you, which can be days after the visitor has subscribed on your website.
This way you can, for example, send several emails to your subscribers, interacting with them, before actually sending out the email with your discount or free product promoted in your campaign.
This article will showcase the steps for setting up an incoming webhook from Infusionsoft so that your Thrive Ultimatum campaign will start at a very specific moment in your campaign timeline.
|
One possible example would be: running a marketing campaign in which you are advertising your latest product. Whenever someone signs up on your website, through an opt-in form that’s connected through API with your Infusionsoft account, they will be added to your mailing list and will receive a “Welcome” email from you. After a couple of days, they’ll receive a second email from you, in which you are asking them whether they are interested in a particular topic. The webhook will be triggered by those users who click your question link and answer that they are interested in your suggested topic. This will allow you to segment your mailing list in such a way that you can send relevant follow-up emails based on their answers. Thus, a follow-up email will be sent out several days later, with a link for your discounted or free product (on your Thrive Ultimatum promotion page), letting them know that this is a limited time offer. |
This entire flow can be set up in several steps: you first have to create or edit a Thrive Ultimatum Evergreen campaign. Then, you’ll have to configure the marketing campaign in Infusionsoft, thus scheduling the emails and when they should be sent out. And lastly, you’ll need to connect an opt-in form from your website to Infusionsoft, through an API connection.
Here is how you can do all of the above:
Set Up the Thrive Ultimatum Evergreen Campaign
The first step in the process is creating or editing an already existing Thrive Ultimatum Evergreen campaign, and you can find here a step-by-step tutorial detailing the entire process.
You can do that by clicking on the “Edit” button from the “Campaign Type” card:
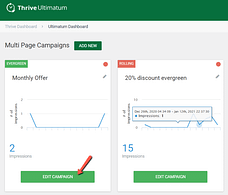
In the pop-up that opens, select “Evergreen Campaign”:
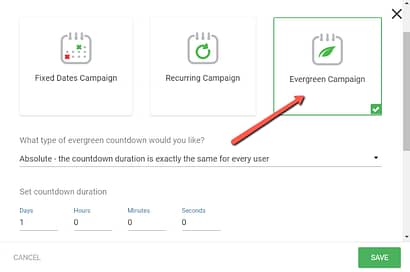
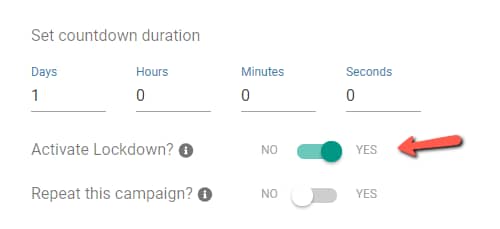
Next, set up the countdown and the duration of the campaign, and then turn on the “Activate Lockdown” toggle:
From the next drop-down, select “3rd Party Event” as your campaign trigger:

Lastly, you will have to choose the third-party platform, “Infusionsoft webhook” in this case:
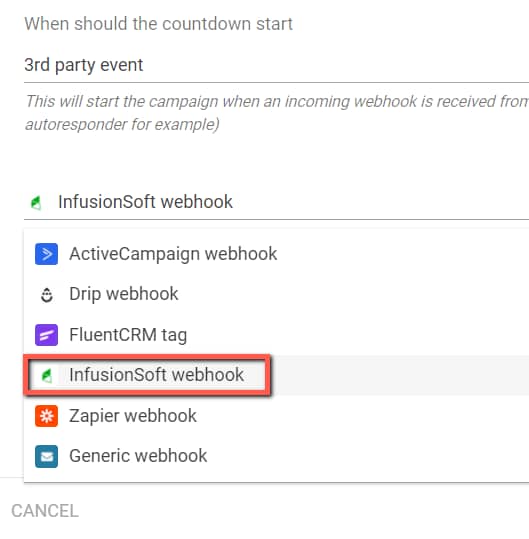
Once the webhook is received from this platform, the campaign will start running.
Note: the API connection with Infusionsoft is not required at this moment; it can be set up at a later stage.
After you select the autoresponder from the list, the webhook URL will be generated, and you will need this when you are creating the campaign in your Infusionsoft account:

You can continue setting up the Display Options for the campaign and then proceed to the next step, which is setting up the “Lockdown Campaign” options.
Choose the Lockdown Settings
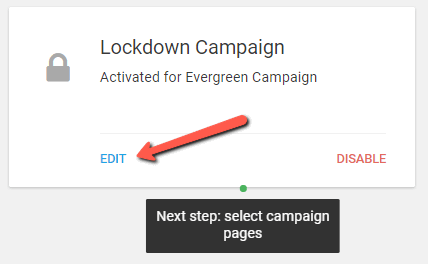
Click on “Edit” in the Lockdown Campaign card, in order to access the full list of options:
Next, choose the “Pre-access” and “Expired” pages for your campaign:
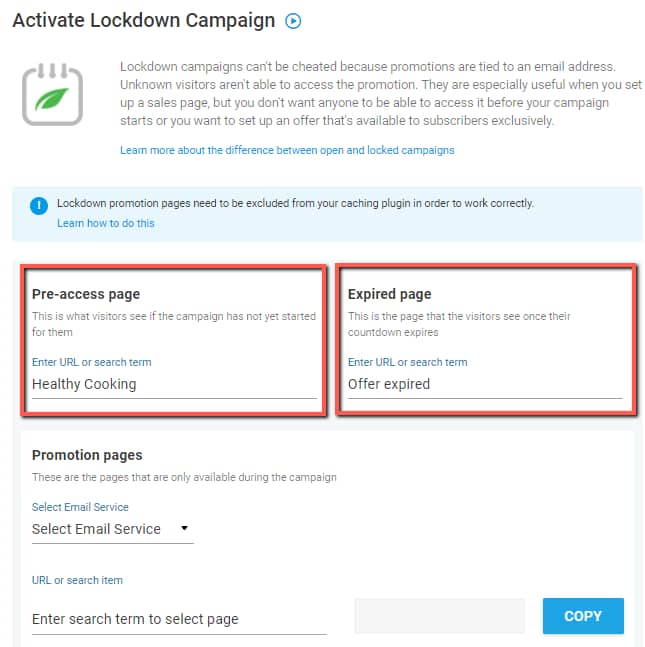
These are the pages that the visitors will see before and after the campaign start, and you can read more about them in this article.
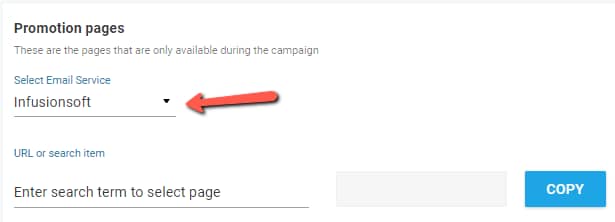
In the “Select Email Service” drop-down list select Infusionsoft as your preferred platform:
And lastly, you will need to add the promotion page on which your campaign will run:
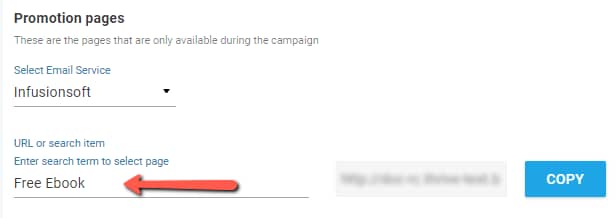
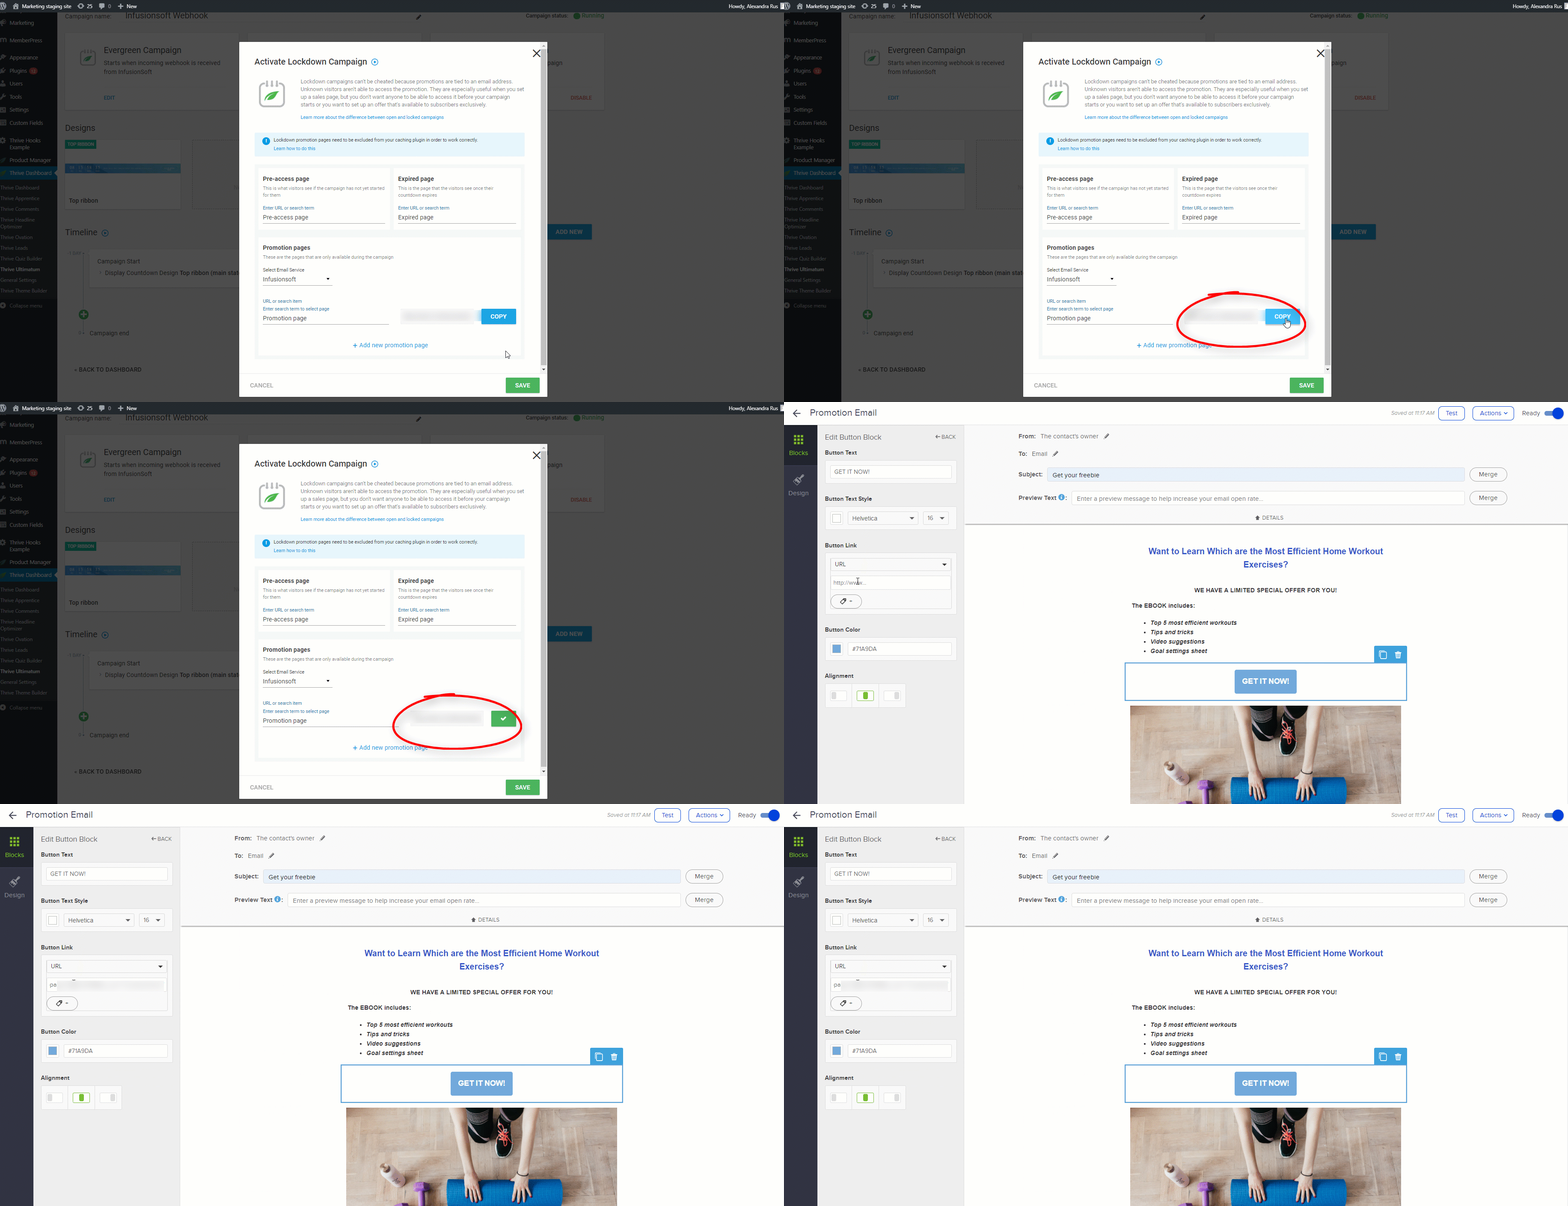
After you do that, you will notice that a link has been generated in the field next to the selected page:
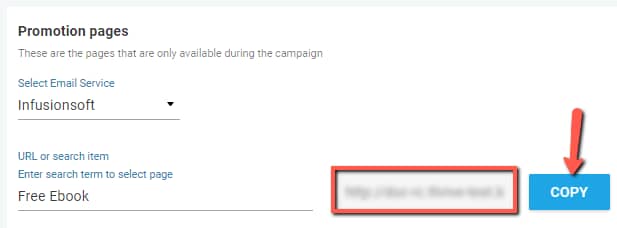
Once again, this is a link that you will need to copy and use at a later stage when you are creating the email with the promotion link for your segmented mailing list.
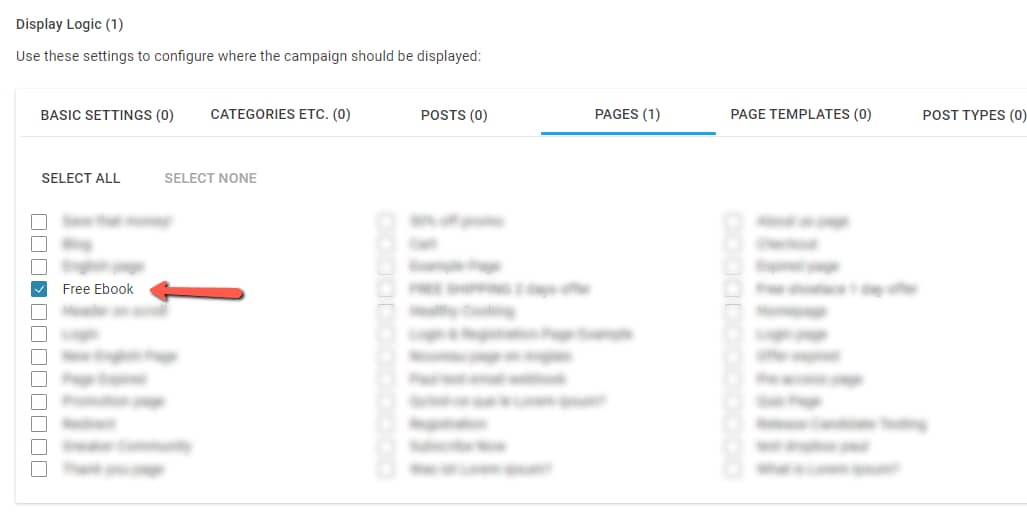
Important! Keep in mind that this promotion page should also be selected when you are setting up the “Display” settings for your campaign:
Once you have completed all your lockdown pages, click on “Save”:

Set up the remaining details of your campaign, such as the “Design” or “Timeline”, and then, don’t forget to set the campaign status to “Running”:

The webhook link was the last piece of information required before accessing your Infusionsoft account and start setting up your marketing campaign.
I have detailed below the example used for setting up an incoming webhook using Infusionsoft, and I will break it down into several easy steps:
-
First of all, I will use an opt-in form from one of my website’s pages, through which the visitors can subscribe.
-
As soon as the subscription is complete, they will receive a “Welcome” email
-
The next day, another email will be sent out, in which I will be asking them whether they prefer “Going to the gym regularly” or “Eating healthy” when it comes to maintaining a healthy lifestyle. They will fall into two different categories, depending on their answers.
-
After several days, I will be sending one last email only to those subscribers who selected “Going to the Gym Regularly” as their answer. The email will contain a link to the promotion page, from where they can download my free “Top 5 Efficient Workouts” Ebook.
The Thrive Ultimatum campaign has been triggered for those subscribers who selected “Going to the gym regularly” as their preferred choice and will be visible for a limited amount of time from the moment each user has received the email with the promotion link.
Create a Campaign in Infusionsoft
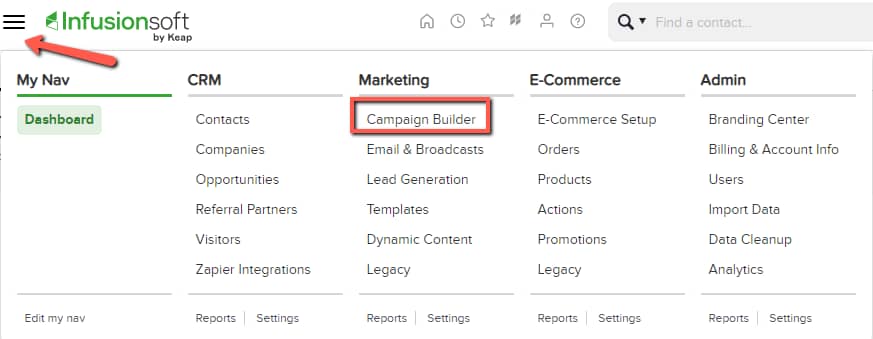
Log into your Infusionsoft account, open the “Menu” and select “Campaign Builder” from the panel:
In the Campaigns dashboard that opens, click on the “Create your own” button:

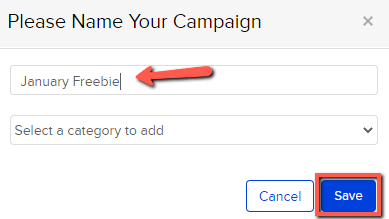
Give your campaign a name (and a category, if you want), and then save it:
The campaign builder from Infusionsoft uses a set of “Goals” and “Sequences” that you can combine and use to create complex marketing campaigns. Each goal and sequence has multiple uses, but I will be explaining only the ones used for this particular example.
Add a Goal
The goal serves the purpose of initiating the campaign automation:
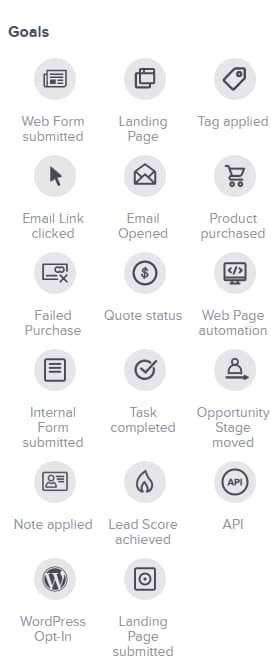
For this example, I will use the “Tag applied” goal, as my campaign’s starting point. The tag I link here to my campaign will also be added in my opt-in form when I am connecting my “Lead Generation” form to Infusionsoft.
Note: Infusionsoft allows you to create tag targeted campaigns, which can be triggered once someone fills in a form from your website (the form needs to be connected to Infusionsoft through API and to have a tag added to it). You can read more about how to set this up in this step-by-step tutorial.
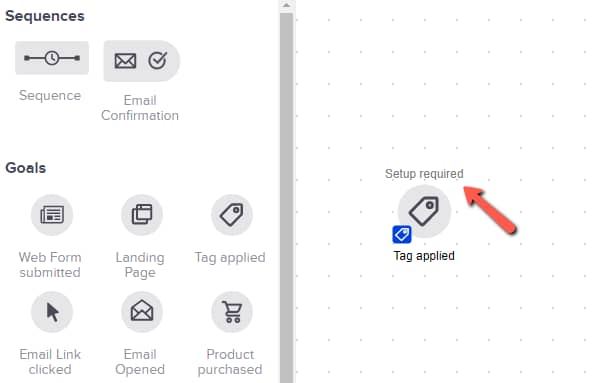
Drag and drop the “Tag applied” goal to your canvas, and once added, double click on it to start setting it up:
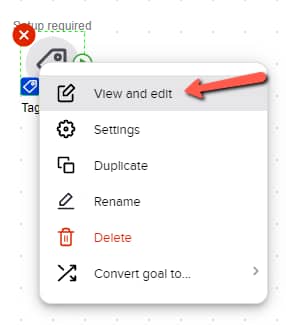
This can be also achieved simply by clicking on it, and then selecting “View and edit” from the drop-down list:
This will open a pop-up form where you need to assign a tag:
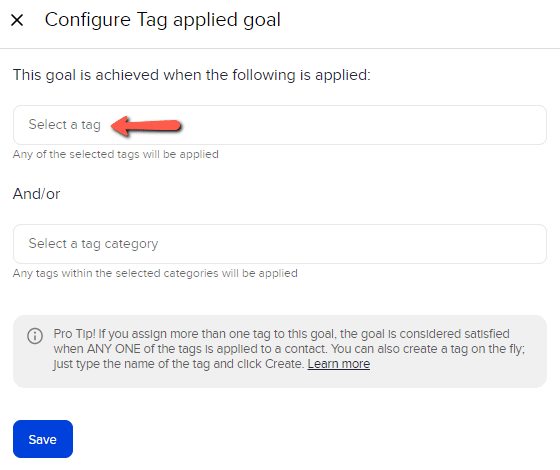
Choose the desired tag and then click on “Save”:
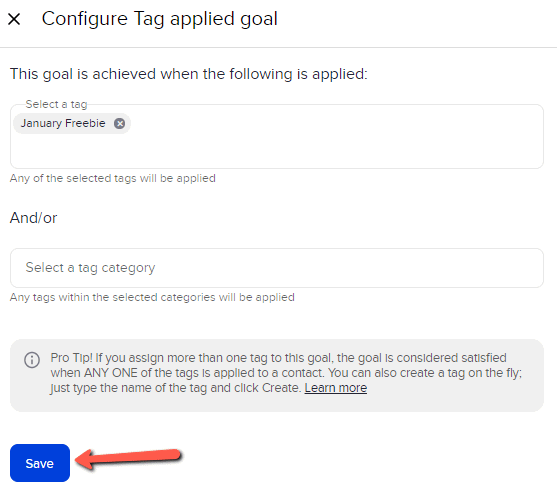
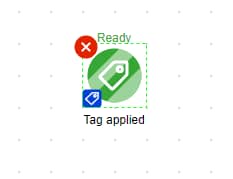
As soon as you do that, the icon will turn green letting you know that it was properly set up:
Add a Sequence
Next, you have to connect this goal to a sequence, and in order to do that simply drag and drop to your canvas the “Sequence” icon from the left sidebar:
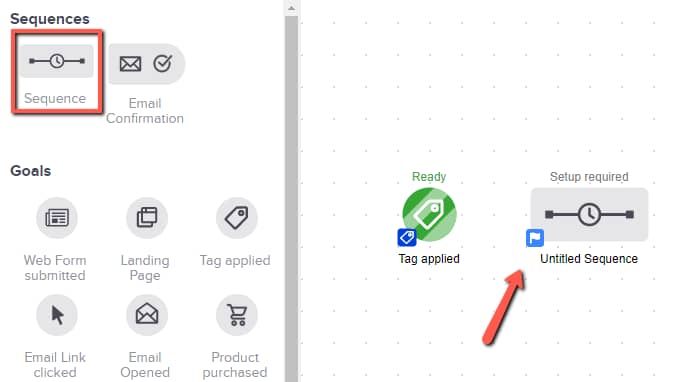
The sequence represents a chain of automated events that begin when a goal has been achieved.
After you access the sequence setup by double-clicking on it, you will be taken to another canvas with a new set of options available in the left sidebar.
From here, you will have to add a “Date Timer” and an “Email” to your canvas, thus setting up the “Welcome” email sent to your subscribers after they sign up:
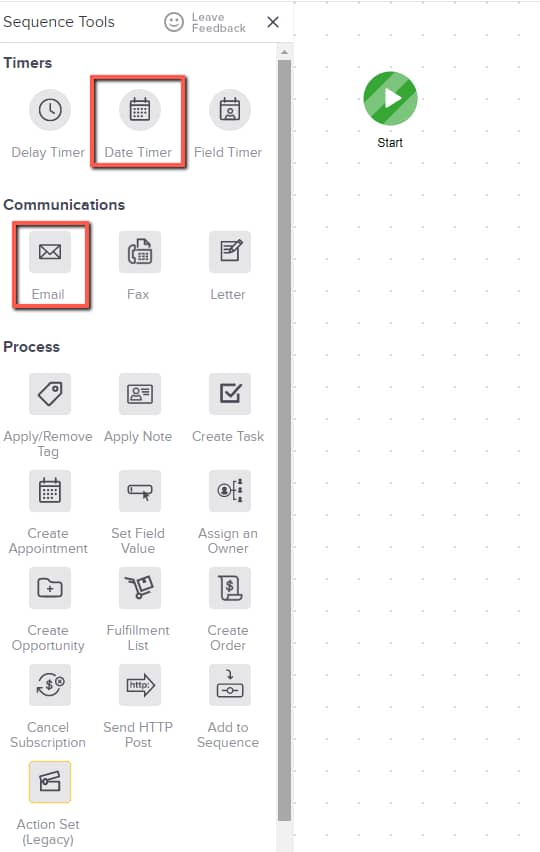
Drag and drop the “Date Timer” from the “Timers” section of the left sidebar, and double click on it to open the timer settings. Schedule the time for when the “Welcome” email should be sent to your mailing list:
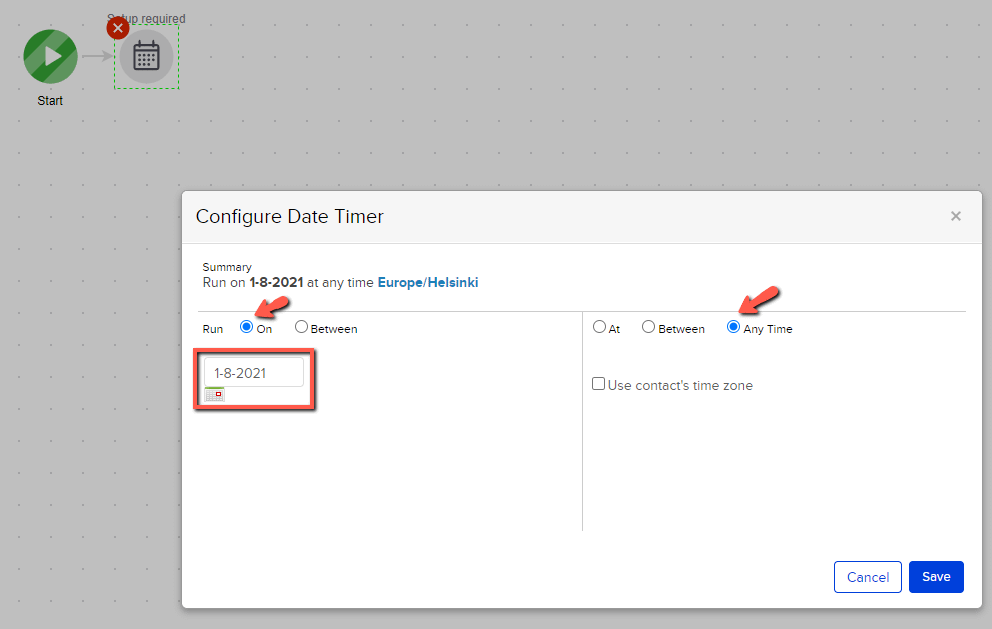
Click on “Save” and return to the sequence.
Next, drag and drop the “Email” icon to the canvas, and place it after the “Timer” icon:
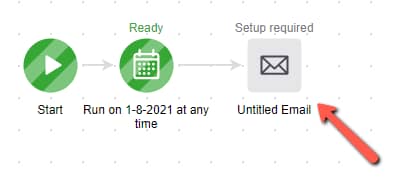
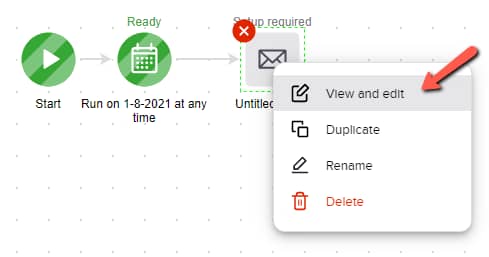
Click on it to open the settings drop-down and select “View and edit”:
You will be taken to the list of available email templates, from where you can select the one that best suits your campaign:
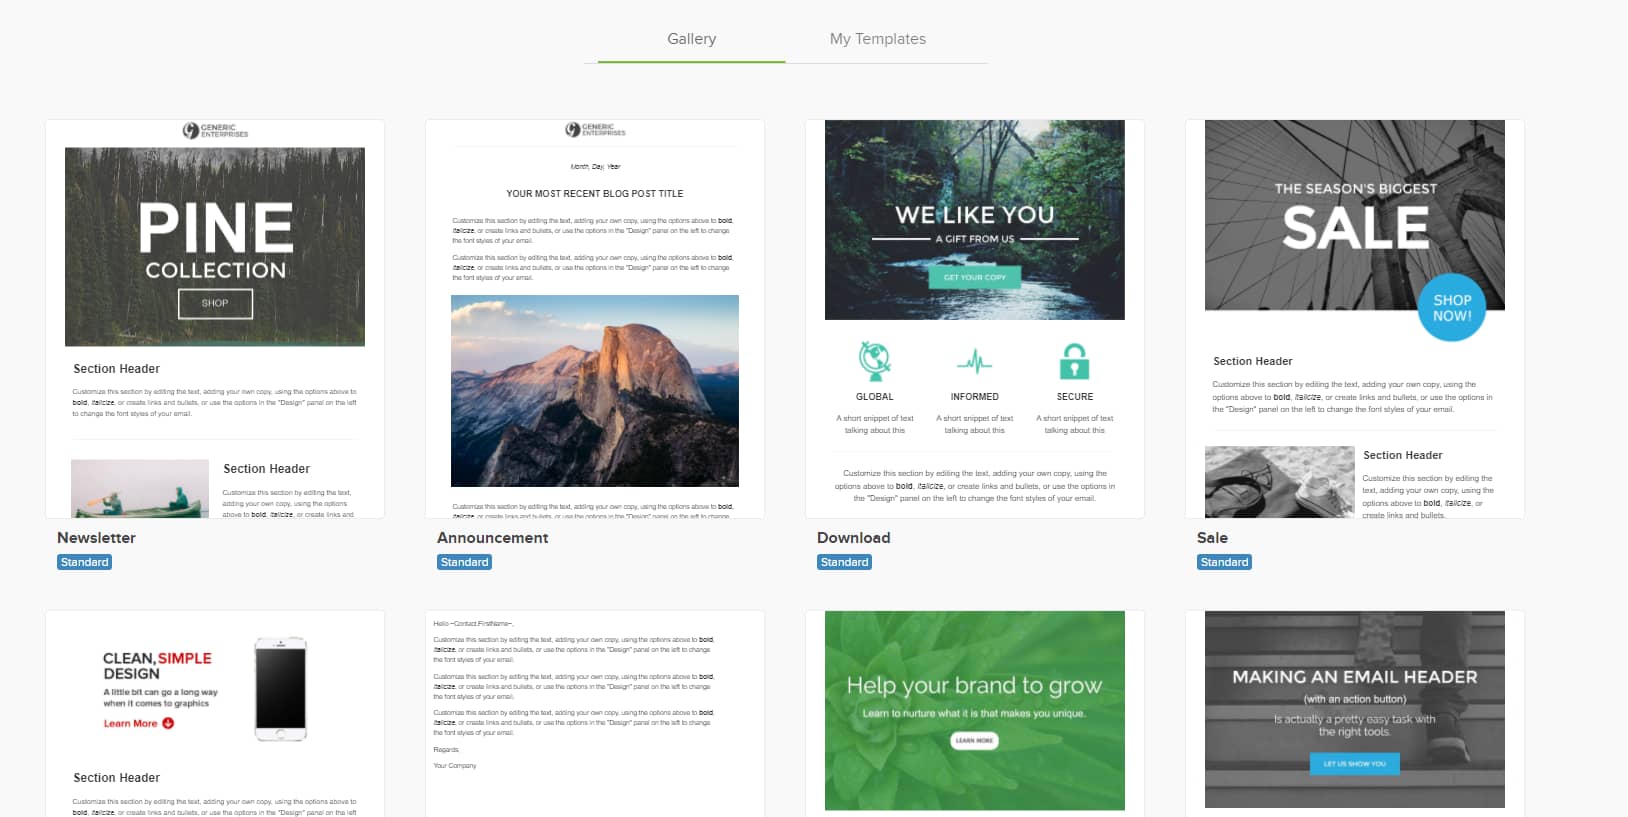
Customize the email as you best see fit, just like you would do with any other email template:
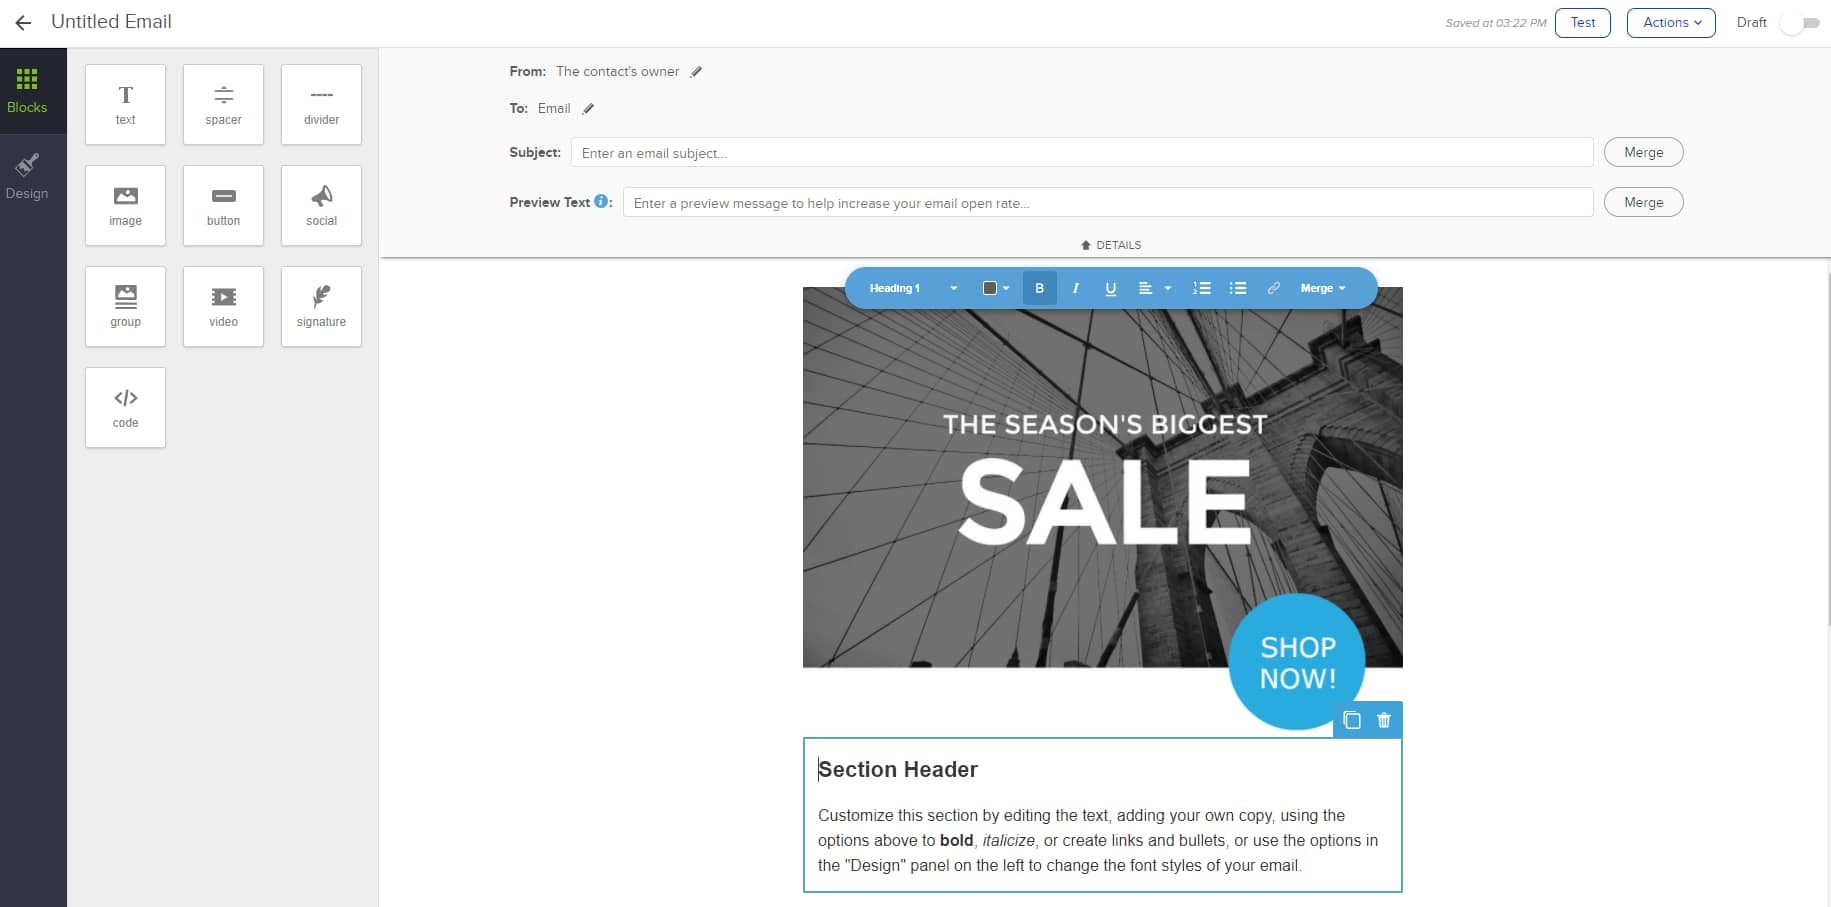
|
Note: there are a couple of things that you should pay attention to here, which are worth remembering while setting up the sequences and goals in the campaign builder. While you are editing the body of the email, make sure to use the “Merge” button from the editing text panel and select a “Contact Field” such as the “First Name”, for example:  This way you are personalizing the email so that it’s addressed individually to each person:  This is not always mandatory, but there might be cases in which you will receive various error messages before publishing your campaign, letting you know that your emails are not personalized:  Secondly, when you are done with customizing the email, make sure the toggle from the upper right side of the page is activated, before returning to the campaign builder canvas:  Whenever you are done setting up a sequence, a goal, or the elements within them, you will have to activate and publish them using this toggle. |
When you are done, and the draft was published, use the “back” arrow to go back to the sequence builder canvas:

So far you’ve set up the time and date for when the welcome email will be sent to your mailing list, as well as the template of the email.
If everything is correctly set up, all your icons will turn green. Click on the “Draft” toggle to make sure this sequence is published:

Then use once more the “back” arrow from the upper left side of the page to return to the main campaign builder canvas.
Next, hover over the goal icon, and then select the arrow that appears and connect it to the sequence:
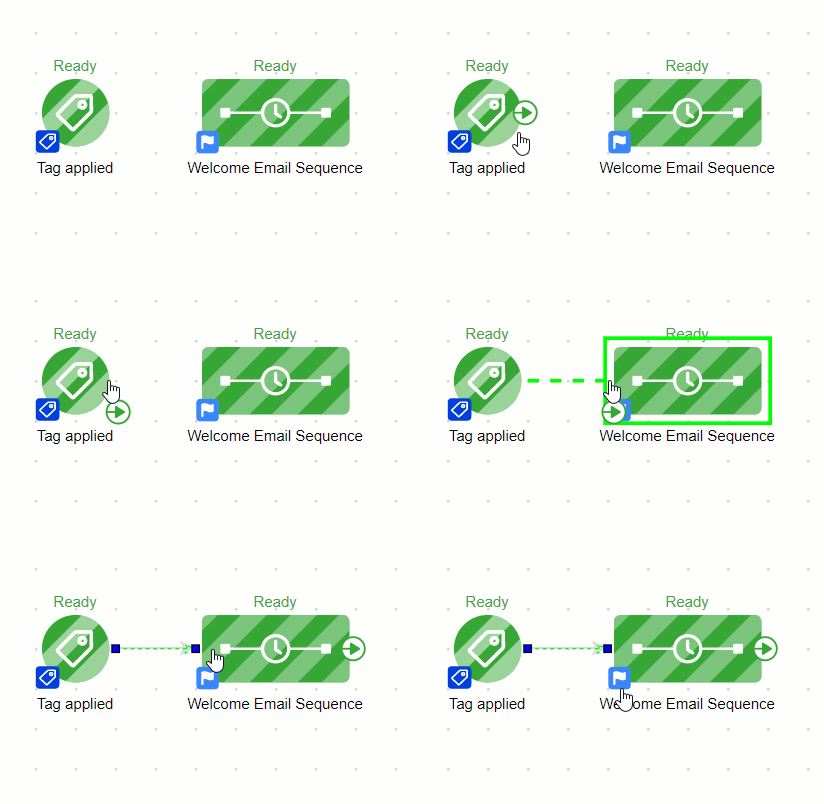
This always has to be done between your canvas elements, in order to make sure the flow is correctly linked together. Therefore, each time you are adding a new “goal” or “sequence” don’t forget to also connect them.
Note: one way to see if everything is configured okay up to this point is to “Publish” the campaign:
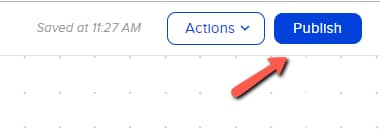
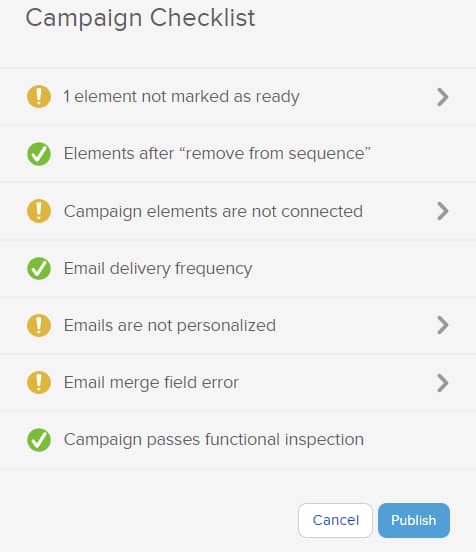
The system will perform a quick checklist, such as the example below, highlighting various errors that might prevent the campaign to run.
You can click on the field error and follow the guidelines for correctly setting up everything:
Add another Sequence
Next, you will need to add a new sequence, in which you will set up the timer for the second email (the one containing the question regarding your chosen topic):

Follow the exact steps as in the case of the “Welcome” email sequence. Add the “Timer” and “Email” from the left sidebar, and configure them one at a time.
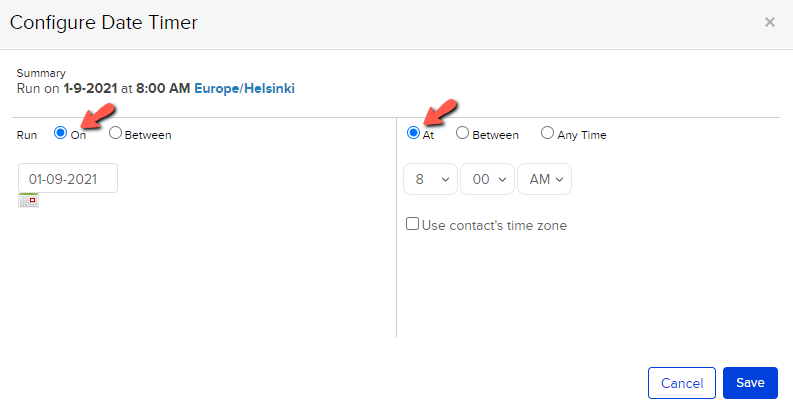
Form the “Trigger” options I’ve set the email to be sent one day after the visitor has registered:
Then, I started customizing my second email (the one where I am asking the visitors if they are interested in a certain topic), and this is how the final design looks like:
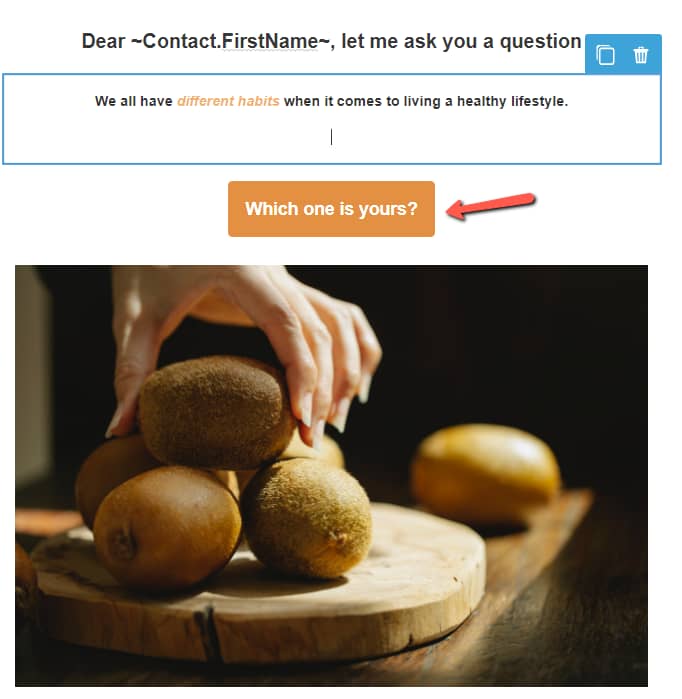
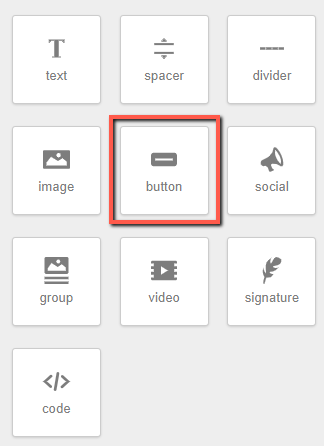
As you can see, I’ve added a button while editing the design of the email, from the left sidebar block list:
The idea behind this is to redirect the visitor to the question, once the button is clicked.
For that, I will need to create a web form with two possible answers, copy its URL and link it to my button. The steps for doing that are detailed below, and we will return to this button once the web form is created, in order to link it to the form.
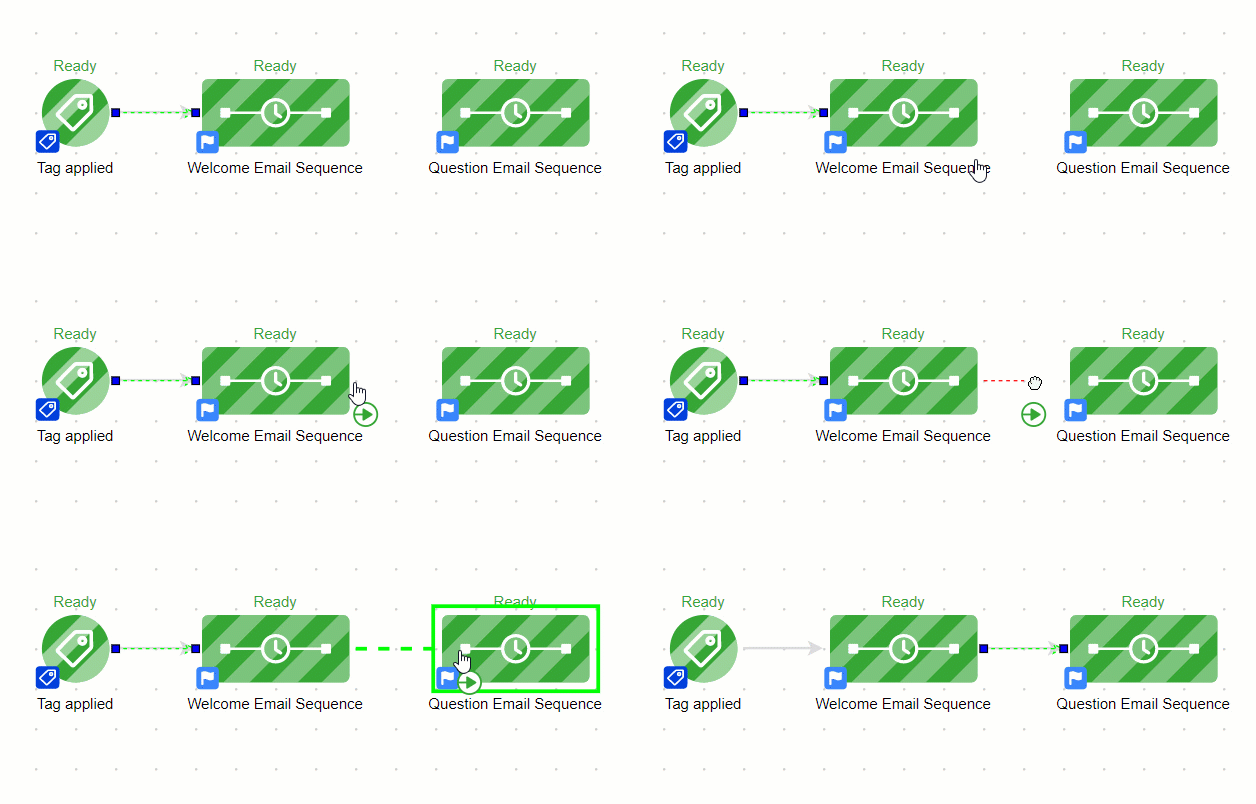
Once done customizing, publish it and then return to the main campaign builder canvas and connect them through the green dotted arrow:
Create a Web Form
The next step in the process is setting up a “Web Form”, which will be used for registering the customer’s answer to our question.
In other words, after you set up the form question and settings, you will copy its URL and paste it in the second email, which you’ve just finished customizing.
Drag and drop the “Web Form Submitted” goal to your canvas, and place it at the end of the campaign flow:

Double click on it to start the editor:
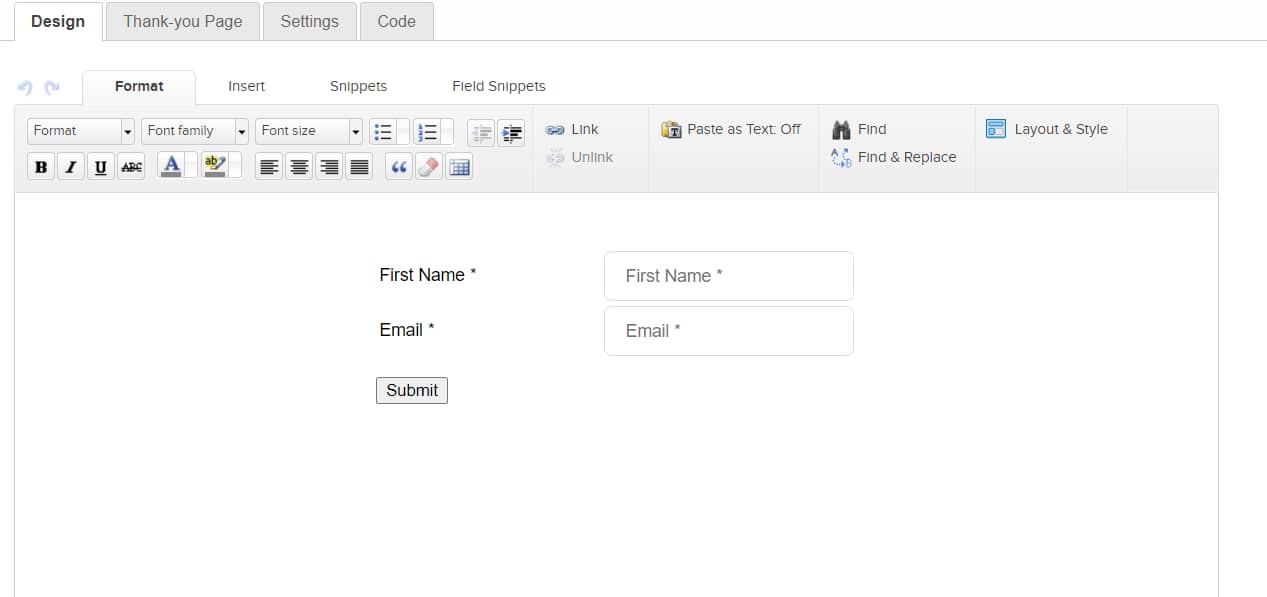
The “Email” field is mandatory for any web form completion, but the “First Name” can be deleted if you want.
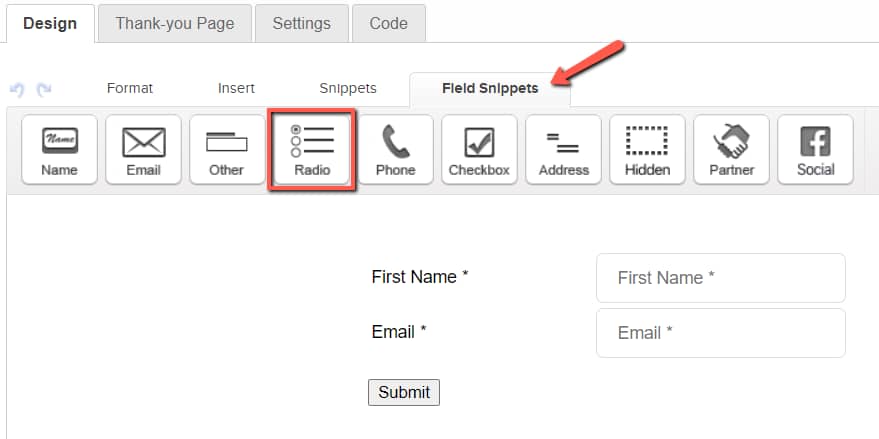
While you are on the “Design” tab, select the “Field Snippets” subtab, and drag and drop a “Radio” snippet to your form:
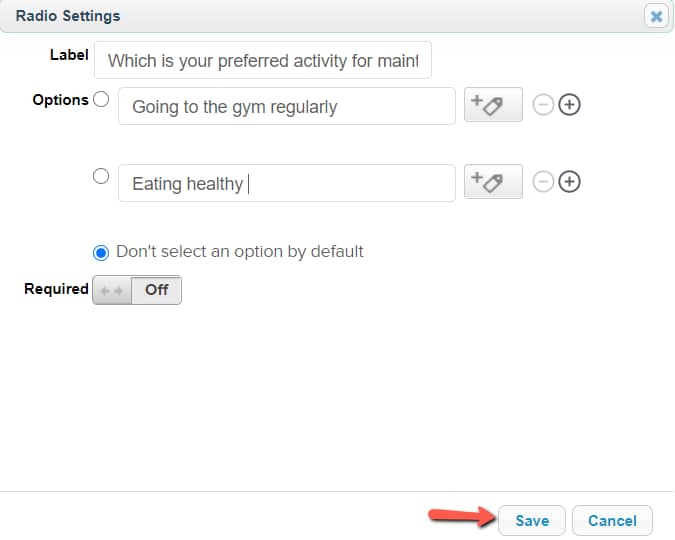
You’ll instantly see this pop-up, where you can add your question and answers and save them:
You can further use the options available in the form editor to customize the form so that it matches your campaign style.
While you are still in the form editor, click on the “Settings” tab and make sure the “Auto-populate Form” checkbox is selected:
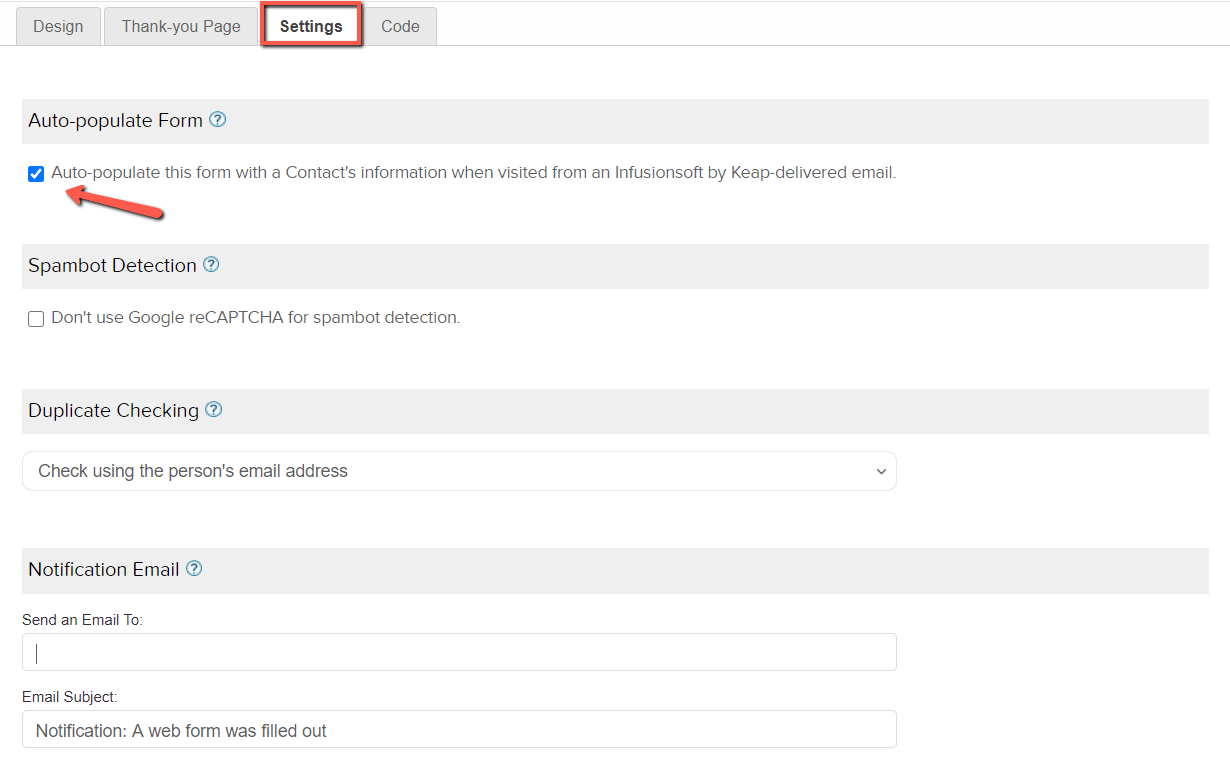
This means that when the user answers your form question, he will not be required to fill in his email address again.
Lastly, go to the “Code” tab from the same form editor, and click on the last section to expand it:
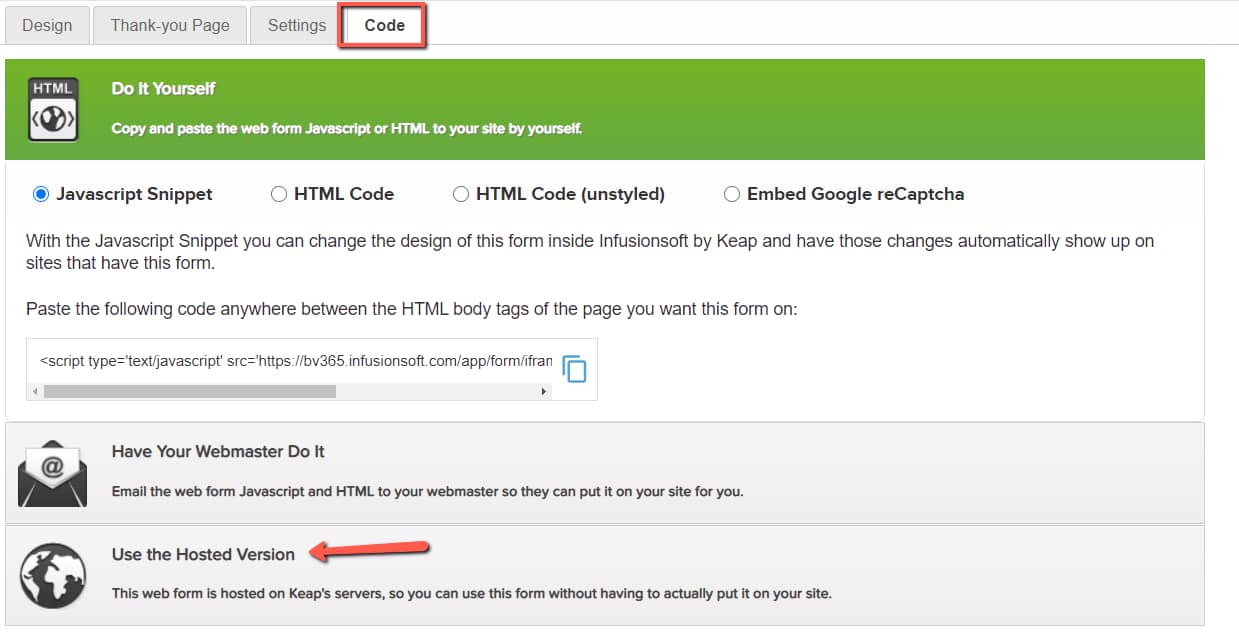
You will have to copy one of the URLs available here:

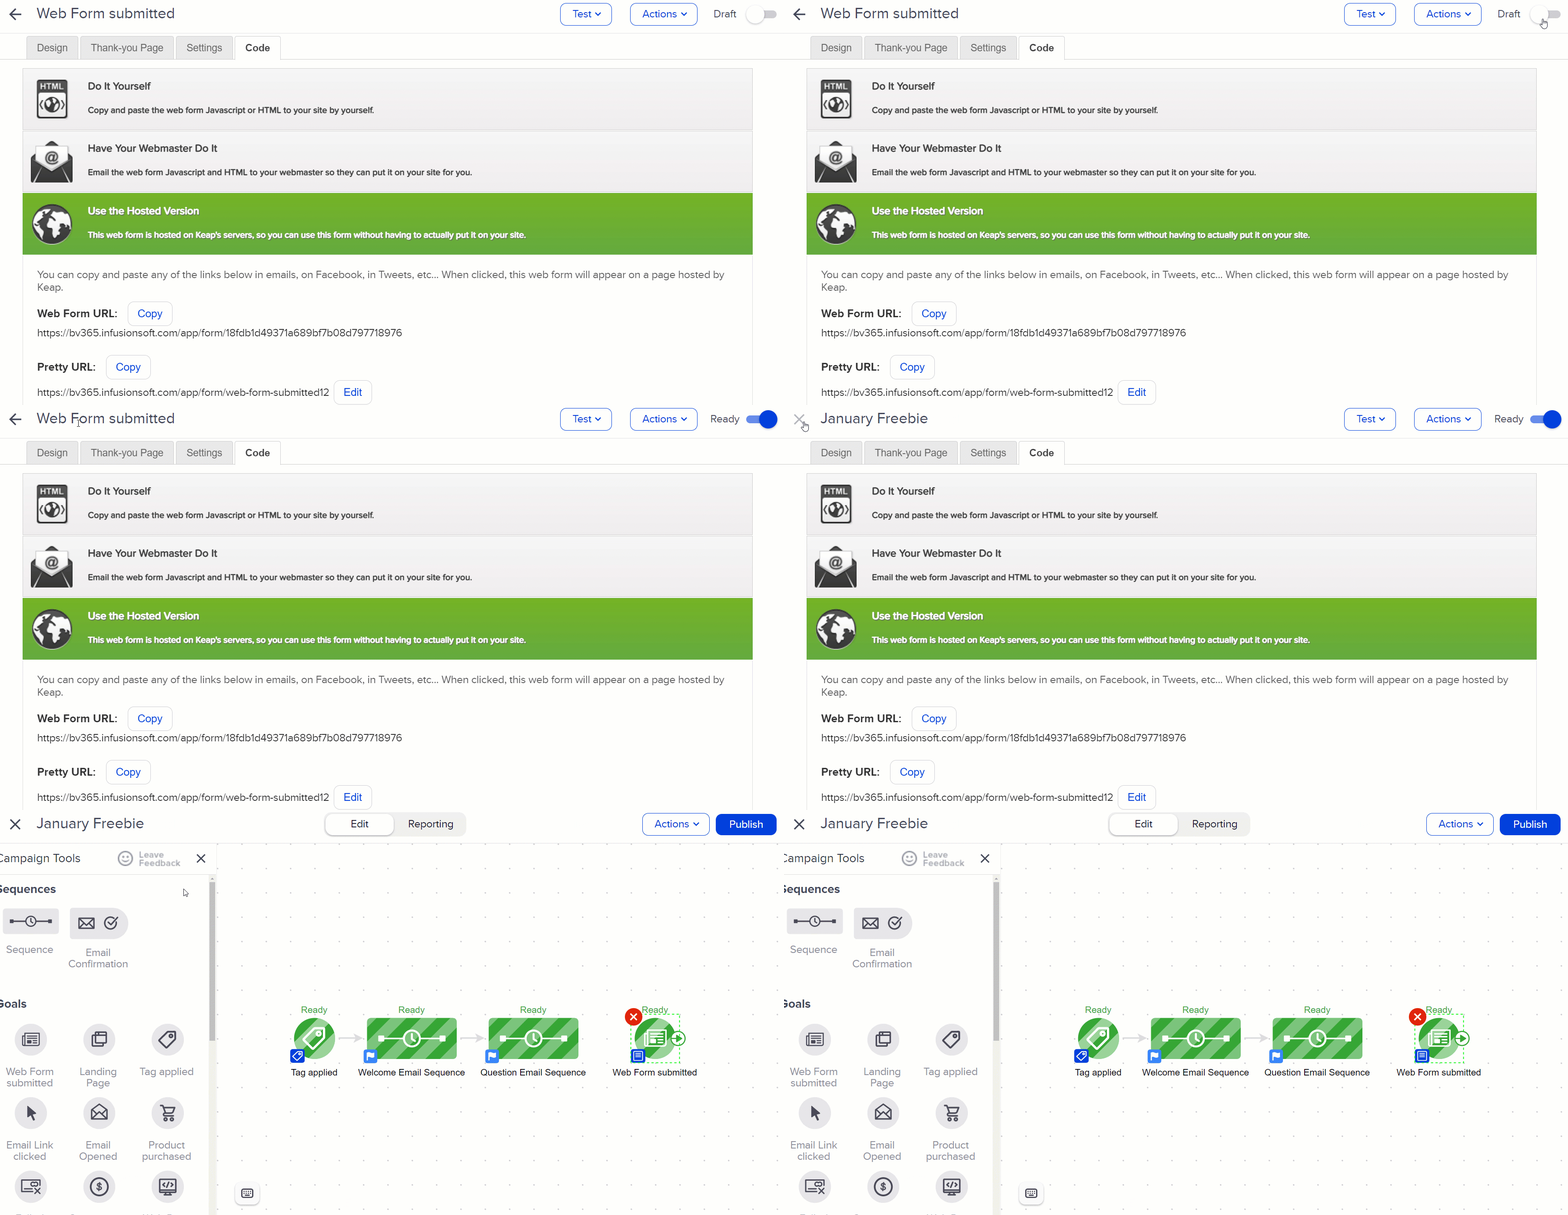
Now publish the form using the toggle, and return to the main campaign builder canvas:
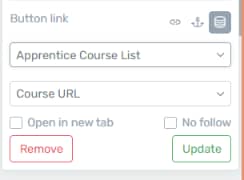
Go back to the email from the second sequence (the one in which you plan to add your question) and select the “Button” block.
In the left sidebar editor, select URL from the drop-down under “Button Link” and paste the URL there:
Once done, return to the main canvas, and connect once more the sequence to the goal:

Set up the Webhook
We will now go on to the next step, which is adding a condition to our web form goal. The goal has two different outcomes, depending on what answer is selected by the visitor.
Therefore, the visitors who are selecting “Going to the gym regularly” will receive a link to download a free ebook. When they select this answer, the webhook will be triggered, and the Thrive Ultimatum campaign will start.
Here’s how you can do that:
You first have to add two sequences to the canvas, like so (I’ve also renamed them to know which one is which):
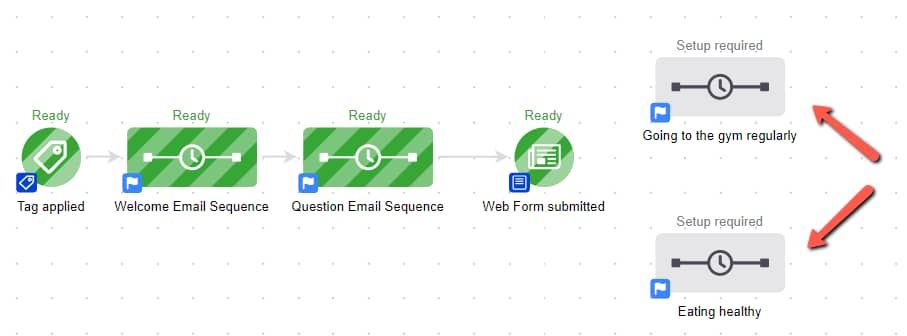
One of these sequences will contain the webhook trigger, in this case, the top one “Going to the gym regularly”.
Double click on the sequence to open it. First of all, you need to schedule when the webhook will be triggered, and in order to do that, you first have to add a “Timer” to your sequence:
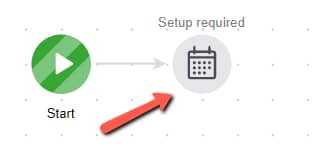
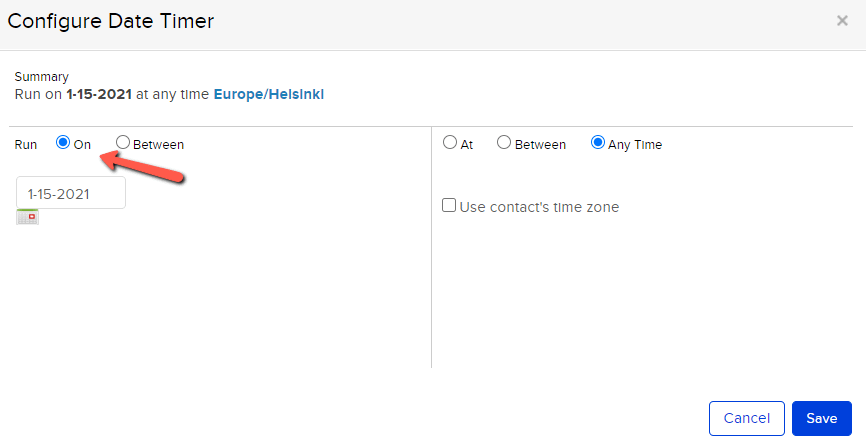
Use the available time settings to set the time of the webhook trigger:
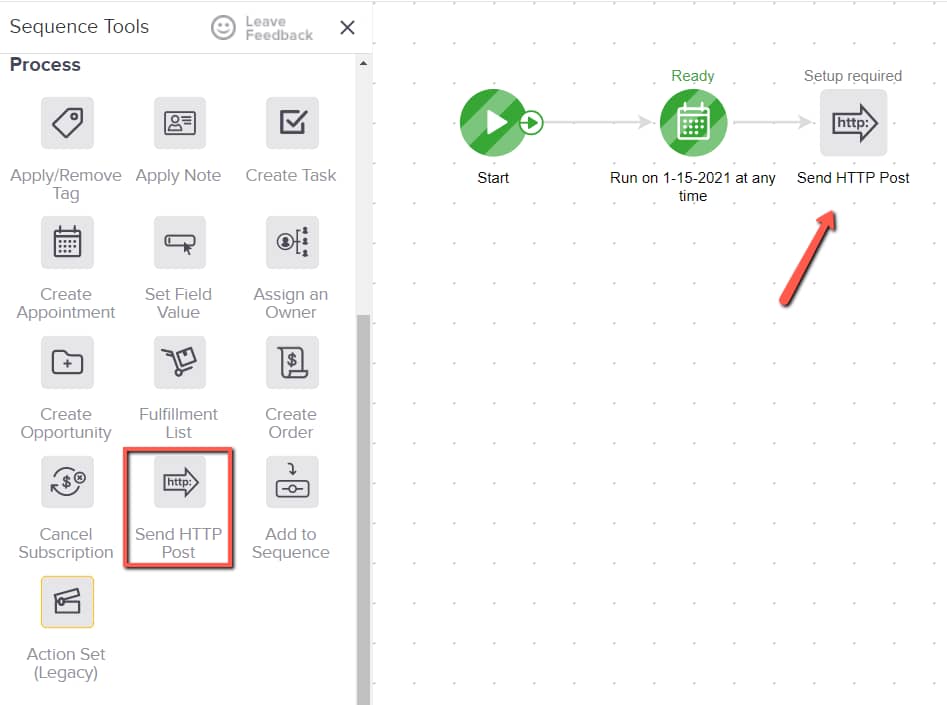
Now, from the “Process” section of the left sidebar, drag and drop a “Send HTTP Post” icon to it:
Open the “Send HTTP Post” by double-clicking on it and you will be taken to its settings. Here, paste the webhook URL from your Thrive Ultimatum campaign in the “POST URL” field:

And lastly, change the “Name / Value Pairs” fields to “email” and “Contact.Email”, like so:
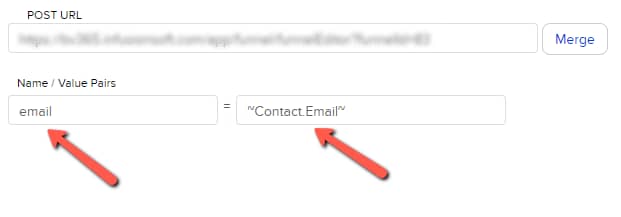
These are known as parameters – each line represents the information the “HTTP Post” will send to the URL.
Then, while you are still on this sequence canvas, drag and drop an “Email” icon after the “Send HTTP Post” icon:

This is the “Promotion” email, with the discount or free product link, that will be sent to those visitors who chose the “Going to the gym regularly” option.
Customize it as you best see fit in order to match your campaign.
After you do that, insert once more a text or a button which the visitor can click in order to be redirected to the promotion page:
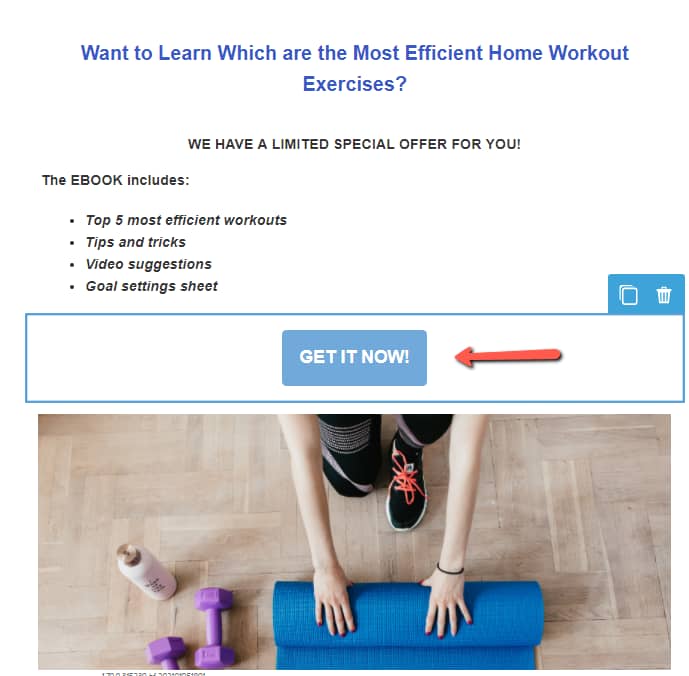
I will use a button for this example and paste the URL of the promotion page that was generated when I configured my “Lockdown Campaign” settings:
After you have customized your email, your sequence for the “Going to the gym regularly” option should look like this:

Save and publish everything.
Next, go back to the main campaign builder canvas, and start setting up the sequence for the second option:
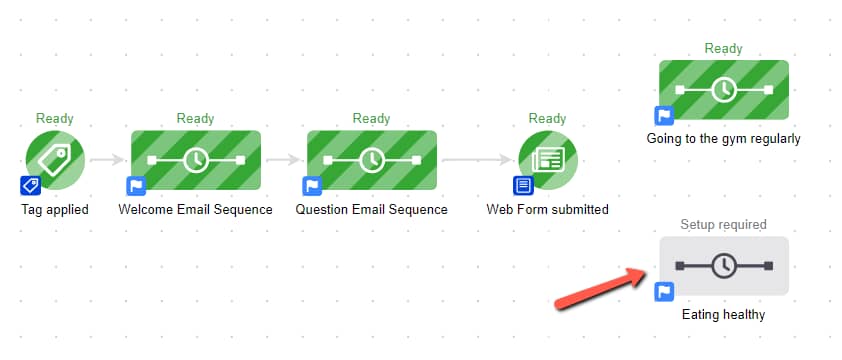
If you don’t want any action to be performed for the visitors who are choosing this option, then simply publish the sequence and return to the main campaign canvas where you will notice that it has turned green:
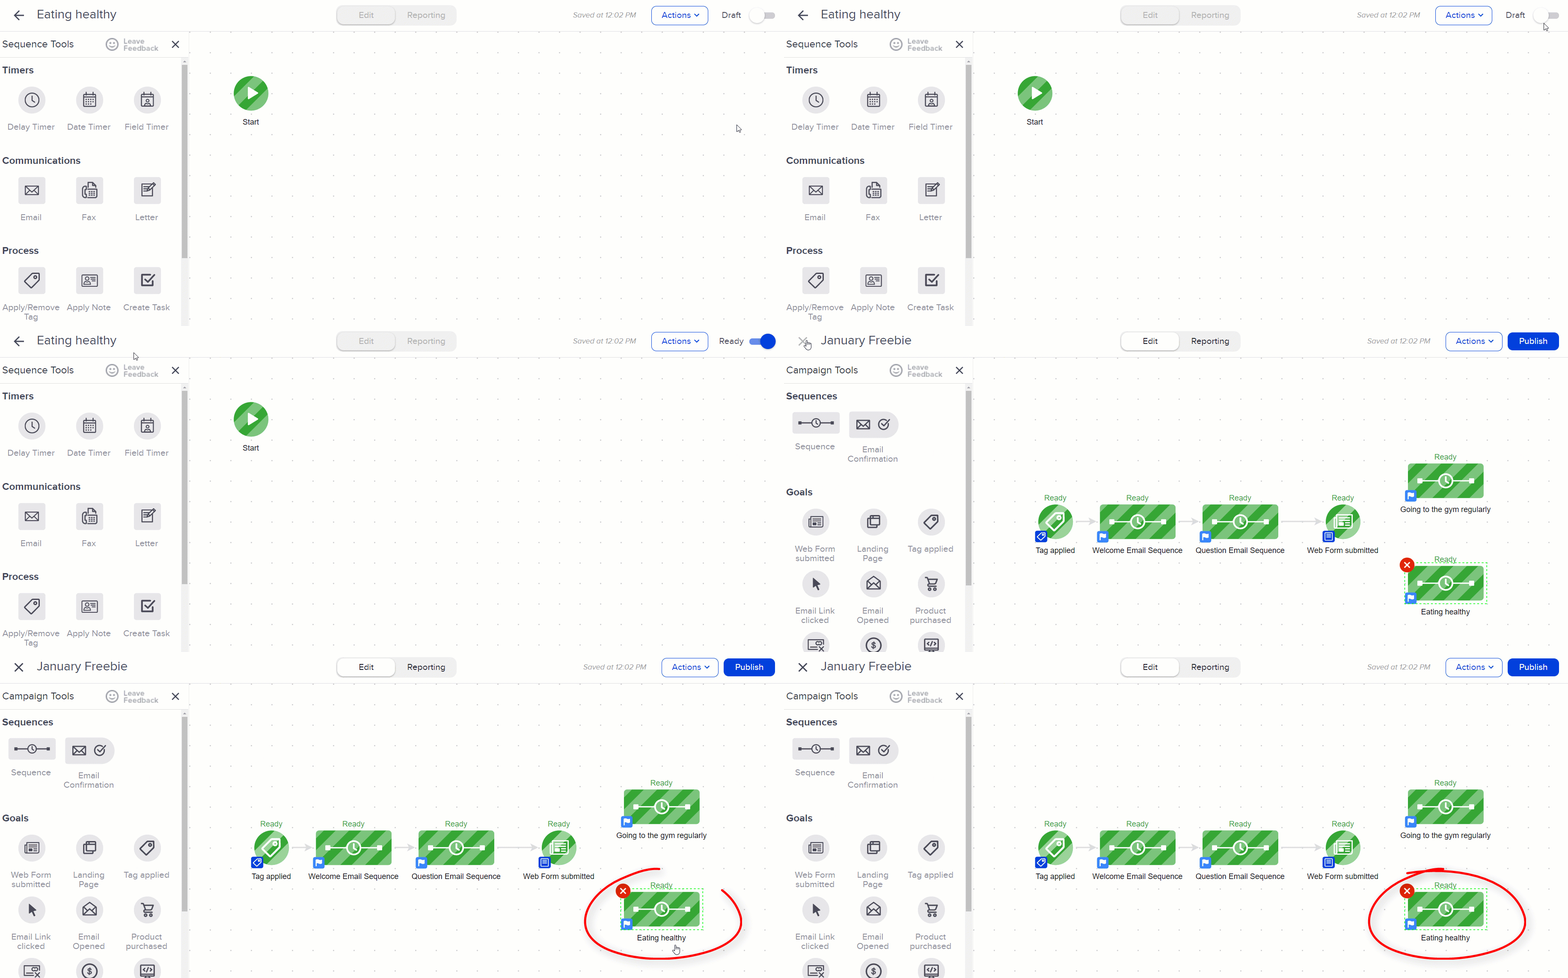
Add a Decision Diamond
The next important step in the process is connecting the “Web Form” goal to these two sequences, by dragging the arrow from the goal to each sequence. Once you do that, you have created a “decision diamond“:

These “decision diamonds” are automatically created when a campaign goal is connected to two or more sequences.
Double click it to start configuring the rules, which will look like this:

Once you click on the “Add a rule” button, you can start setting up the conditions that need to be met:
The flow needs to look something like this:
-
If the “Form Submission’s” -> “Option” -> “x” -> “is selected”
This means that if the visitors select the “Going to the gym regularly” option, then the webhook and subsequently promotion offer will be triggered for them.
You don’t need to set anything up for the second option.
The final campaign flow should look like this:

You first trigger the flow through the “Tag” goal (1) and send the first “Welcome” email (2). After one day, the “Question” email (3) will be sent to your subscribers, and they will be redirected to the “Web Form” (4) containing your questions. The “Decision Diamond” (5) will segment the answers into two groups, and the visitors who have replied to the “Going to the gym regularly” will receive a third e-mail (6) with the link to your promotion page, as scheduled by you.
Don’t forget to “Publish” your campaign when you are done with setting up all necessary details:

Once you do that, you will be taken to the “Reporting” section of your campaign, where you can view stats about how your campaign is performing:
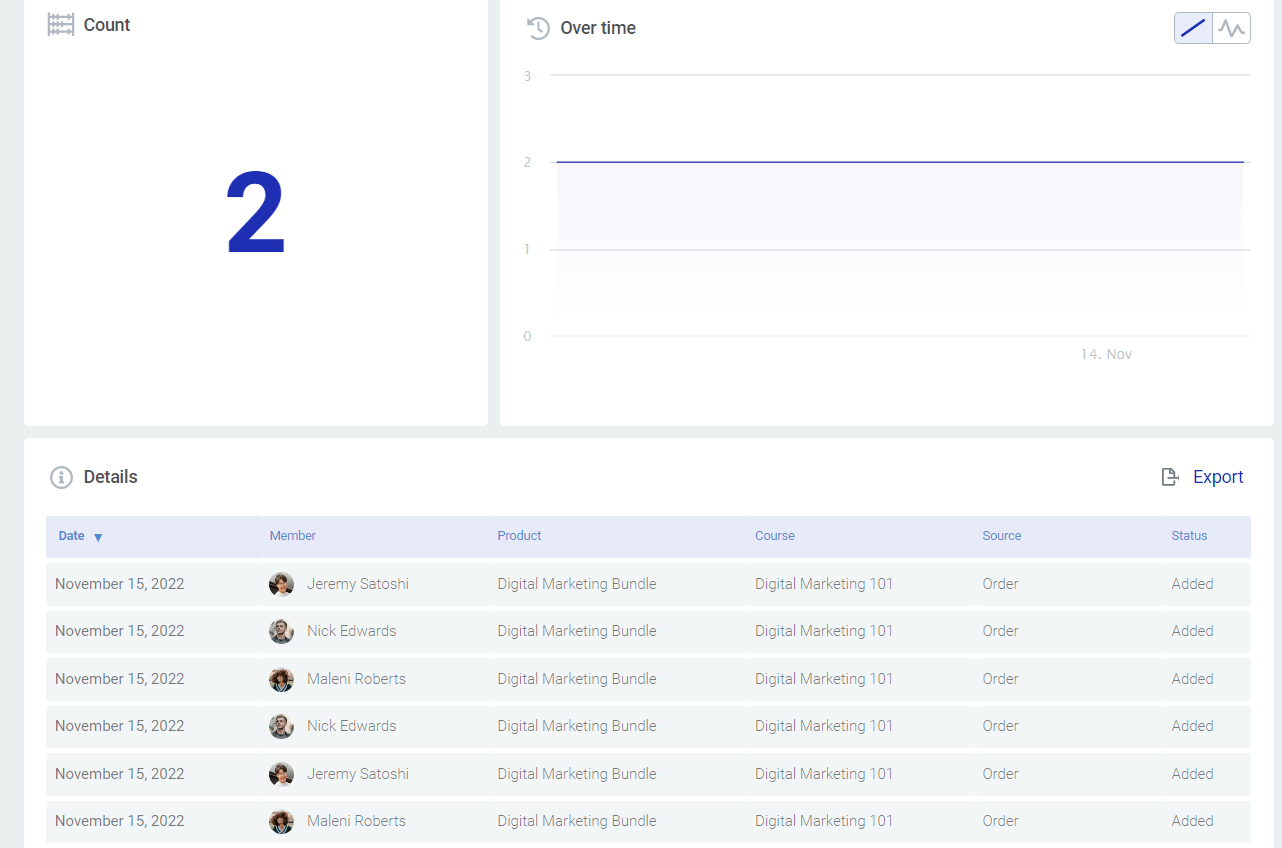
Click on the “Edit” button when you want to return to the main canvas builder:

Create the necessary settings on your site
At this point, the automated campaign is set up and ready to be triggered.
In order to do that, you’ll have to go back to your WordPress admin dashboard and open the page or post on which your form is placed:

Then, add a “Lead Generation” element to your page/post, if you have not already added one.
Then connect the element to your Infusionsoft account, through an API connection.
If you want, you can also add the “Email Connection”, so that you will get notified each time someone fills in the form.
Connect the element to Infusionsoft
In order to connect your “Lead Generation” element to Infusionsoft, you first have to add it to your API manager dashboard. You can find here a detailed step-by-step article about how to set up and use an API connection with Infusionsoft.
To explain it very succinctly, this is how your connection should look while setting up the API with a “Lead Generation” element:

-
1: Select “Infusionsoft” from the list of available connections
-
2: Choose the tag which will trigger the marketing campaign in “Infusionsoft”
Important! The tag you choose here needs to be identical to the one you have added as your trigger goal in your Infusionsoft campaign builder:

Create an “Email” Connection
This step is optional, but you can also create an “Email” connection here so that you get notified each time someone submits a form:
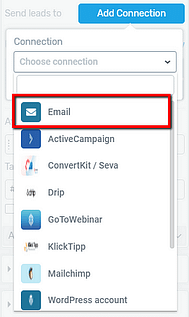
You can read more about setting up an email connection here.
Now your webhook and campaign should be up and running. Any visitor who subscribes to your mailing list should start receiving these e-mails, and, if interested in your product, will be included in the promotion.
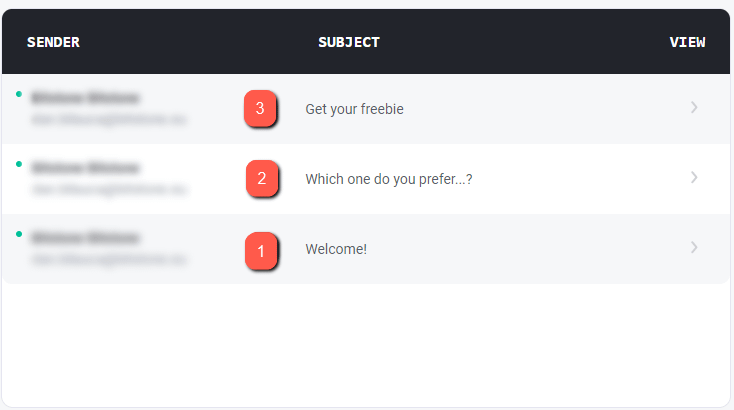
I’ve added here an example of what emails would be received by someone who has selected “Going to the gym regularly” in the second email, and therefore triggered the campaign:
-
1: The “Welcome” email
-
2: The “Question – Which one do you prefer…?” email
-
3: The webhook was triggered for the visitors who have replied “Going to the gym regularly”, so the campaign has started. After a certain amount of time (decided by you), they would receive in their inbox the “Get the Freebie” email, along with the link to the promotion page:
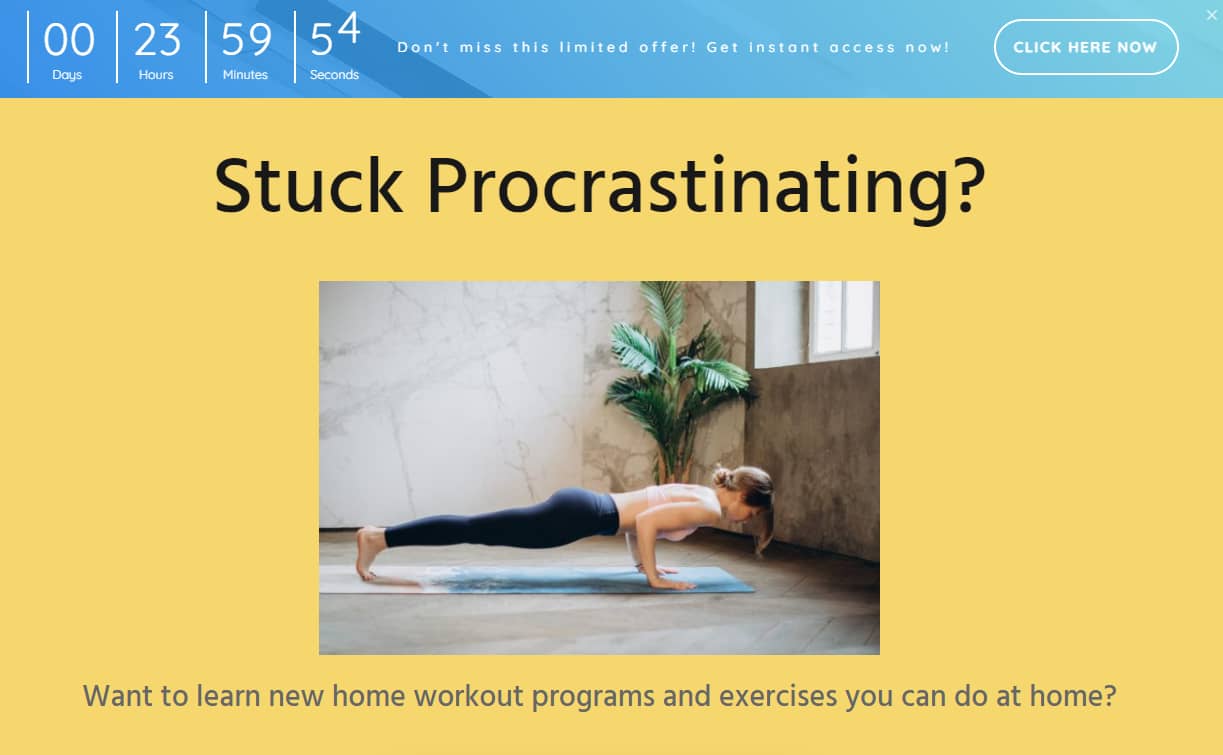
There are the steps for setting up the “Incoming Webhook” for a Thrive Ultimatum Evergreen campaign, using Infusionsoft.
Keep in mind that there are multiple ways in which you can build your campaigns using both Thrive Ultimatum and the campaign builder from Infusionsoft.
Hopefully, this article was useful to you. Don’t hesitate to rate it with a smile below, if you found it helpful. 🙂