The “Advanced Custom Fields” plugin offers an easy way of creating custom fields for your WordPress website. These custom fields can then be dynamically controlled on each post/page they are used on.
Once you set up custom fields, you will have the possibility to display those fields, when editing your pages/posts with Thrive Architect. In order to do that, you will need to use the dynamic feature of elements that are compatible with the custom fields.
First, you will need to create and set up the custom fields for your website, using the “Advanced Custom Fields” plugin. Here are the detailed steps of how you can do that:
Install & activate the plugin
Note: If you already have the “Advanced Custom Fields” plugin up & running on your website, and you have also created the custom fields you want to use, you can skip these steps and go directly to our article here, to find out how to use the fields with the compatible elements, when editing your page/post with Thrive Architect.
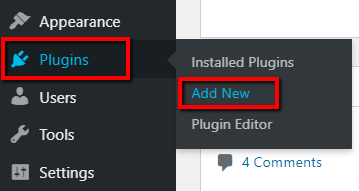
Go to your WordPress admin dashboard, hover over the “Plugins” item from the left side menu and click on the “Add New” option from the sub-menu that appeared:
You will find a “Search plugins” field in the upper right part of the page that opened:

Enter “Advanced Custom Fields” in this field, in order to search for it:

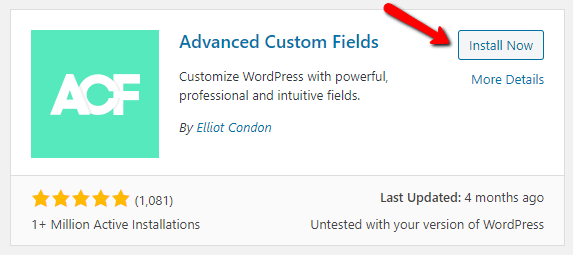
The “Advanced Custom Fields” plugin will be among the first search results on the “Plugins” page. Look for it and when you have found it, click on its “Install Now” option:
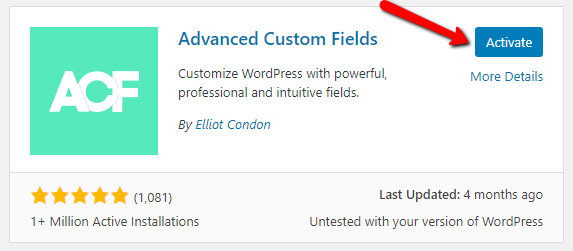
After the plugin is installed, the “Activate” button will be displayed for it. Simply click on the button and the plugin will be activated, in a matter of seconds:
Create the Field Group with the Custom Fields
Once the plugin is activated on your website, you can start creating the custom fields you want to add to your pages/posts using compatible Thrive Architect elements.
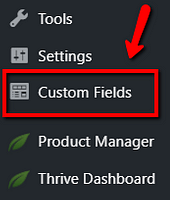
In order to create fields, first, you will have to access the plugin. After the “Advanced Custom Fields” plugin was installed and activated, you will see the “Custom Fields” item appear in the left side menu. Click on it:
Add Field Group
Next, add a new “Field Group” by clicking on the “Add New” button from the page that opened and completing the necessary steps:
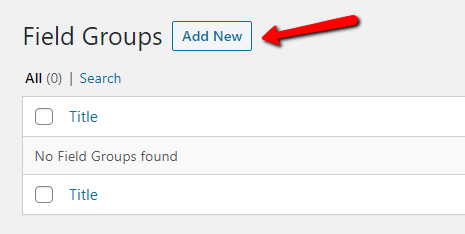
This will open the “Add New Field Group” page. First, add a title for your “Field Group” in the “Add title” field from the page:

Add Fields
Then comes the section with the fields. Click on the “Add Field”, button from the section below the title of the “Field Group”:
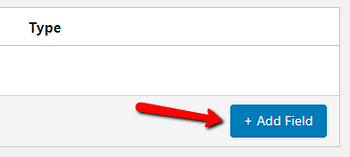
A drop-down section will open, where you can set up and add the field. There are three important things that you are required to set up for every field: the label, the name, and the type.
Field Label and Field Name
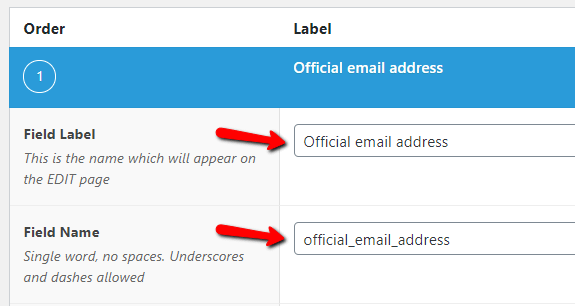
The “Field Label” and the “Field Name” will help you easily find the field, if you will set up more fields. First, complete the “Field Label” field with the label/name you want to give to the new field.
Then, click anywhere outside the field and you will see how the “Field Name” field will also be completed automatically, with the computer version (lower case, one word connected with dashes, underscores) of the same text you have entered as the label:
Field Type
The third required info for the new field is its type. In order to set this, first, click on the field from the “Field Type” section. By default, you will see the “Text” type in it:

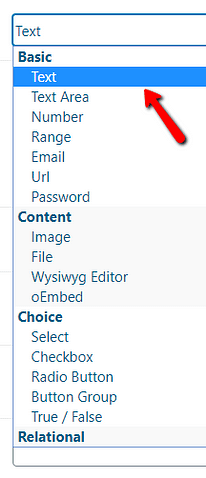
The drop-down with the available field types will open:
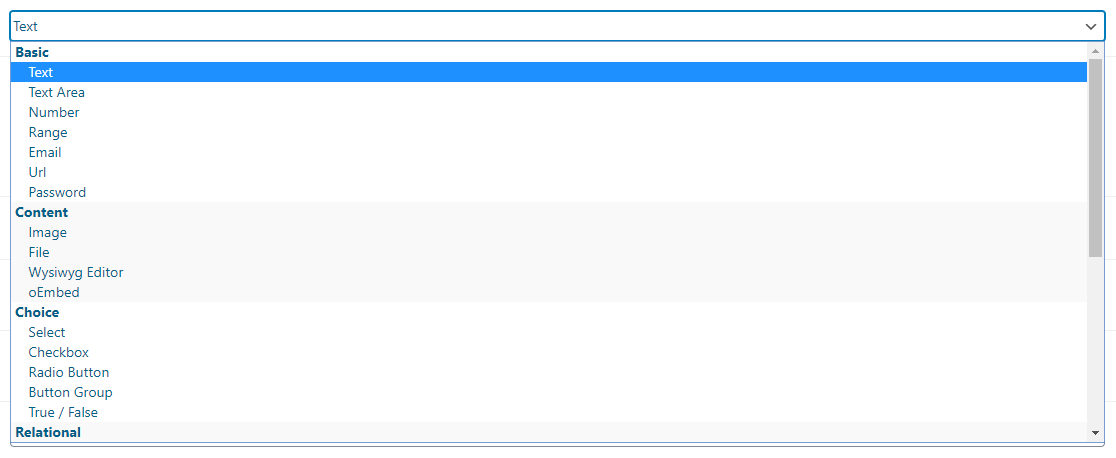
Scroll down to see every type available and then, select the one you want to use by clicking on it. In this example we are selecting the “Text” field type:
If you want to know how to set up each specific custom field type that you may need to use with Thrive Architect elements, take a look at this article here.
In case you want detailed information on each field type available in the drop-down, take a look at the knowledge base section of the “Advanced Custom Fields” plugin here.
Below the “Field Type” section, you will find more options/settings in the “Add Field” drop-down:
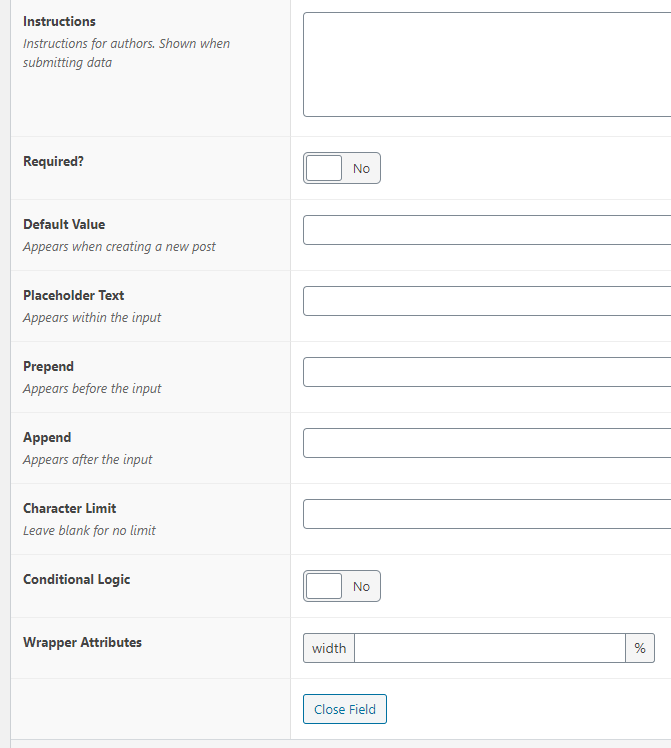
You can use these to customize the new field and the way it will be displayed (when editing pages/posts), by adding things like a “Default Value”, “Wrapper Attributes” etc. You can find some details regarding these options in the article from “Advanced Custom Field” here.
When you have finished setting up the field, you can click on the “Close Field” button, from the “Add Field” drop-down:

You can add as many fields to the “Field Group” as you like, by repeating the same steps as detailed above.
Define Location
Once the fields are all ready, you can define a location for the “Field Group”, with the help of the “Location” section of the “Add Field Group” page:

Here, you can define a set of rules which will determine when and where your custom fields will appear, while editing your posts/pages. You can set up one simple rule, or more rules grouped together with the “and” button if you want.
You can also use the “Add rule group” button from the “Location” section, if you want, to set up different rules for the same “Field Group” on an “or” basis, meaning that the “Field Group” will be displayed if one rule or the other applies:

In the example below, one simple rule is set for the “Field Group”, and it means that the “Field Group” will be displayed for every page when you edit them:

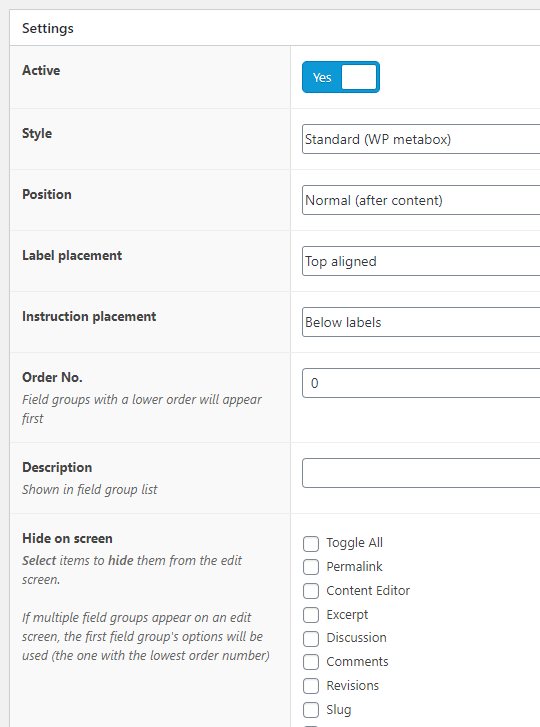
After you set up the rules, you can also use the various settings from the “Settings” section, such as the “Style”, the “Position”, the “Description” etc., to further customize the “Field Group”, if you want:
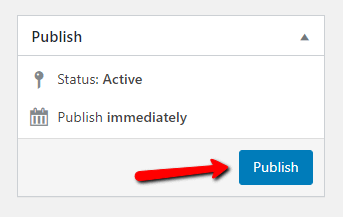
Once you have finished customizing the “Field Group” and its fields, click on the “Publish” button, from the upper right part of the page to publish the group, as well as the fields it contains:
For more details regarding how to create a “Field Group”, you can check out this article here.
Note: You have the possibility to edit any of the “Field Groups” that you have created, if you go to the “Custom Fields” page, hover over the “Field Group” and use the “Edit” option, from the ones that appeared, below the name of the group:
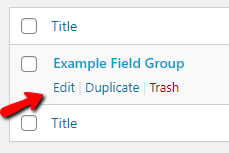
Furthermore, while editing a “Field Groups”, you also have the option of editing the custom fields that it contains. In order to do that, hover over the field you want to edit and use the “Edit” option, from the options that appeared below the custom field:

Assign values to the fields on each specific post/page
After creating the “Field Group” containing the custom fields you will want to use, the next step is to assign a custom value to the custom fields, for each specific post/page, on which you will want the fields and their values to appear. This is very important and essential because it allows you to assign different values when the same custom field is used on different posts/pages.
This way the actual content of the custom fields will become dynamic, it will change based on which post/page the custom field is displayed/used on.
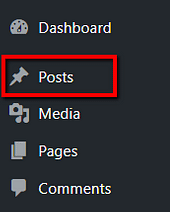
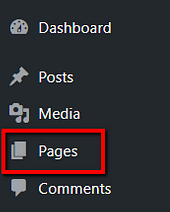
If you want the custom fields to appear on a post, then access the “Posts” item, whereas, if you want to display the custom fields on a page, then access the “Pages” item, from the left side menu of your WordPress admin dashboard:
Then, look for the post/page you want the display the custom fields on. Keep in mind that the post/page has to meet the rules you have set up for the “Field Group”.
When you have found the post/page, hover over it and click on the “Edit” option from the ones that appear below it:

Assign the values
If the post/page meets the rules of the “Field Group”, you will be able to see every custom field you have added to the respective group, below the editing options of the post/page, in the WordPress editor. In this example, I have two custom fields set up for the “Field Group”, the “Official email address” text field, and the “CEO Image” image field:
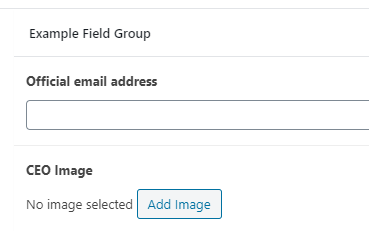
What you need to do now is to assign a custom value for each of the custom fields. The values you add will be the values associated with the custom fields for this specific post/page.
Each type of custom field can have different ways in which you can assign a value to them. In our example we have a “Text” and an “Image” custom field type:
-
for the “Text” custom field type, simply enter the value in the field below the name you have previously given to the custom field:
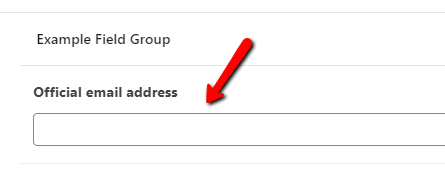
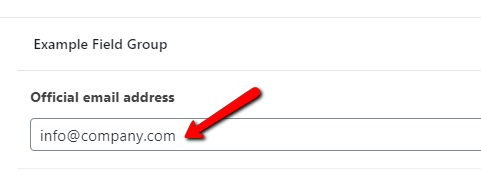
After you have completed the field with the value (in our example, an email address), click anywhere outside the field and the value will be added for the respective custom field:
-
for the “Image” custom field type, click on the “Add Image” button below the name you have previously given to the custom field:

Your Media Library will open, and you can select or upload the image you want to assign as the value for the custom field for this page/post.
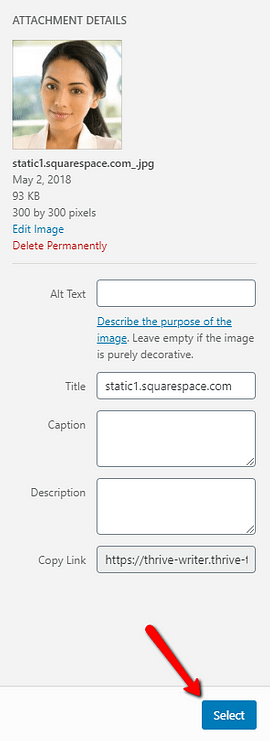
If the image is already in your Media Library, then simply click on it, to select it, and then click on the “Select” button from the bottom right corner of the Media Library to add it:
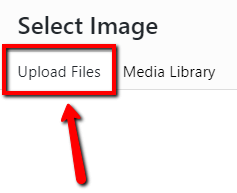
If the image is not uploaded to your Media Library yet, then use the “Upload Files” tab from the upper left corner of the Media Library to upload the image from your computer first:
Once the image is uploaded, click on it and use the “Select” button, as showcased above, to add it.
After you assign values (add images, texts, etc.) to the custom fields of the “Field Group”, you will see them added for every custom field of the respective group, below the editing options of the post/page. In our example, these are the email address and the image:

Update the post/page
When you have finished assigning values to each custom field, you will have to save the changes you made to the post/page by doing the following:
-
if your post/page has already been published, then click on the “Update” button from the upper-right corner of the WordPress editor:

-
if the post/page is not published yet, so it is only a draft, then click on the “Save Draft” option from the upper-right corner of the WordPress editor:

This way the custom fields and their assigned values will be saved for the respective post/page.
Note: Keep in mind that these values will be available only for the post/page you have assigned them to. You will have to repeat these steps for each post/page you will want to use the custom fields on.
After you have set up your custom fields, and assigned values for them, on each post/page you want, you will be able to use them, when editing the respective post/page with Thrive Architect. If you need details on how to do that, please take a look at our step-by-step article about it here.
Hopefully, this article was useful for you. If so, please reward it with a smile below 🙂