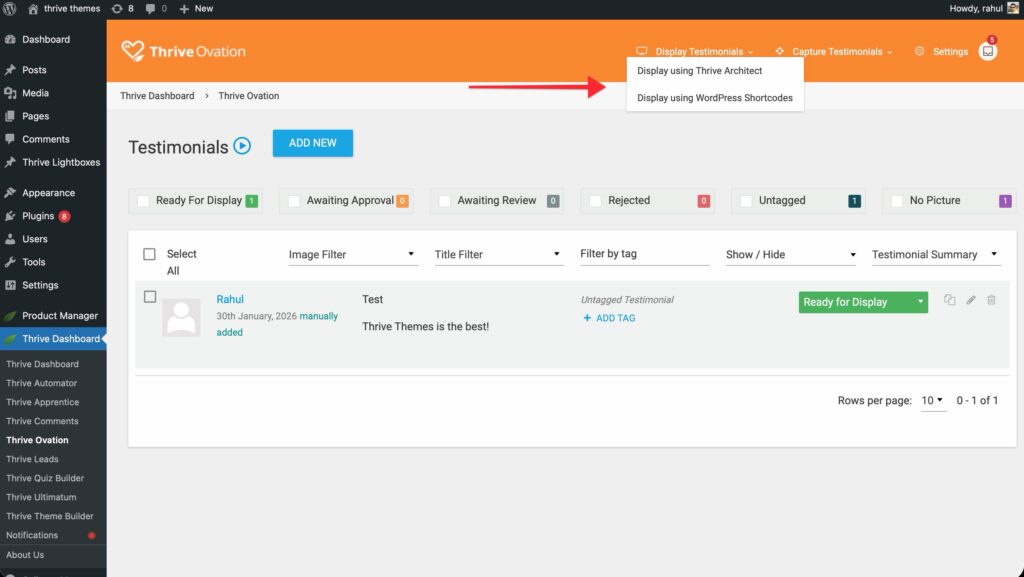
If you are using Thrive Ovation to manage the testimonials from your website, you can very easily capture or display them on your Thrive Architect pages.
Both of these actions can be done with the help of the two dedicated elements:
This article will show you how to set up and use the “Display Testimonials” element on your Thrive Architect pages.
Add the element and choose the template
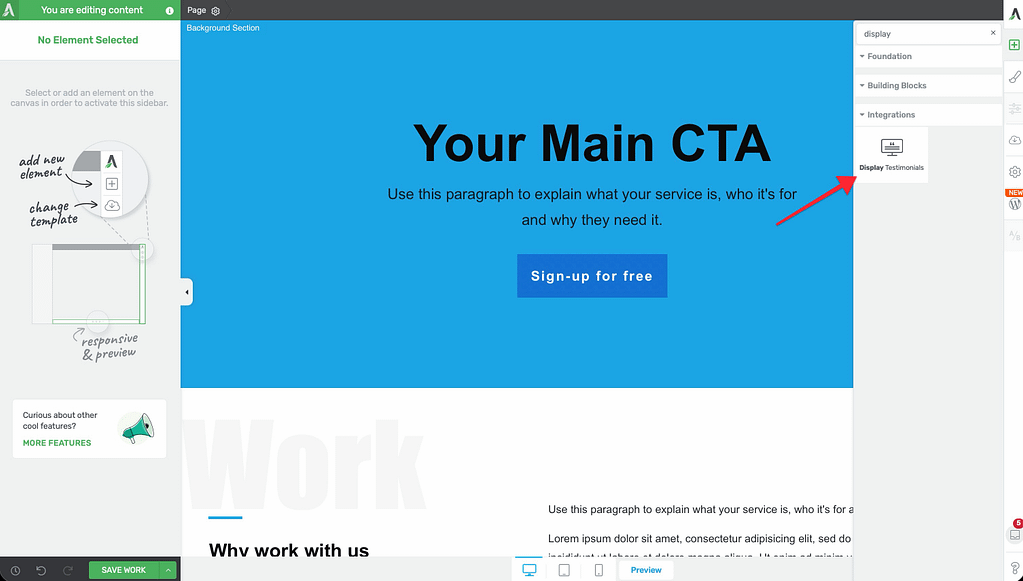
Just like you would add any other Thrive Architect element to a page, click on the plus sign from the right sidebar to open the list of available elements and scroll down to find the “Display Testimonials” one. Click on it and drag and drop it onto the editor:
A pop-up will open, from where you’ll be able to choose a template for this element:
Display Settings
After choosing the template, you can click on the “Display Settings” button, to go to the next step.
This is where you can choose what you want to display through the element. If you click on the button, you will see these options:
We will go through each one.
Specific Testimonials
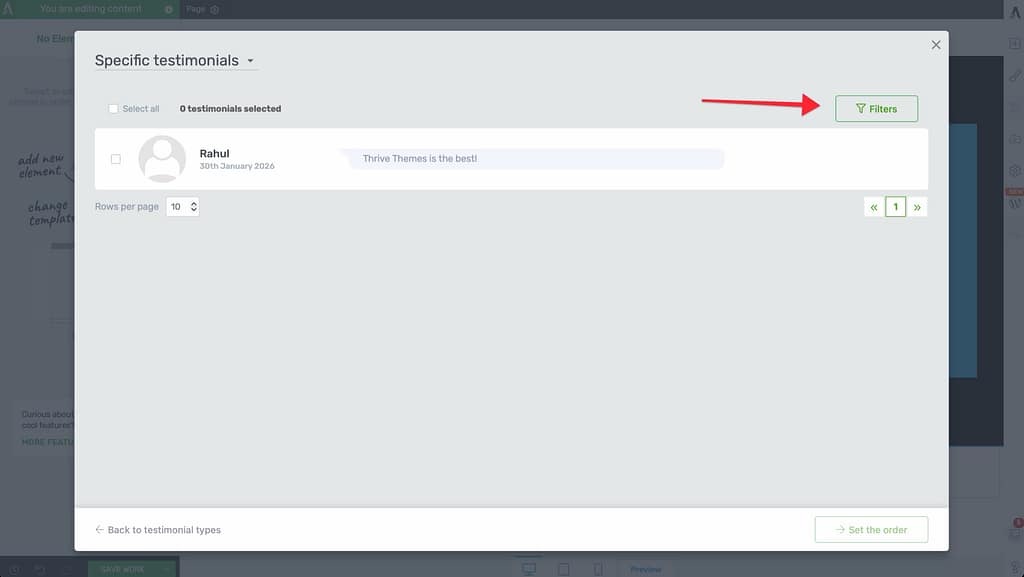
If you want to manually choose the testimonials to be shown, this is the option you should use:
In this case, you’ll be able to select each testimonial by ticking the checkbox in front of it:
You can use the “Select all” checkbox if needed.
Filters
If you want to filter these testimonials, you can do that using this option:
A new section will appear on top of the pop-up, with some criteria that can be used to filter the testimonials that will be displayed:
-
Title Filter
-
Image Filter
-
Word Count
-
Tags
Dynamic List
If, instead of the “Specific Testimonials” option you decide to go for the “Dynamic List” one, you will have the option to filter the testimonials that will be displayed using tags or order:
Testimonials order
After selecting the testimonials you can continue by setting their order. For that, click on this button:
And then grab the testimonials and drag and drop them as you see fit:
If you click on the “Set orders” button, the ordering panel will appear:
By default, the order here will be set to “Manual”, so that you can drag and drop the testimonials as you wish.
The other available option here is “Date published”:
Naturally, this will order the testimonials by their publish date.
Please keep in mind that once an order has been set, if you go back and reorder the testimonials, the sort type will be updated to “Manual”, but it will be based on the current order.
Save a new testimonial set
If you’re happy with a testimonial set and you think you’ll be using it more across your site, you can save it as a testimonial set:
Simply name it and click on “Save”:
You can find the testimonial sets that you’ve previously saved here:
Once you’ve chosen the testimonials to be shown, you can click on “Apply” to add them to the Thrive Architect editor:
As you do that, the testimonials will be added to the Thrive Architect editor and you can start customizing them.
Use the Main Options
The “Display Testimonials” element has been designed in a similar manner to the “Post List” element, for which you can find a detailed description of each setting here.
The main options of the “Display Testimonials” element are found in the left sidebar immediately after adding the element to your page:
Choose the Template
Should you want to change the current template of the element with another one from the available templates, you can click on the box with the current template’s name:
This will open the same pop-up window from where you have chosen the template in the first place and you can quickly change it.
Note: If you change the template of the “Display Testimonials” element, the content that you have previously added to the element will be lost.
Thus, it is advisable to select a suitable template before starting to add content to the “Display Testimonials” element.
Edit Design
In order to customize the design of the “Display Testimonials” element itself, click on the “Edit Design” button:
When clicking the “Edit Design” button, the editing interface changes a bit, allowing you to go more in-depth and make changes to the actual elements inside the element.
This way, you can choose to remove a certain element from there or modify its structure.
Group editing is enabled at all times when you edit the design of this element, in order to keep consistency inside the “Display Testimonials” element. You can check out this article for more information about the “Group Styling” feature.
This means that, for example, if you remove or modify an element from one column, the corresponding elements from the other columns will also be affected.
While editing the design, you can also add new elements from the right sidebar, elements that are currently available only for the Display Testimonials element.
So, if you open the list of elements by clicking on the plus sign from the right sidebar, while in “Edit Design” mode, you will see the following elements:
Stylistically, you can also customize each of these elements how you see fit, using all of the customization options available in Thrive Architect.
Filter Testimonials
This option will let you choose the content you want to display in the “Display Testimonials” element. To do this, click on the “Filter Testimonials” button:
This will take you to the “Filter testimonials” section of the pop-up described at the beginning of this article.
You can choose how the testimonials should be filtered in order to decide which ones will show up within the element.
Display Type
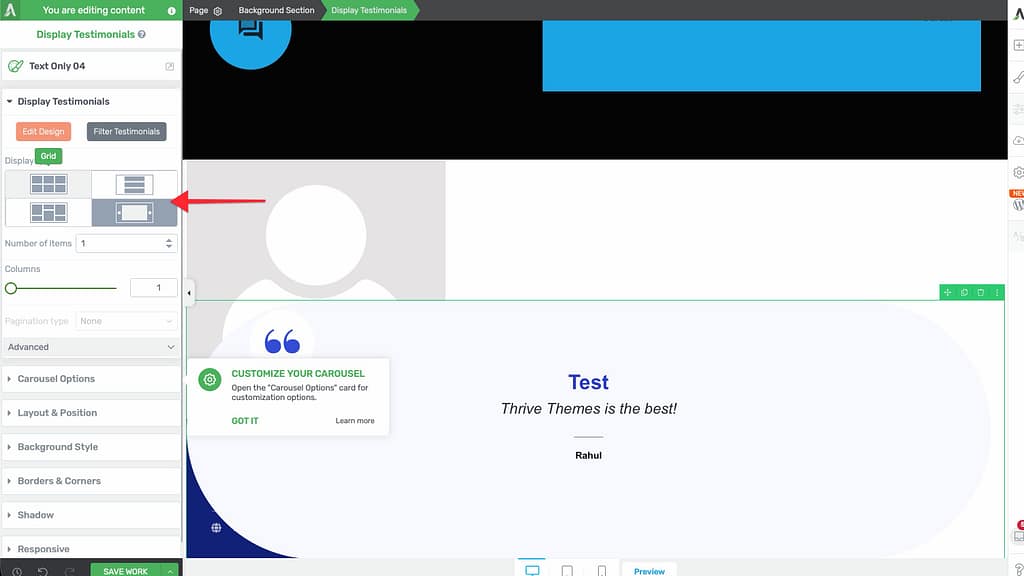
There are four ways in which you can display the testimonials. In order to select one of these settings, simply click on the preferred setting from the “Display Type” section:
-
List: If this setting is selected, the testimonials will be sown in a list format, one after another.
-
Grid: If the “Grid” setting is selected, then the testimonials will be displayed in a series of columns side by side. Each column will have a fixed height and spacing between them, to form a perfect grid.
-
Masonry: This setting resembles the “Grid”, in the sense that this will also display the testimonials in columns. The difference is that there are no fixed heights for the columns (irregular layout, best visible when having 2 or more rows of testimonials).
-
Carousel: This setting will create a carousel and you can use the “Carousel Options” section to further customize it. The options are described in this article.
Number of items
You can input the number of testimonials to be shown in this field:
Columns
Here you can select how many columns should the element display the content in. In order to change the number of columns, simply drag the slider from the “Columns” section, or enter a value manually in the box next to it:
Horizontal/Vertical Space
With the help of these two options, you can adjust the horizontal space (the space between the columns) and the vertical space (the space between the rows). All you have to do is to drag the slider, or enter a value manually in the box next to the slider for the space you want to modify:
Pagination Type
The “Pagination Type” option allows you to add pagination below the items of your element. This comes in handy if you have many testimonials that you display on more pages of the element.
By default, there is no pagination added to the element. In order to use this option, click on the field from the “Pagination Type” section. This will open a small drop-down with the three options you can choose from. Click on the one you want to use:
-
None is the default state and it means that there is no pagination added to the element.
-
Numeric: if you choose this option, a “Numeric” “Pagination” element will be added, below your “Display Testimonials” element.
-
Load More: if you choose this option a “Pagination” in the form of a “Load More” button will be added, below your “Display Testimonials”.
If you want to find out how to further customize the “Pagination” that is added when you use the “Numeric” or the “Load More” “Pagination Type” options, take a look at this step-by-step guide.
Advanced
From the “Advanced” section, you can choose what message to be shown if there are no testimonials that match the selected filtering criteria and the element can’t show any:
Use the Rest of the Options
Just like in the case of other elements, besides the “Main Options”, you can use some other general options, as well (such as Layout&Position, Borders&Corners, etc.):
If you want to know how to use the rest of the options from the left sidebar, make sure to take a look at the articles and tutorials from our knowledge base.
Hopefully, this article was useful for you. If so, please give it a smile below 🙂