When using Thrive Apprentice to create courses, you can add dynamic labels to the courses, that will change depending on the status of the user that is seeing the course.
The access restriction labels are the labels added to each of your courses, on the course page, so that the users are aware that the access to the respective course is limited, and the course cannot be accessed unless they sign in/purchase the course:
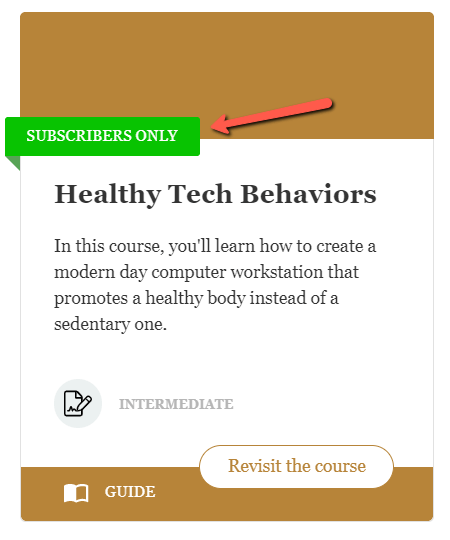
If you need to find out how to set access restrictions in Thrive Apprentice, please see this article.
You can add dynamic access restriction labels and dynamic buttons to the courses, to make it clear for the users why their access to the course might be limited.
This article will explain how to handle dynamic access restriction labels.
For example, if you have set up access rules for some of your courses, the labels will be different, depending on the context of each user:
If one of the users is looking at a premium course, for which they have to sign in and then purchase it, they can find themselves in either one of these three situations:
- they are not signed in and have not purchased the course – they will see the “Premium Course” label;
- they are logged in, but have not yet purchased the course – they will see the “Logged in but no access” label;
- they are logged in and the course has been purchased – they can see their progress status on the label (for example: “In Progress” or “Not Started Yet” – if you activate the “Switch labels depending on user status option” ).
Thus, using dynamic access restriction labels can come in very handy, as the text shown on the labels will change, depending on the context in which the user finds themselves.
Access the Dynamic Labels Option
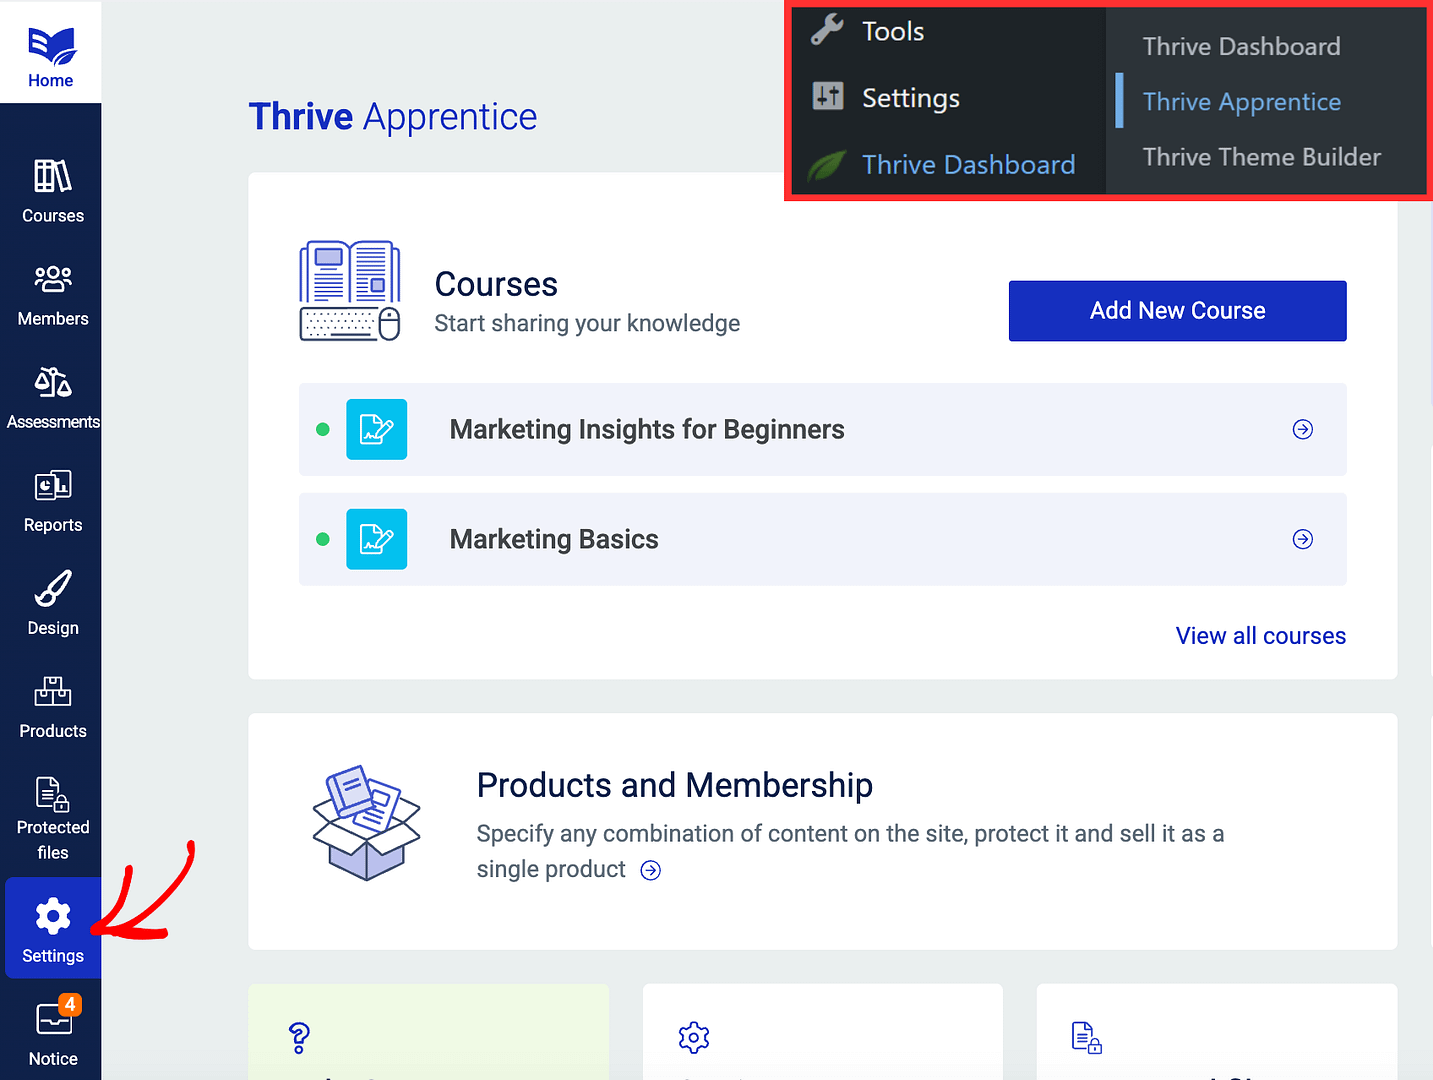
To find the “Dynamic Labels” option, click on the “Settings” tab from the left sidebar of your Thrive Apprentice dashboard:
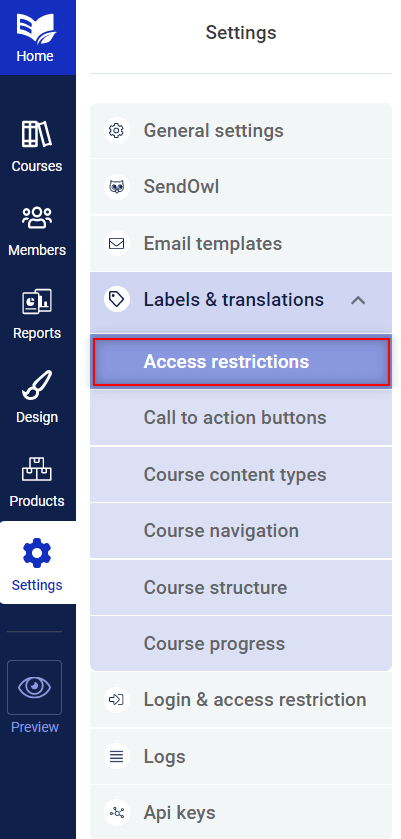
Then, under the “Labels & translations” section, click on “Access restrictions”:
You can check out this article to find out more general information about this feature, as this article will go through the options of the “Access Restriction Labels” only.
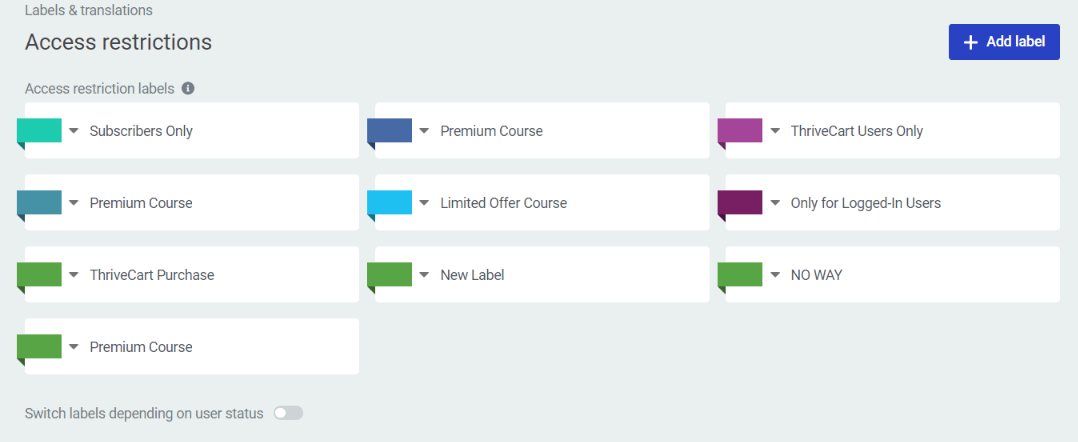
On the page that opens, you will be able to create and customize dynamic labels:
Access Restriction Labels
These are the labels added to each of your courses, on the course page, so that the users are aware that the access to the respective course is limited, and the course cannot be accessed unless they sign in/purchase the course.
Add, remove or customize access restriction labels
By default, you will have some labels here. However, these can be modified, and you can also add new ones.
- Change the name of a label
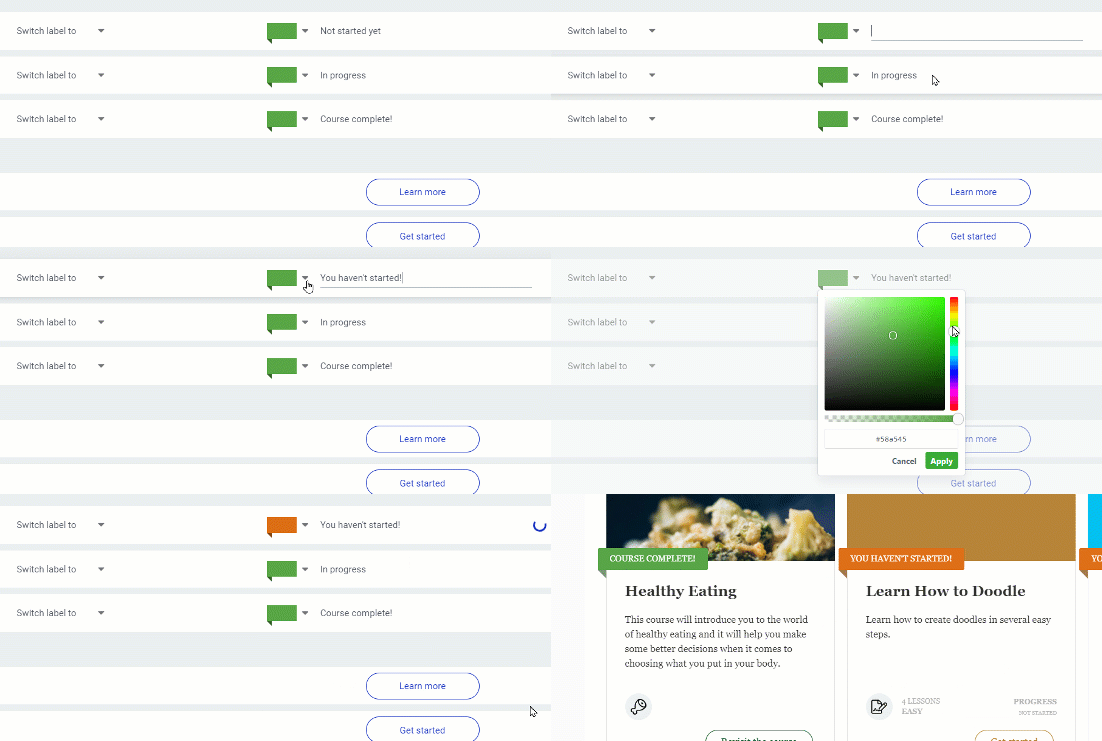
To modify the name of the existing labels, simply click on the existing text, remove it, and enter your own, and then hit “Enter” on your keyboard
-
Change the color of a label
If you want to change its color, click on the down arrow next to the label:

Choose the desired color using the color picker that opens, and click on “Apply”:
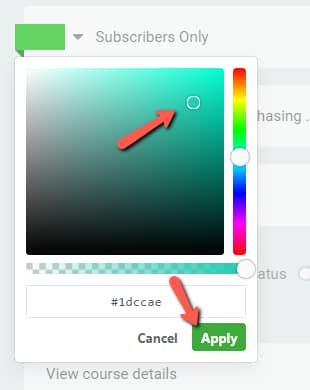
- Remove labels
You can also remove the labels if you want.
|
Note: The default labels cannot be deleted. |
If you want to do that, hover over the label that you want to remove, and click on the trash can icon next to it:

Then, confirm by clicking on the “Delete Label” option:

- Add a new label
To add a new access restriction label, click on the “Add Label” button, from the top right corner of the page:

A new label will be created, and you can customize its name and color, just as shown above:

Switch labels depending on user status
The “Switch labels depending on user status” option will change the labels into the progress of each user if they have access to the course.
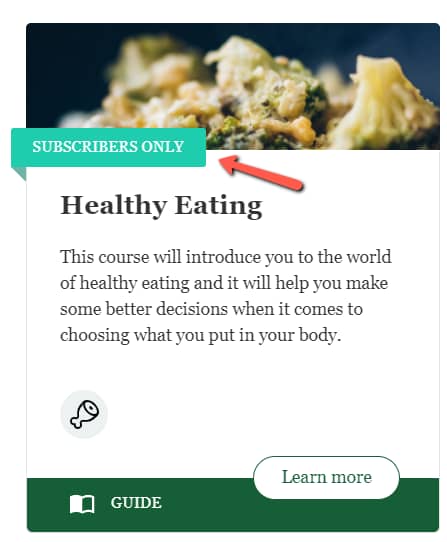
So, for example, if someone is not logged in, they will see this label for a “Subscribers Only” course:
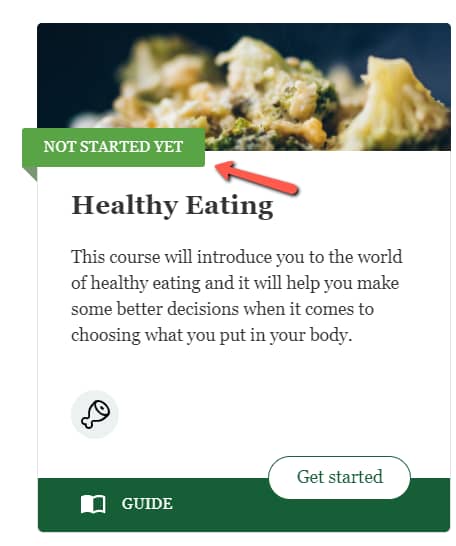
After they sign in, the label will look like this:
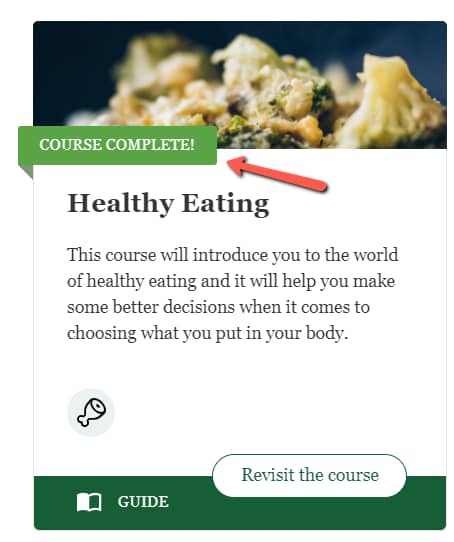
Moreover, once they finish the course, the same label will look like this:
If you want to activate this option, click on the switch next to it:

When you do that, another section will open:

Before the user has access to a course, they will see the access restriction labels presented in the first part of this article. Once they gain access, the labels can show their progress, if you activate this option.
For each of the three situations here, you can choose which label should be shown. These are the situations for which you can choose to show the progress:
- If the user has access but not started the course;
- If the user has started the course;
- If the user has finished the course.
For each one, you can choose what switch the (initial) label to one that you choose here, to hide it, or to make no changes:

Moreover, the progress labels can be customized as well, as you can change their color and the text to be displayed:
These were the ways in which you can customize the access restriction labels.
You can also use dynamic buttons, and you can read this article to find out more about them.
Assign labels to courses
Once you create and customize the labels, you can add them to each of the courses for which you’ve added access rules.
To add a certain label to a course, access the “Courses” section from the left sidebar
Then, click on the course that you want to add an access restriction label to.
In the course dashboard, next to the “Difficulty” drop-down, you can see the “Restriction label” section:
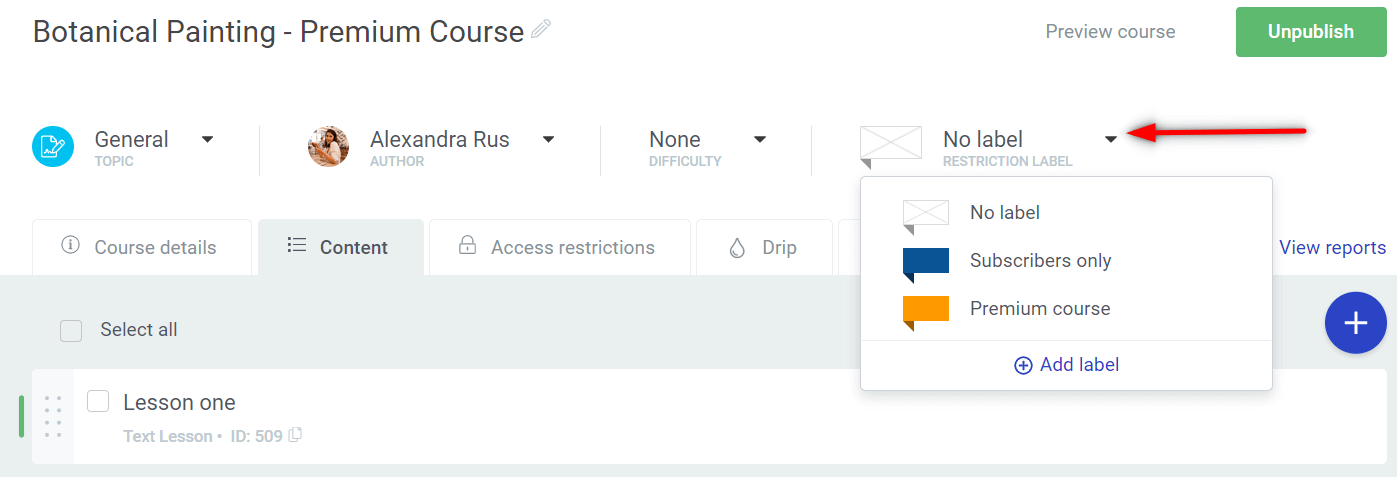
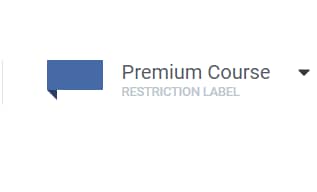
Given the fact that the course from this example is one that can be bought through a checkout too, I’ve added a “Premium Course” type of label:
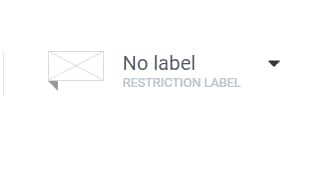
For the courses that do not have any kind of label set, you’ll see this “No label” field selected:
Depending on the rule that you have set up, choose a suitable label. If you are going to offer your course for free, you can advertise it as such:

Lastly, save everything using the “Save” button:

These were the ways in which you can set up “Access restriction labels” and add them to your Thrive Apprentice courses.
Also, don’t forget to check out our knowledge base, for more articles and tutorials about Thrive Themes and all of our products.