The “Featured Image” element comes in handy if you want to showcase the “Featured Images” of your posts/pages on the template that you create.
The “Featured Image” element can be used when you edit a “Page Template” or a “Post Template”. Here is how you can use it:
Select or add the element
If the “Page Template” or a “Post Template” that you are editing already has the “Featured Image” element, then simply click on it to select it.
If you do not have a “Featured Image” on the template yet, then, you will first have to add the element to your template. For that, click on the plus sign from the right sidebar of the editor:
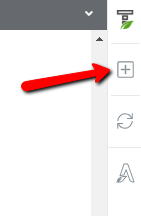
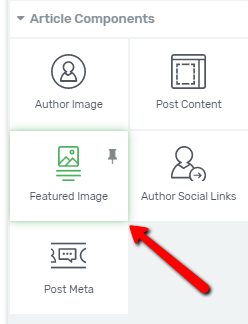
This will open the list of elements that you can choose from. Look for the “Featured Image” element and when you have found it, drag and drop it to the desired place on your template:
Customize the element
After you have selected or added the “Featured Image” element, you will see its options in the left sidebar:
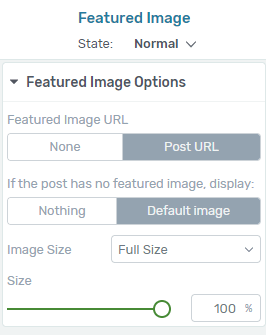
You can use these options to customize the element as follows:
Featured Image URL
With the help of the options from this section, you can link the “Featured Image” to the post/page it represents. By default, the “Post URL” option is selected (you can tell by the grey background that it has):

-
Post URL
If you leave the “Post URL” option selected, then the URL of the post/page will be assigned to the “Featured Image”, making the image clickable.
This way the image will be linked to the respective post/page that you will apply the template to, and people will be able to click on it.
-
None
However, if you do not want the “Featured Image” to link to the Post/Page URL, you can simply click on the “None” option from the “Featured Image URL” section and the image will not be clickable.
Featured Image Title
These two options can be used to set a title for your featured image – you can either choose a post title or the media gallery title:

If your post has no featured image, display
Just as its name says, with this option you can define what should happen, if the post/page, you will be applying your template to does not have a featured image.
There are two options you can choose from here: “Nothing” and “Default Image”:

In order to use either of these, simply click on them. This way the one you clicked on will be selected (will have a grey background) and used, in case it will be needed.
-
Display Nothing
If you select this option, then nothing will be displayed, in the cases when you will apply the template with the “Featured Image” element to a post/page that has no “Featured Image” associated with it.
-
Display default image
If you select this option, then a default image will be displayed, whenever the template that has the “Featured Image” element will be applied to a post/page that does not have a “Featured Image” associated with it.
Image Size
The “Image Size” option gives you the possibility to set the size for the image in the “Featured Image” element. First, click on the field with the current size, next to the “Image Size” option:

This will open a little drop-down with the available sizes that you can choose from:
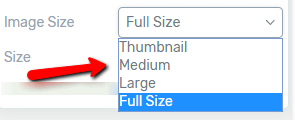
Then, in this drop-down, simply click on the size you want the “Featured Image” to be on your template and that new size will be applied for the “Featured Image”.
Size
With the “Size” option, you can adjust the size of the “Featured Image” element. To modify the size of the element, either drag the slider from the “Size” section or enter a percentage value in the field next to the slider:

General options
Besides the “Featured Image Options”, you can see that some of the more general options are also available, in the left sidebar, for the “Featured Image” element:
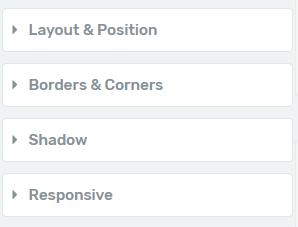
You can use these general options (such as the “Layout & Position” or the “Borders & Corners” options) to customize the element further.
If you want to find detailed information on how to use the general options, please check out our knowledge base, because we have separate tutorials on each of them.
Moreover, you might also be interested in this article, in which we’re showing the ways to hide or show a “Featured Image” when customizing your pages, posts and templates.
After you have finished customizing the “Featured Image” element, you can save the work you have done on the template, using the “Save Work” button, from the bottom-left part of the editor. Then, you can continue building your template using the other options and elements of the Thrive Theme Builder editor.
For more information about other Thrive Theme Builder elements and options, check out our knowledge base here.
Hopefully, this article was useful for you. If so, please give it a smile below 🙂