When using Thrive Theme Builder, the “Post Content” element is an important element because it represents the content of your posts/pages. However, this element is not like other usual elements from your Thrive Theme Builder editor.
Here is how and why this element is different and how you can use it:
Important aspects of the Post Content element
- First and foremost, you should know that the “Post Content” element is automatically inserted on each “Post Template” and “Page Template” (the default ones, as well as the ones that you add).
You can see this when you edit any of your “Post Templates” or “Page Templates”. The “Post Content” element will already be added to the template in the editor.
This is one of the main differences between this element and other elements. While you may need to add other elements to your “Post Template”/”Page Template”, in order to use them, the “Post Content” element will be added by default.
- Another key aspect of the “Post Content” element is that this element is a dynamic element. This means that the content of the element from the template will change, depending on what post/page the template will be applied to.
For example, whenever you apply a “Post Template” to a post, the “Post Content” element from it will display the content of the respective post.
If you apply the same “Post Template” to another one of your posts, then the “Post Content” element from it will show the content of that specific post. This is why the element is a dynamic one.
Since having content on a template is crucial, you cannot remove the initial “Post Content” element from the template, while you edit it.
If the “Post Content” element would be removed, then there would be no content displayed, when you apply the template to a post/page.
When you select any other element inside the editor on the template, you will notice four different options, represented by four icons, on the top right corner of the selected element, like this:

This means that you can move, save, duplicate or delete a regular element.
However, since the “Post Content” element is different, out of the four, only the “Move” option will be available for it.
You cannot save, duplicate or delete the default dynamic “Post Content” element; you can only move it to another position on the template. Therefore, you will only be able to see the “Move” icon when this element is selected:

However, if you use more than one “Post Content” element on a template, you are able to remove/duplicate/save the other ones. The restriction only applies to the one that has been automatically inserted into the template.
Using the Post Content Element
General Options
As you will notice, unlike other elements, the “Post Content” element does not have any specific options in the left sidebar, when it is selected. Again, this is because the “Post Content” element is not a static element, but a dynamic one.
You do not need to customize it, since its content is dependent on the post/page to which the template with it will be applied.
Nevertheless, the “General Options” of the element are available in the left sidebar for this element too.
This means that you can use these general options, in order to edit certain design-related aspects, such as the “Layout & Position”, or the “Animation & Action” of the “Post Content”:
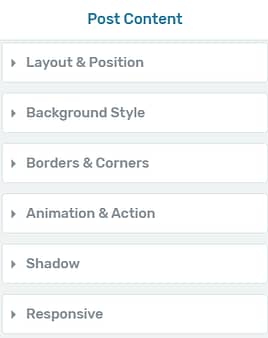
All the information you may need about how to use these general options can easily be found in our knowledge base, here.
Preview the “Post Content” element
You have the option of previewing how the content of various posts/pages would look like in the “Post Content” element (if the template containing it, would be applied to the posts/pages).
In order to do this, you will have to use the “Content Drop-down” from the top right corner of the editor:

With the help of this drop-down, you can select the post/page with the content you want to preview on the template and therefore in the “Post Content” element. If you are not familiar with how this “Content Drop-down” works, this article goes into more details about it.
Edit the content
The only way of editing the content that you are previewing on the template and in the “Post Content” element is to switch to Thrive Architect. If you want to do that, you can click on the last option from the right sidebar:
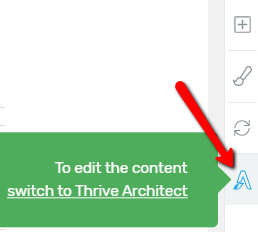
This will take you to the Thrive Architect editor, where you will be able to make modifications to the content.
However, if you use more than one “Post Content” element on a “Post Template”, you are able to remove/duplicate/save the other ones. The restriction only applies to the one that has been automatically inserted into the template.
That being said, if for some reason, you need to duplicate the content of a template, you can add another “Post Content” element to it. Keep reading if you want to find out how you can do that.
Add the Element to the Template
In the Thrive Theme Builder editor, click on the plus sign from the right sidebar:
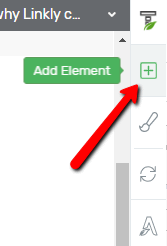
When you do that, a list of all the available elements will open. Look for the “Post Content” one, or type its name in the search bar:
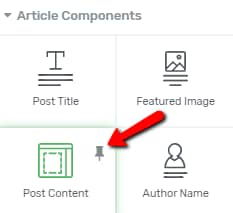
Once you find the element, drag and drop it anywhere you want on the editor:
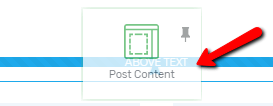
After the new element is added to the template, you will be able to use it the same way as described above, for the default “Post Content” element, except for one thing:
- If you add another “Post Content” element on a “Post Template”, besides the default one, you will be able to remove/duplicate/save it. The restriction mentioned above, where these options are not available, only applies to the “Post Content” element that has been automatically inserted into the template.
This concludes the article about the “Post Content” element. For more information regarding Thrive Theme Builder, make sure to read the articles we have created and posted in our Thrive Theme Builder section of the knowledge base.