Do you want to allow users to login to your website using their WordPress account? This can be done when you activate the WordPress integration in the Thrive Dashboard.
In this article, we’ll show you how you can enable an integration between the Thrive Dashboard and WordPress and use it within a Thrive form.
- Enabling a WordPress Account in Thrive Dashboard
- Using the WordPress Account Connection in a Thrive Form
Enabling a WordPress Account in Thrive Dashboard
To enable a WordPress account, open your WordPress admin area, navigate to Thrive Dashboard >> Thrive Dashboard, scroll down to API Connections and click on Manage Connections.

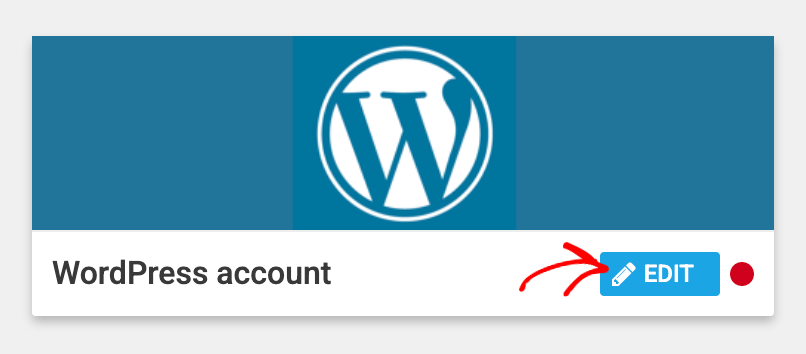
On the Manage API Connections page, hover on the WordPress account block and click on Edit.
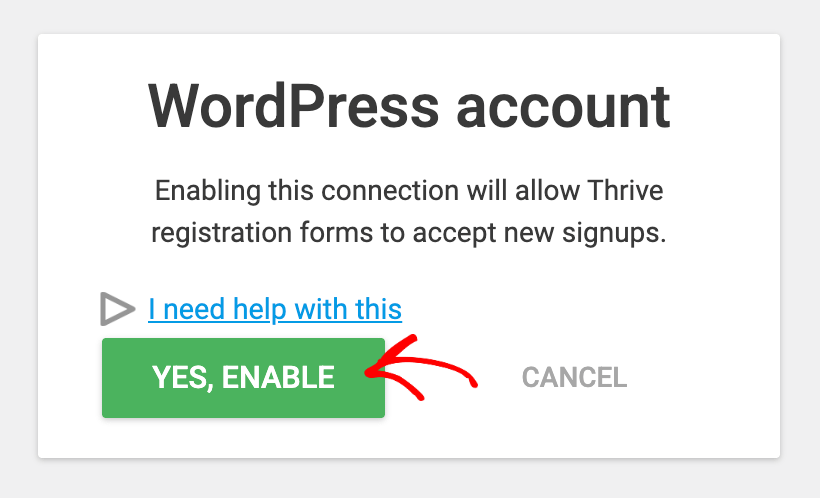
When you click Edit, you’ll see the next stage where you click Yes, Enable to enable the connection.
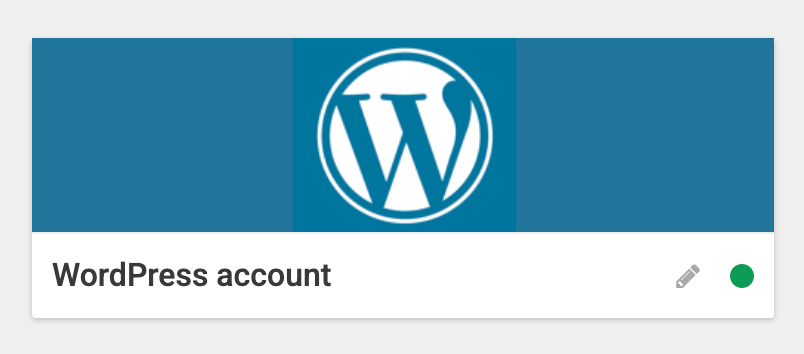
After you enable the WordPress account integration, you’ll see a green dot on the WordPress account block showing that it is enabled.
Using the WordPress Account Connection in a Thrive Form
When you’ve enabled the WordPress account integration in the Thrive Dashboard on your website you can now proceed to add it to a form on a page.
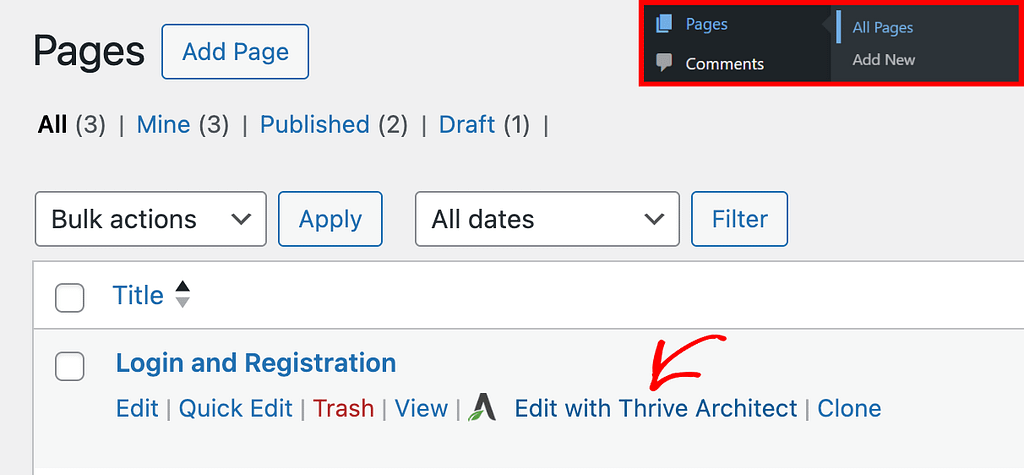
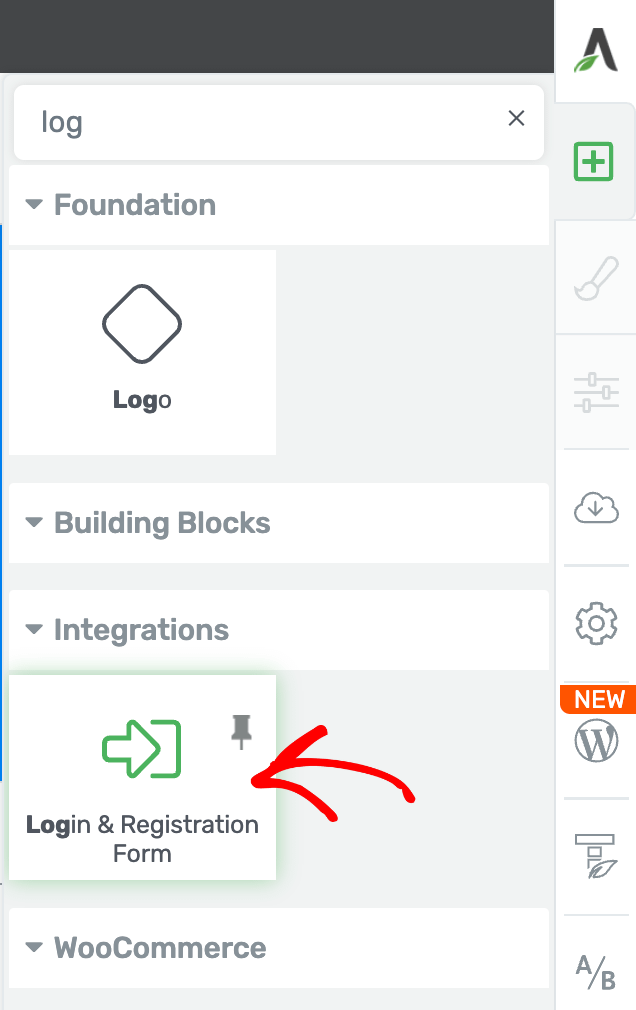
To do so, open your WordPress admin area, navigate to Pages >> All Pages, hover on the page you want to edit, click Edit with Thrive Architect.
In the Thrive Architect editor, go to the right panel, click the plus (+) sign, and drag and drop the Login and Registration element on the page.
When you drag and drop the element on the page, you’ll see a popup where you select the template you want to use.
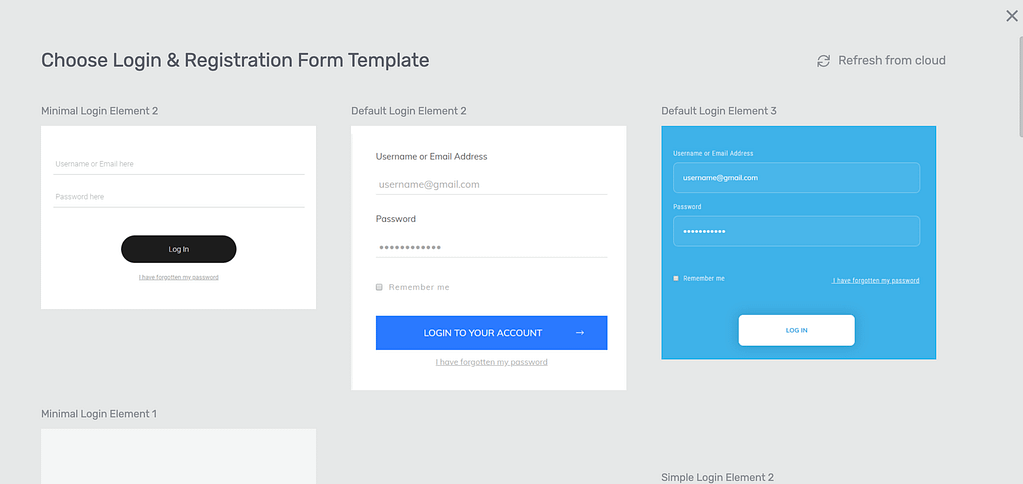
After selecting the template for the Login and Registration element, you’ll see that added on the page.
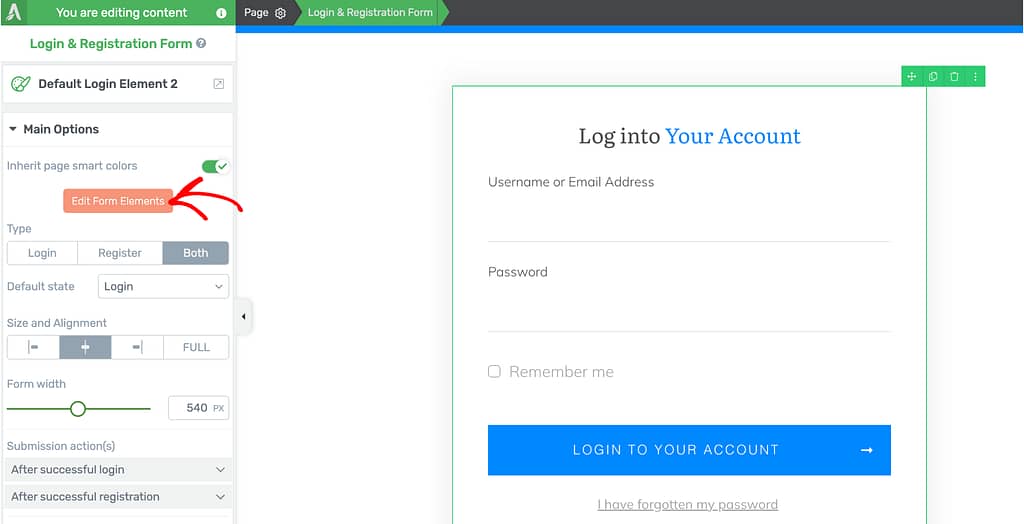
When the WordPress account integration is enabled and the Login and Registration element added to the page, you’ll see the WordPress registration page integrated in the element.
If you want to ensure the connection, click the form on the page and click the Edit Form Elements in the left column.
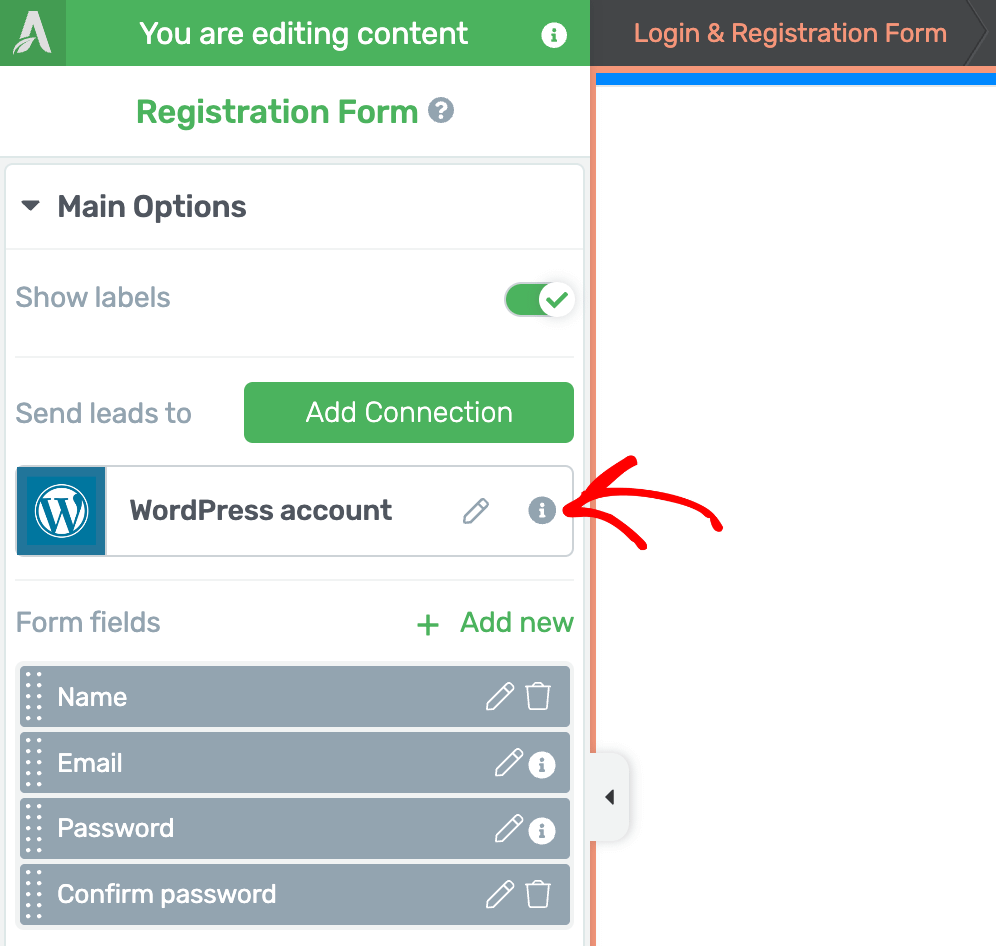
In the Form Element’s editor mode, click the dropdown to select the registration form.

Selecting the Registration Form in the Editor mode will list the WordPress account under Connections in the left column.
We’ve just seen how you can enable a WordPress account connection and use that inside a Login and Registration Element in Thrive Architect.
Need help using a Login & Registration Form element? Here’s a document that will help.
Next, do you want to set up a login and registration page on your website? You can refer to our document here that will help.