In this article, you’ll learn how to connect your Mailchimp account to Thrive Themes. This allows you to automatically send leads captured through Thrive Leads or Thrive Architect directly to your MailChimp lists and apply specific tags.
Get Your MailChimp API Key
- Log in to your Mailchimp account.
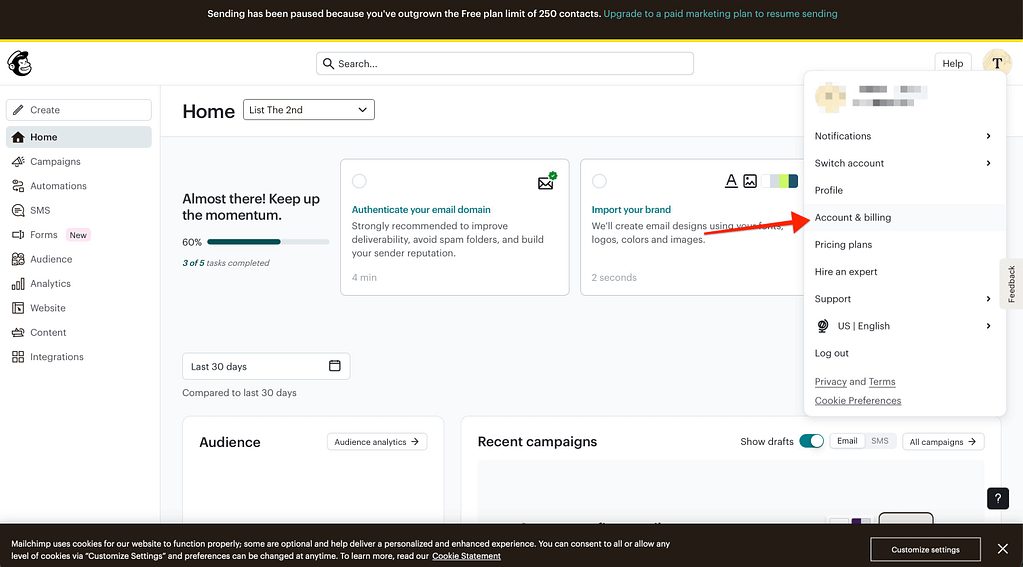
- Click your Profile Picture in the top right and select Account & billing.
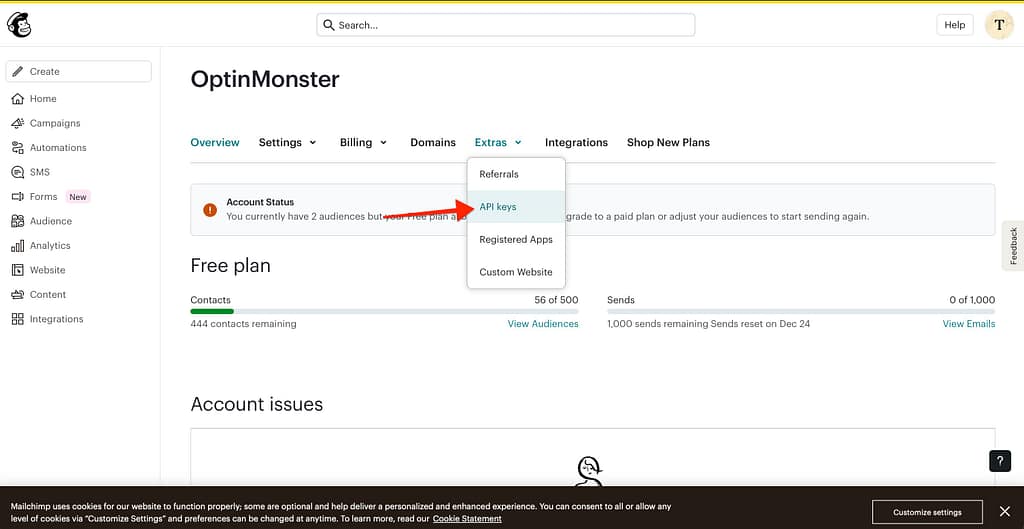
- Click the Extras tab and select API Keys.
- Scroll down to the API keys section and click Create A Key.
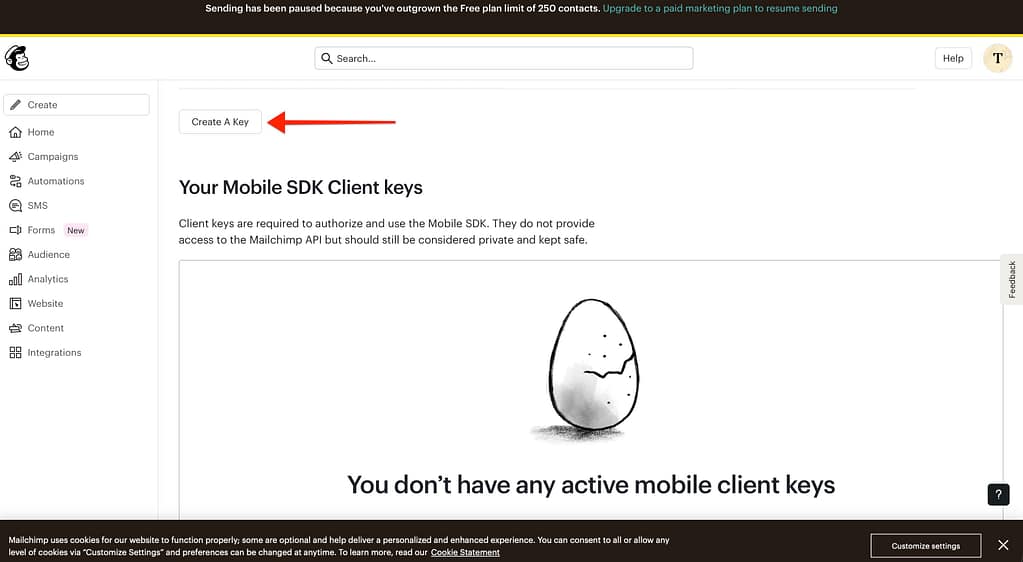
- Enter a name for your key (e.g., “Thrive Integration”) and click Generate Key.
- Click Copy to Clipboard to save your API key.
Connect to Thrive Dashboard
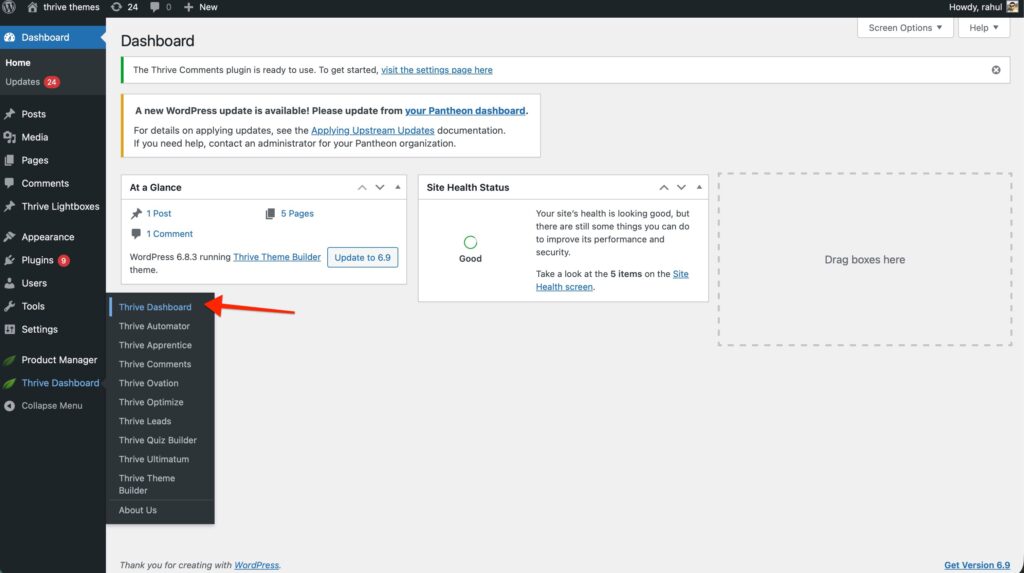
- Log in to your WordPress admin dashboard.
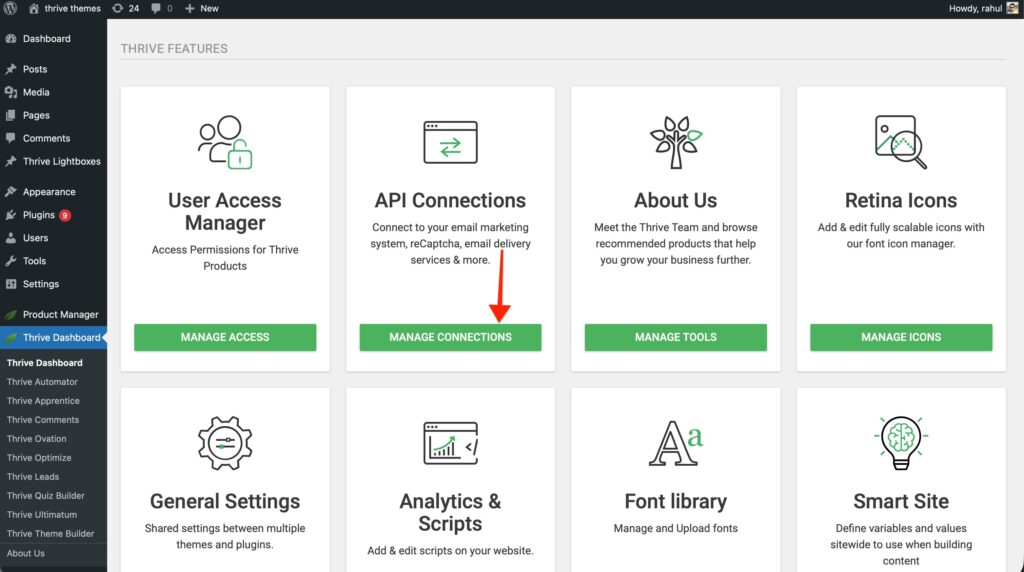
- Navigate to Thrive Dashboard > Thrive Dashboard.
- Scroll to the API Connections card and click Manage Connections.
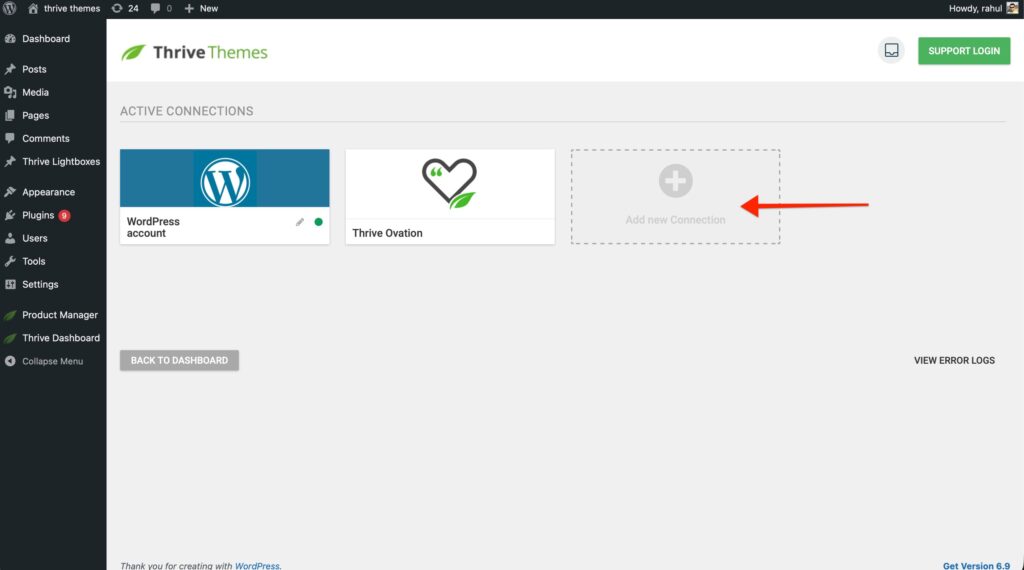
- Click Add New Connection.
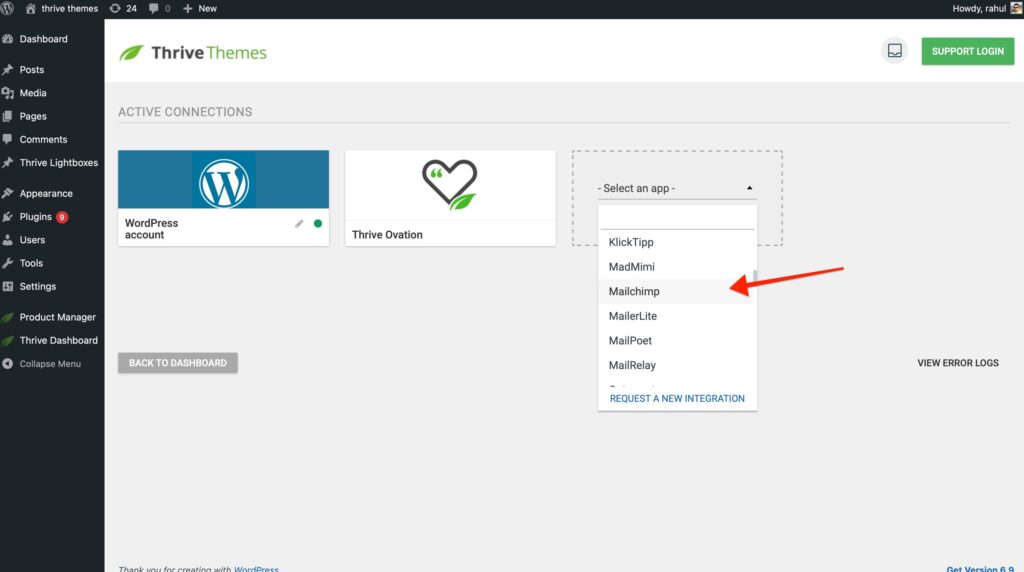
- Select MailChimp from the dropdown menu.
- Paste your API Key into the field.
- Optional: Check the box to use Transaction Email (formerly Mandrill) if needed.

- Optional: Check the box to use Transaction Email (formerly Mandrill) if needed.
- Click Connect.
Connect to a Lead Generation Form
Once connected, you can use Mailchimp with any lead generation form.
- Open your page or form in Thrive Architect or Thrive Leads.

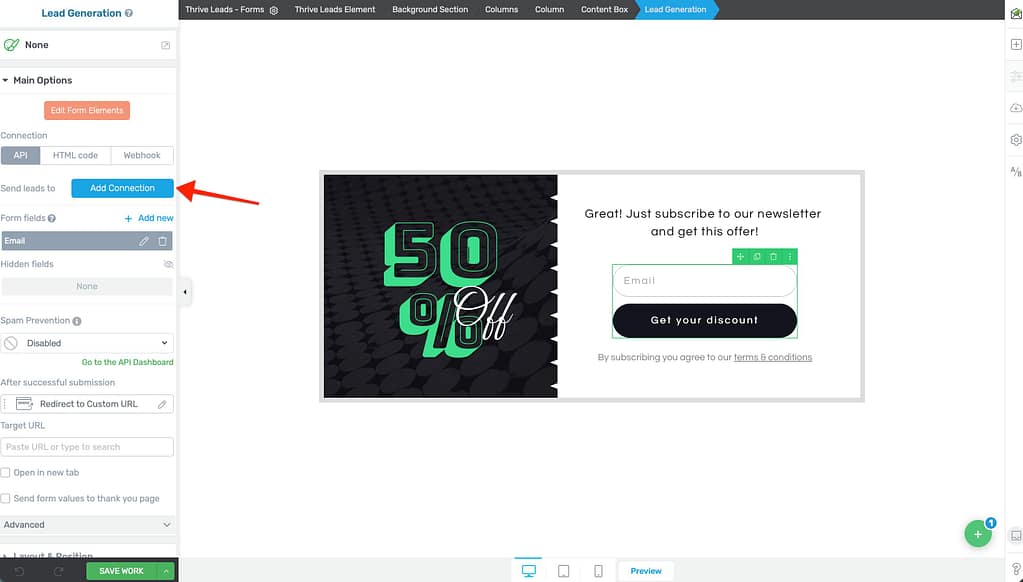
- Click on the Lead Generation element to select it.

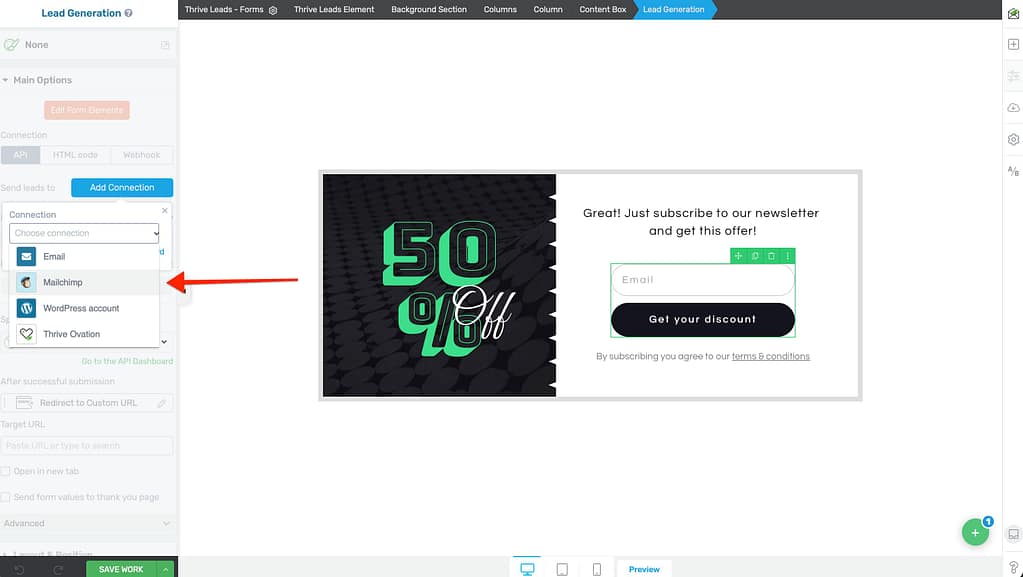
- In the left sidebar, click Add Connection.
- Select MailChimp from the dropdown.
- Mailing List: Choose the list where you want to add subscribers.
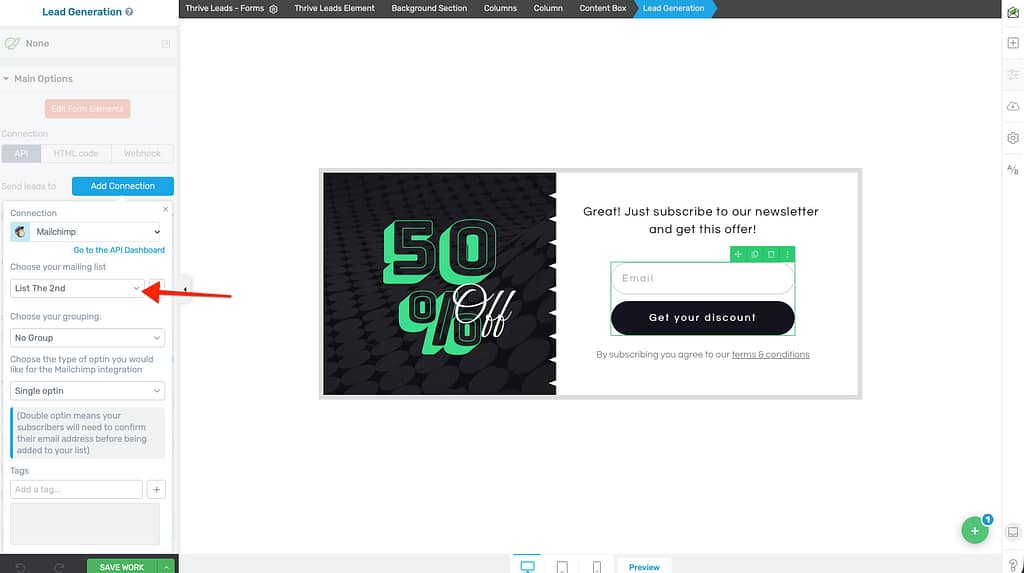
- Grouping: (Optional) Select a grouping if you want to segment leads further.
- Opt-in: Choose Single or Double opt-in.
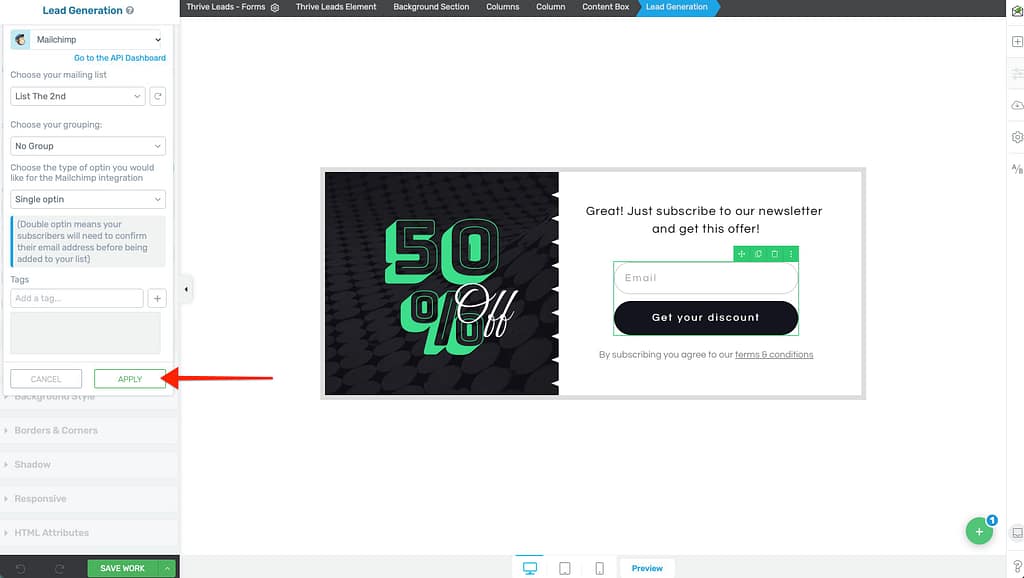
- Tags:
- Click in the Tags field to see a dropdown of all available tags.
- Refresh Tags: If you recently created a tag in Mailchimp and don’t see it, click the Refresh button to update the list immediately.
- Select Multiple: You can select multiple tags to apply to new leads.
- Create New Tag: Type a new tag name and click + Add new tag: [tag-name] to create it instantly.
- Click Apply to save your settings.
Related Resources
- SmartLinks: Using the Thrive Leads SmartLinks Feature.
- AWeber: Setting up an API Connection with AWeber.
- KlickTipp: Setting up an API Connection with KlickTipp.