This article will detail the steps for setting up a “Navigation Menu” for your WordPress pages.
This is not a Thrive Themes specific feature – this is a tutorial about how you can use the WordPress core menu functionality to add menus to your site.
What is a Menu?
A menu is a navigation component that can be added to menu areas in your WordPress dashboard.
The idea is that you have one centralized area where you can manage your navigational menus.
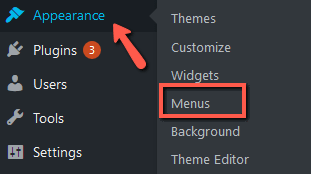
First of all, go to the “Appearance” section of your WordPress admin dashboard and click on “Menus”:
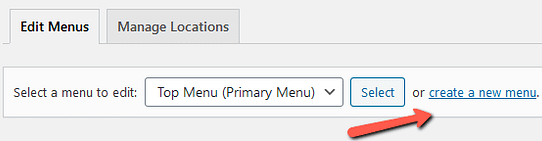
On the page that opens, click on “Create new menu”:
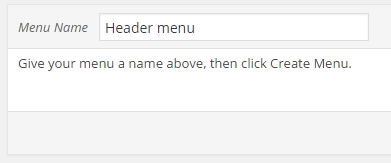
Give your new menu a meaningful name:
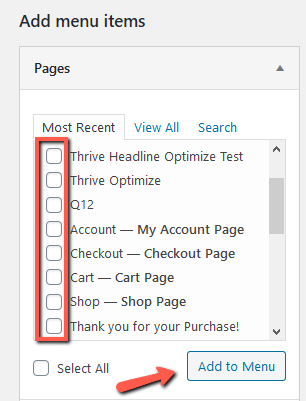
You can then start adding items to your menu using the control panel on the left-hand side of your screen. Simply select the content that you wish to link and then click “Add to Menu”:
You’ll notice that you can rearrange menu items easily by dragging and dropping the various components:

You’ll also notice that by clicking on any individual menu item, you can open up a list of options that you can use to customize the display:
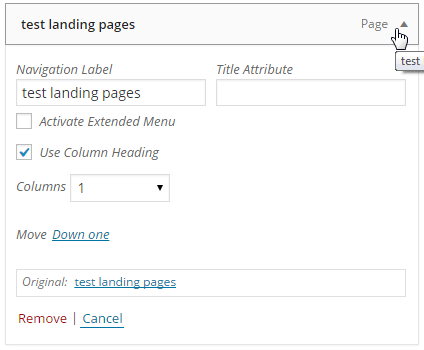
The navigation label allows you to set the text that will appear on the menu item.
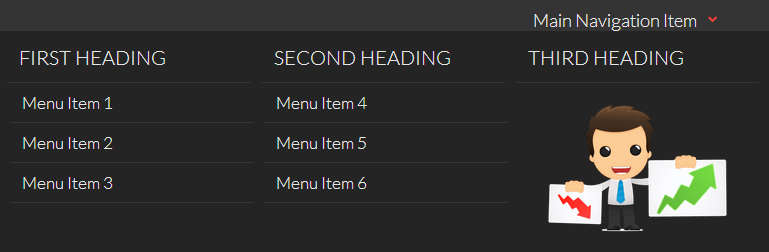
In the example above, you can also the option “Activate extended menu”. This allows you to create high impact extended menus such as the one shown below:
How to Display a Menu in your Site
There are a few different ways in which you can show menus on your site.
Adding a Menu Through Designated Theme Menu Areas
Firstly, your theme will have designated menu areas. These areas are specific to each theme that you use.
The list of available menu areas are displayed at the bottom of the menu screen under the title “Menu Settings”:
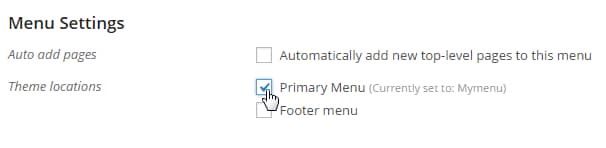
Simply click the menu location where you want the menu to display, and it will be attached to the theme.
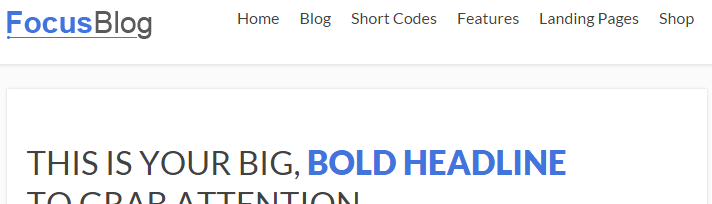
The menu will be displayed in different locations and styles, depending on the theme that you’re using. For instance, a header menu looks like this:
Whereas in Pressive the menu looks like this:

Adding a Menu Through a Sidebar Widget
You also have the ability to add the menu widget to any sidebar region that your theme has.
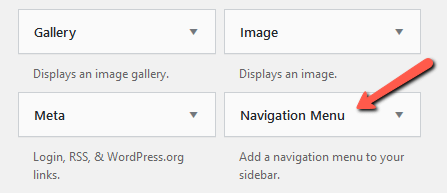
To do that, go to the “Appearance” section of your WordPress admin dashboard and click on “Widgets” in order to see the standard widget screen:

Here you can look for the “Navigation Menu” widget:
Once found, and drag this into a sidebar:
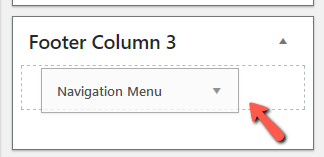
Here you can see I’ve dragged the “Navigation Menu” into the sidebar named “Footer Column 3”.
To be clear on the terminology: the official word for a designated widget area is called a sidebar. Again, these sidebars and their locations depend on the theme that you’re using. Some themes, for instance, may have three footer widget areas whereas others may only have one, or even none at all.
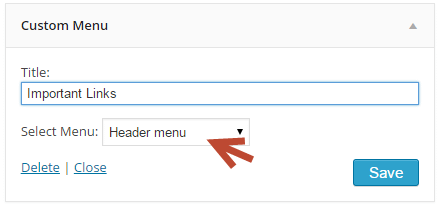
Once you’ve added the widget to the sidebar of your choice, you can then expand the options to choose add a Title (optional) and select the menu location:
Adjusting the Look and Feel of your Menus
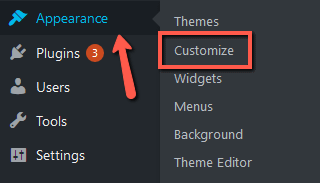
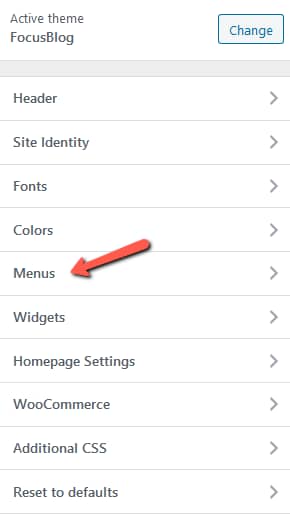
If you’re using a Thrive Theme, then you can modify the look and feel of your menu items by going to the “Appearance” section of your dashboard, and clicking on “Customize”:
On the new page that opens, click on “Menus”:
This will take you to a new sidebar menu, from where you can further customize your menu items as you best see fit. There are two main sections from where you can do that: “Menus” and “Menu Locations”:
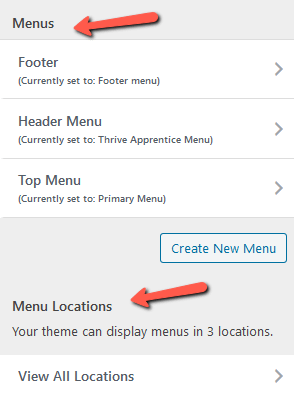
Menus
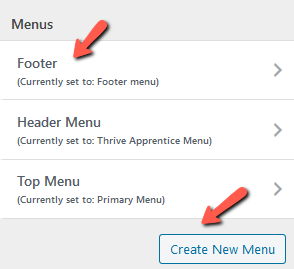
In the first section of the newly opened sidebar, you will be able to see the menus that you have set up, as well as create a new menu by clicking on the “Create New Menu” button:
If you click on any of the available menus, a new sidebar will expand:
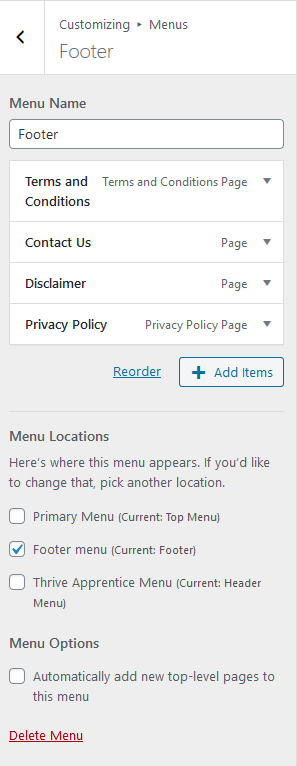
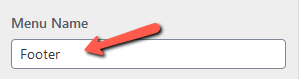
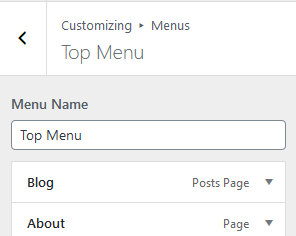
From here, you can change the “Menu” name:
You can also reorder the “Menu” items as you best see fit by clicking on the “Reorder” button, or simply by moving around the items:
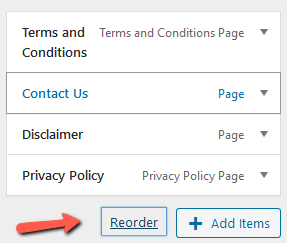
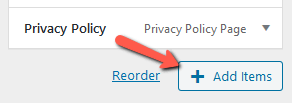
Last but not least, you can also add new items to your menu by clicking on the “Add Items” button:
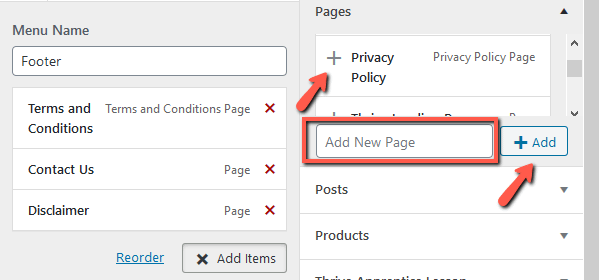
In the extended menu that appears, click on the plus sign next to each page that you’d like to add to the menu or simply search for the page in the “Add New Page” field, and then click “Add”:
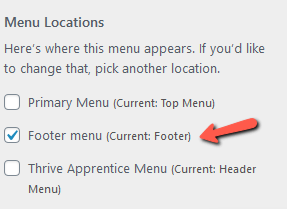
The next section of the left sidebar shows the “Menu Locations”.
From here you can see where is your menu located, but you can also choose another location by simply ticking the checkbox next to the new location in which you want your menu to appear:
From the “Menu Options” section you can enable the option of automatically adding all your top-level pages to the menu you are currently editing:

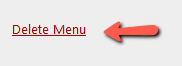
Lastly, if you want to delete your menu, you can do so by clicking on the “Delete Menu” option:
Menu Locations
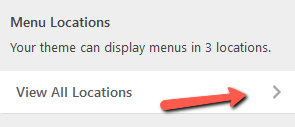
Another way in which you can see the locations in which your menus appear is by clicking on “View All Locations” from the “Menu Locations” section:
The new window that opens will let you know the number of menus that your current theme is able to support, as well as the location of each of your menus:
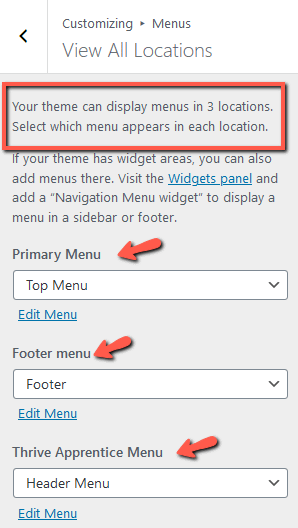
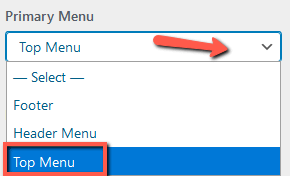
If you want to change the location of a menu, just click on the drop-down list and choose a new one:
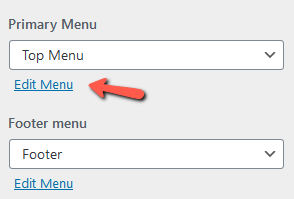
Lastly, if you click on “Edit Menu”, you will be taken back to the initial customizing menu described above:
Hopefully, this article about how to create a “Navigation Menu” in your WordPress account was helpful to you.