In this article, you’ll learn how to connect the three most popular WordPress membership plugins—WishList Member, MemberPress, and MemberMouse—to Thrive Apprentice so you can control course access based on membership levels.
Note: Thrive Apprentice has a built-in membership and payment system powered by Stripe. You only need a membership plugin if you already run a membership site or require advanced multi-tier access control beyond what the native tools provide.
How Membership Plugins Work with Thrive Apprentice
All three membership plugins follow the same general pattern when integrated with Thrive Apprentice:
- The membership plugin manages your users, membership levels, and payments.
- Users sign up or purchase a membership through the membership plugin.
- Thrive Apprentice reads the membership level data from the plugin.
- You configure access requirements on your Thrive Apprentice products to restrict courses to specific membership levels.
- When a user logs in, Thrive Apprentice checks their membership status and grants or denies course access automatically.
This means you manage members in one place (the membership plugin) and manage courses in another (Thrive Apprentice), while the two systems communicate seamlessly behind the scenes.
WishList Member
WishList Member is a WordPress membership plugin that offers access control, multiple membership levels, payment processing, and marketing tools. When connected to Thrive Apprentice, it lets you restrict course access based on WishList Member membership levels.
Prerequisites
- WishList Member plugin installed and activated on your WordPress site
- At least one membership level created in WishList Member
- At least one product created in Thrive Apprentice with a course assigned to it
How to Set Up WishList Member Access
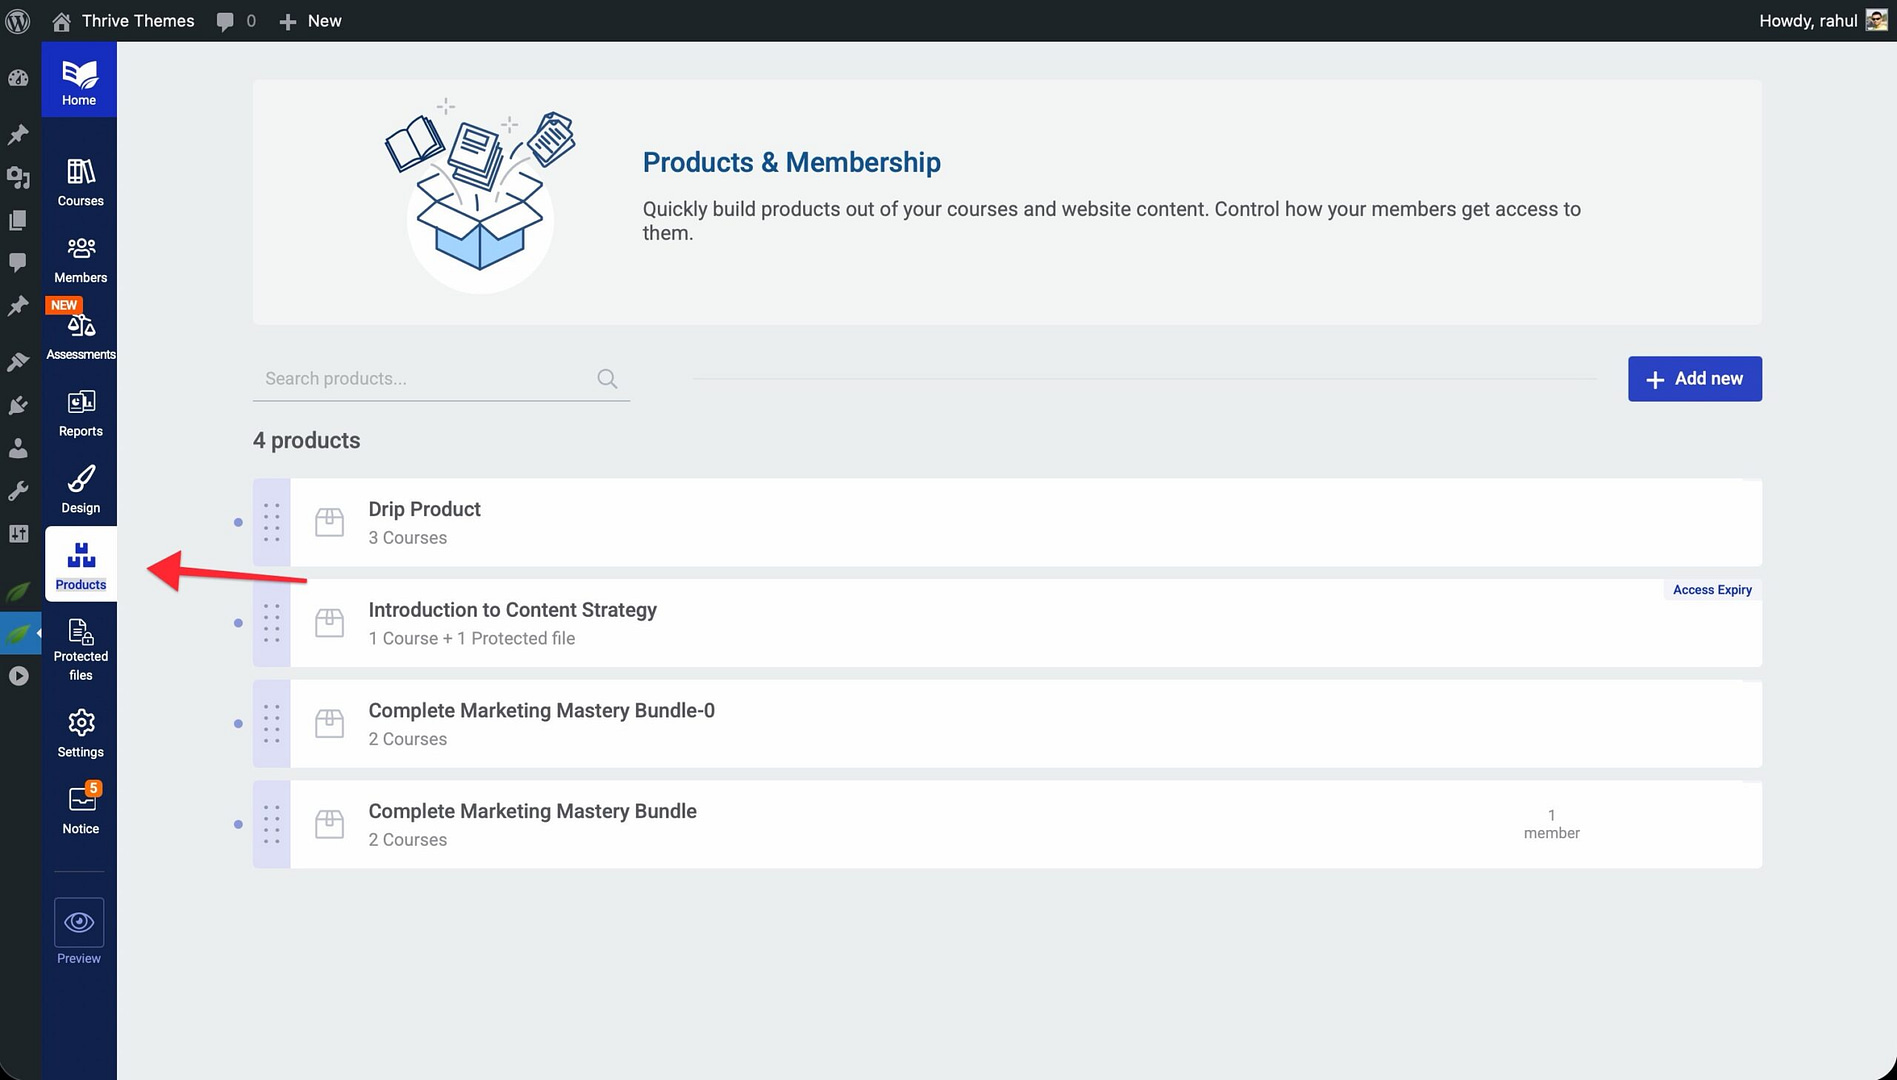
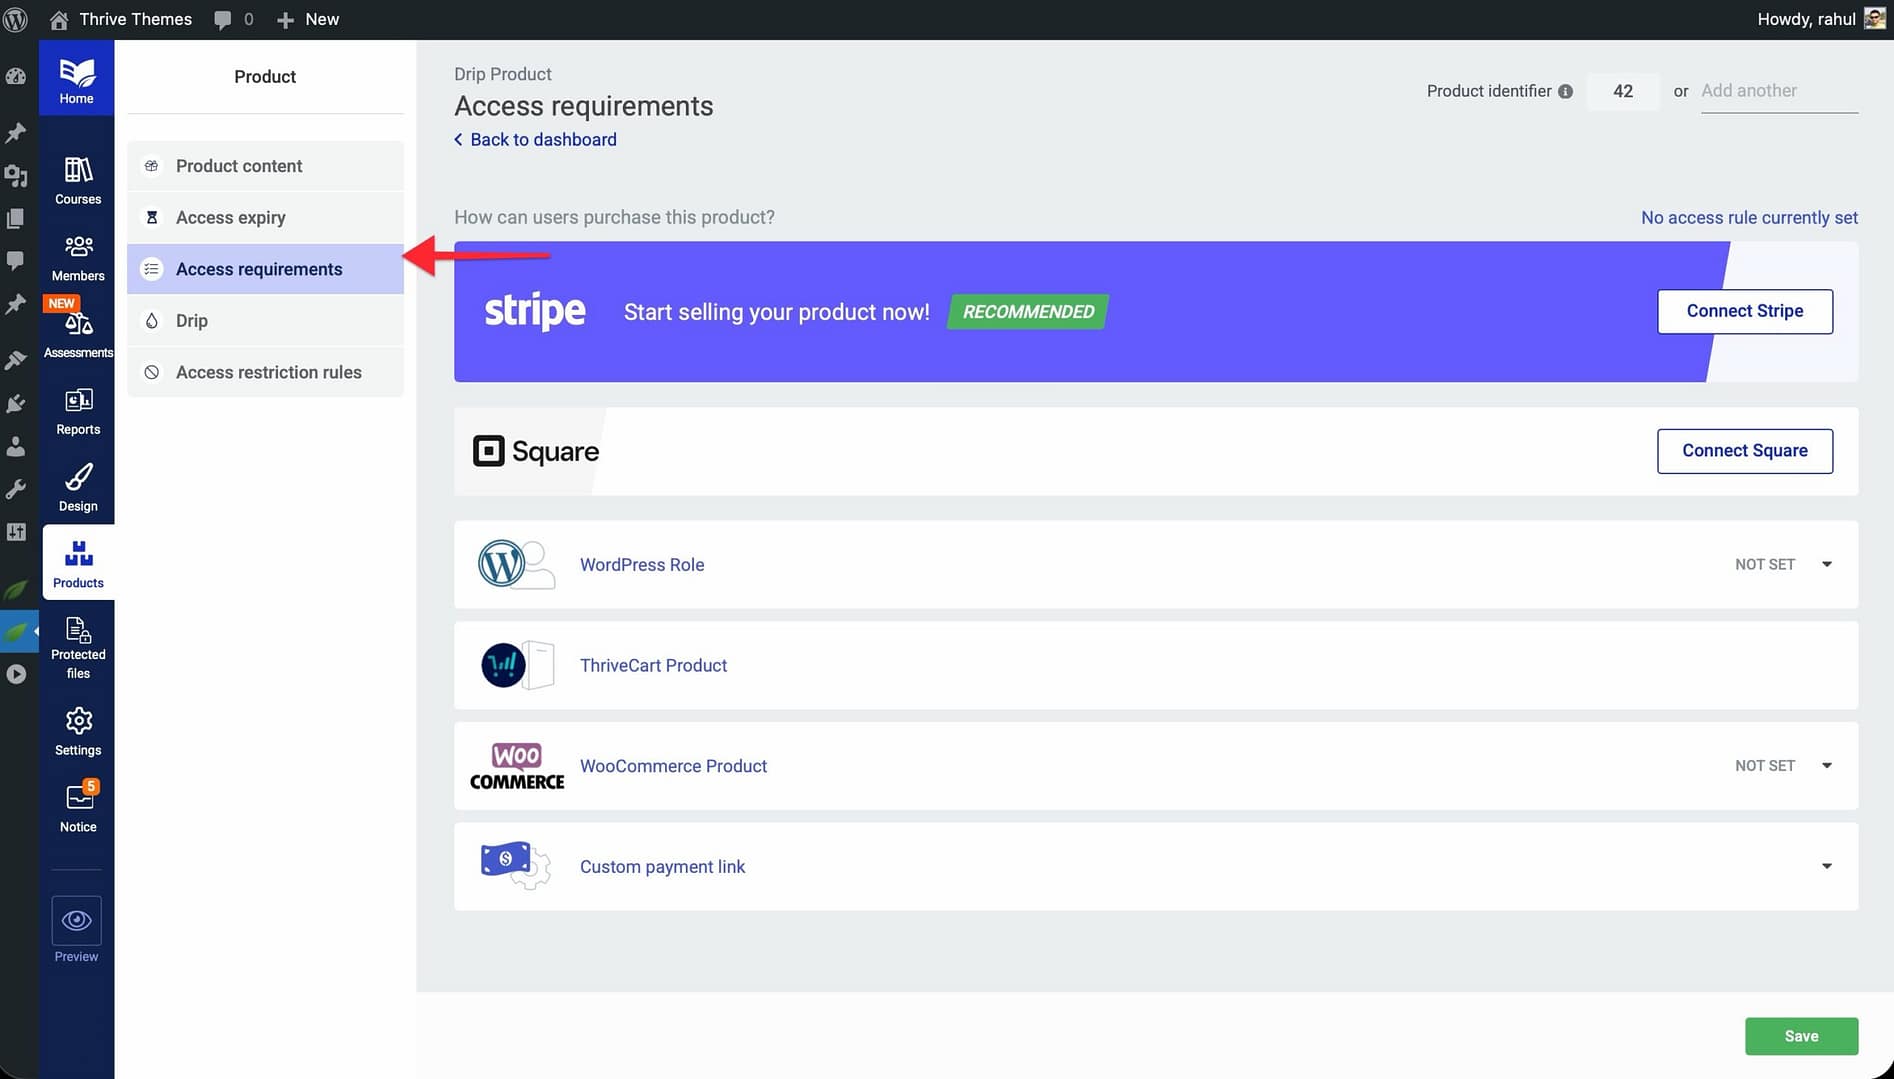
- Go to Thrive Dashboard > Thrive Apprentice.
- Click Products in the left sidebar.
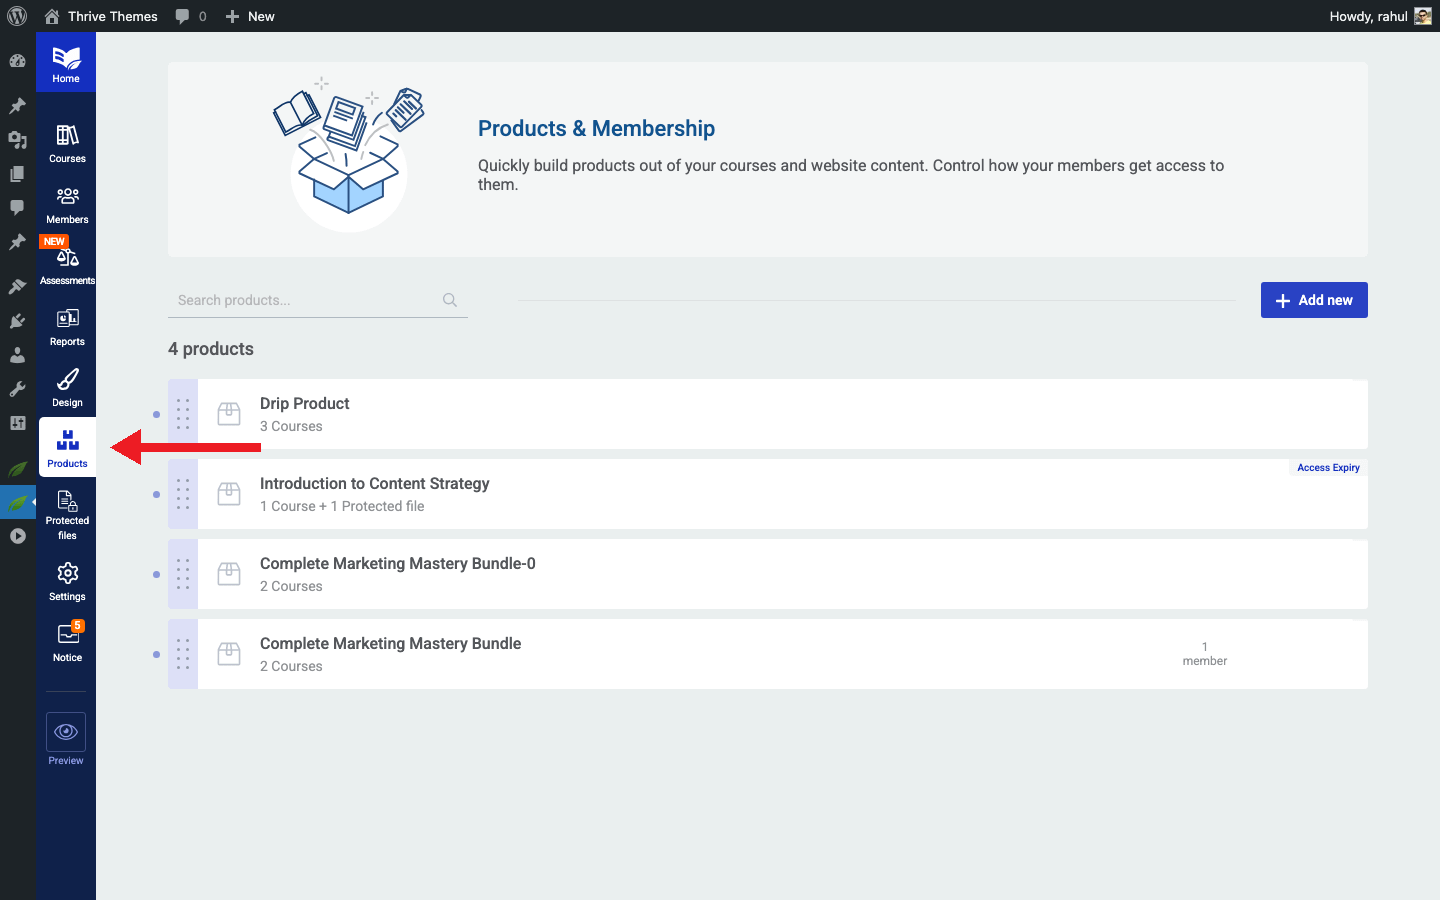
- Select the product you want to protect.
- Click the Access requirements tab.
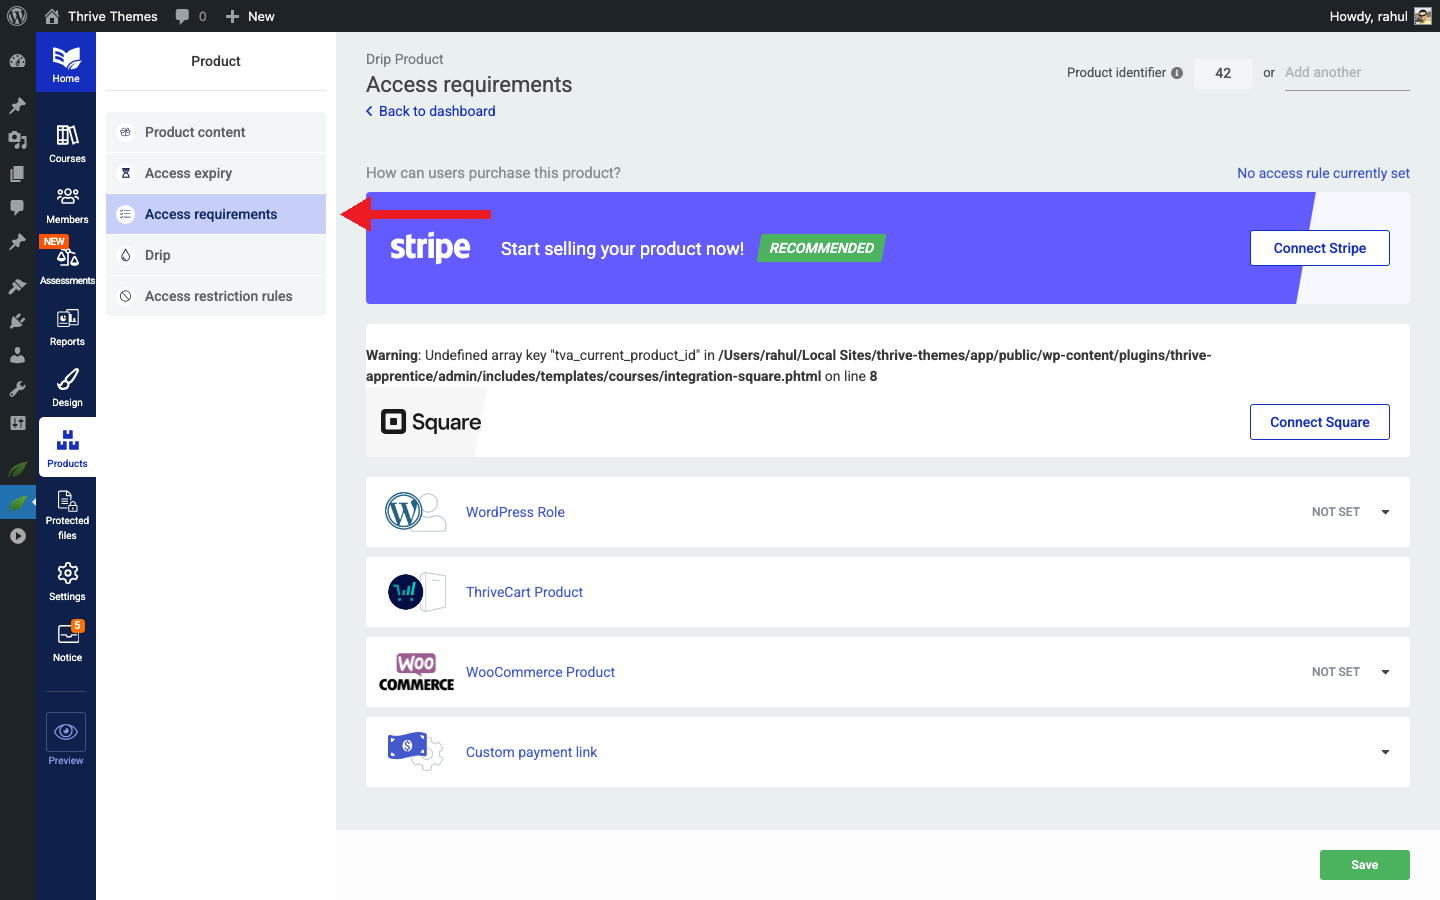
- In the access requirements panel on the right, look for the WishList Member protection options.
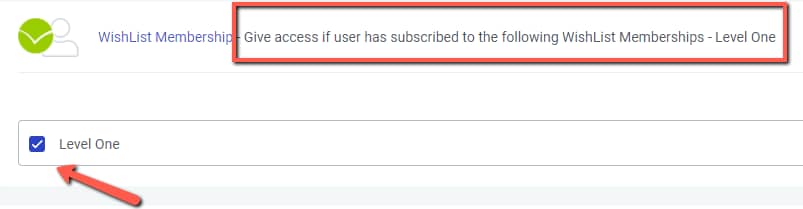
- Select the WishList Member membership level(s) that should grant access to this product.
- Save your changes.
Once configured, only users with the selected WishList Member membership level will be able to access the courses inside that product. Users without the correct level will see a restricted access message or be redirected to a registration page—depending on your settings.
Key Settings
- Membership levels: You can assign one or multiple levels to a single product, giving you flexible tiered access.
- Access requirements panel: This is where you’ll see all available WishList Member levels pulled directly from the plugin.
- Restricted content behavior: Configure what non-members see when they try to access protected content in your Thrive Apprentice design settings.
MemberPress
MemberPress is a premium WordPress membership plugin known for its advanced features—coupons, access rules, reminders, and drip content. When integrated with Thrive Apprentice, your MemberPress membership levels are imported directly and used to control course access.
Prerequisites
- MemberPress plugin installed and activated on your WordPress site
- At least one membership level (called “Memberships” in MemberPress) created
- At least one product created in Thrive Apprentice
How to Set Up MemberPress Access
- Go to Thrive Dashboard > Thrive Apprentice.
- Click Products in the left sidebar.
- Select the product you want to protect.
- Click the Access requirements tab.
- In the access requirements panel, locate the MemberPress protection options.
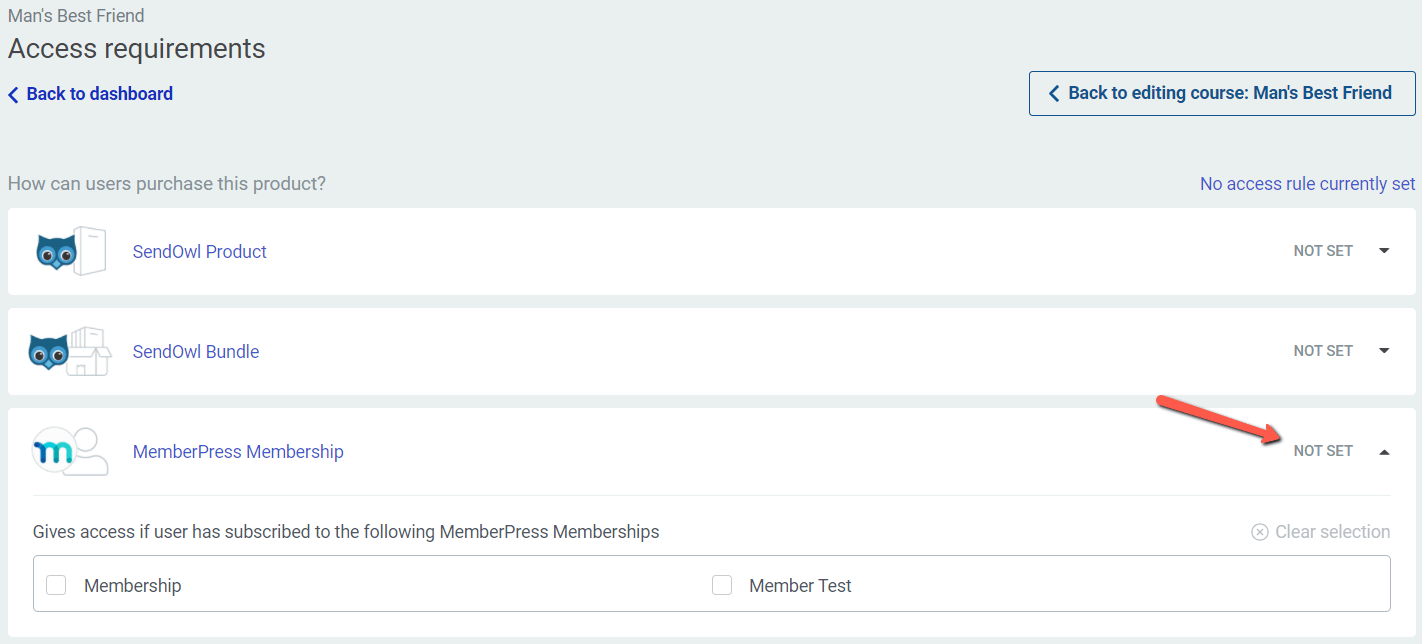
- Choose the MemberPress membership level(s) that should grant access.
- Save your changes.
The membership level entries are imported straight from MemberPress, so any levels you create there will automatically appear in Thrive Apprentice’s access settings.
Key Settings
- Membership levels: Directly imported from MemberPress—no manual syncing required.
- Restricted access behavior: When a user without the required membership tries to access a course, they can be redirected to a login or registration page, or shown custom restricted content.
- Coupons and rules: These are managed inside MemberPress itself. Thrive Apprentice reads the resulting membership status.
MemberMouse
MemberMouse is a subscription and membership plugin that offers content restriction, billing, customer management, and membership tier creation. When connected to Thrive Apprentice, you can restrict course access based on MemberMouse membership levels or bundle purchases.
Prerequisites
- MemberMouse plugin installed and activated on your WordPress site
- At least one MemberMouse product created
- Membership levels established in MemberMouse
- A bundle configured in MemberMouse (if using bundle-based access)
How to Set Up MemberMouse Access
- Go to Thrive Dashboard > Thrive Apprentice.
- Click Products in the left sidebar.
- Select the product you want to protect.
- Click the Access requirements tab.
- In the access requirements panel, find the MemberMouse protection options.
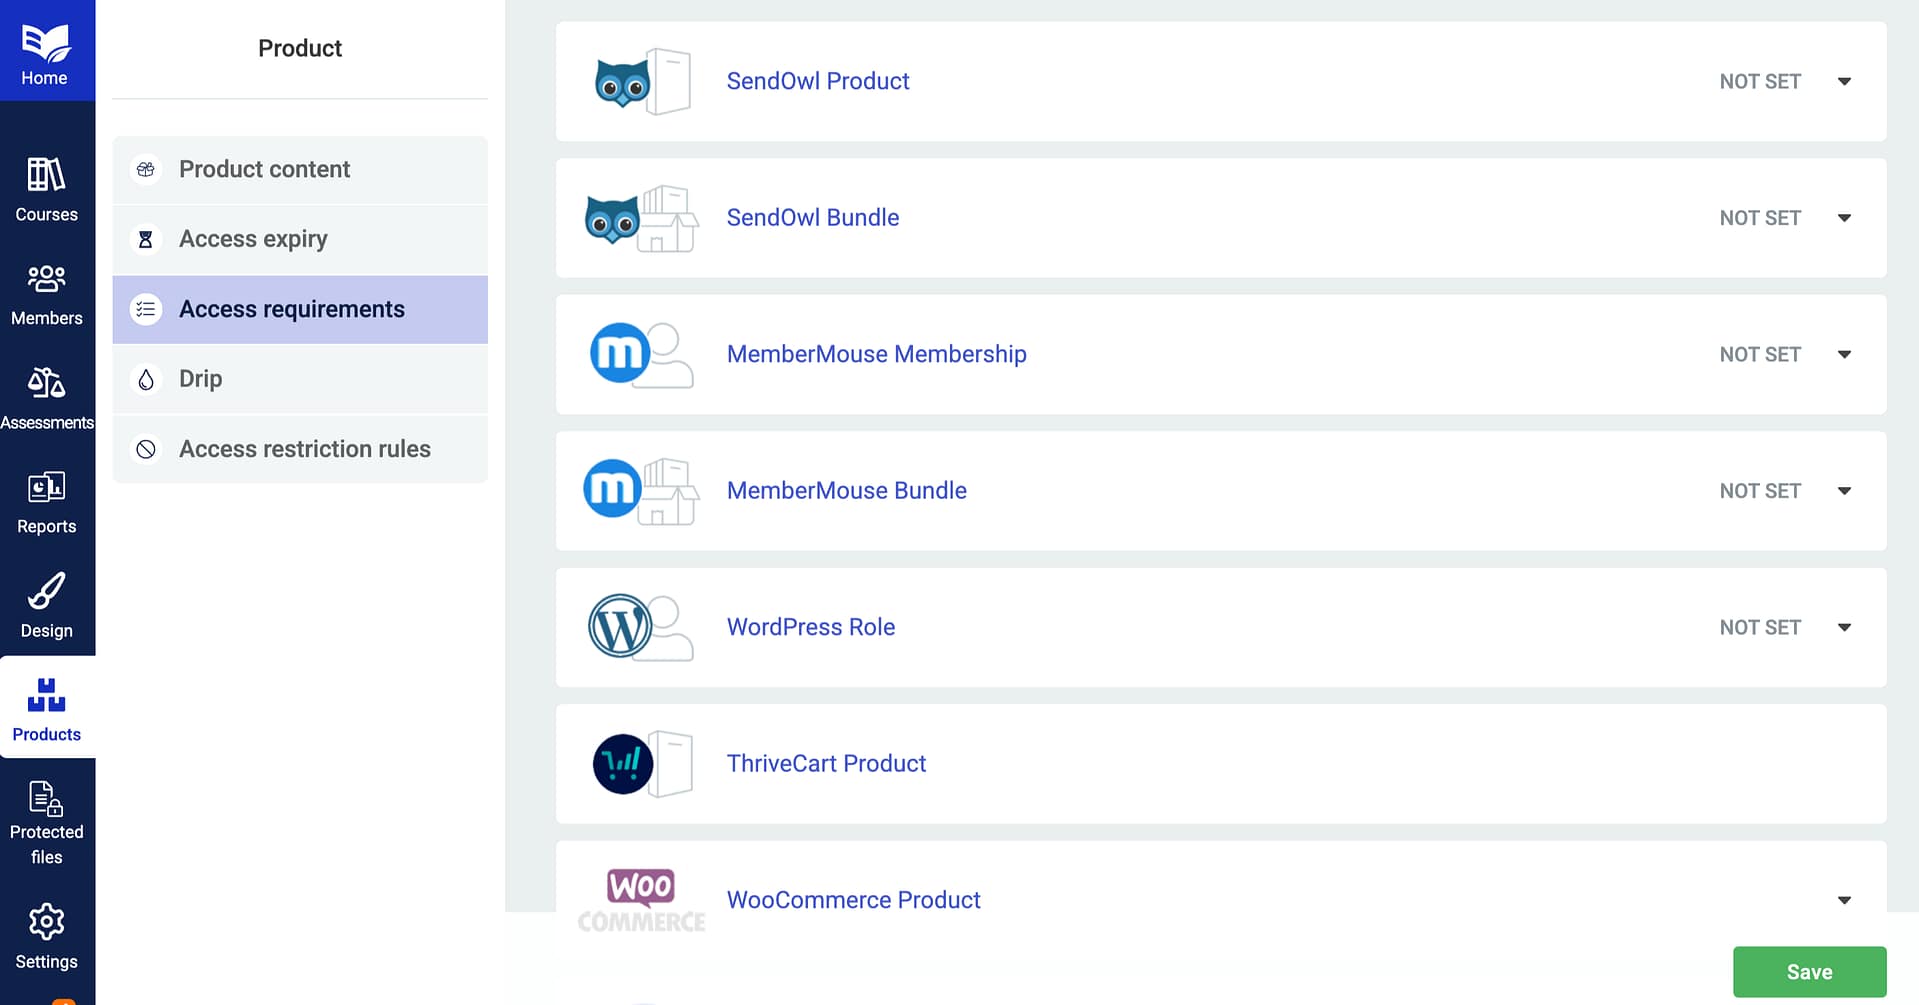
- Choose the MemberMouse membership level(s) or bundle(s) that should grant access.
- Save your changes.
Key Settings
- Membership levels: Select which MemberMouse membership levels grant access to the product.
- Bundles: You can also grant access based on bundle purchases, giving you an additional layer of flexibility.
- Access control: MemberMouse verifies the user’s membership status or bundle ownership before Thrive Apprentice grants course access.
Tip: If you use bundles in MemberMouse, you can create course packages that give users access to multiple Thrive Apprentice products with a single purchase.
Troubleshooting Common Issues
If your membership plugin integration isn’t working as expected, check these common issues:
- Membership levels not appearing: Make sure the membership plugin is activated and that you have created at least one membership level. Refresh the Thrive Apprentice settings page.
- Users can’t access courses: Verify that the user’s membership level matches the access requirement set on the product. Check that the user’s membership is active and not expired.
- Changes not taking effect: After updating access requirements, ask affected users to log out and log back in so their session refreshes.
That’s it! You’ve successfully learned how to integrate WishList Member, MemberPress, and MemberMouse with Thrive Apprentice to control course access through membership levels.
Related Resources
- Choosing an integration: How to Choose the Right Integration for Thrive Apprentice
- Stripe setup: How to Set Up Stripe in Thrive Apprentice
- WooCommerce setup: How to Get Started with WooCommerce and Thrive Apprentice
- ThriveCart connection: How to Connect ThriveCart to Thrive Apprentice