In this article, you’ll learn how to add third-party scripts—such as Google Analytics, Google Tag Manager, Facebook Pixel, and Google Search Console verification—to your Thrive Theme Builder website.
Understanding Script Placement
Thrive Theme Builder provides a built-in script management system that lets you add custom code to three locations on your site:
- Header Scripts — Inserted before the closing tag. Use this for tracking codes that need to load early, such as Google Tag Manager and Facebook Pixel.
- Body (Header) Scripts — Inserted immediately after the opening tag. Use this for scripts that require placement at the top of the body, such as Google Tag Manager’s
- Body (Footer) Scripts — Inserted before the closing tag. Use this for scripts that can load last, such as chat widgets and analytics.
Adding Scripts Site-Wide
To add a script that loads on every page of your site:
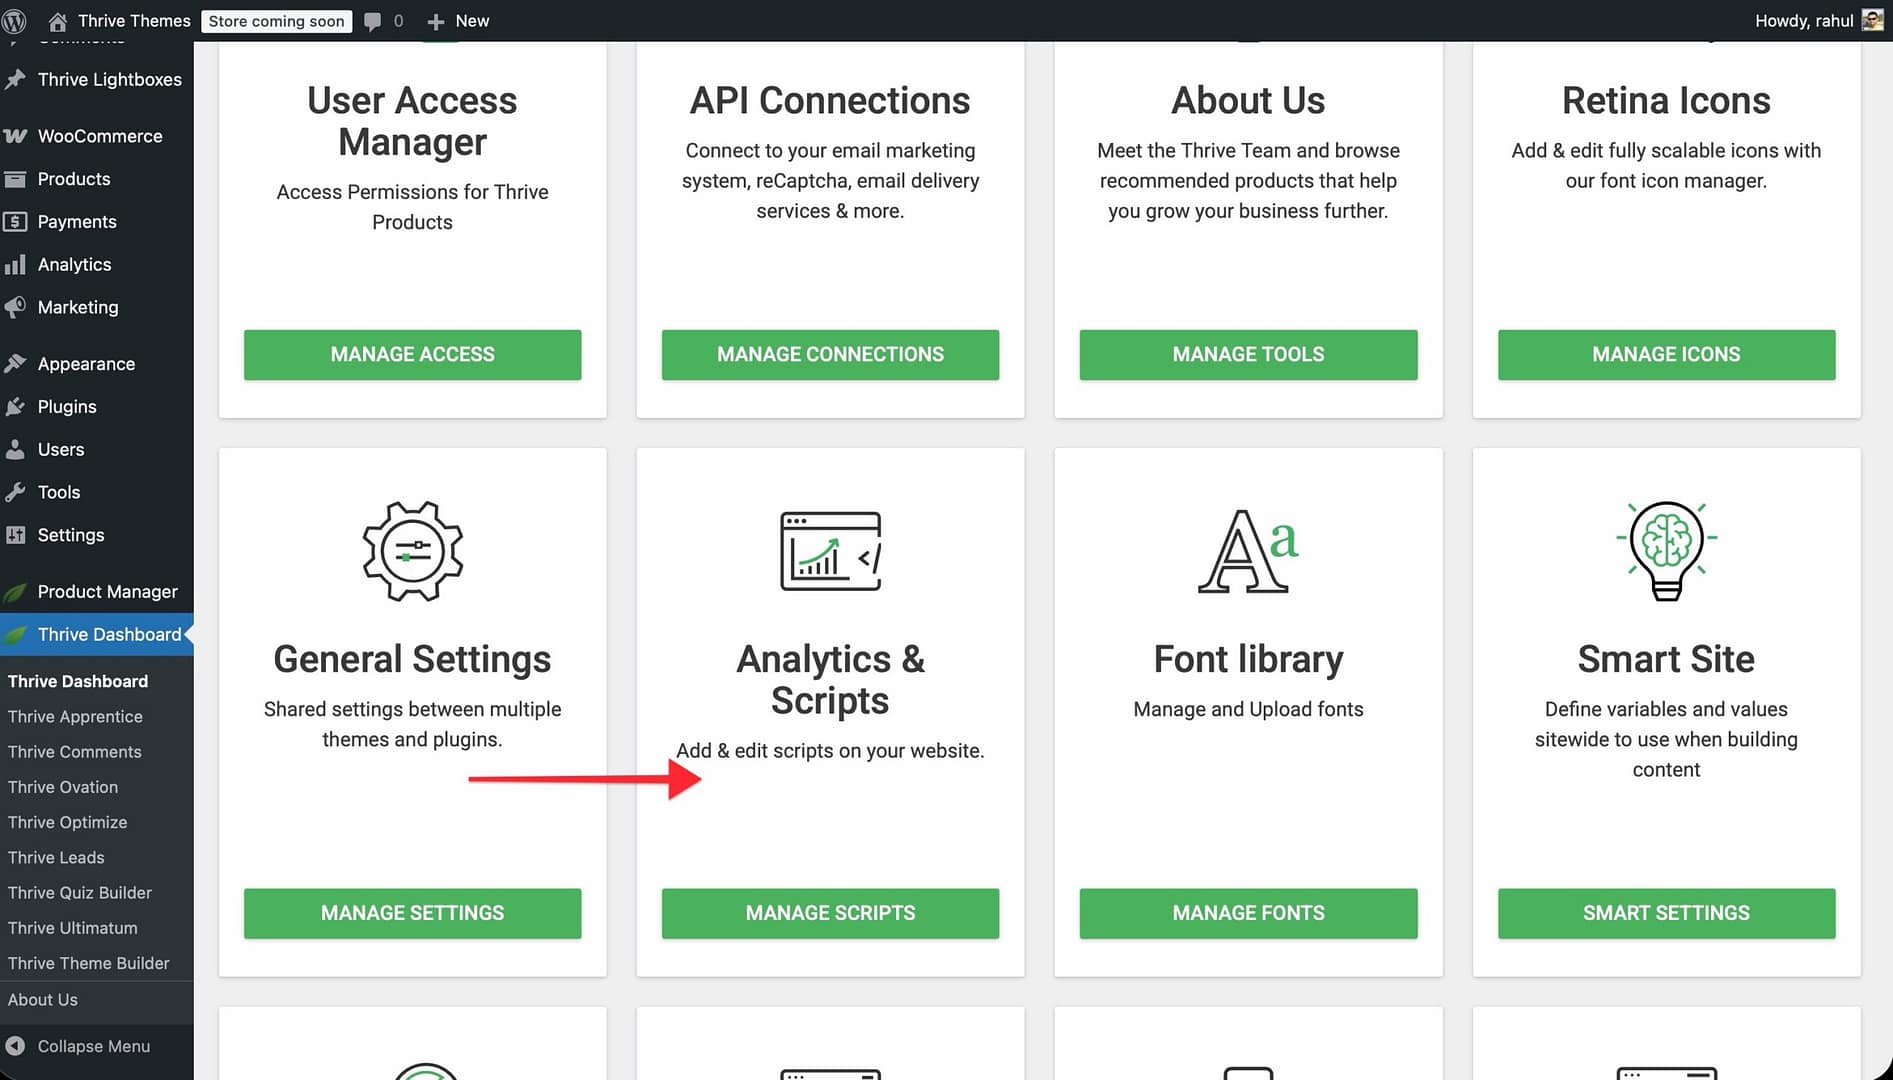
- In the WordPress admin, go to Thrive Dashboard.
- Click Analytics & Scripts.
- Click Manage Scripts.
- Choose where to place your script:
- Header Scripts — Paste the code in the header section.
- Body (Header) Scripts — Paste the code in the body header section.
- Body (Footer) Scripts — Paste the code in the body footer section.

- Paste the full script code (including the
The script will now load on every page of your website.
Adding Scripts to Individual Pages and Posts
You can also add scripts to specific pages or posts instead of site-wide:
- Open the page or post in the WordPress editor.
- Scroll down to the Custom Scripts metabox in the right sidebar.
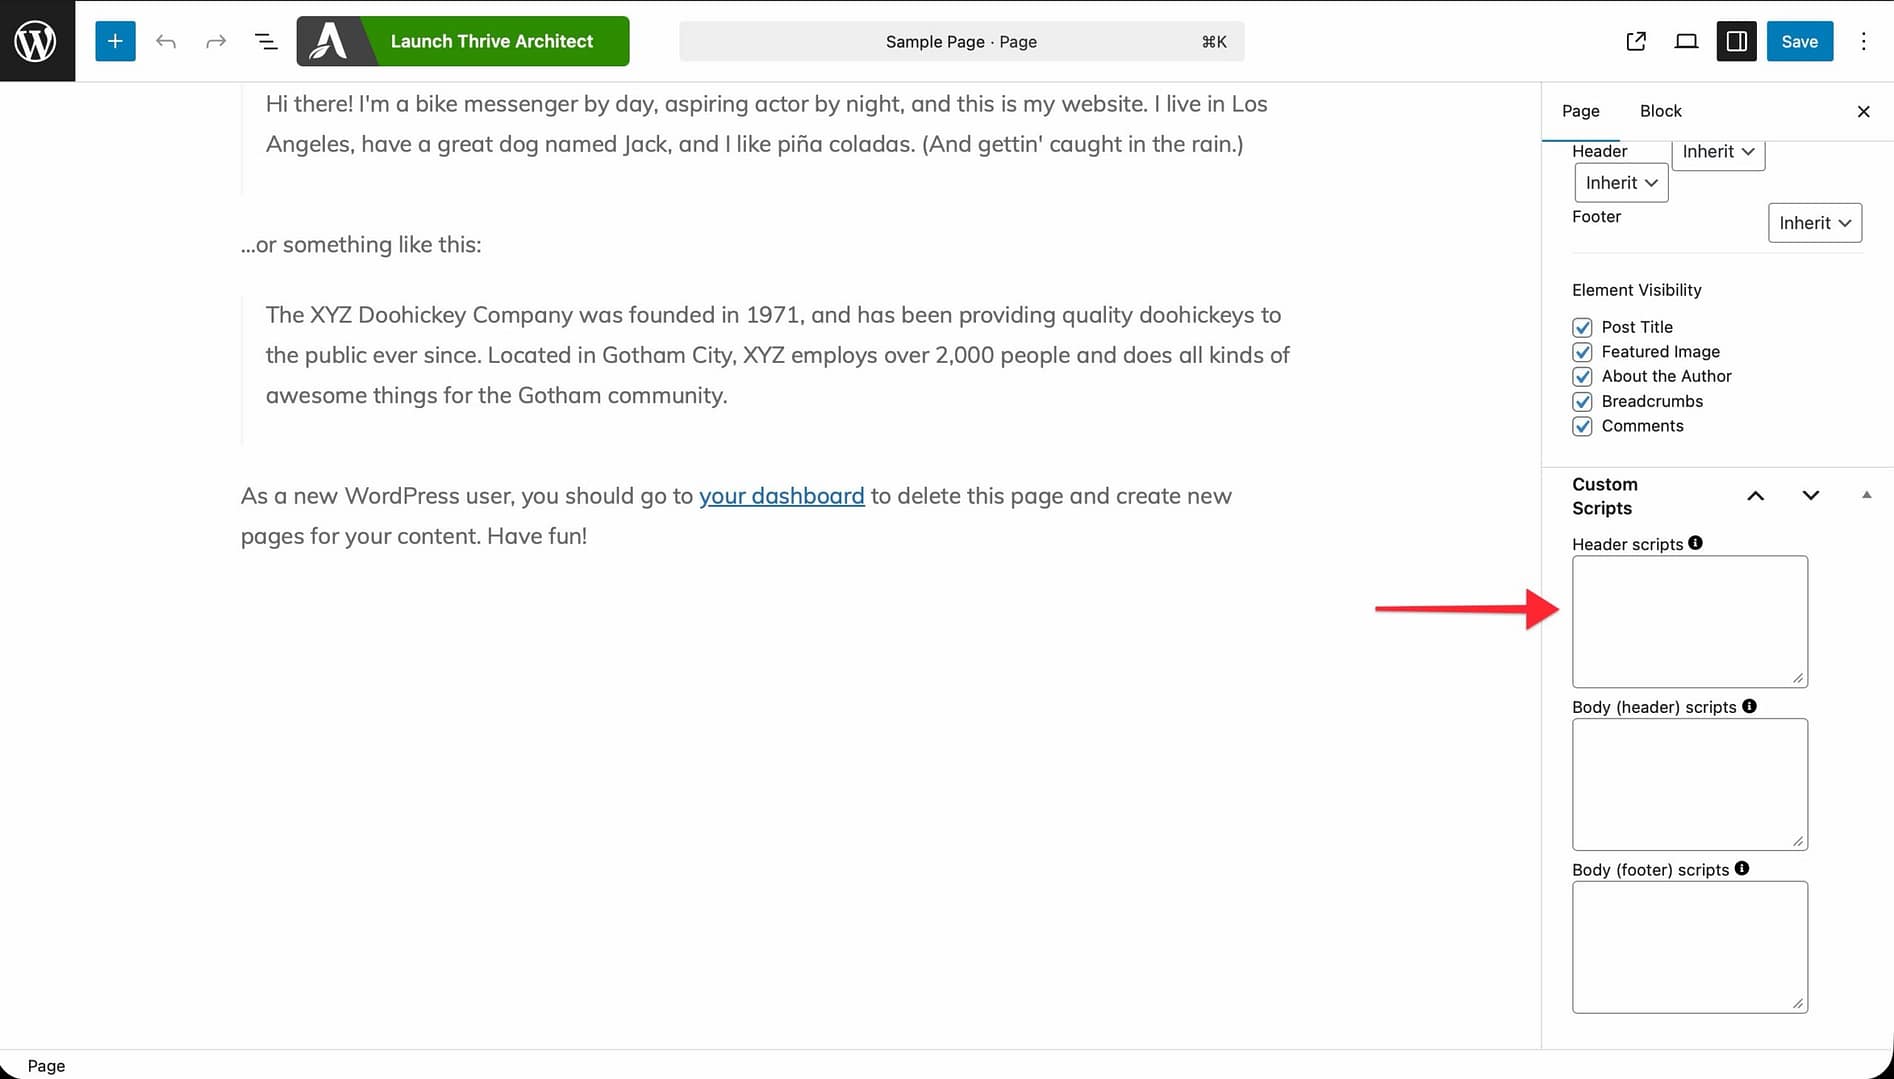
- Paste your script into the appropriate section:
- Header Scripts — Loads in the of this page only.
- Body (Header) Scripts — Loads after the tag on this page only.
- Body (Footer) Scripts — Loads before the tag on this page only.
- Click Update or Publish to save the page.
Note: Page-level scripts load in addition to site-wide scripts—they don’t replace them.
Adding Google Analytics
Google Analytics tracks visitor behavior on your website, including page views, session duration, and traffic sources.
Using Google Tag Manager (Recommended)
Google Tag Manager (GTM) is the recommended way to add Google Analytics because it lets you manage all your tracking codes from a single dashboard without editing your site each time.
- Sign in to Google Tag Manager and create an account if you don’t have one.
- Create a new Container for your website.
- Copy the two GTM code snippets provided:
- The first snippet goes in the Header Scripts section.
- The second snippet (the
- In the WordPress admin, go to Thrive Dashboard > Analytics & Scripts > Add New.
- Paste the first GTM snippet into Header Scripts.
- Paste the second GTM snippet into Body (Header) Scripts.
- Click Save.
- Back in Google Tag Manager, create a new Tag for Google Analytics (GA4) and configure it with your Measurement ID.
- Publish the container in GTM.
Adding the GA4 Tracking Code Directly
If you prefer not to use Google Tag Manager, you can add the Google Analytics tracking code directly:
- In your Google Analytics account, go to Admin > Data Streams and select your web stream.
- Under Google tag, click View tag instructions and copy the Global Site Tag (gtag.js) code.
- In the WordPress admin, go to Thrive Dashboard > Analytics & Scripts > Add New.
- Paste the tracking code into the Header Scripts section.
- Click Save.
Adding Facebook Pixel
Facebook Pixel tracks visitor activity on your site so you can create targeted ad audiences and measure ad conversions.
- In your Facebook Business account, go to Events Manager > Data Sources.
- Select your Pixel (or create one) and click Settings.
- Copy the Pixel base code.
- In the WordPress admin, go to Thrive Dashboard > Analytics & Scripts > Add New.
- Paste the Pixel code into the Header Scripts section.
- Click Save.
Tip: Use the Facebook Pixel Helper browser extension to verify the Pixel is firing correctly on your site.
Connecting Google Search Console
Google Search Console lets you monitor your site’s search performance and verify ownership with Google.
Verifying with an HTML Tag
- In Google Search Console, add your property and choose HTML tag as the verification method.
- Copy the tag provided.
- In the WordPress admin, go to Thrive Dashboard > Analytics & Scripts > Add New.
- Paste the meta tag into the Header Scripts section.
- Click Save.
- Return to Google Search Console and click Verify.
Alternative Verification Methods
You can also verify with Google Search Console using:
- DNS record — Add a TXT record to your domain’s DNS settings (managed by your hosting provider, not TTB).
- Google Analytics — If you’ve already added GA tracking code, Google Search Console can verify ownership automatically.
- Google Tag Manager — If you’ve already added GTM, Search Console can verify through your container snippet.
Adding Other Third-Party Scripts
The same process works for any third-party script, including:
- Hotjar — Heatmaps and session recordings.
- Pinterest Tag — Conversion tracking for Pinterest ads.
- TikTok Pixel — Conversion tracking for TikTok ads.
- Custom chat widgets — LiveChat, Intercom, Drift, etc. (typically placed in Body (Footer) Scripts).
- Custom CSS or JavaScript — Any custom code you need to add to your site.
For each service, copy the tracking code from the provider’s dashboard and paste it into the appropriate script section in Thrive Theme Builder.
Best Practices
- Use Google Tag Manager when possible — GTM lets you manage multiple tracking codes from one dashboard without editing your site each time.
- Place tracking codes in the Header — Most tracking pixels (GA, Facebook Pixel) need to load early to capture all page views. Place them in Header Scripts.
- Place chat widgets in the Footer — Chat widgets and non-essential scripts can load last without affecting page speed. Place them in Body (Footer) Scripts.
- Test after adding scripts — Use browser developer tools (F12 > Console) or the provider’s debugging tool to verify scripts are firing correctly.
- Don’t duplicate scripts — If you add a script through Google Tag Manager, don’t also add it directly through the Manage Scripts panel.
Related Resources
- Using the Site Speed Section: Learn how to optimize your site’s performance.
- Getting Started with Thrive Theme Builder: Learn how to set up your site.