In this article, you’ll learn how to create targeted templates for specific tags, categories, and custom post types in Thrive Theme Builder. This lets you give different sections of your website a unique look.
How Targeted Templates Work
By default, all category archive pages use the same All Archives template, and all tag archive pages share the same design. With targeted templates, you can create different designs for specific categories, tags, or custom post types.
Thrive Theme Builder uses a priority system when selecting templates:
- Specific template — If a template exists for a specific category, tag, or term, it’s used.
- Type template — If no specific template exists, the general template for that type (e.g., “All Categories”) is used.
- Default archive template — If no type-specific template exists, the default All Archives template is used.
This means you can create targeted templates for the sections that need unique designs while relying on the default template for everything else.
Creating a Category-Specific Template
Category templates control how category archive pages look—the pages that list all posts within a specific category.
Creating a Template for All Categories
- In the Thrive Theme Builder dashboard, click Templates in the left sidebar.

- Click the Add New button in the top-right corner.

- Enter a name (e.g., “Category Archive Template”).
- Click List in the Single or List? toggle.
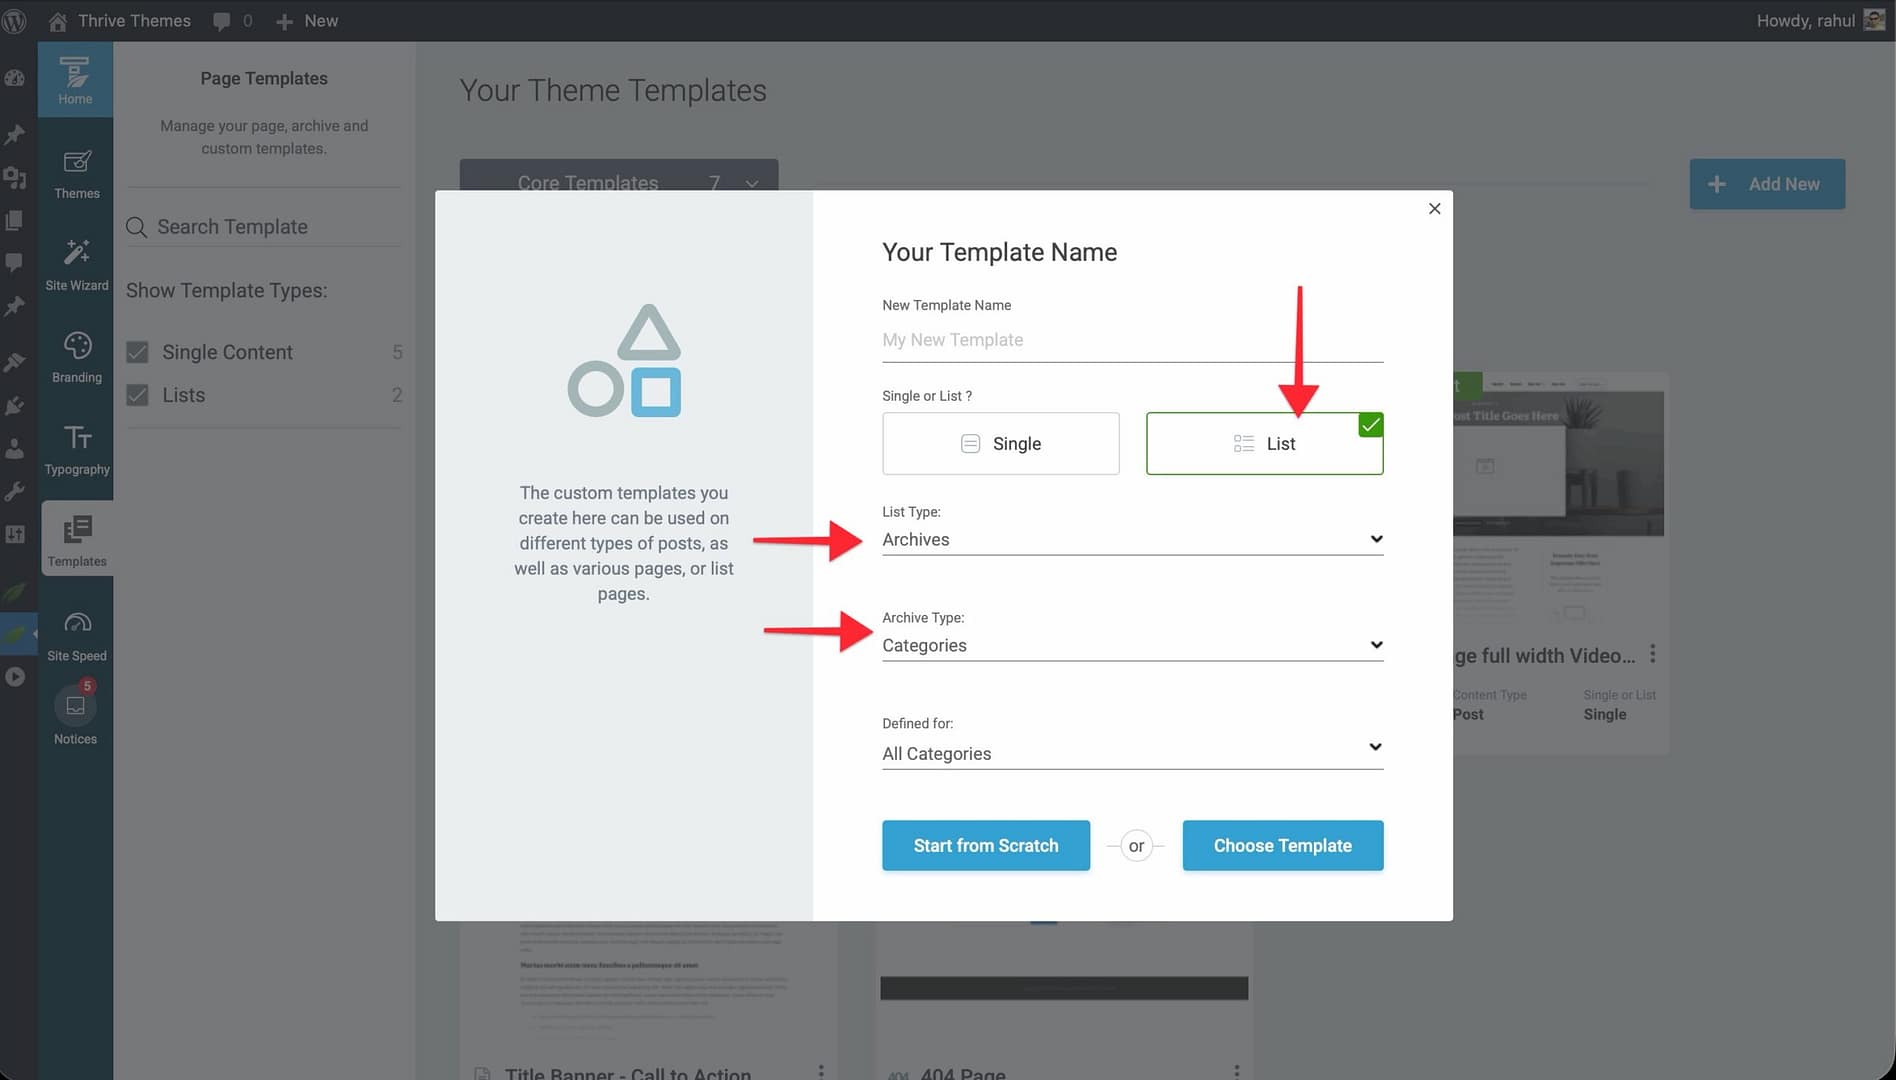
- Select Archives as the list type.
- In the archive type dropdown, select Categories.
- Choose Start from Scratch or Choose Template from the library.
This template will be used for all category archive pages.
Creating a Template for a Specific Category
To create a template that only applies to one category (e.g., “Tutorials”):
- Follow the same steps above.
- After selecting Categories as the archive type, look for the option to assign the template to a specific category.
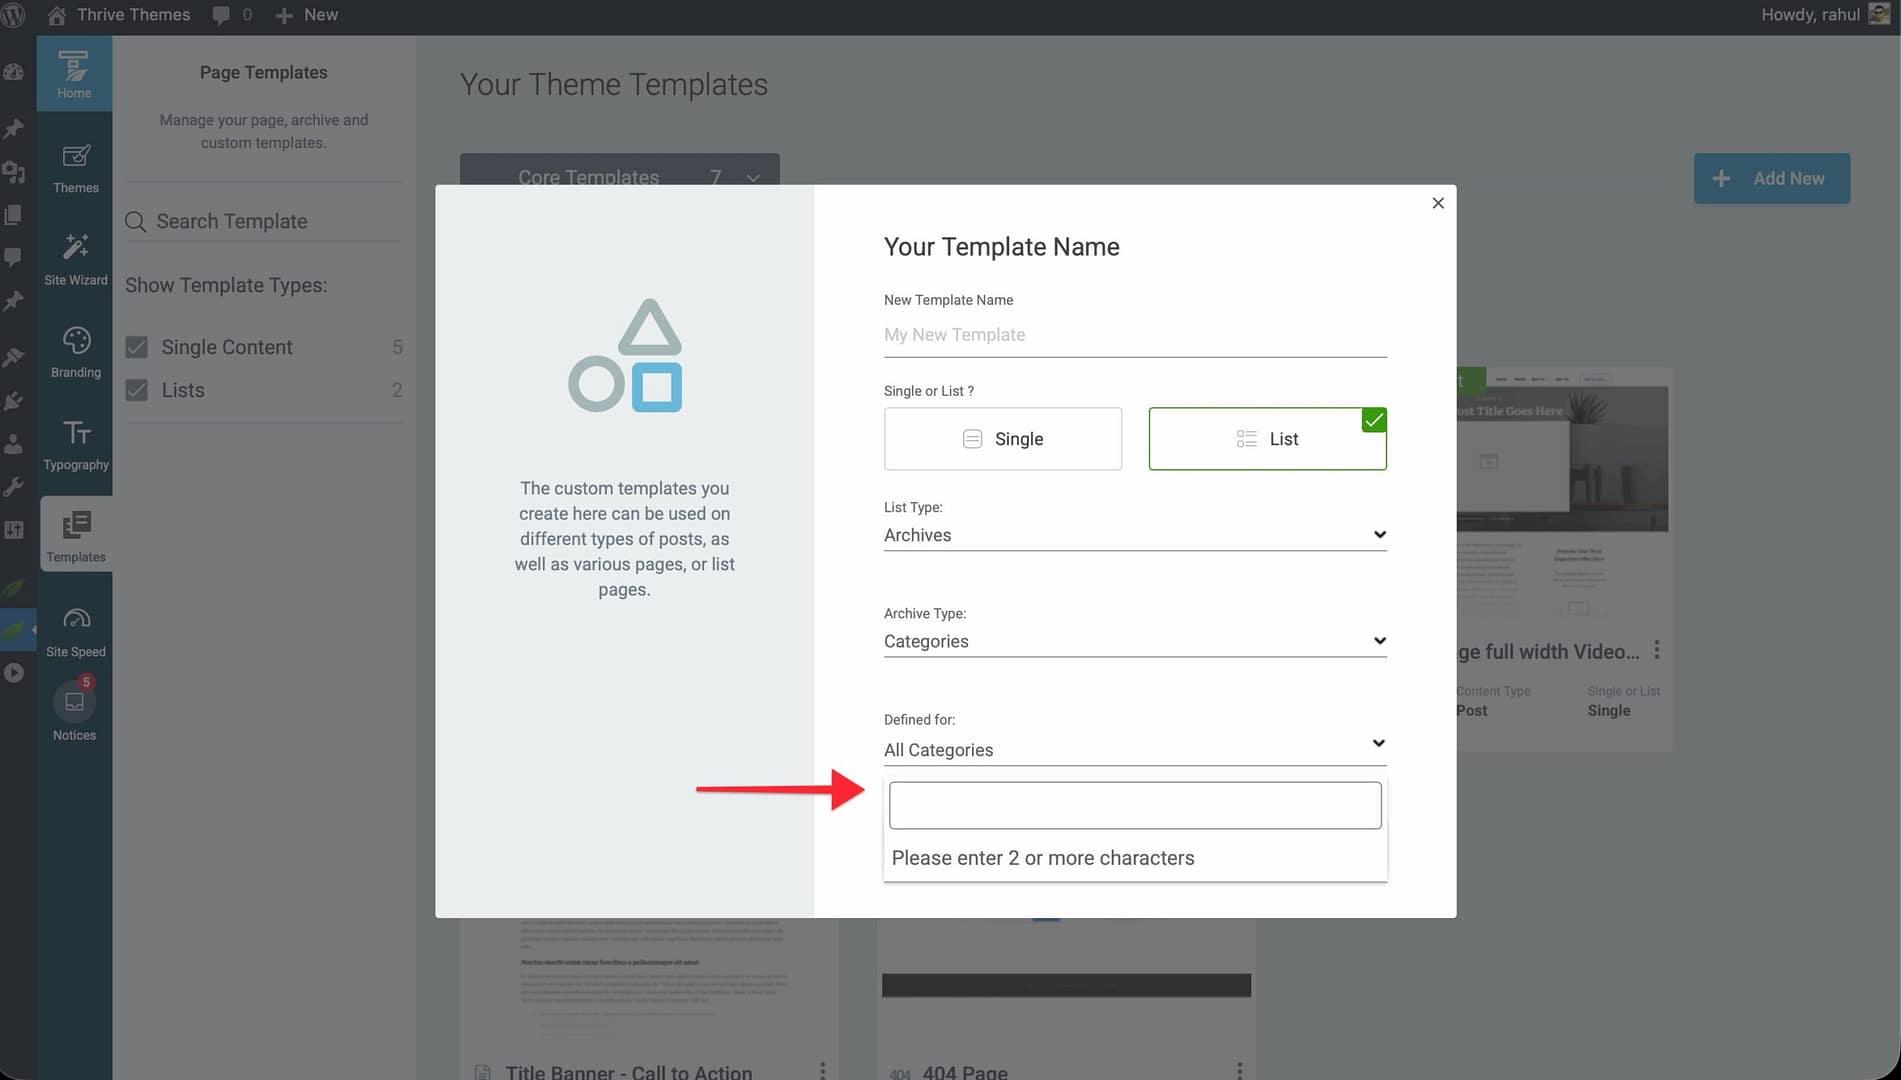
- Select the individual category from the list.
The template will only be used for that specific category’s archive page. All other categories will continue using the default archive template.
Creating a Tag-Specific Template
Tag templates control how tag archive pages look—the pages that list all posts associated with a specific tag.
WordPress automatically generates archive pages for every tag. By default, these pages use the All Archives template. You can create custom designs for tag archive pages.
Creating a Template for All Tags
- In the Templates section, click Add New.
- Enter a name (e.g., “Tag Archive Template”).
- Click List in the Single or List? toggle.
- Select Archives as the list type.
- In the archive type dropdown, select Tags.
- Choose a starting point and create the template.
Creating a Template for a Specific Tag
To create a template for an individual tag or group of tags:
- Follow the same steps above.
- After selecting Tags, assign the template to a specific tag.
Creating a Custom Post Type Template
Custom post types are content types created by plugins (e.g., WooCommerce products, portfolio items, testimonials). Thrive Theme Builder lets you create templates for both individual custom post type entries and their archive pages.
Prerequisites
- A Thrive Theme Builder theme must be installed and active.
- Custom post types must already be configured on your site (using plugins like Custom Post Type UI, Pods, or WooCommerce).
Creating a Single Content Template for a Custom Post Type
- In the Templates section, click Add New.
- Enter a name (e.g., “Portfolio Item Template”).
- Click Single in the Single or List? toggle.
- In the Choose Content Type dropdown, select the custom post type name (it appears alongside Post and Page in the list).
- Choose Start from Scratch or Choose Template from the library.
This template will be used when visitors view individual entries of that custom post type.
Creating an Archive Template for a Custom Post Type
- In the Templates section, click Add New.
- Enter a name (e.g., “Portfolio Archive Template”).
- Click List in the Single or List? toggle.
- Select Post Types as the list type.
- Select the specific custom post type from the dropdown.
- Choose a starting point and create the template.
This template will be used for the custom post type’s archive page (e.g., /portfolio/).
Setting a Targeted Template as Default
After creating a targeted template, set it as the default for its type:
- In the Templates section, hover over the template.
- Click the More option (three-dots icon).
- Select Set as Default.
The template will be used automatically for all content matching its type unless a more specific template is assigned.
Best Practices
- Start broad, then specialize — Customize the default archive template first, then create targeted templates only for categories or tags that need a distinct design.
- Use descriptive names — Name templates after their target (e.g., “Tutorials Category Archive” or “Product Portfolio — Grid”).
- Limit the number of targeted templates — Each template adds complexity. Only create specific templates when a distinct design is genuinely needed.
- Test with real content — Preview targeted templates with the actual posts in that category or tag to make sure the design works with your content.
Related Resources
- Creating List & Archive Templates: Learn how to create list and archive templates.
- Understanding Templates: Learn about template types and how they work.
- Applying Templates to Pages & Posts: Learn how to assign templates to specific content.