Thrive Ultimatum is the perfect tool for adding scarcity to your marketing campaigns, helping to boost conversions by limiting the time an offer is available.
In this guide, we’ll walk you through the essential initial settings and the steps to launch your first scarcity campaign.
Initial Settings: Date & Time
Before creating your first campaign, it is crucial to ensure your date and time settings are correct. Thrive Ultimatum relies on these settings to display countdowns accurately.
By default, the plugin uses the time and date settings from your WordPress General Settings. However, you can override these specifically for your campaigns.
Configuring Date & Time
- Navigate to your Thrive Dashboard and locate Thrive Ultimatum.
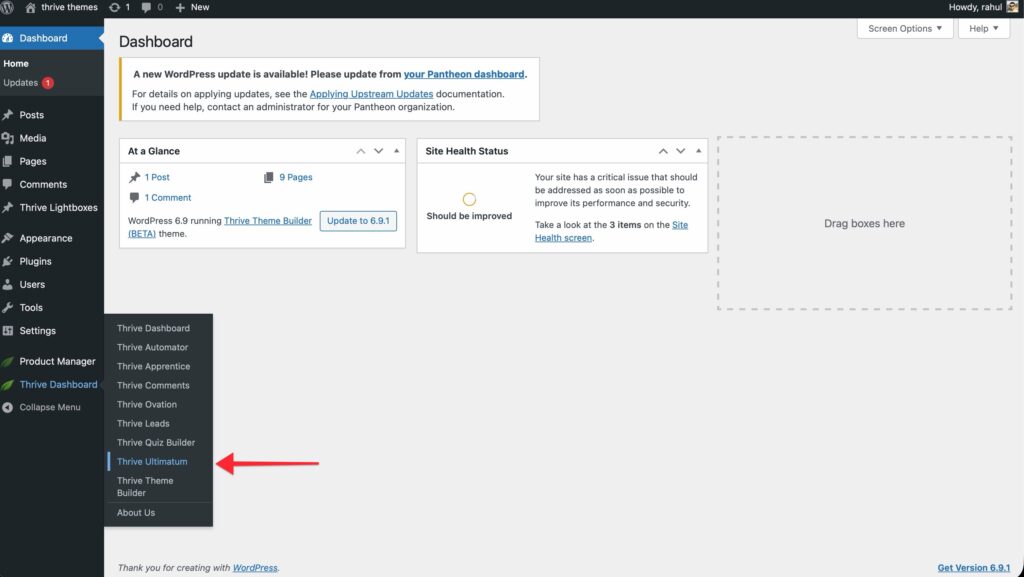
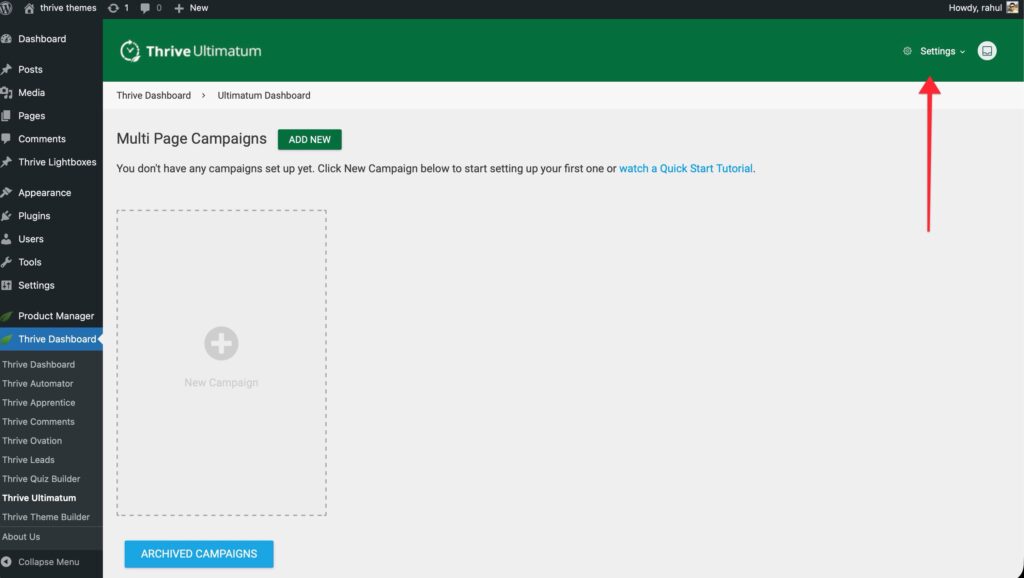
- Click the Settings menu (three dots icon) in the top right corner of the card.
- Select Date & Time Settings.
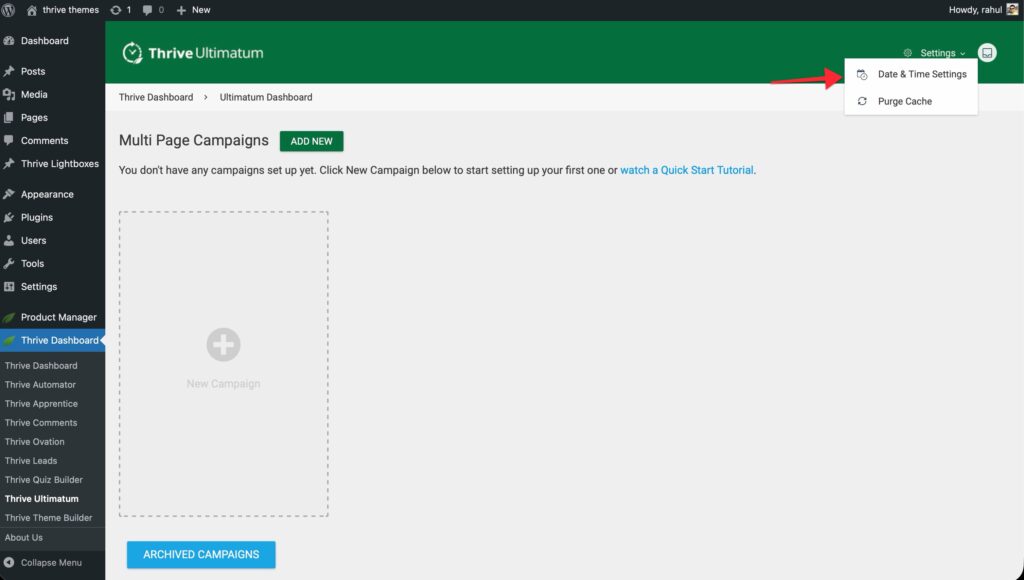
- In the lightbox that appears, you can customize the Date Format, Time Format, and Time Zone.

- Click Save changes to apply your changes.
Creating Your First Campaign
Once your settings are configured, you can create your first campaign.

- Open the Thrive Ultimatum dashboard.
- Click the New Campaign box (or the “Plus” sign).
- Choose a Template:
- Build from scratch: Start with a blank slate.
- Templates: Choose from pre-configured campaigns like “7 Day Offer,” “End of Month Special,” etc.
- For this guide, we’ll select Build from scratch and click Continue.
- Name Your Campaign: Enter a name (internal use only) and click Continue.
The Campaign Wizard
You will now be taken to the campaign dashboard, whch guides you through the setup process step-by-step:

- Campaign Type: Choose how the scarcity works.
- Fixed Dates: The campaign runs for everyone during specific dates.
- Recurring: The campaign repeats automatically (e.g., every Christmas).
- Evergreen: The campaign is unique to each visitor (e.g., starts when they visit a page).
- Learn more about Types of Campaigns in Thrive Ultimatum.
- Display Settings: Choose where the campaign appears.
- You can target specific posts, pages, categories, or use advanced filtering logic.
- Learn more about Display Settings.
- Design: Create the countdown timer visuals.
- Click New Design and choose a type: Top Ribbon, Bottom Ribbon, Widget, or Shortcode.
- Edit the design using the visual editor to match your brand.
- Learn more about Countdown Display Options.
Activating the Campaign
Once you have configured the Type, Display, and Design:
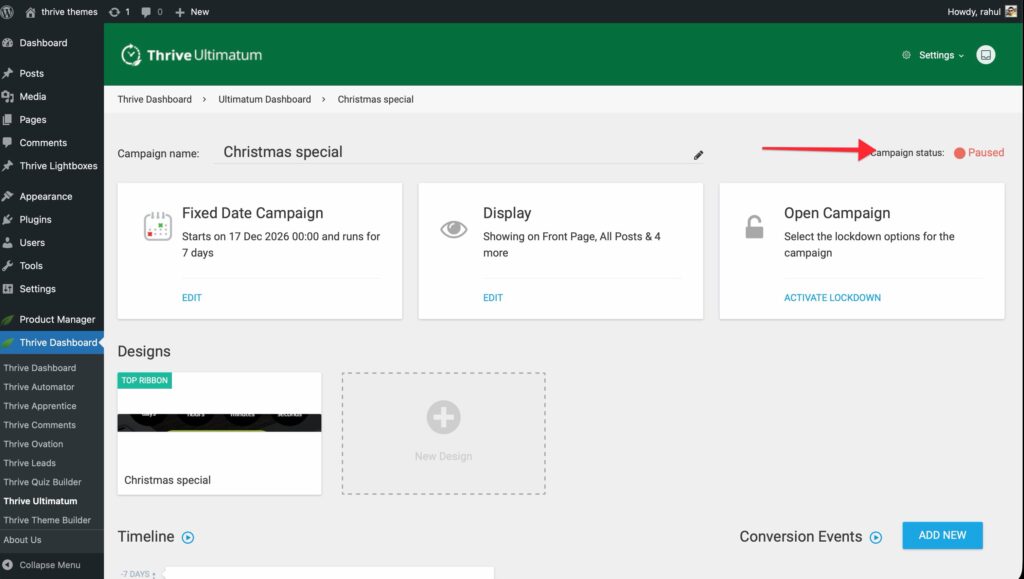
- Scroll to the top of the campaign dashboard.
- Locate the Status toggle in the top right corner.
- Switch it from Paused to Running.
That’s it! Your campaign is now live!