In this article, you’ll learn how to customize the footer section of your Thrive Theme Builder templates.
Accessing the Footer Section
- In the Thrive Theme Builder dashboard, click Templates in the left sidebar.
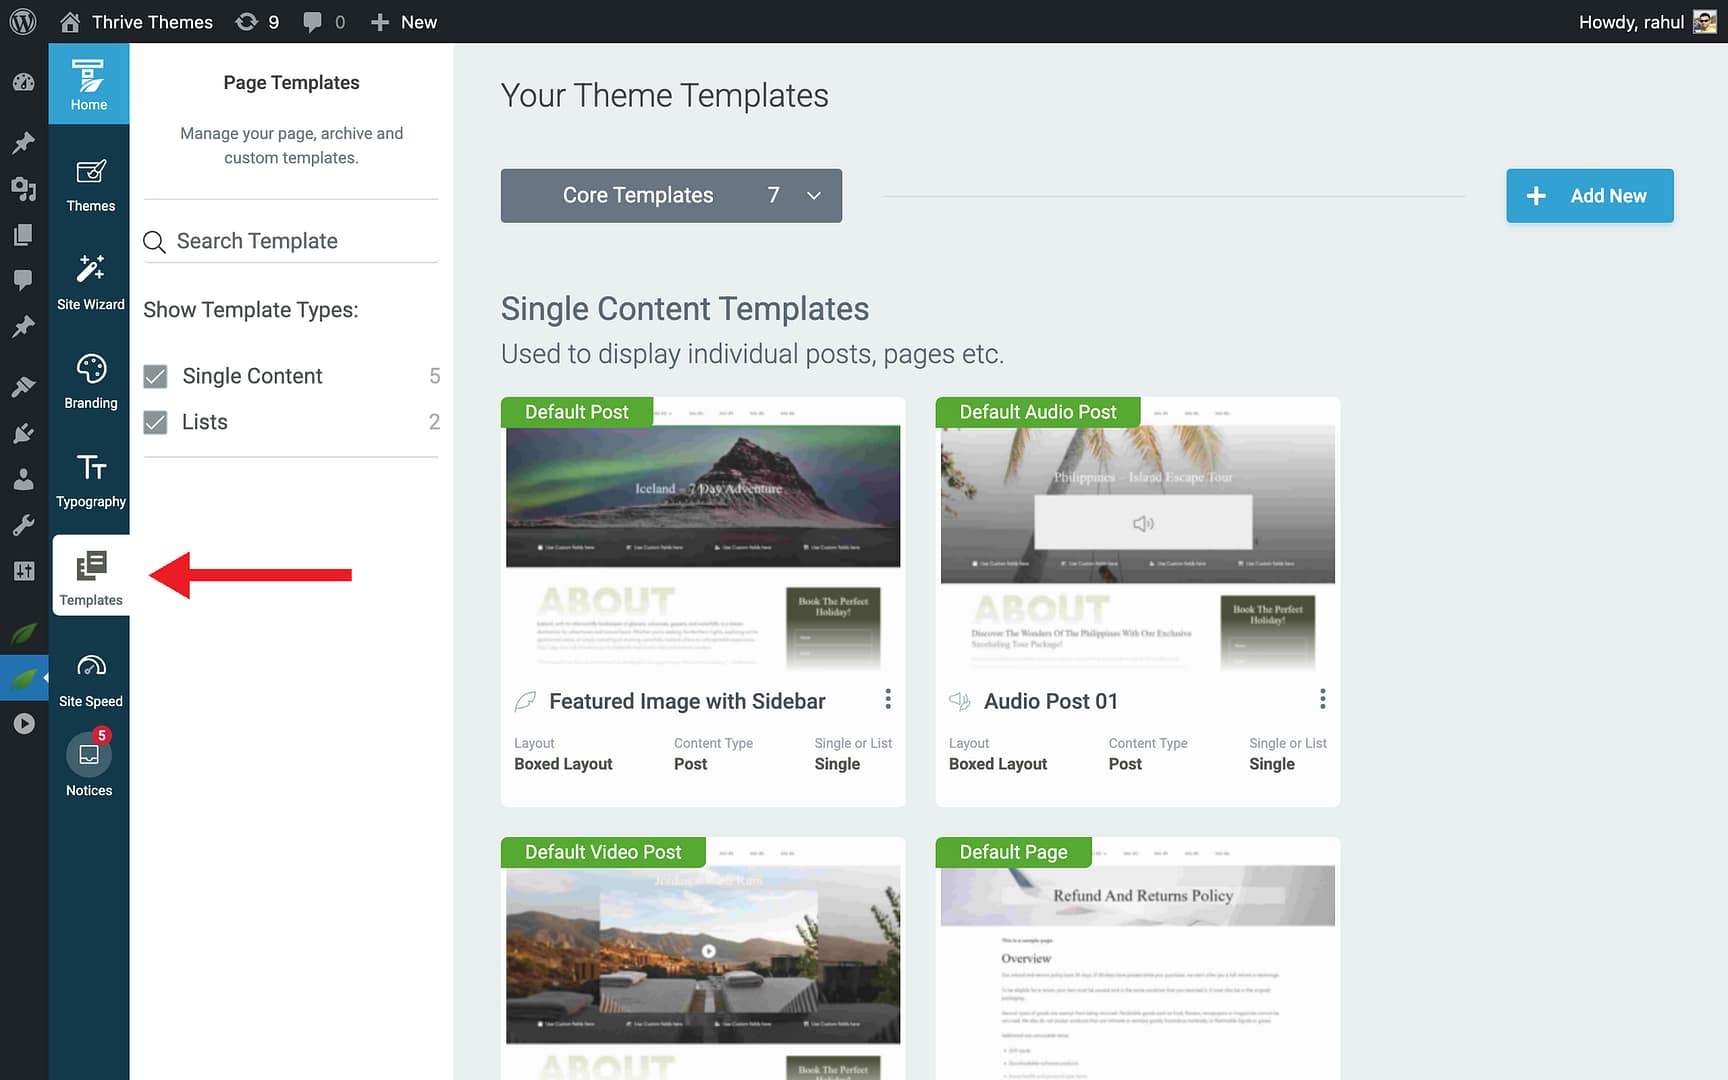
- Hover over the template you want to edit and click Edit.
- In the editor, click on the footer area at the bottom of the template, or go to Main Options in the left sidebar and click Bottom (or Footer) to select the footer section.
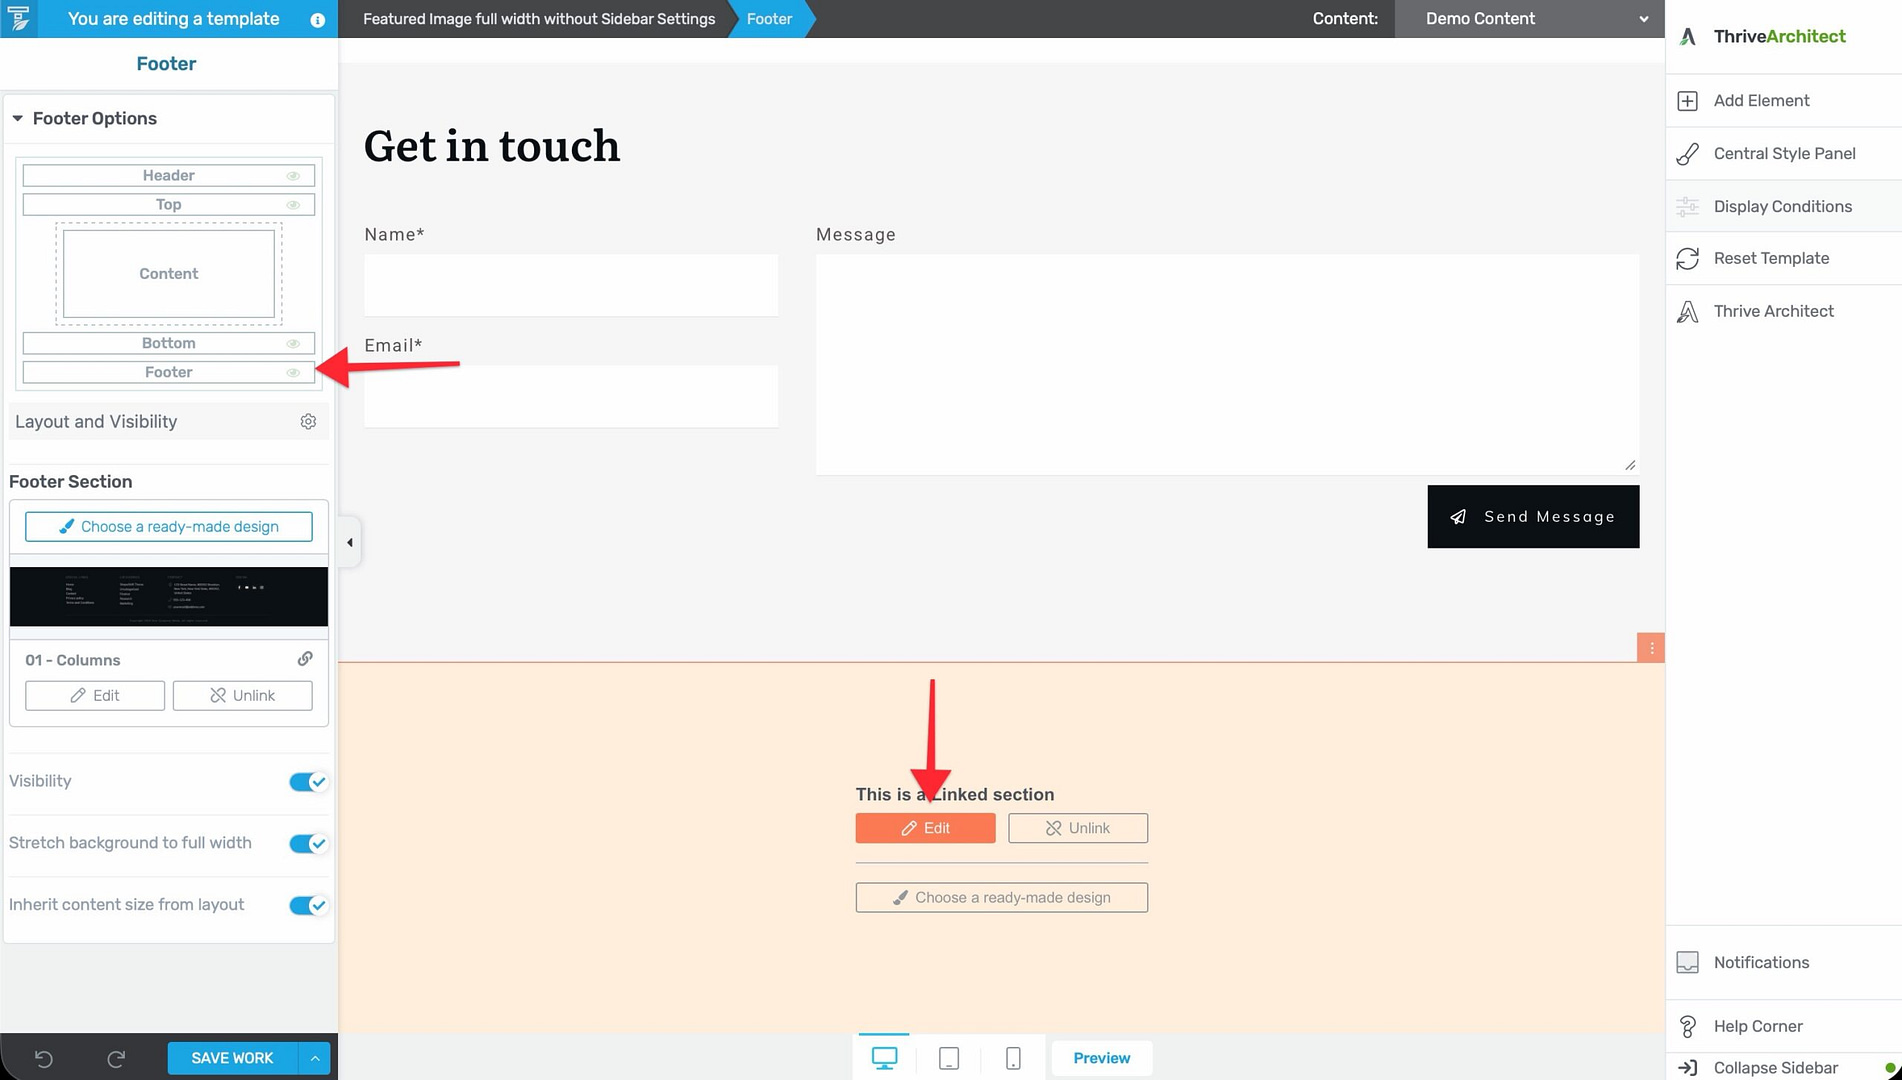
- The footer section highlights, and its configuration options appear in the left sidebar.
Default Footer Structure
The default footer includes basic elements:
- Copyright text
- Links (e.g., Privacy Policy, Terms of Service)
You can replace this with a fully custom footer design using any elements available in the editor.
Customizing the Footer
With the footer section selected, you can customize:
Content Elements
Add any elements to the footer using the element panel:
- Text elements — Copyright notices, company information, taglines.
- Logo — A secondary logo or brand mark.
- Custom Menu — Footer navigation links (often organized in columns).
- Social Follow — Links to your social media profiles.
- Contact information — Phone numbers, email addresses, physical address.
- Newsletter signup — An opt-in form for email subscriptions.
Design Options
The left sidebar provides design controls for the footer section:
- Background — Set a background color, gradient, or image.
- Padding and margins — Adjust spacing inside and outside the footer.
- Border — Add borders or a top separator line.
- Layout — Use columns to organize footer content into multiple sections (e.g., a three-column footer with navigation, contact info, and social links).
Footer as a Global Element
Like headers, footer designs saved in Thrive Theme Builder automatically become Global Elements in the Thrive Dashboard. This means:
- The footer is reusable across multiple templates.
- Changes to the footer update everywhere it’s used.
- You can insert the saved footer into Thrive Architect landing pages.
Best Practices
- Include essential links — Privacy Policy, Terms of Service, and contact information are commonly expected in the footer.
- Add social media links — The footer is a natural place for social follow icons.
- Keep it organized — Use columns to break the footer into logical sections. A common pattern is three or four columns: About, Quick Links, Contact, and Social.
- Include a copyright notice — Add a copyright line with your site name and the current year.
- Test responsiveness — Footer columns should stack vertically on mobile. Check that the footer is readable and well-spaced on all devices.
Related Resources
- Using the Header Section: Learn how to customize the header.
- Using Headers & Footers on Landing Pages: Learn how to use theme sections on landing pages.
- Connecting Social Media Profiles: Learn how to set up social media links.