The Opt-in Gate is a powerful lead generation tool that allows you to capture a user’s contact information before showing them their quiz results. In this article, you’ll learn how to set up the gate, use dynamic content, and improve the user experience for returning visitors.
How to Add an Opt-in Gate
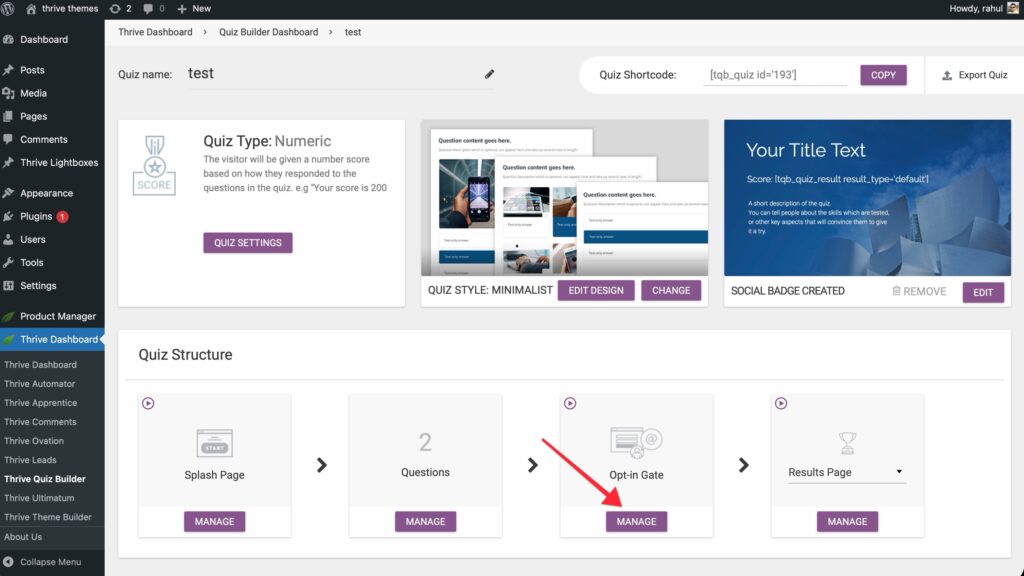
- In your quiz dashboard, locate the Opt-in Gate card in the Quiz Structure section.
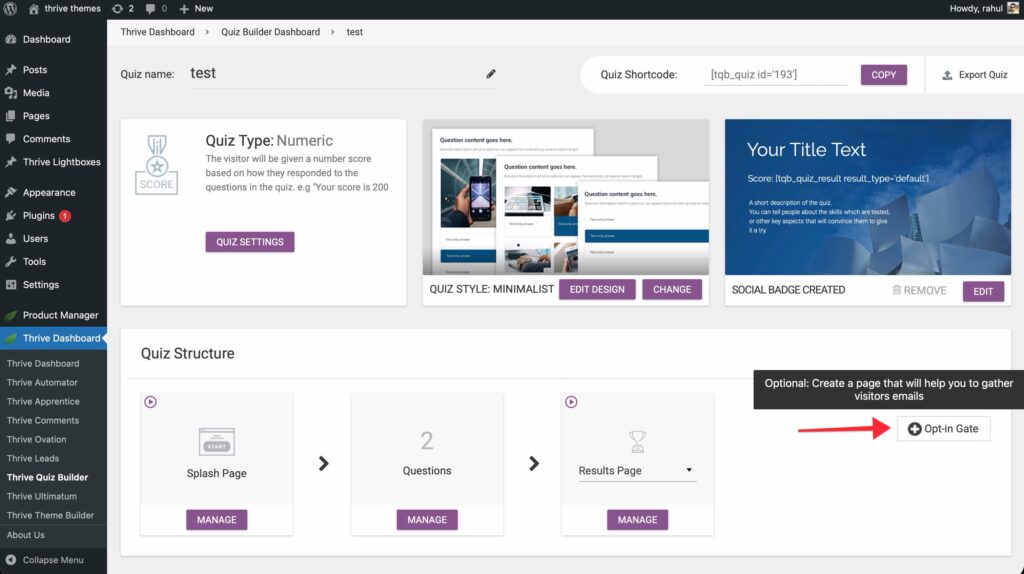
- Click Manage.
- Click the Edit with Thrive Architect button to customize the design.

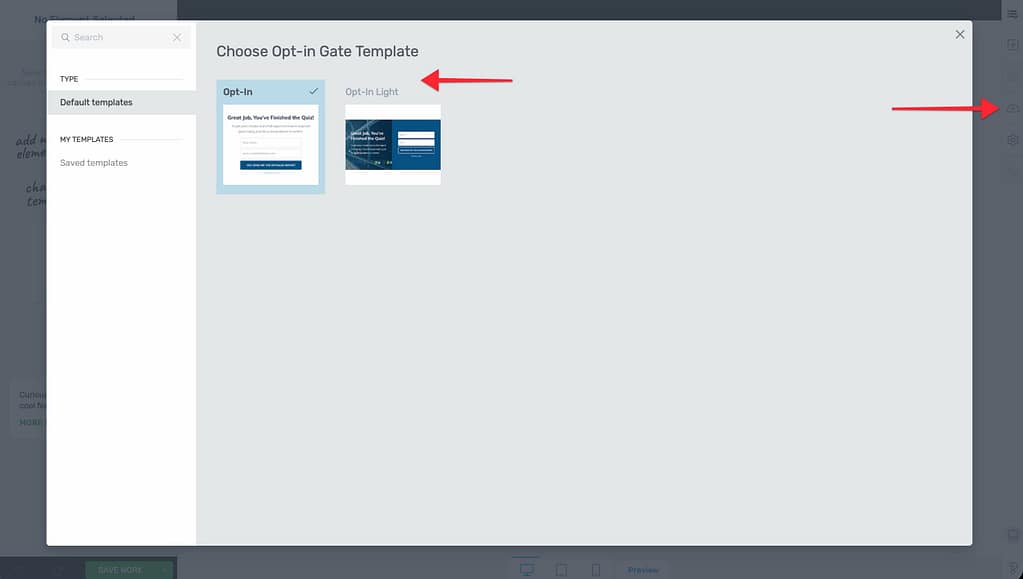
- Choose a template for your lead generation form.
Dynamic Content on the Opt-in Gate
One of the most powerful features of Thrive Quiz Builder is the ability to show different opt-in forms based on the user’s quiz result.
- Inside the Opt-in Gate editor, add the Dynamic Content element from the sidebar.

- Define States based on the scores or categories you’ve set up in your quiz.

- Result-Specific Offers: You can now show a different lead magnet or mailing list for users who scored “Advanced” vs. those who scored “Beginner.”
Improving User Experience
1. Hiding the Gate for Logged-in Users
If a user is already logged into your WordPress site, you may want to skip the gate to provide a smoother experience or avoid asking for their email twice.
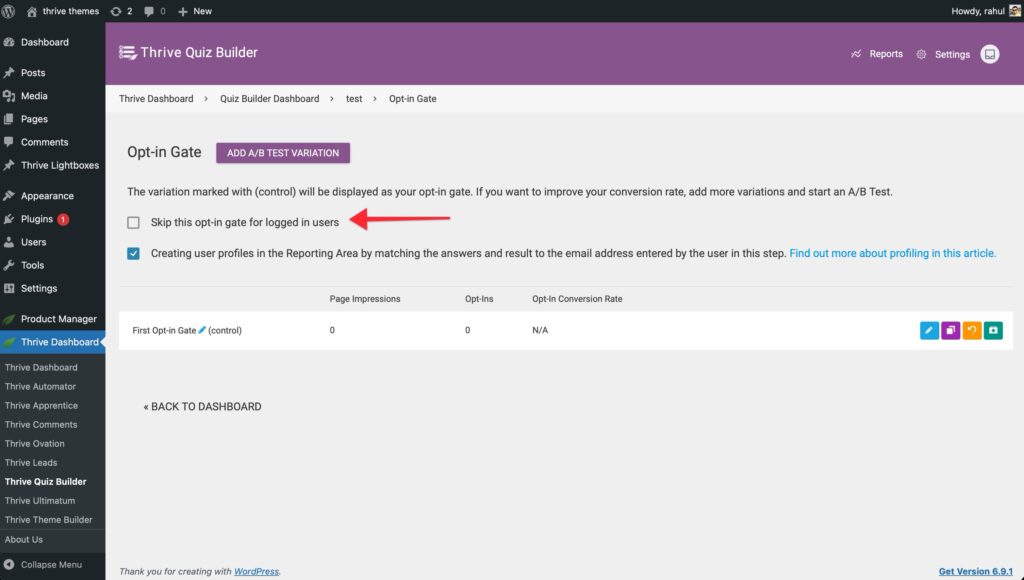
- On the Opt-in Gate card.
- Toggle the Skip opt-in gate for logged in users switch to ON.
2. Making the Gate Optional
While mandatory gates maximize lead volume, optional gates can build trust.
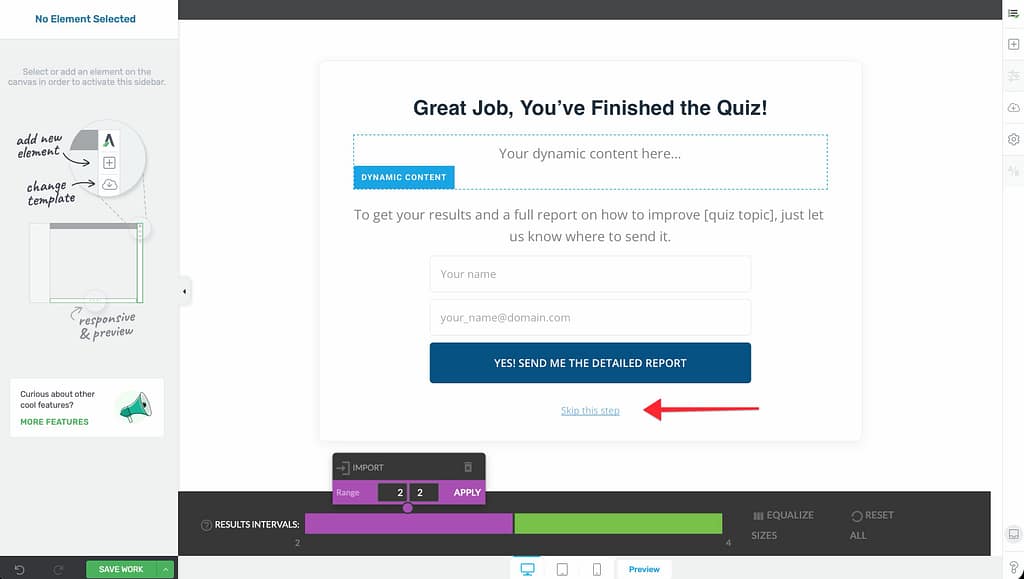
- Use a template that includes a “Skip this step” link.
- This allows users to proceed directly to the results without providing their email.
Connecting to Your Email Provider
To actually capture leads, you must connect the form in your Opt-in Gate to your email marketing service:
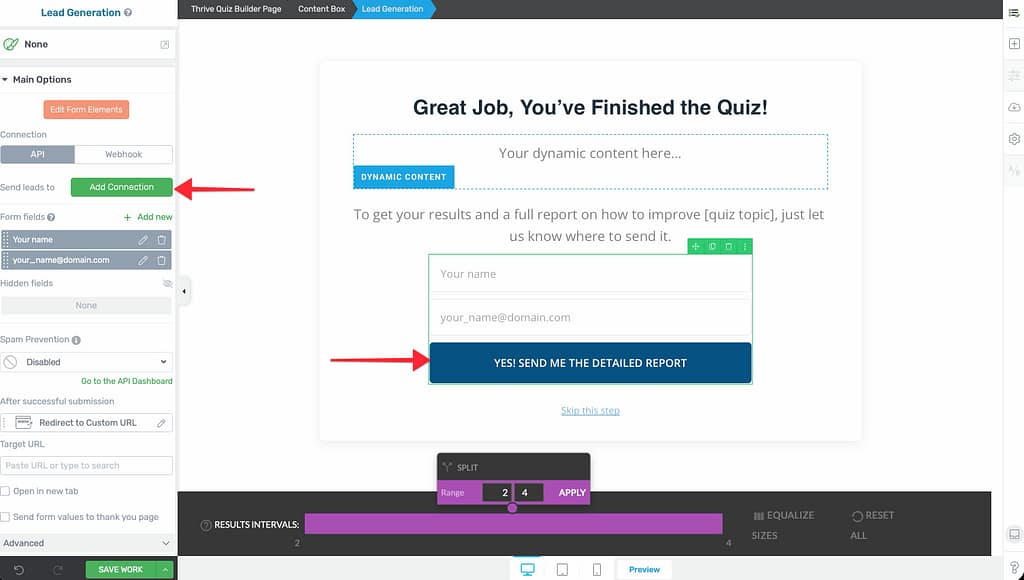
- Select the Lead Generation element inside the Opt-in Gate editor.
- In the sidebar, click Add Connection.
- Select your integrated service (e.g., Mailchimp, ActiveCampaign).
- Map your fields and apply any specific Tags based on the quiz results.
Related Resources
- Results Page: How to Customize Your Quiz Results Page
- Email Integrations: Connecting Quiz Data to Your Email Marketing Service
- A/B Testing: A/B Testing Your Quiz Pages for Higher Conversions
- Thrive Quiz Builder Documentation: Explore the full Thrive Quiz Builder knowledge base