In this article, you’ll learn how to use HTML Attributes, the Custom HTML element, and the Google Map element in Thrive Architect. These features let you add custom CSS classes and IDs to any element, embed third-party code and shortcodes, and display interactive Google Maps on your pages.
HTML Attributes is a sidebar panel available on virtually every element, while Custom HTML and Google Map are standalone elements found in the element panel. Together, they give you the flexibility to extend Thrive Architect beyond its built-in elements and integrate external content seamlessly.

HTML Attributes Panel
The HTML Attributes panel is not a standalone element—it is a sidebar section available on virtually every element in Thrive Architect. It provides two fields for adding custom HTML attributes to any element.
Accessing HTML Attributes
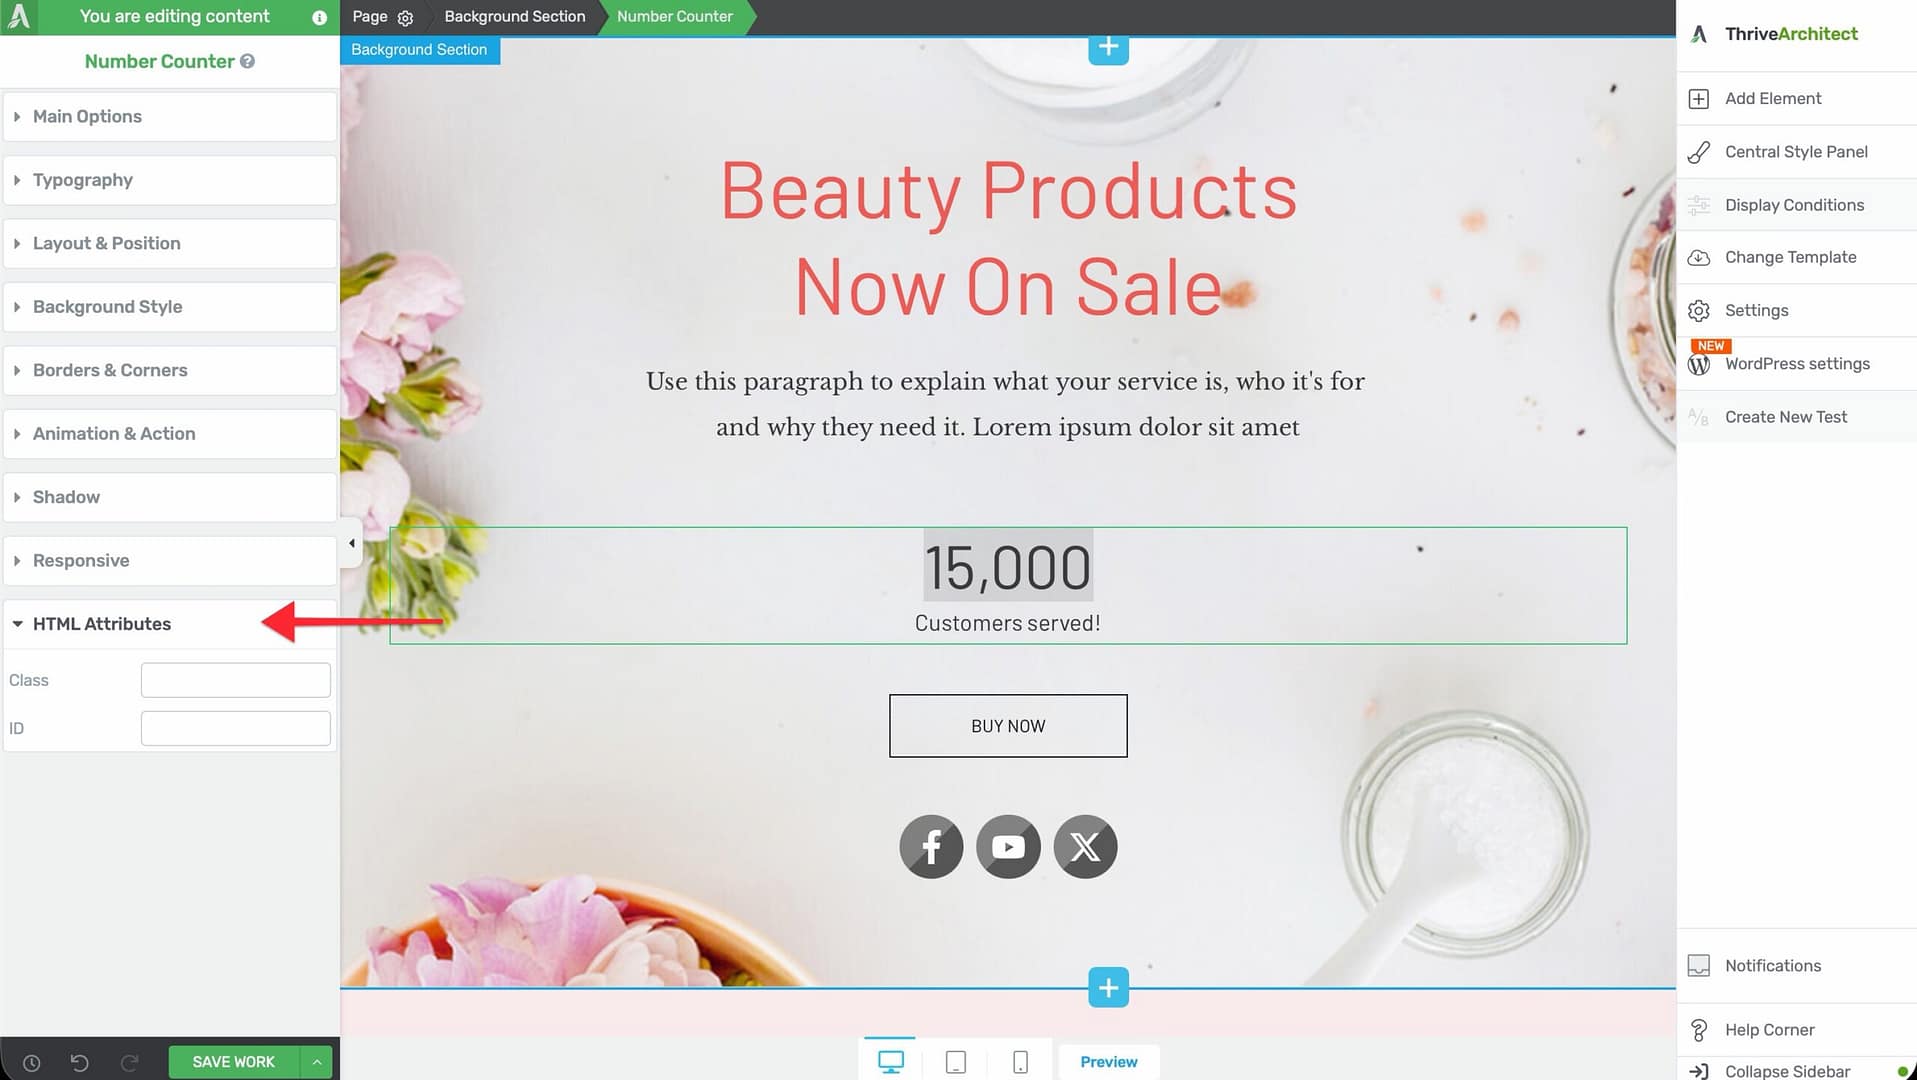
To access the HTML Attributes panel:
- Select any element on the canvas.
- In the left sidebar, scroll down to find the HTML Attributes section.
- The panel displays two input fields: Class and ID.
Class Field
The Class field lets you add one or more custom CSS class names to the selected element.
Use cases for custom classes:
- Custom CSS styling — Add a class name, then target it with custom CSS rules to apply styles beyond what the Thrive Architect sidebar controls offer
- JavaScript targeting — Assign a class that your custom scripts or third-party tools can select and manipulate
- Third-party integrations — Some tools and plugins require specific class names to identify elements on the page
To add multiple classes, separate them with spaces (for example, my-class highlight-box featured).
ID Field
The ID field lets you assign a unique HTML ID to the selected element.
Use cases for custom IDs:
- Anchor links — Set an ID on a section or heading, then link to it using
#your-idin any URL or button link to create smooth scroll-to-section navigation - JavaScript targeting — Use the ID to select a specific element with JavaScript for dynamic behavior
- CSS specificity — Target a single element with high-specificity CSS rules using the
#idselector
Important: Each ID must be unique on the page. Using the same ID on multiple elements can cause unexpected behavior with anchor links, JavaScript, and CSS.
Tip: When creating anchor links for a table of contents or in-page navigation, use descriptive IDs like pricing-section, faq, or contact-form so your URLs are readable and meaningful.
Custom HTML Element

The Custom HTML element lets you insert raw HTML, JavaScript, shortcodes, iframes, and other code directly onto your page. It provides a code editor for entering any custom markup that Thrive Architect’s built-in elements don’t cover.
Adding the Custom HTML Element to a Page
Follow these steps to add a Custom HTML element:
- Open your page or post in the Thrive Architect editor.
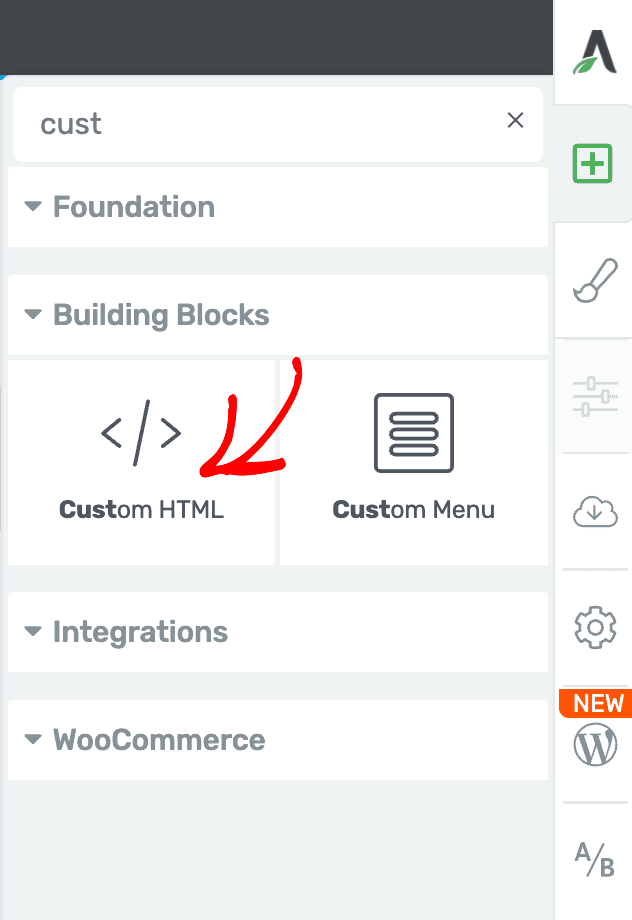
- Click the green plus (+) icon in the right sidebar to open the element panel.
- Type Custom HTML in the search field at the top of the panel.
- Alternatively, scroll down to the Building Blocks section in the element list to find the Custom HTML element.
- Drag the element from the panel and drop it onto your page canvas.
A placeholder block will appear on the canvas indicating where your custom code will render.
Editing HTML Content
After adding the element, click the Edit HTML content button in the left sidebar to open the code editor modal. In this modal, you can:
- Write or paste any HTML markup
- Add JavaScript code wrapped in script tags
- Insert WordPress shortcodes
- Embed iframes from third-party services
- Add inline CSS for custom styling
Click Save to close the editor and see your code rendered on the canvas.
Common Use Cases
- Third-party widgets — Embed chat widgets, booking calendars, review badges, or social media feeds using the embed code provided by the service
- Custom JavaScript — Add tracking scripts, interactive components, or custom behavior that runs on the front end
- WordPress shortcodes — Insert shortcodes from other plugins that generate dynamic content (such as forms, galleries, or product displays)
- Iframes — Embed external pages, tools, or applications within a framed window on your page
- Custom forms — Add form code from external form builders or payment processors
Google Map Element
The Google Map element lets you embed an interactive Google Map on your page by entering an address. It uses an embedded iframe approach, so no per-element API key configuration is required—the API key is configured at the Thrive Dashboard level.
Adding the Google Map Element to a Page
Follow these steps to add a Google Map:
- Open your page or post in the Thrive Architect editor.
- Click the green plus (+) icon in the right sidebar to open the element panel.
- Type Google Map in the search field at the top of the panel.
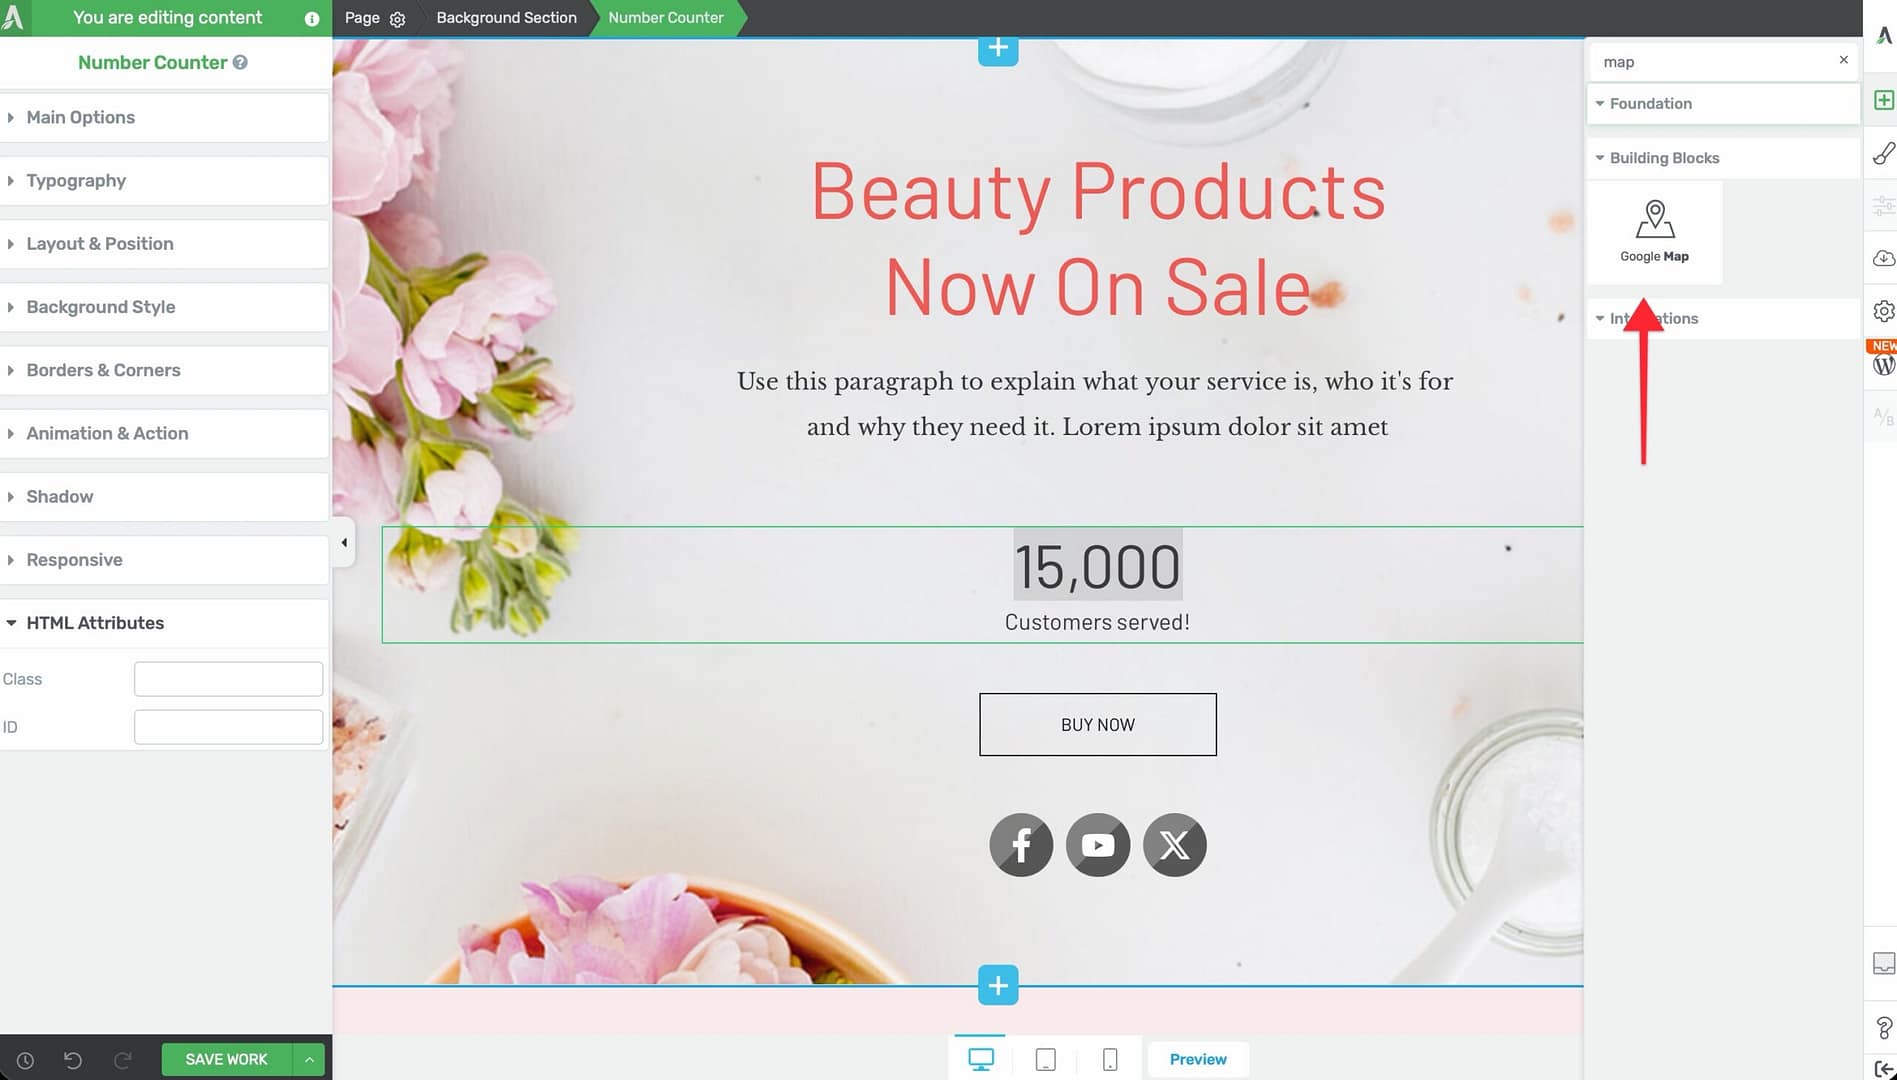
- Alternatively, scroll down to the Building Blocks section in the element list to find the Google Map element.
- Drag the element from the panel and drop it onto your page canvas.
A map placeholder will appear on the canvas, ready to be configured.
Configuring the Google Map Options
After selecting the Google Map element, the left sidebar displays the following controls:
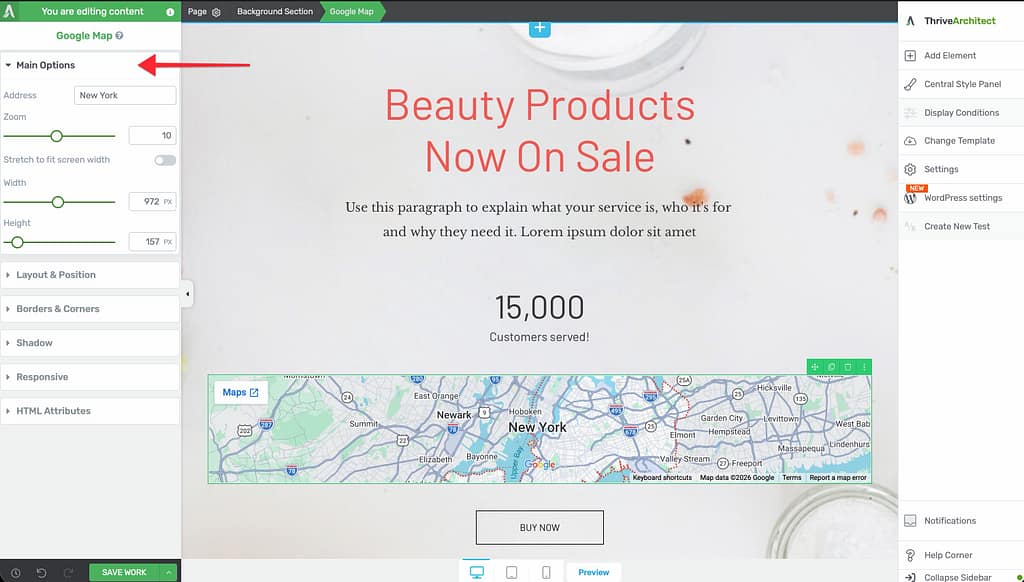
Address
Enter the location you want to display in the Address field. Type a full street address, city name, landmark, or any location that Google Maps can resolve. The map updates to show the specified location.
Tip: Use specific, complete addresses for the most accurate pin placement. For example, “1600 Amphitheatre Parkway, Mountain View, CA” is more reliable than “Google headquarters.”
Zoom
A slider that controls the map’s zoom level:
- Default: 10
- Range: 1 (world view) to 20 (street level)
Lower values show a wider area, while higher values zoom in for street-level detail.
Stretch to Fit Screen Width
A toggle switch that, when enabled, stretches the map to the full width of the browser window, breaking out of its container.
Width
A slider that controls the map’s width:
- Range: 0 to 2000
- Units: px, %, vh, or vw
This control is available when Stretch to fit screen width is disabled.
Height
A slider that controls the map’s height:
- Range: 0 to 2000
- Units: px or vh
External Fields (Dynamic)
The External Fields option lets you bind the map address to a custom field, enabling dynamic addresses. This is useful when:
- Displaying location data from custom post types
- Showing different map locations based on dynamic content
- Building location-specific landing pages that pull addresses from custom fields
API Key Configuration
The Google Map element uses an embedded iframe approach. The API key is configured globally through the Thrive Dashboard, not on each individual map element.
To configure or update your Google Maps API key:
- Navigate to your WordPress admin area.
- Go to Thrive Dashboard in the left sidebar menu.
- Look for the Google Maps or API Connections section.
- Enter your Google Maps API key and save.
Once configured at the dashboard level, all Google Map elements across your site will use this key automatically.
Frequently Asked Questions
Can I Add Multiple CSS Classes to One Element?
Yes. In the Class field under HTML Attributes, enter multiple class names separated by spaces.
Does Custom HTML Work With WordPress Shortcodes?
Yes. Enter the shortcode directly in the code editor (for example, [contact-form-7 id="123"]), and it will render on the front end of your page. Shortcodes may not preview correctly in the editor but will work on the published page.
Why Isn’t My Google Map Showing?
Verify that you have entered a valid address and that your Google Maps API key is correctly configured in the Thrive Dashboard. Also check that the map has sufficient width and height values to be visible on the page.
Can I Style the Custom HTML Element With the Sidebar?
Only the Layout panel is available for the Custom HTML element. All other visual styling (typography, borders, colors, backgrounds) must be handled within your custom HTML and CSS code.
How Do I Create an Anchor Link Using HTML Attributes?
Set an ID on the target element (for example, pricing), then link to it from a button or text using #pricing as the URL. Clicking the link will scroll the page to the element with that ID.
Using the Table Element
The Table element lets you add fully customizable data tables to your pages. It is found in the Building Blocks section of the element panel.

Adding a Table Element
- Click the green plus (+) icon in the right sidebar.
- Search for Table or find it in Building Blocks.
- Drag it onto your page and choose a template from the library.
Main Options
Select the table to see its options in the left sidebar:
- Change Template — Switch to a different pre-designed table layout.
- Cell Padding — Adjust the inner spacing within each table cell.
- Vertical Alignment — Set how content aligns vertically within cells (Top, Center, Bottom).
- Manage Rows and Columns — Add, remove, or reorder rows and columns using the table editing controls.
- Header Row — Toggle whether the first row is styled as a header.
- Striped Rows — Alternate row colors for better readability.
Tip: Click inside any cell to edit its content directly. You can add text, images, buttons, or other elements inside table cells.
Related Resources
- Editing HTML and Custom CSS: How to Edit HTML and Add Custom CSS — Adding site-wide custom CSS that works with HTML Attributes classes
- Shortcodes: How to Use Shortcodes in Thrive Architect — Inserting plugin shortcodes into your pages
- Table of Contents: How to Set Up a Table of Contents — Anchor-based navigation using element IDs
- Getting Started: Getting Started with Thrive Architect — Overview of the editor and element panel
That’s it! You’ve successfully learned how to use HTML Attributes, the Custom HTML element, and the Google Map element in Thrive Architect. With custom classes and IDs for targeted styling, a code editor for embedding any third-party content, and an easy-to-configure map element for displaying locations, you have the tools to extend your pages well beyond Thrive Architect’s built-in elements.